The Amrita Journal
Explore thoughtful stories, practical wellness guidance and inspiring ideas to support your movement, mindfulness and everyday wellbeing at Amrita.

Start Pilates Safely: 45–60 Minute Workouts and Studio Modifications
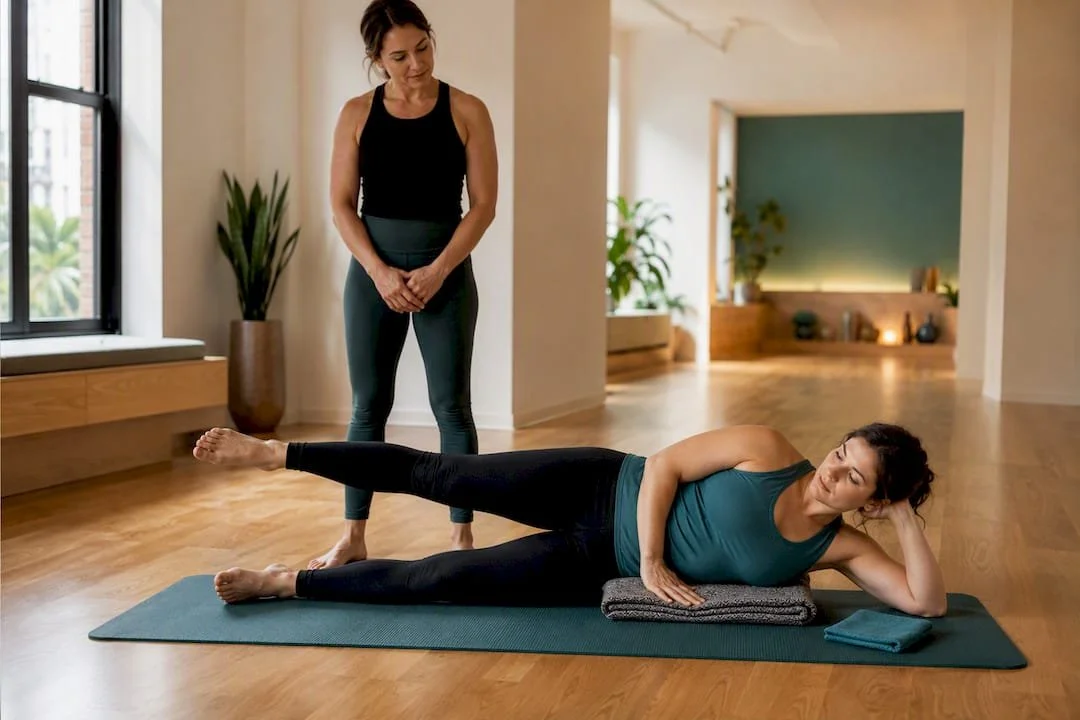
Pilates is a controlled, low-impact exercise system built around core stability, precise movement, and coordinated breathing, typically performed on a mat or a spring-loaded machine called a reformer. A typical session runs between forty-five and sixty minutes, and instructors generally recommend practicing Pilates multiple times per week. Expect muscle fatigue and better posture, not a breathless cardio burn.
TL;DR:
Pilates mainly improves core stability, posture, and flexibility, but strong evidence for back pain relief and long-term benefits is still emerging.
Proper form, instructor corrections, and gradual progression are essential for effectiveness and injury prevention, especially for those with health issues.
Beginners should start with mat classes or private sessions, particularly if managing injuries or health conditions, and ideally practice two to three times weekly for sustained results.
The method is adaptable for seniors, pregnant individuals, and rehab patients, with modifications focusing on safety and specific body needs.
Pilates is a muscular, low-impact workout that emphasizes control and precision, not cardio or muscle bulk, making it suitable for many different fitness levels.
Amritayogawellness
Find Your Pilates Practice
Explore Pilates options at Amrita Yoga & Wellness, with classes suited to beginners, active adults, and those seeking low-impact movement.
Table of Contents
What Are Pilates Exercises? Mat, Reformer, and Other Formats
Benefits of Pilates Classes: What the Research Actually Shows
Where Pilates Came From: Joseph Pilates and the Method's Rehab Roots
What Is Pilates Training, Really? The Core Principles
Joseph Pilates built his method around six principles, and they show up in every class whether you know their names or not: breath, centering, control, precision, flow, and alignment. Skip these and you're just doing calisthenics with better branding.
Breath: Instructors cue inhale and exhale patterns tied to specific movements, usually breathing out during the most exertive part of an exercise. This isn't decoration. Coordinated breath helps recruit the deep abdominal muscles and keeps you from holding tension in your shoulders.
Centering: Nearly every exercise initiates from the "powerhouse," the region spanning your abdominals, lower back, hips, and glutes. Movement radiates outward from there rather than starting at the limbs.
Control: Nothing in Pilates is thrown or rushed. Each rep is a deliberate, muscle-driven action, which is part of why a Pilates class feels harder than it looks.
Precision: Exact alignment matters more than range of motion. A smaller, correctly executed movement beats a bigger sloppy one.
Flow: Exercises link together smoothly, building stamina without resorting to fast, ballistic reps.
Alignment: Your spine, pelvis, and shoulder blades stay in specific positions throughout, protecting joints and keeping the load on the right muscles.
Because the emphasis sits on quality over quantity, most exercises run just 3 to 5 repetitions per set. That's a sharp contrast to strength training's higher-volume approach, and it's exactly why proper form gets so much attention in a beginner class. Complete Pilates breathing techniques go deeper into how the breath pattern connects to core engagement if you want to study the mechanics before your first class.
What Are Pilates Exercises? Mat, Reformer, and Other Formats
Pilates exercises fall into recognizable categories, and knowing them helps you follow along in your first class instead of guessing what's coming next.
Breathing and stability moves. The Hundred is the classic opener: you pump your arms while holding a curled position, timing the movement to breath counts. It wakes up the core before anything else happens.
Spinal articulation exercises. Roll-Ups and Rolling Like a Ball move your spine one vertebra at a time, building flexibility and control through the back rather than just stretching it.
Hip and leg work. Leg Circles and Single-Leg Stretch challenge you to keep your pelvis still while your legs move, which is harder than it sounds and directly trains hip stability.
Scapular and shoulder control. Swan and Swimming exercises strengthen the upper back and teach your shoulder blades to move correctly instead of hiking toward your ears.
Beyond the mat, the Reformer changes the entire experience. It's a sliding carriage attached to springs and pulleys, and according to Les Mills, that spring-based resistance lets you adjust load, add support for injuries, or increase challenge without ever touching a barbell. The result feels closer to guided resistance training than a floor workout.
Other apparatus you'll encounter as you go further: the Cadillac (a raised frame with bars, straps, and springs for assisted stretching and rehab work), the Wunda Chair (a compact box used for single-leg strength and balance drills), and small-group reformer classes that combine machine work with instructor coaching. Clinical or rehab-focused Pilates sessions use these same tools at a slower pace under closer supervision. If you can't make it into a studio, online mat classes cover most of the fundamental moves, though they can't replicate hands-on correction. Our beginner Pilates guide breaks down what to expect from each format in more detail.
Benefits of Pilates Classes: What the Research Actually Shows
Pilates delivers real, measurable benefits, but the research supporting them is more cautious than most marketing copy suggests. Here's the honest version.
Core strength. Nearly every exercise trains the deep stabilizing muscles of the trunk, not just the visible six-pack muscles.
Posture. Repeated alignment cues carry over into how you stand and sit outside class.
Flexibility. Spinal articulation and controlled stretching build range of motion gradually.
Balance. Single-limb and unstable-position exercises challenge coordination in ways many workouts skip.
Lower back pain. Some evidence points to improvement, though this is the benefit with the weakest support so far.
A PMC review found cautious support for Pilates improving flexibility and lumbo-pelvic stability, but the authors were clear that stronger, better-designed studies are still needed before drawing firm conclusions. A separate clinical review echoes that call, pointing to inconsistent study quality across the existing research. That doesn't mean Pilates doesn't work. It means the evidence is real but not yet as robust as, say, research on walking for cardiovascular health.
Session length runs 45 to 60 minutes, with 2 to 3 sessions per week recommended for building strength, mobility, and body awareness, according to Better Health Channel Victoria. The practical implication: Pilates rewards consistency far more than intensity. Two moderate sessions a week for a few months will do more for your posture than one brutal session followed by two weeks off.
How to Start Pilates Without Overthinking It
Picking your first class comes down to three questions: what's your goal, what's your budget, and do you have any injuries an instructor needs to know about.
Mat classes cost less and need almost no equipment, making them the natural starting point if you're just curious. Reformer classes cost more per session but offer adjustable resistance and more support for people easing back into movement after an injury. If you have a history of disc issues, joint replacements, or chronic pain, start with a private or small-group setting where an instructor can watch your form closely, rather than a crowded mat class where corrections are harder to give.
Before your first class:
Wear fitted, stretchy clothing. Loose shirts flip upside-down during inversions and get in the way.
Skip shoes. Most mat and reformer classes are done barefoot or in grip socks.
Tell your instructor about any back, neck, shoulder, or hip issues before class starts, not after an exercise hurts.
Expect modifications. A good instructor will adjust range of motion or swap an exercise entirely rather than force you through pain.
Pro Tip: Book a private session before your first group class if you have any injury history. One-on-one time lets an instructor build your personal modification list, so you walk into a group class already knowing which versions of each exercise are yours.
Plan on two to three sessions weekly for the first couple of months. Progression in Pilates usually means moving from assisted or modified versions of an exercise to the full version, then eventually adding resistance or reducing points of support, not lifting heavier external weight.
Who Pilates Is For (and What People Get Wrong About It)
Pilates suits a wider range of people than its studio-class image suggests. Beginners benefit from the slow pace and clear cues. Older adults get a low-impact way to maintain balance and core strength, which Harvard Health points to as one of the format's real advantages since it's adaptable across mat, reformer, and chair variations. Rehab patients with medical clearance often use it to rebuild control after injury. Athletes lean on it to fix the stability gaps that heavier lifting doesn't address.
A few misconceptions are worth clearing up directly:
"It's cardio." It isn't, primarily. Heart rate stays moderate for most classes; the challenge is muscular, not aerobic.
"It builds bulky muscle." Pilates tends to build long, functional muscle tone rather than size, according to Boston University, which makes it a useful complement to, not a replacement for, strength training.
"It's not adaptable." A skilled instructor can almost always modify an exercise to hit the same muscles without strain, according to WebMD.
If you have a specific spinal condition, recent surgery, or a diagnosed disc issue, check with a healthcare provider before starting, and mention it to your instructor regardless of clearance status.
Where Pilates Came From: Joseph Pilates and the Method's Rehab Roots
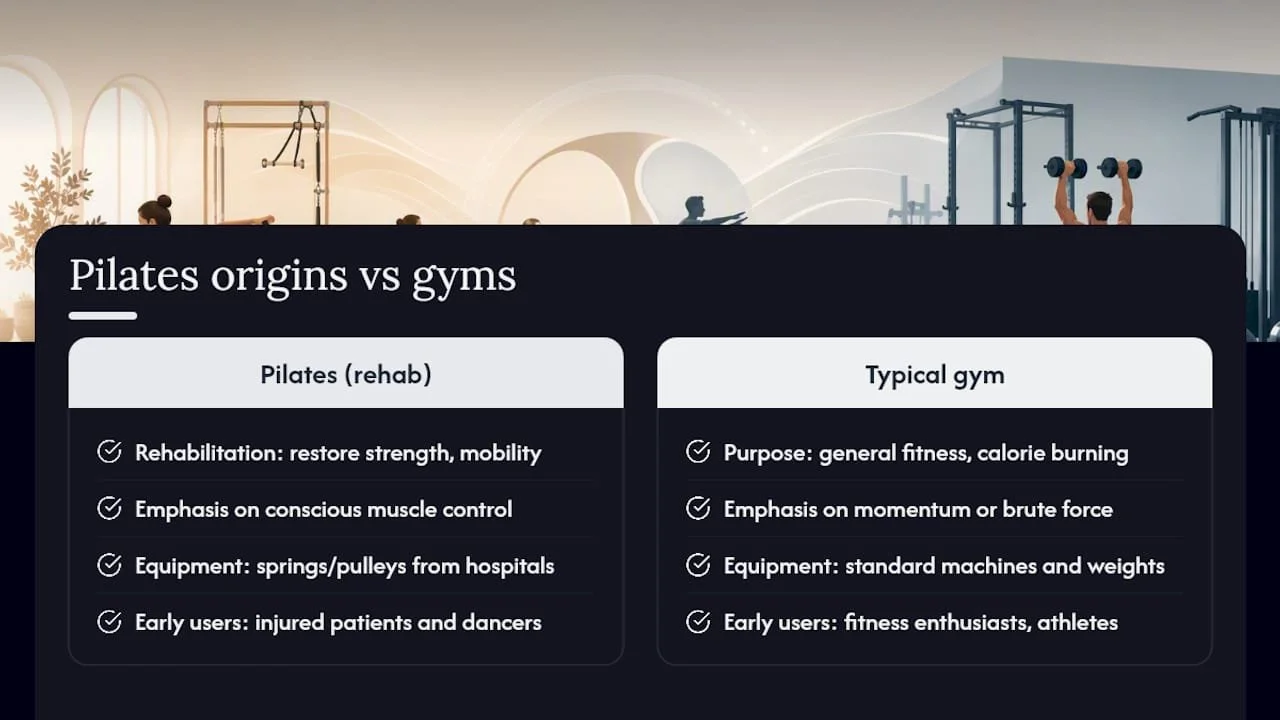
Joseph Pilates developed the method in the early 20th century, originally as a rehabilitation system rather than a fitness trend. According to Britannica, he built it while working with injured patients and dancers, designing movements meant to restore strength and mobility without straining damaged joints. That rehab origin explains a lot about why the method still feels different from typical gym workouts: it was never built around burning calories fast. It was built around rebuilding bodies carefully.
Pilates called his approach "Contrology," emphasizing conscious control over every muscle involved in a movement rather than momentum or brute force. He designed much of the original equipment, including early versions of the reformer, using springs and pulleys salvaged from hospital beds and gym gear during his time interned in England during World War I. The dancers who trained with him later brought the method into performing arts studios, where it picked up its reputation for building long, lean muscle tone and better body awareness.
That history matters for a practical reason: it's why physical therapists and rehab clinics still use Pilates-based exercises today. The method was designed from the start to meet people wherever their bodies were, whether that meant an injured soldier or a professional dancer recovering from strain. A century later, that same adaptability is what makes it work equally well for a first-time exerciser and a marathon runner cross-training between races.
Who Should Be Cautious or Avoid Certain Pilates Exercises
Pilates is generally safe for most adults, but a handful of situations call for real caution rather than just a modified rep.
People with osteoporosis need to avoid deep spinal flexion exercises, since rounding forward under load can increase fracture risk in fragile vertebrae. Anyone with a recent hernia, uncontrolled high blood pressure, or a recent abdominal surgery should get medical clearance before doing exercises that heavily pressurize the core. Severe disc herniations and unstable joint conditions also warrant a conversation with a doctor or physical therapist first, since certain flexion and rotation movements can aggravate those issues.
Pregnant individuals should avoid exercises done flat on the back past the first trimester, along with any deep twisting or intense abdominal work, and should look specifically for prenatal-modified classes rather than a standard session. People recovering from a recent joint replacement need instructor guidance on which ranges of motion are still off-limits during healing.
None of this makes Pilates inherently risky. It makes it a method where the modifications matter as much as the exercises themselves, which is exactly why an attentive instructor is worth more than a workout video when you're managing a health condition. If you're unsure whether a condition falls into a caution category, ask before booking, and mention it again during the first few minutes of class.
How Pilates Adapts for Seniors, Pregnancy, and Rehab
The same six principles that guide a standard mat class flex easily to fit very different bodies, which is a big part of why Pilates shows up in physical therapy clinics as often as fitness studios.
For seniors, classes typically shift toward chair-supported or reformer-assisted variations that reduce the balance demands of floor-based mat work while still training core strength and stability, an approach Harvard Health highlights as one of the format's advantages for older adults. For pregnant clients, instructors modify or eliminate supine positions after the first trimester, replace deep twists with gentler rotational work, and emphasize pelvic floor and breath coordination instead of intense abdominal loading. Rehab settings use Pilates differently again, often with a physical therapist directing slow, single-joint focused movements on the Cadillac or reformer to rebuild strength around a specific injury site, such as a shoulder recovering from surgery or a lower back healing from a disc issue.
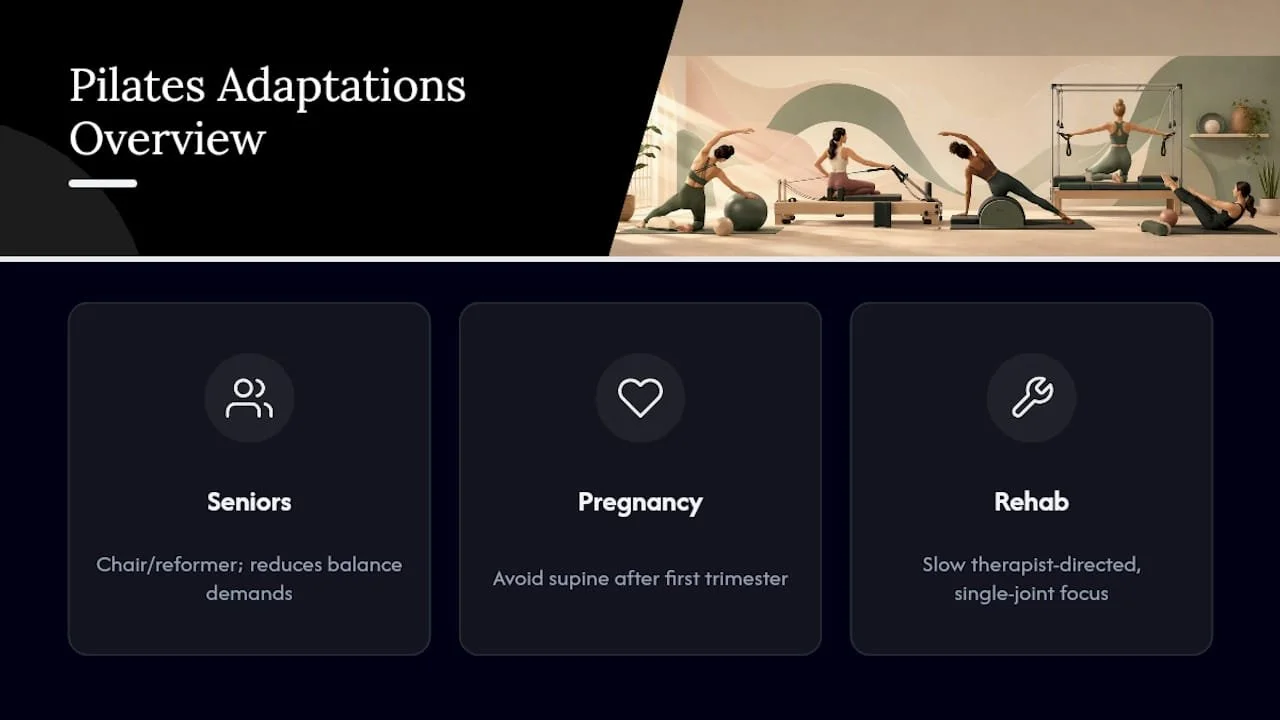
What stays constant across all three is the instructor's role. A senior in a chair-based class, a pregnant client modifying her second-trimester routine, and a rehab patient working through a shoulder injury are all doing the same underlying method, just adjusted for what their body can safely handle that day. That flexibility is the entire point of a system Joseph Pilates originally designed for injured patients in the first place.
Amrita's Take: What We Prioritize When Teaching Pilates
We think the biggest gap in how people understand Pilates isn't about the exercises. It's about how much the instructor matters. Two people can do the exact same reformer sequence and get completely different results depending on whether someone is actually watching their alignment or just calling out reps from across the room.
At Amrita Yoga & Wellness, that's the priority: hands-on correction over choreography. A modification isn't a downgrade from the "real" exercise. It's often the version that actually works for your body that day. We'd rather slow a class down to fix one person's hip alignment than keep everyone moving at the same pace toward the same mistake.
— Juiced
Try a Pilates Class at Amrita Yoga & Wellness
There are many ways to start Pilates classes, rather than following a one-size-fits-all first-class approach. That matters because the right entry point depends on your body, not a generic beginner script.
If you want to test the waters without commitment, a Community Class Drop In runs $11 per session, or step up to a full Group Class Drop In at $28. Curious about reformer work specifically? The Nurtured Beginnings pass, priced at $35, is built for exactly that first-timer transition. And if you're managing an injury or just want an instructor's full attention while you learn the fundamentals, a One to One Session starts from $85 per hour and lets you set the pace entirely around your own body. Pick whichever entry point matches where you're starting from, and book your first session directly on our site.
Sources
Pilates: a good workout option even as we get older — Harvard Health
Pilates: Overview, Pros and Cons, Benefits, and More — WebMD
FAQ
How Often Should You Do Pilates as a Beginner?
Two to three sessions per week is the commonly recommended frequency for building strength, mobility, and body awareness as a beginner. Spacing sessions across the week gives your muscles recovery time while keeping the habit consistent.
Is Pilates Good for Lower Back Pain?
Some research shows cautious support for Pilates improving lumbo-pelvic stability and reducing back discomfort, though the existing studies call for stronger evidence. If you have a diagnosed back condition, get clearance from a healthcare provider and tell your instructor before class.
What's the Difference Between Pilates and Yoga?
Pilates centers on core strength and controlled, repetition-based movement, while yoga blends held poses, breathwork, and often a meditative or spiritual component. Both improve flexibility and body awareness, but Pilates leans more toward muscular conditioning and yoga leans more toward flexibility and mind-body connection.
Can You Do Pilates at Home?
Yes, mat-based Pilates translates reasonably well to home practice since it needs little to no equipment. Reformer work requires the machine itself, so at-home practice generally sticks to mat exercises unless you have access to equipment.
How Long Until You See Results From Pilates?
Most people notice improved posture and core awareness within a few weeks of practicing two to three times weekly, with visible strength and flexibility changes building over a couple of months. Consistency matters more than intensity, since Pilates relies on frequent, controlled practice rather than occasional hard sessions.
Recommended

8–12 Weeks to Measurable Effects of Pilates on Body and Mind
Pilates reliably improves core strength, posture, balance, and flexibility, and it can ease low-back pain and lift mood, with measurable changes showing up in studies after about 8 to 12 weeks of practice, typically twice a week. The strongest evidence points to moderate physical gains and moderate-to-large psychological ones, backed by meta-analytic research and controlled trials rather than anecdote alone.
TL;DR:
Most physical benefits from Pilates, including core strength and flexibility, are typically measurable after 8 to 12 weeks of practicing twice weekly.
Psychological improvements, such as mood and sleep quality, tend to show even larger effects within the same timeframe, especially in older adults or those with higher baseline stress.
Consistent practice at the recommended dose can lead to a 31.5% increase in core strength and a 1.5 to 3% reduction in body fat over 12 weeks.
Safe participation depends on individual health conditions; medical clearance is recommended for recent surgeries, osteoporosis, or unexplained pain.
Mat-based Pilates offers substantial benefits and can be supplemented with equipment-based classes as progress demands.
Amritayogawellness
Build Your Pilates Practice
Amrita Yoga & Wellness offers Pilates classes in Philadelphia for beginners, enthusiasts, and those seeking stronger movement and flexibility.
Table of Contents
The Physical Effects of Pilates: Core, Posture, Flexibility, and Balance
Amrita Yoga & Wellness Perspective: Bringing the Research Into the Studio
The Physical Effects of Pilates: Core, Posture, Flexibility, and Balance
Pilates trains the deep stabilizing muscles around your spine and pelvis, the transverse abdominis, multifidus, and pelvic floor, in a way most gym routines skip entirely. That trunk stabilization matters because a stronger, more coordinated core reduces the shear forces that grind on your lumbar spine during ordinary movement: bending to load a dishwasher, twisting to grab something off a shelf, or standing up from a low chair.
Posture improvements follow from that same mechanism. Better alignment isn't cosmetic. It changes how load travels through your joints, which is why people who stick with Pilates often report less shoulder and neck tension within weeks, not months.
Flexibility gains show up through controlled, full-range movements like the Spine Stretch and Saw, which mobilize the hips, hamstrings, and thoracic spine simultaneously rather than isolating one joint at a time. A 2011 review of Pilates research found cautious but consistent support for improved flexibility, lumbo-pelvic stability, and muscular activity, though the authors flagged that many underlying studies were small and inconsistently designed.
Balance is where older adults see some of the clearest payoff. A 2021 meta-analytic review of 51 studies covering more than 2,400 participants aged 55 and older found moderate effects on strength, balance, and flexibility compared to inactive control groups. That matters directly for fall risk, since balance training is one of the few interventions shown to reduce falls in aging populations.
On strength and body composition, be realistic about what Pilates does and doesn't do. It builds functional, endurance-based strength rather than the kind of maximal strength you'd get from heavy barbell training.
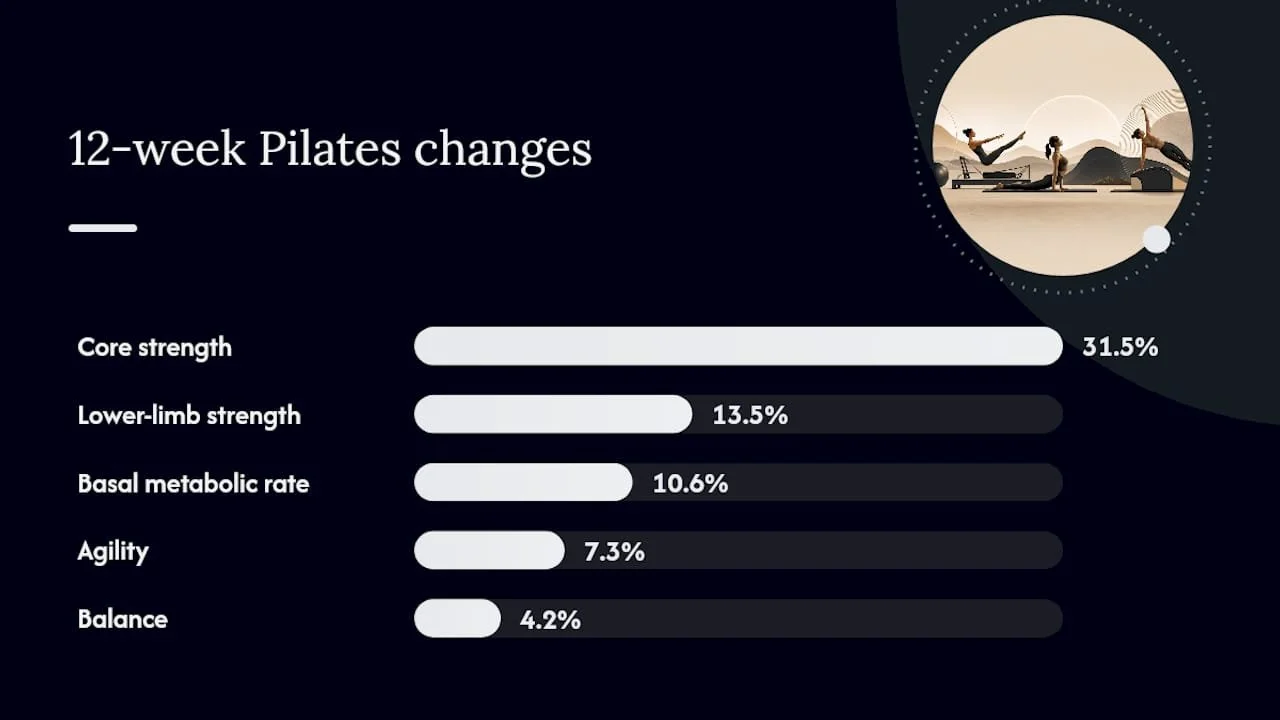
Quick data snapshot: A 12-week mat-based Pilates program run twice weekly in one-hour sessions produced these changes in middle-aged women:
Core strength improved 31.5%
Lower-limb strength improved 13.5%
Agility improved 7.3%
Balance improved 4.2%
Body fat dropped 1.5 to 3%, with basal metabolic rate up roughly 10.6%
Those numbers come from one trial, not a universal guarantee, but they show what consistent, dosed practice can produce in a fairly short window.
Can Pilates Improve Mood, Sleep, and Mental Clarity?
Yes, and the effect size is often larger for psychological outcomes than for physical ones. The same 51-study meta-analysis found moderate-to-large effects on quality of life, depression symptoms, and sleep quality in older adults compared to doing nothing at all, which puts Pilates in unusually strong territory among low-impact exercise interventions.
Three mechanisms likely explain this:
Breath control activates the parasympathetic nervous system, which is the same pathway targeted by clinical breathing therapies for anxiety.
Mindful, slow movement demands enough attention to interrupt rumination, similar to how mindfulness-based practices work.
Group class dynamics add a social support layer that solo home workouts don't replicate.
Expect the psychological lift to show up gradually rather than instantly. People managing higher baseline stress or older adults dealing with isolation tend to report the biggest shifts, while already-active, low-stress individuals may notice smaller but still real improvements in sleep quality and day-to-day mood stability.
What Does the Strongest Research Actually Show?
The most-cited evidence comes from a mix of large meta-analyses and smaller, tightly controlled trials, and the two types of study answer different questions.
The 51-study meta-analysis is the closest thing this field has to a definitive verdict on psychosocial outcomes: moderate-to-large effects for quality of life, depression, and sleep across a combined pool of 2,485 older adults. That scale gives the finding real weight, since it isn't riding on one small sample.
At the trial level, the 12-week mat-based study cited above is the field's go-to example of what a realistic dose produces, and a separate 2022 quasi-experimental community program for middle-aged women replicated that pattern, showing significant gains in BMI, body fat percentage, basal metabolic rate, and functional fitness tests like sit-and-reach and timed up-and-go versus non-exercising controls.
Study typePopulationDuration/doseKey outcomesMeta-analysis (51 studies)Adults 55+, n=2,485Varied across pooled studiesModerate effects on strength/balance/flexibility; moderate-to-large on depression, sleep, quality of lifeMat-based RCTMiddle-aged women12 weeks, 2x/week, 1 hour+31.5% core strength, +13.5% lower-limb strength, +4.2% balanceCommunity quasi-experimental studyCommunity-dwelling middle-aged women12 weeksImproved BMI, body fat, BMR, functional fitness
The honest limitation across this evidence base is heterogeneity. Studies measure "core strength" or "balance" differently, sample sizes are often modest, and few trials run longer than 12 weeks, so long-term durability data is thinner than anyone would like. The practical takeaway: the direction of the evidence is consistent and the effect sizes are real, but researchers still need standardized outcome measures before anyone can cite a single definitive number for any of these benefits.
How Often Should You Practice Pilates to See Results?
Most of the trials producing measurable results used the same basic formula: one-hour mat classes, twice a week, for 8 to 12 weeks. That's a realistic target for anyone starting from scratch, and it's short enough to see whether the practice is working for you before committing further.
Start with two 60-minute mat classes weekly for your first 8 to 12 weeks, matching the dosing used in the trials cited above.
Track a few concrete markers every 4 weeks: how long you can hold a plank, how far you can reach in a seated stretch, and whether you can rise from a chair without using your hands.
Add a third session or move toward reformer work once mat sessions feel manageable, since equipment-based classes add resistance progression that plateaued practitioners often need.
Older adults, people with non-specific low-back pain, and deconditioned beginners tend to show the largest gains relative to their starting point, largely because they have the most room to improve. Mat Pilates is the more accessible entry point since it needs no special equipment, while reformer classes offer adjustable spring resistance for people who've outgrown mat-only progressions. Check class descriptions before booking to match the intensity level to where you're starting from.
Pro Tip: Keep a simple log of one strength marker and one flexibility marker each week. Trials show measurable change by week 8, so give yourself that long before judging whether a class format is working for you.
Who Should Be Cautious About Starting Pilates?
Pilates is widely described as a safe, low-impact activity, and Better Health Channel's guidance supports that framing for most healthy adults. That doesn't mean everyone should walk into a class unscreened.
Get medical clearance first if you have any of the following:
Recent spinal, hip, or joint surgery
Diagnosed osteoporosis or significant bone density loss
Acute, unexplained back or joint pain
A pregnancy with any complicating factors
Statistic to know: the 2011 review of Pilates mechanisms found the practice shows cautious support for clinical populations, but noted that inconsistent methodology across small studies limits how confidently anyone can generalize those results to your specific condition.
The most common real-world risks are overstretching and poor technique, both of which are mitigated almost entirely by working with a certified instructor and progressing slowly rather than chasing intensity in week one. Stop and seek guidance if you feel sharp pain, numbness, or dizziness during any movement.
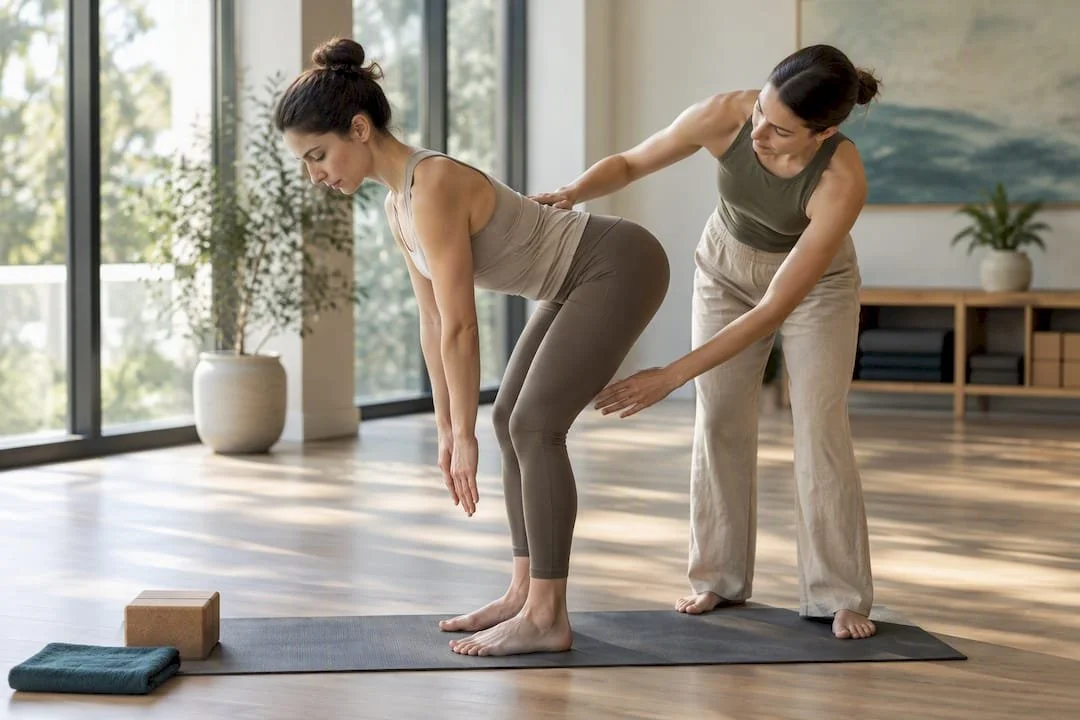
Does Pilates Change How You Breathe?
Pilates builds breathing pattern changes directly into its movement vocabulary rather than treating breath as an afterthought. The method's lateral, ribcage-focused breathing, expanding the sides and back of the ribcage rather than just the belly, trains the diaphragm and intercostal muscles to work more efficiently under load.
That matters beyond the studio. Coordinating exhale with exertion, a core principle in nearly every Pilates exercise, teaches practitioners to stabilize the trunk through breath rather than holding tension in the shoulders or neck. Over repeated sessions, this can translate into better breath control during other physical activity, from climbing stairs to running.
The 12-week mat-based trial referenced earlier didn't isolate respiratory measures specifically, but its core strength and agility gains are consistent with the kind of trunk and diaphragm coordination that breath-focused training produces. Clinical populations with mild respiratory limitations sometimes use Pilates-style breathing drills as a low-intensity supplement to standard breathing therapy, though it's not a substitute for pulmonary rehabilitation for anyone with a diagnosed respiratory condition.
For most healthy adults, the practical effect is simpler: better awareness of your own breathing mechanics, and less tendency to hold your breath during effort, a habit that quietly undermines performance in weightlifting, running, and everyday exertion alike.
Does Pilates Help Prevent Injuries in Athletes?
Athletes across running, cycling, and field sports use Pilates as supplemental conditioning because it targets exactly the stabilizing muscles that sport-specific training tends to neglect. Strong hip and trunk stabilizers reduce compensatory movement patterns, the kind of small mechanical inefficiencies that eventually show up as overuse injuries in knees, hips, and lower backs.
The core strength gains documented in the mat-based trial, a 31.5% improvement over 12 weeks, translate on the field into better force transfer between the lower body and upper body during rotational movements like throwing, swinging, or sprinting.
Pilates won't replace sport-specific strength training or plyometric work for competitive athletes. What it adds is a layer of movement quality and body awareness that makes those higher-intensity sessions safer and more efficient. Many strength coaches now build one Pilates or Pilates-adjacent mobility session into weekly programming specifically for that reason, treating it as maintenance work rather than a primary training stimulus.
Is Pilates Effective for Lower Back Pain?
Pilates is one of several exercise therapies shown to help with non-specific low-back pain, particularly when it's part of an active rehabilitation program rather than a standalone fix. Clinical reviews note it performs better than minimal intervention (advice alone, rest) for some back-pain outcomes, but no single exercise therapy has proven universally superior to every other structured exercise approach.
The mechanism is straightforward: strengthening the deep core stabilizers reduces the compensatory strain that weak trunk muscles put on the lumbar spine during daily movement. For people with chronic, non-specific pain, that stabilization often translates into fewer flare-ups and better tolerance for everyday bending and lifting.
The important caveat: "non-specific" is the operative word. If your back pain stems from a diagnosed structural issue, a disc herniation, spinal stenosis, or nerve impingement, Pilates needs to be adapted under professional guidance rather than attempted from a general class format. Anyone with acute or worsening pain should get a clinical evaluation before starting any new exercise program, Pilates included.
Amrita Yoga & Wellness Perspective: Bringing the Research Into the Studio
The research keeps pointing to the same formula: consistent dosing, qualified instruction, and gradual progression. That's precisely how Amrita Yoga & Wellness structures its Pilates offerings, from beginner mat sequences to more advanced formats, so students build the same trunk stability and balance improvements the studies describe, without guessing at technique on their own.
— Juiced
Start Feeling These Effects for Yourself
Reading about core strength gains and mood improvements is one thing. Feeling your own balance sharpen or your back pain ease over a few weeks of consistent classes is another. This studio offers structured mat and group sessions taught by instructors who focus on safe progression rather than advanced work too soon.
If you're starting from zero, Nurtured Beginnings is built specifically for that entry point, priced at $35 per pass so you can test the format before committing to a membership. Prefer more individual attention while you learn the fundamentals? A One to One Session starting at $85 per hour lets an instructor tailor pacing to any injury history or mobility limits you're working around. For readers ready to commit to the twice-weekly dose the research supports, the Earth Monthly Membership at $119 per month covers unlimited group classes, which comfortably covers the 8 to 12 week window most trials used to measure results. Book your first class through the in-studio group class page and start tracking your own progress from week one.
Sources
PubMed - 12-week mat-based Pilates study (middle-aged women)
PMC - 2011 review: Pilates mechanisms and research limitations
FAQ
How Long Does It Take to See Results From Pilates?
Most studies measure meaningful physical changes, core strength, balance, and lower-limb strength, after 8 to 12 weeks of practice at two sessions per week. Psychological benefits like improved mood and sleep quality often follow a similar timeline, based on the 2021 meta-analysis of 51 studies.
Does Pilates Really Help With Back Pain?
Pilates helps with non-specific low-back pain when used as part of an active rehabilitation program, largely by strengthening the deep core muscles that stabilize the spine. It works better than minimal intervention for some outcomes, though no single exercise approach is universally superior for every case.
Is Mat Pilates as Effective as Reformer Pilates?
Mat-based Pilates is evidence-supported and produces measurable strength and balance gains on its own, as shown in a 12-week mat-only trial. Reformer work adds adjustable resistance for progression but isn't required to achieve the core benefits research has documented.
How Much Does Pilates Cost at Amrita Yoga & Wellness?
A single group class drop-in is available on the in-studio group class page, with monthly membership options like the Earth Monthly Membership at $119 per month for unlimited classes. Private one-on-one sessions start at $85 per hour for readers who want individualized instruction.
Can Older Adults Safely Start Pilates?
Yes, older adults are one of the groups shown to benefit most, with moderate-to-large improvements in balance, strength, and quality of life documented in a meta-analysis of 51 studies on adults 55 and older. Anyone with osteoporosis, recent surgery, or acute pain should get medical clearance and choose a class adapted to their needs before starting.
Recommended

See Results in 4–6 Weeks With Barre: Posture, Endurance, and Calm
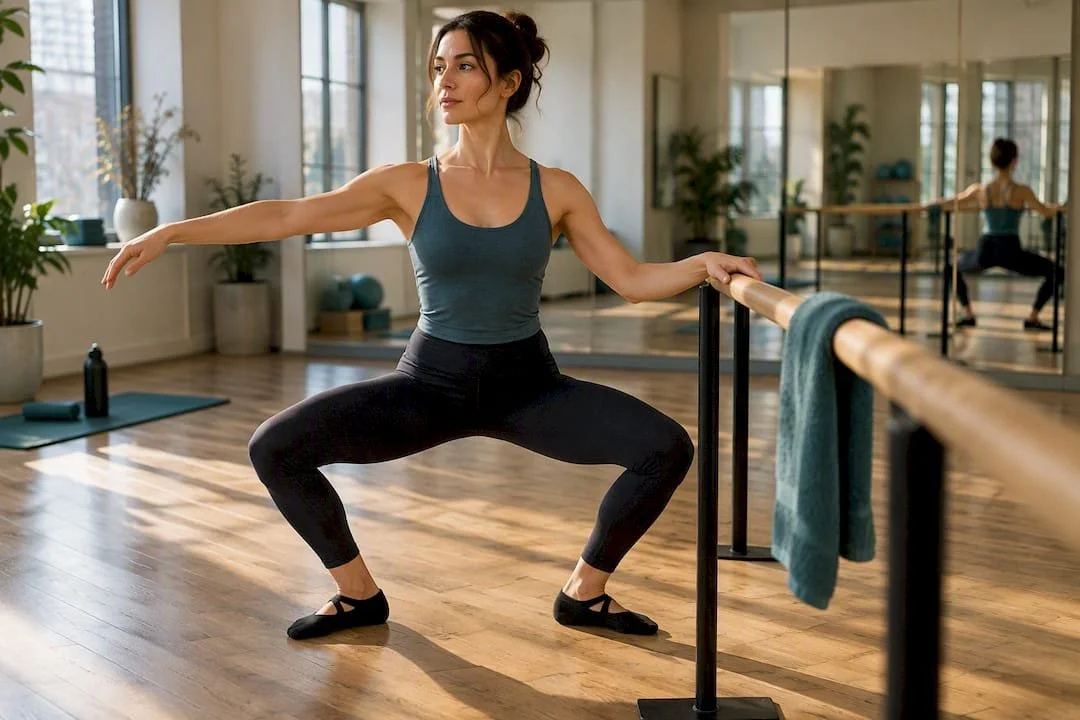
Barre delivers real, measurable benefits: better muscular endurance and visible toning, stronger postural muscles and core control, improved flexibility, sharper balance, and a genuine mental reset through focused, low-impact movement. The Cleveland Clinic and WebMD both back this up, and it matches what we see week to week at Amritayogawellness. It works best as a complement to heavier strength training or cardio, not a replacement for either.
TL;DR:
Barre enhances muscular endurance and postural strength mainly through high-repetition, low-weight exercises that engage slow-twitch fibers.
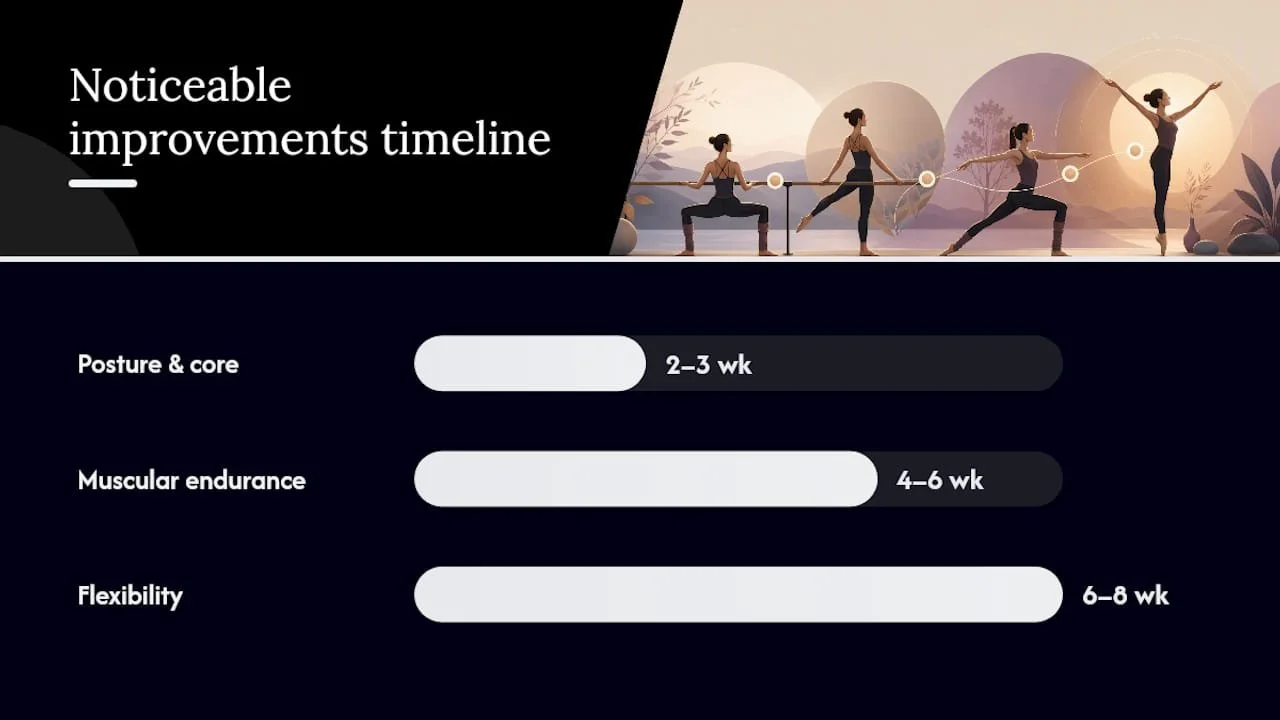
Most improvements in posture and core control appear within two to three weeks of consistent practice, with flexibility gains taking up to eight weeks.
Its low-impact nature makes it suitable for beginners, those with joint sensitivities, and pregnant individuals when proper modifications are used.
Barre should be combined with strength and cardio sessions for a balanced fitness routine, as it does not efficiently build maximal strength or cardiovascular fitness.
Consistent attendance and progression involve adding repetitions, extending holds, or increasing resistance, with noticeable physical and mental benefits typically emerging within a month.
Amritayogawellness
Build Strength With Barre
Amrita Yoga & Wellness offers barre alongside yoga, Pilates, and other practices for adults seeking accessible movement in Philadelphia.
Explore Amrita Yoga & Wellness
Table of Contents
What Is Barre Fitness, and How Does It Work?
Barre fitness fuses ballet, Pilates, and yoga into one format built around tiny, controlled movements and long isometric holds rather than big, explosive reps. A typical class has you pulsing at a ballet barre, holding a chair-like squat for 30 seconds, or shaking through a plank, often with light dumbbells, resistance bands, or a small ball wedged between your knees. Barre's design leans on high repetition and constant tension instead of heavy loads.
Here's what shows up in most classes:
A ballet barre for balance and leg work
Light hand weights (1 to 3 pounds) or resistance bands for arm toning
Grippy socks for stability on hardwood or marley floors
Small props like Pilates balls or sliders for core isolation
That combination of repetition and time under tension is exactly why barre builds endurance and postural strength faster than it builds maximum power.
What Physical Benefits Does Barre Actually Deliver?
Barre's biggest physical payoff is muscular endurance paired with visible toning, driven by high-rep, low-weight work that keeps muscles under tension far longer than a typical strength set. SELF's exercise-science reporting notes that this kind of volume training builds endurance and lean tone effectively, though it doesn't maximize absolute strength the way progressive heavy lifting does. Your slow-twitch muscle fibers, the ones responsible for sustained, low-force output, get the bulk of the work in a typical class.
By the numbers: One small observational study tracked 25 participants and found improvements in urinary incontinence symptoms after roughly ten Pure Barre sessions. That's a promising early signal, not proof, given the tiny sample size.
Posture and core strength improve for a straightforward reason: nearly every barre exercise demands a neutral pelvis, an engaged core, and stacked alignment from head to heel. The Cleveland Clinic links this consistent postural demand to reduced lower back pain, particularly for people who sit at a desk most of the day.
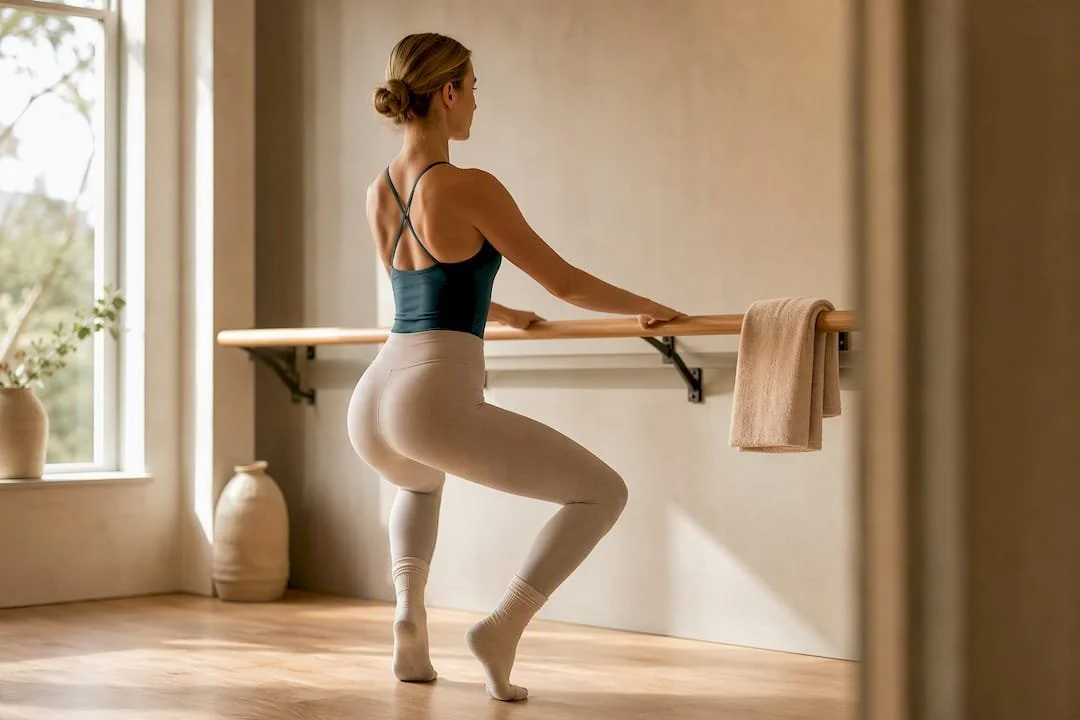
Flexibility gains come from the ballet lineage. Classes typically end with deep stretches at the barre, targeting hip flexors, hamstrings, and shoulders, and the repeated range-of-motion work adds up over weeks.
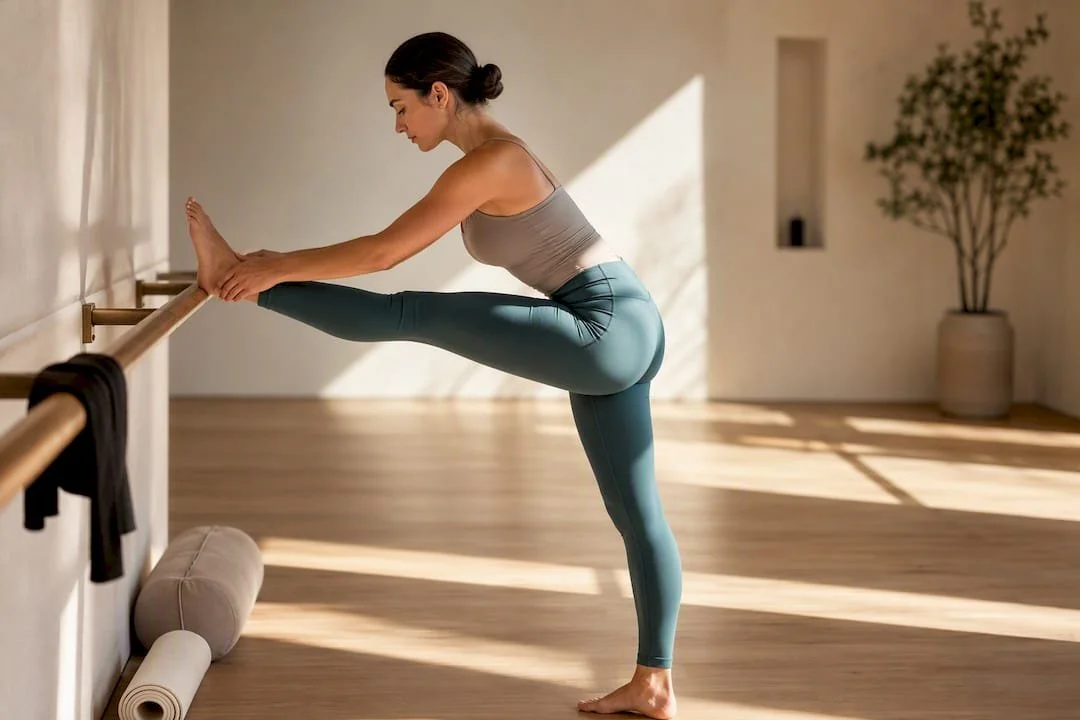
Balance and proprioception see some of the most underrated improvements in barre. Single-leg holds, heel raises, and grippy socks that let you actually feel the floor sharpen your body's spatial awareness. Balance-training research on PubMed supports the broader idea that this kind of neuromuscular control work matters for functional fitness and fall prevention, especially as people age.
A quick rundown of what changes and how fast:
Muscular endurance: Noticeable within 4 to 6 weeks of consistent practice
Posture and core control: Often felt within 2 to 3 weeks
Flexibility: Gradual, visible over 6 to 8 weeks
Balance: Improves steadily with single-leg and heel-elevated work
Pelvic-floor benefits deserve a cautious mention. The evidence is preliminary, limited to small samples, but instructors report enough anecdotal improvement in core and pelvic control that it's worth watching as more research comes in.
Does Barre Help Your Mental Health Too?
Barre's slow, precise cueing pulls your attention into the present moment in a way that's harder to achieve during, say, a treadmill run. Exercise in general reduces stress according to the Mayo Clinic, and barre's demand for constant micro-adjustments (pull your navel in, tuck your pelvis, lift through your spine) functions almost like a moving meditation.
The class environment does real work here too. Music-driven pacing, shared effort, and a room full of people shaking through the same 30-second hold build a kind of camaraderie that keeps people coming back.
Focused cueing sharpens mind-body awareness
Group energy and music boost enjoyment and consistency
Regular attendance is tied to better emotional quality of life
Pro Tip: If you struggle to quiet your mind during workouts, pick a barre class with a live instructor over an on-demand video. The real-time alignment cues force your brain to stay engaged rather than drift.
For more on the mental side of movement, science-backed approaches to inner peace offer useful context on how structured practices lower stress.
Where Does Barre Fit in a Balanced Fitness Routine?
Barre shines at endurance, posture, and mobility, but it has real limits. It won't build maximal strength the way barbell squats or deadlifts will, and it won't replace a hard cardio session for heart-rate conditioning. Treat it as one piece of a larger routine, not the whole plan.
A sensible weekly blend looks like this:
Two to three barre sessions for endurance, posture, and mobility
One to two strength sessions with progressive resistance (weights, bands, or machines) to build maximal force
One to two cardio sessions (running, cycling, or swimming) for heart-rate conditioning
One rest or active-recovery day to let muscles adapt
Progression in barre usually means adding reps, extending hold times, or moving to heavier hand weights, since the format rarely goes above a few pounds of resistance.
Who Benefits Most From Barre, and What Modifications Matter?
Barre suits a wide range of people, but it's especially useful for beginners easing into fitness, anyone with joint sensitivity who wants to avoid high-impact stress, and people cross-training alongside heavier lifting or running. WebMD notes that its low-impact nature makes it a reasonable option for people managing joint issues, though instructor-led modifications matter.
Beginners often start with a chair or wall for extra balance support
People with knee or hip sensitivity can shorten range of motion on pulses
Pregnant or postpartum practitioners typically skip deep core flexion and high-impact holds, with pelvic-floor caution built into modifications
Anyone recovering from injury should flag it to the instructor before class starts
If a movement causes sharp pain (not the usual muscle shake), stop and ask for a modification or sit it out.
How Amritayogawellness Teaches Barre
At Amritayogawellness, barre classes emphasize alignment and safety first, whether you're dropping into a group class, joining a livestream, or booking a private session for one-on-one attention. Students consistently mention feeling steadier on their feet and less achy through the lower back after a few weeks of regular attendance. Before your first class, tell the instructor about any injuries, pregnancy, or joint concerns so they can offer modifications from the very first pulse. Check the class descriptions to find the format that fits your experience level.
When Should You Prioritize Barre?
Barre earns a spot in your routine two to three times a week, with noticeable posture and endurance changes by week four to six. Pair it with strength and cardio work, and pick it because you enjoy it. Consistency beats intensity here.
— Juiced
Try a Barre Class Built Around Alignment, Not Guesswork
Amritayogawellness gives you a direct, low-pressure way to try barre with instructors who correct your form in real time instead of leaving you to copy a video screen. That alignment-first coaching is the practical difference between a class that leaves you sore in the right places and one that leaves you nursing a tweaked knee.
You can start with a Group Class Drop In for $28 or try it from home with a Livestream Class Drop In for $19. If you want individualized modifications, especially for an injury, pregnancy, or joint sensitivity, a One to One Session starting at $85 per hour puts an instructor's full attention on your form. Beginners often start with Nurtured Beginnings for $35, a pass designed specifically for a first visit. Browse the full class descriptions and pick a time that works, then book your spot for this week.
Sources
FAQ
What Are the Main Benefits of a Barre Workout?
Barre improves muscular endurance, posture, core strength, flexibility, and balance through high-rep, low-weight movements and isometric holds. It also offers mental benefits like stress reduction, thanks to its focus-heavy, precise cueing style, as noted by the Cleveland Clinic.
Is Barre a Good Workout for Beginners?
Yes, barre is beginner-friendly because it's low-impact and instructors typically offer modifications like using a chair for extra support. Amritayogawellness offers a Nurtured Beginnings pass for $35 specifically designed for first-time students.
How Long Does It Take to See Results From Barre?
Most people notice improved posture and core control within 2 to 3 weeks, with muscular endurance and toning becoming visible around 4 to 6 weeks of consistent practice. Flexibility gains tend to build more gradually, over 6 to 8 weeks.
Can Barre Replace Strength Training or Cardio?
No, barre builds endurance and tone but doesn't maximize absolute strength or cardiovascular conditioning the way heavy lifting or running does, according to SELF's reporting on barre and strength training. Pairing barre with two to three sessions of progressive strength work and cardio each week gives you a more complete routine.
Is Barre Safe During Pregnancy?
Barre can be safe during pregnancy with modifications, since it's low-impact and adjustable, but deep core flexion and certain pelvic-floor-intensive moves are typically avoided. Always tell your instructor you're pregnant before class so they can guide you through safe alternatives.
Recommended

10–20 Minute Home Routines to Learn Yoga for Beginners and Studio Tips
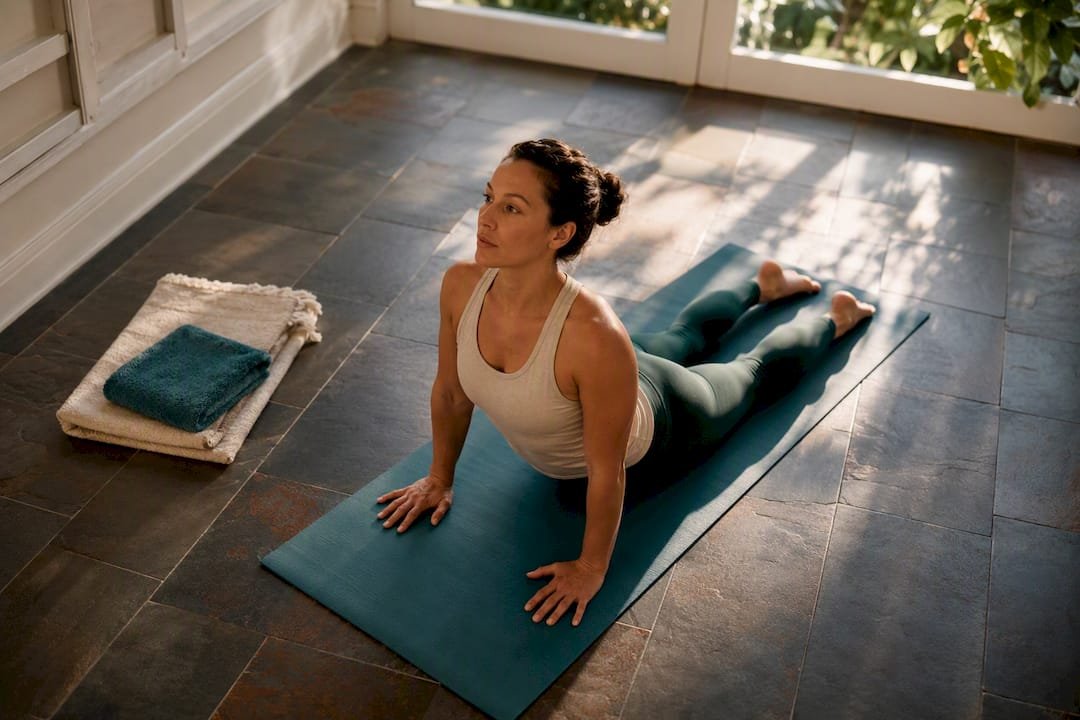
Start with short, gentle practices lasting a moderate amount of time that pair steady breath with a handful of basic poses like Mountain, Cat-Cow, and Child's Pose. If you want feedback on form, book a class labeled "foundational," "gentle," or "beginner" at a local studio rather than jumping into a fast-paced flow. Either way, the rule that matters most on day one: breathe through your nose without straining, and back off the instant you feel sharp or radiating pain. Soreness is fine. Pain is a stop sign.
TL;DR:
Starting with gentle, short sessions helps establish a habit that promotes steady progress without risking injury, especially when focusing on breath and alignment.
Most beginner classes rely on a common structure of centering, warming, a flow sequence, and cool-down, which remains consistent across studios and home routines.
Core poses like Mountain, Cat-Cow, Downward Dog, and Child's Pose form the foundation, with modifications and props essential for safe practice and progression.
Breath techniques such as diaphragmatic breathing and Ujjayi help deepen focus, improve movement safety, and are integral from the first class onward.
Studio classes labeled "foundational," "gentle," or "beginner" offer the safest environment for learning, with advance booking, early arrival, and instructor guidance enhancing the experience.
Amritayogawellness
Find Your Beginner Yoga Class
Amrita Yoga & Wellness offers accessible yoga classes and studio guidance for beginners and experienced practitioners in Philadelphia.
Table of Contents
What Learning How to Do Yoga Actually Looks Like Week One
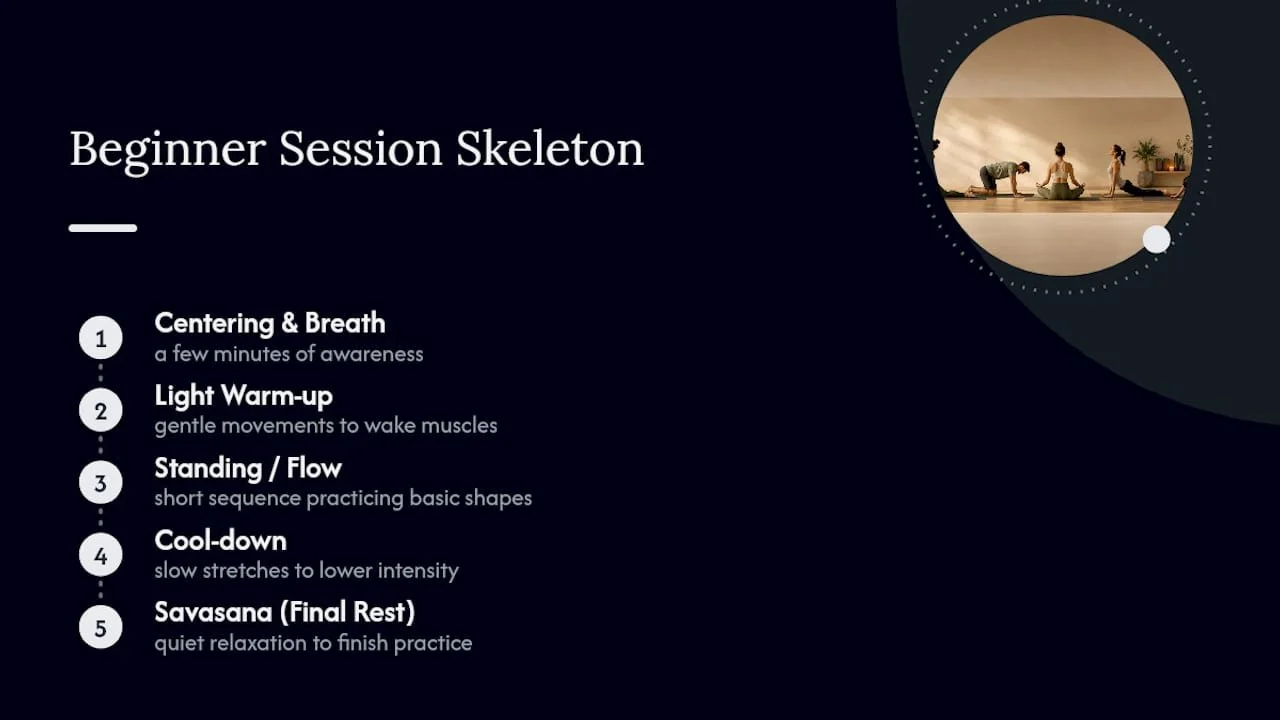
Most beginner classes and home routines follow the same skeleton: a few minutes of centering and breath awareness, a light warm-up, a short standing or flow sequence, a cool-down, and Savasana (final rest) at the end. That shape holds whether you're on a studio floor or your living room rug, and once you recognize it, no class will feel unfamiliar for long.
At home, short sessions are plenty. Consistent, brief practices build the habit without wearing you out, and that consistency matters more than any single long practice. Studio classes typically run moderate durations with warm-up time and hands-on instruction. Aim for a few sessions a week to start. That's frequent enough to notice progress, not so frequent that your body never gets a recovery day.
Not every style suits a first-timer. Hatha, gentle yoga, restorative, and slow flow are built for learning alignment at a pace where you can actually think about what your body is doing. Faster-paced styles like Vinyasa or power flow ask you to transition quickly between poses, which is much easier once the basic shapes are already in your muscle memory. There's no rush to get there.
If you're heading to a studio, know that most operate on a reservation system, so check the schedule and book your spot in a foundational or beginner class ahead of time rather than showing up and hoping for a mat. It also gives the teacher a heads up that a new face is coming, which tends to mean a warmer welcome and a quick check-in before class starts.
Foundational Poses and Two Sequences You Can Do Today
You don't need forty poses to start. You need about a dozen that show up in nearly every beginner class, plus the confidence to modify them. These core shapes form the backbone of most beginner routines:
Mountain Pose (Tadasana): Stand tall, feet hip-width apart, weight even across both feet. This is your reset button between poses.
Cat-Cow: On hands and knees, arch your back on the inhale, round it on the exhale. Great for waking up the spine.
Downward-Facing Dog: Hands and feet on the floor, hips lifted. Bend your knees generously if your hamstrings are tight.
Child's Pose: Kneel and fold forward, arms extended or by your sides. Your rest pose whenever you need one.
Low Lunge: One foot forward, back knee down. Place a folded blanket under the back knee if it's sensitive.
Warrior I and II: Wide stance, front knee bent. Shorten your stance if your balance feels shaky.
Tree Pose: Balance on one foot, other foot resting on your ankle, calf, or thigh. Skip the thigh placement until your balance is solid.
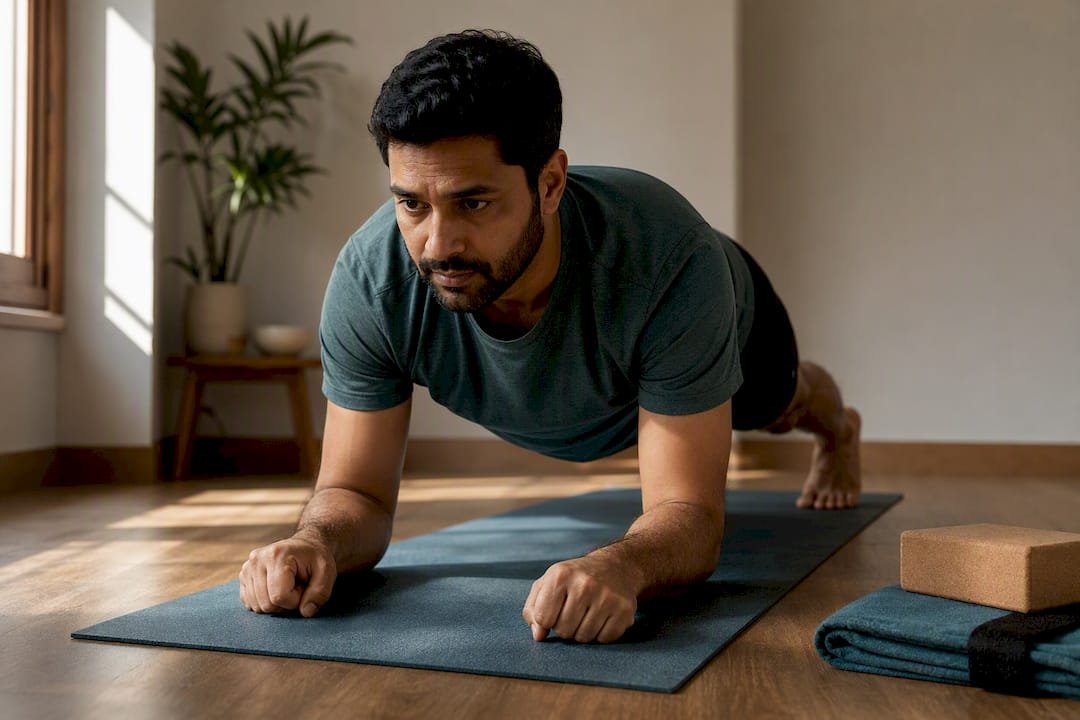
Plank: A straight line from shoulders to heels. Drop to your forearms or knees if your wrists complain.
Cobra: Lying face down, press up gently through your hands. Keep the lift small at first.
Bridge Pose: Lying on your back, feet flat, lift your hips. A block under your sacrum turns this into a restful variation.
Seated Forward Fold: Legs extended, hinge from the hips. Bend your knees as much as needed. Flexibility is not a prerequisite here. It's the outcome you're working toward, not the ticket to get in the door.
Savasana: Flat on your back, arms loose, eyes closed. Non-negotiable at the end of every practice.
A 10-minute gentle flow: Mountain Pose (1 minute of breathing) → Cat-Cow (1 minute) → Downward-Facing Dog (1 minute) → Low Lunge, both sides (2 minutes) → Child's Pose (2 minutes) → Seated Forward Fold (1 minute) → Savasana (2 minutes).
A 15 to 20 minute beginner sequence: Add Warrior I and II on both sides, Tree Pose on both sides, and Plank into Cobra before your cool-down stretches and Savasana. Move slowly enough that you can name each body part doing the work.
Common mistakes at this stage: rushing transitions before you've found your breath, locking the knees in standing poses, and comparing your Downward Dog to whatever shape you saw online. Alignment and breath matter far more than how the pose looks, and chasing a visual instead of a feeling is the fastest way to strain something.
Props help more than pride ever will. A yoga block brings the floor closer for tight hamstrings. A strap extends your reach in seated folds. A folded blanket cushions knees and wrists. No blocks or straps at home? A stack of books and a bathrobe belt work just as well.
Breathing Basics That Change Everything
Breath is not a footnote to the poses. It's the thing that makes them yoga instead of stretching. Beginner practice centers on breath awareness, and two techniques cover almost everything you'll need early on.
Diaphragmatic (belly) breathing: Sit or lie down, one hand on your belly. Inhale so your belly rises, exhale so it falls. Your chest should barely move.
Ujjayi breath: A soft, ocean-like sound made by slightly narrowing the back of your throat as you breathe through your nose. It's easier to feel than to explain. Try whispering "ha" with your mouth closed and you'll find the sensation.
Practical drills to link breath and movement:
Sit for 3 to 4 full breath cycles before you move at all. Just notice the inhale and exhale.
In Cat-Cow, inhale as you arch (Cow), exhale as you round (Cat). One breath, one movement.
In a simplified sun salutation, inhale to reach your arms up, exhale to fold forward. Let the breath set the pace, not the other way around.
Never hold your breath through a pose, and never force air in or out so hard that you feel light-headed. If a pose makes you gasp instead of breathe, it's a sign you've gone too far. Ease back.
Setting Up a Home Practice That Actually Sticks
You need less space than you think. A clear patch of floor about the size of a yoga mat, away from furniture corners, is enough. A rug or carpet works if you don't own a mat yet. Skip the fancy gear until you know you'll stick with it: a folded towel substitutes for a blanket, a broomstick or belt substitutes for a strap, and a stack of hardcover books substitutes for a block.
Here's a simple weekly structure to try:
Monday: 10-minute gentle flow (Mountain, Cat-Cow, Downward Dog, Child's Pose, Savasana).
Wednesday: 15-minute sequence adding Low Lunge and Seated Forward Fold.
Friday: 20-minute full sequence including Warrior poses and Tree Pose.
Weekend (optional): A slower 10-minute breath-focused session, no standing poses, just to reset.
Rotate which day gets more standing work and which stays restorative. Your body will tell you which one it needs most that week.
Check in with yourself the same way every time: Is my breath steady? Is this sensation stretch or pain? Am I gripping muscles I don't need to grip? If you can answer those honestly, you're doing the self-assessment that matters more than any pose photo. A short video call with a teacher, or even recording yourself on your phone, can catch alignment issues you can't feel from the inside.
Progress in the first month rarely looks like new flexibility. It looks like steadier breath, less wobble in Tree Pose, and showing up on the days you said you would. Those are the markers worth tracking.
Pro Tip: Anchor your practice to something you already do daily, like right after brushing your teeth or right before your morning coffee. A 10-minute mat session tacked onto an existing habit survives far longer than one floating alone on your calendar.
Finding a Beginner-Friendly Class and Studio Etiquette
Class descriptions are coded, and once you know the code, picking the right one gets easy. Words like "foundational," "gentle," "restorative," and "beginner" signal a slower pace and more instruction. Anything labeled "power," "advanced," or unlabeled by level is a gamble for week one.
A few habits make your first studio visit smoother:
Reserve your spot ahead of time. Most studios run on a booking system, and popular beginner classes fill up.
Arrive 10 to 15 minutes early to set up your mat and get oriented to the room.
Tell the teacher about any injuries or limitations before class starts, not mid-pose.
Ask directly: "What modifications are available for this pose if I need one?"
A good teacher offers variations without being asked twice, and that willingness is one of the clearest signs you're in the right room. A red flag worth noticing: an instructor who pushes everyone toward the same advanced version of a pose regardless of experience level, or offers no alternative when you ask for one. That's a class to skip next time. For help figuring out timing and how often to show up, Amritayogawellness has a scheduling guide and a guide to finding classes nearby worth a look before you book.
Safety Rules Every Beginner Should Know By Heart
One distinction solves most beginner anxiety about getting hurt: soreness that eases within a day or two is normal, but sharp, radiating, or breath-limiting pain is not. If a pose makes you catch your breath or sends a shooting sensation anywhere, come out of it immediately.
The most common beginner mistakes are fixable in seconds. Holding your breath during a hard pose? Consciously exhale and keep breathing. Forcing a deeper stretch than your body wants? Grab a block or bend your knees instead of pushing. Skipping the warm-up because you're short on time? Even 60 seconds of Cat-Cow wakes up the spine enough to prevent strain later in the sequence.
Specific joints need specific care. Sensitive wrists do better in Plank or Downward Dog on the forearms, or in fists instead of flat palms. Cranky knees appreciate a folded blanket underneath in kneeling poses. A tender lower back benefits from bent knees in forward folds and a block under the hips in Bridge Pose.
Medical evidence supports yoga as a generally safe, low-impact practice for most adults when it's approached gradually, but that gradual part matters. If you have a chronic condition, a recent injury, or you're pregnant, check with a doctor before starting, and treat yoga as a complement to medical care rather than a substitute for it.
Pro Tip: Keep a one-line note after each session: how your breath felt, any tight spots, anything that hurt. Three weeks of these notes will tell you more about your progress than any single class ever could.
Why Amritayogawellness and Juiced Back This Approach
This guide reflects how Juiced approaches beginner content across the board: practical steps first, safety cues built in, no assumption that you already know the vocabulary. It draws on established beginner frameworks from yoga and medical sources rather than guesswork, because a first-timer deserves accurate information, not filler.
Amritayogawellness, the Philadelphia studio behind this content, builds its beginner offerings around the same principle. Class descriptions spell out pacing and difficulty upfront, so you're never guessing whether "flow" means gentle or grueling. If you want a low-pressure entry point before committing to a full membership, the studio's free beginner class is built exactly for that first visit.
A Personal Note on Getting Started
Progress in yoga rarely arrives the way you expect. You won't wake up one day suddenly flexible. You'll just notice, three or four weeks in, that Downward Dog doesn't feel like a fight anymore, or that you caught yourself breathing instead of holding your breath during Warrior II. That's the whole game.
Comparing your first month to anyone else's, especially the confident-looking people two mats over, wastes energy you could spend on your own breath. Yoga rewards the people who keep showing up small and steady, not the ones who show up impressive once and burn out.
— Juiced
Ready to Take Your First Class?
Amritayogawellness is the alternative to figuring this out alone from a phone screen: a real room, a real teacher watching your alignment, and modifications offered the moment you need one, not after you've already strained something. That's a meaningful difference from a solo home routine when you're still learning what your body is supposed to feel like in these shapes.
If you're ready to try a class in person, a Group Class Drop In at $28 per session is a low-commitment way to test the format with a teacher who can adjust poses for you on the spot. Want more individual attention before joining a group? A One to One Session starting at $85 per hour lets you move at your own pace with someone watching your form the whole time. New to the studio entirely? Check the new student specials before you book your first visit.
Sources
For deeper detail beyond this guide, consult Yoga Journal for foundational pose breakdowns, Cleveland Clinic for medically grounded beginner postures, and the NCBI-published safety research for evidence on injury prevention.
Yoga for Beginners: The Ultimate Guide to Start Your Practice - Yoga Journal
Yoga for Beginners: 6 Postures To Get Started - Cleveland Clinic
Yoga for Beginners: A Complete Guide to Starting Your Practice - ClassPass Blog
FAQ
How long should a beginner practice yoga each session?
Ten to 20 minutes is enough to build a habit without exhausting a beginner. Studio classes tend to run 45 to 75 minutes since they include more warm-up and instruction time.
Do I need to be flexible to start yoga?
No. Flexibility develops through consistent practice; it isn't a requirement to begin. Beginners are better served focusing on breath and alignment than on how deep a stretch looks.
What yoga style is best for absolute beginners?
Hatha, gentle yoga, restorative, and slow flow are the friendliest starting points because they move at a pace that allows you to learn alignment. Faster styles like Vinyasa are easier once basic poses feel familiar.
How much does a beginner class cost at Amritayogawellness?
A Group Class Drop In costs $28 per session, and a Community Class Drop In is available for $11 per session for a lower-cost entry point.
What should I do if a pose hurts?
Stop immediately if the pain is sharp, radiating, or interrupts your breathing. Mild, fading soreness is normal, but any pain beyond that means the pose needs a modification or a prop.
Recommended

Best Yoga Style? Decide in 3–6 Sessions by Matching to Your Goal
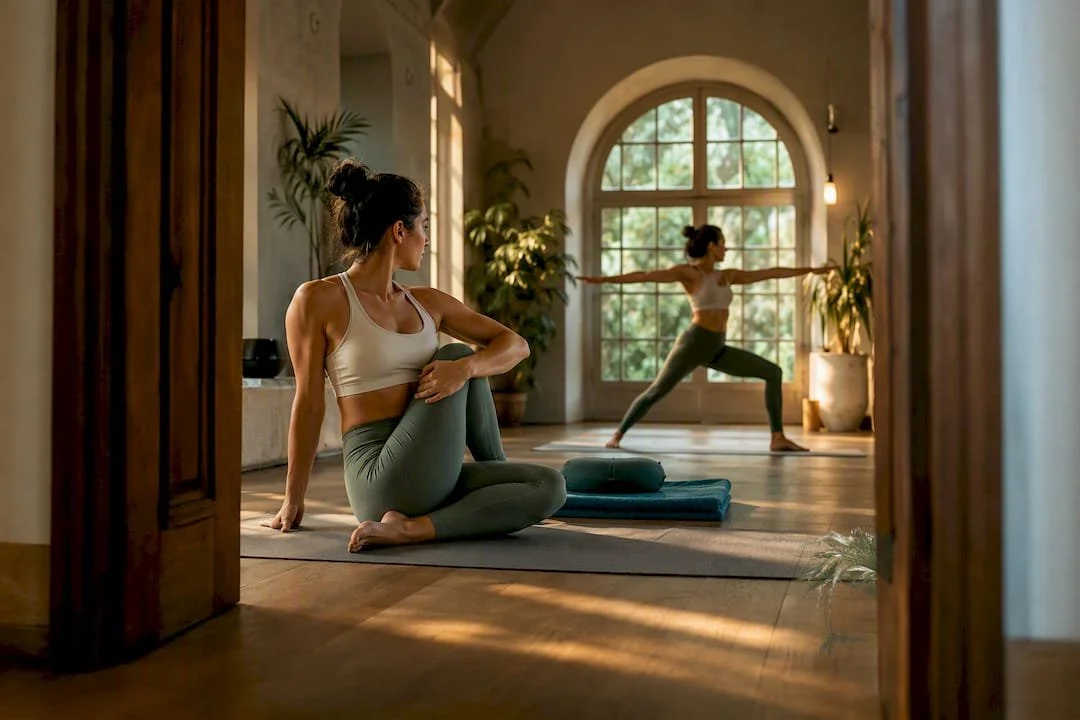
The best yoga style depends entirely on what you're trying to fix, build, or calm down. Restorative and Yin suit relaxation and recovery. Hatha and Iyengar build a safe foundation for beginners and anyone healing an injury. Vinyasa and Ashtanga suit those aiming to build strength and endurance. Whatever you pick, safety and a good teacher matter more than the label on the class schedule.
TL;DR:
Most yoga styles deliver similar health benefits, such as improved flexibility and reduced stress, regardless of the specific type practiced.
The risk profile of a yoga class depends more on intensity and heat than on style, requiring appropriate choices for individuals with health conditions.
Beginners should start with gentle styles like Hatha or Restorative, gradually exploring more active forms like Vinyasa or Power yoga over time.
Clear class descriptions, props availability, and instructor flexibility are more important than style labels when choosing a studio or teacher.
Testing different styles through short trial classes and asking targeted questions helps find the best fit for individual goals and physical capacity.
Amritayogawellness
Find Your Yoga Practice
Explore yoga, Pilates, barre, tai chi, and wellness offerings at Amrita Yoga & Wellness in Philadelphia.
Explore Amrita Yoga & Wellness
Table of Contents
What Does Research Say About the Best Type of Yoga for Health?
Which Yoga Styles Are Most Popular, and What Is Each Best For?
What Does Research Say About the Best Type of Yoga for Health?
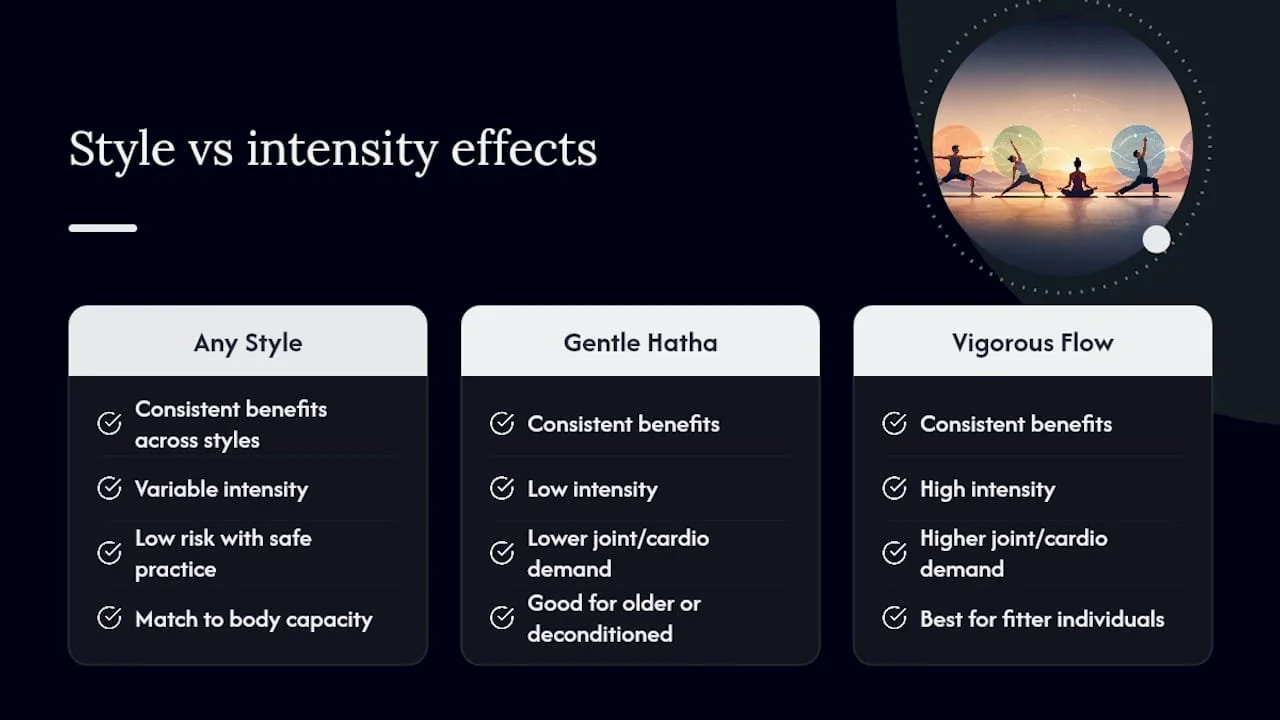
Yoga's benefits show up consistently across styles: lower stress, better balance, improved flexibility, stronger muscles, and meaningful help managing chronic pain. What's surprising is how little the specific style seems to matter for those outcomes. A systematic review of randomized yoga trials found that the proportion of positive results in a study had no real connection to which yoga style was tested. Gentle Hatha classes and vigorous Ashtanga sessions both produced favorable results at similar rates.
The National Center for Complementary and Integrative Health backs this up, noting that consistent, safely practiced yoga delivers benefits regardless of brand name or lineage. That said, intensity and heat do change the risk profile. Fast-paced flow classes and heated rooms demand more from your joints and cardiovascular system, which matters if you're older, deconditioned, or managing a health condition. The style you choose should match your body's current capacity, not just your goals.
Which Yoga Styles Are Most Popular, and What Is Each Best For?
Studio schedules can look like alphabet soup to a newcomer. Here's what the most commonly searched yoga styles actually involve and who tends to benefit most from each one.
Hatha: A slower, foundational style focused on basic postures and breath awareness. Best for beginners building body awareness and comfort with alignment. Low to moderate intensity, highly accessible, and classes typically move through postures one at a time with plenty of instruction.
Vinyasa: A flowing practice that links breath to movement in continuous sequences. Best for people wanting a cardio and strength component alongside flexibility work. Moderate to high intensity depending on the teacher, and pace can escalate quickly, so beginners should watch for classes labeled "slow flow" or "level one."
Ashtanga: A fixed sequence of postures performed in the same order every time, often at a demanding pace. Best for disciplined practitioners who already have some fitness base and want a repeatable, athletic practice. High intensity, with classes generally running the full primary series or a modified version of it.
Iyengar: A precision-focused style built around exact alignment, often using blocks, straps, and bolsters. Best for injury rehabilitation and anyone who wants detailed corrective feedback. Low to moderate intensity, and it's one of the more accessible styles for people with mobility limits, since clinical guidance specifically points to Iyengar for students needing modification.
Restorative or Yin: A slow practice using long holds, often five minutes or more per pose, supported by props. Best for stress relief, deep connective tissue stretching, and recovery days. Very low intensity, with classes usually built around five or six poses total for the entire session.
Bikram or hot yoga: A sequence of postures practiced in a room heated to around 100°F or higher. Best for people already comfortable with heat and looking for an intense sweat-based practice. High intensity, and providers caution that heat adds real risk for anyone with cardiovascular issues or heat sensitivity.
Power yoga: A fitness-driven variation of Vinyasa built for strength and calorie burn rather than tradition or lineage. Best for gym-goers who want a mat-based strength workout. High intensity, with class structure resembling circuit training more than a meditative flow.
Prenatal or chair yoga: Modified sequences adapted for pregnancy, seniors, or anyone with significant mobility restrictions. Best for accessibility first, movement second. Low intensity by design, and classes lean heavily on props and seated or supported variations of standard poses.
If you want to go deeper on any of these, what is Vinyasa yoga and why it matters breaks down the flow-based styles in more detail, and the Hatha yoga archive covers foundational practice for anyone starting from zero.
How Do You Choose the Right Yoga Style for Your Goals?
Start by naming your actual goal, not the goal you think you're supposed to have. Strength and endurance point toward Vinyasa, Ashtanga, or power yoga. Flexibility and relaxation point toward Yin, Restorative, or gentle Hatha. Rehab after injury or surgery points toward Iyengar or a private session with a teacher who can watch your form closely.
Before booking anything, ask a few direct questions:
What level is this class, and does the description match my experience?
Will props like blocks, straps, or chairs be available and offered?
What training does the instructor have, and how do they handle modifications?
Can I stop or rest during class without being singled out?
Is this a heated room, and if so, how does that affect people with health conditions?
Watch for red flags: instructors who push students past visible discomfort, classes that never mention props, or any pressure to skip a modification you clearly need. A physician-oriented review of yoga recommendations notes that class-level detail and instructor responsiveness predict individual outcomes better than the style name ever does.
Pro Tip: Give any new style three to six sessions before judging it. Your first class in a new format almost always feels awkward. The real signal comes once your body knows what to expect.
How Should Beginners Test Different Yoga Styles Safely?
A short, structured trial period beats guessing from a class description. Here's a simple way to explore without overloading your body.
Book one gentle class first, either Hatha or Restorative, and focus entirely on breathing and alignment rather than achieving deep stretches.
Over the next four to six weeks, add one more active class, like Vinyasa, alongside your gentle session to compare how your body responds to each pace.
Once you know which pace suits you, increase frequency gradually, and consider a private session if you want individualized correction on tricky poses.
A realistic starter week looks like two studio classes, one short home practice using basic poses, and at least one full rest day.
The 7 yoga styles for beginners and wellness seekers guide walks through this kind of trial approach in more depth if you want a longer roadmap.
What Should You Look for in a Yoga Studio or Teacher?
Clear class descriptions tell you more than any style label. A studio that spells out pace, prop availability, and who the class suits is doing you a favor before you even walk in.
Look for beginner-specific tracks rather than a single mixed-level catch-all.
Confirm the studio actually stocks props and that teachers offer them without being asked twice.
Check whether class descriptions mention modifications for injuries, pregnancy, or mobility limits.
Notice whether a studio offers multiple styles, since that variety usually signals teachers trained across different approaches rather than one narrow specialty.
Amrita Yoga & Wellness lists detailed class descriptions covering everything from hot yoga to restorative formats, which is exactly the kind of transparency worth checking for wherever you decide to practice.
An Honest Take on Picking a Yoga Style
Forget the label. A distracted teacher running a "gentle" class can hurt you faster than an attentive one running a demanding flow. Prioritize alignment, ask for modifications without hesitation, and let intensity build slowly under someone who actually watches how you move.
— Juiced
Ready to Try a Class and See What Fits?
Reading about styles only gets you so far. Amrita Yoga & Wellness gives you a direct way to test what actually suits your body, with class descriptions detailed enough that you know what you're walking into before you unroll a mat.
If you're brand new, the Nurtured Beginnings pass at $35 is built for exactly that first step, and a single Group Class Drop In runs $28 if you'd rather sample one class at a time. Prefer individual attention while you sort out alignment issues or an injury? A One to One Session starts at $85 per hour. New students can also check the New Student Specials page for current offers before committing to a membership. Book a beginner-friendly class this week and let a real teacher, not a style name, tell you what fits.
Sources
For deeper clinical detail, see the NCCIH overview on yoga effectiveness and safety and the physician's guide to recommending yoga published through the National Institutes of Health.
Yoga: In Depth — National Center for Complementary and Integrative Health (NCCIH)
A Physician’s Guide to Recommending Yoga — PMC (National Institutes of Health)
FAQ
What is the best yoga style for beginners?
Hatha is usually the easiest entry point because it moves slowly through basic postures with clear instruction. Iyengar is a strong second option if you want extra alignment feedback and prop support from day one.
Which yoga style is best for flexibility?
Restorative and Yin yoga produce the most noticeable flexibility gains because poses are held for several minutes, allowing connective tissue to release gradually. Hatha also builds flexibility over time, just at a gentler pace with shorter holds.
Is Vinyasa or Hatha better for weight loss?
Vinyasa burns more calories per session because it keeps you moving continuously between poses, which makes it a better fit for cardio-focused goals. Hatha still supports strength and mobility, but its slower pace means it contributes less to calorie burn.
Do I need to be flexible to start yoga?
No. Flexibility is a result of consistent practice, not a requirement to begin one. Beginner-friendly styles like Hatha and Restorative are built specifically for people starting with limited mobility or no prior experience.
Recommended

See Measurable Changes in Eight Weeks: Reformer Pilates for Adults
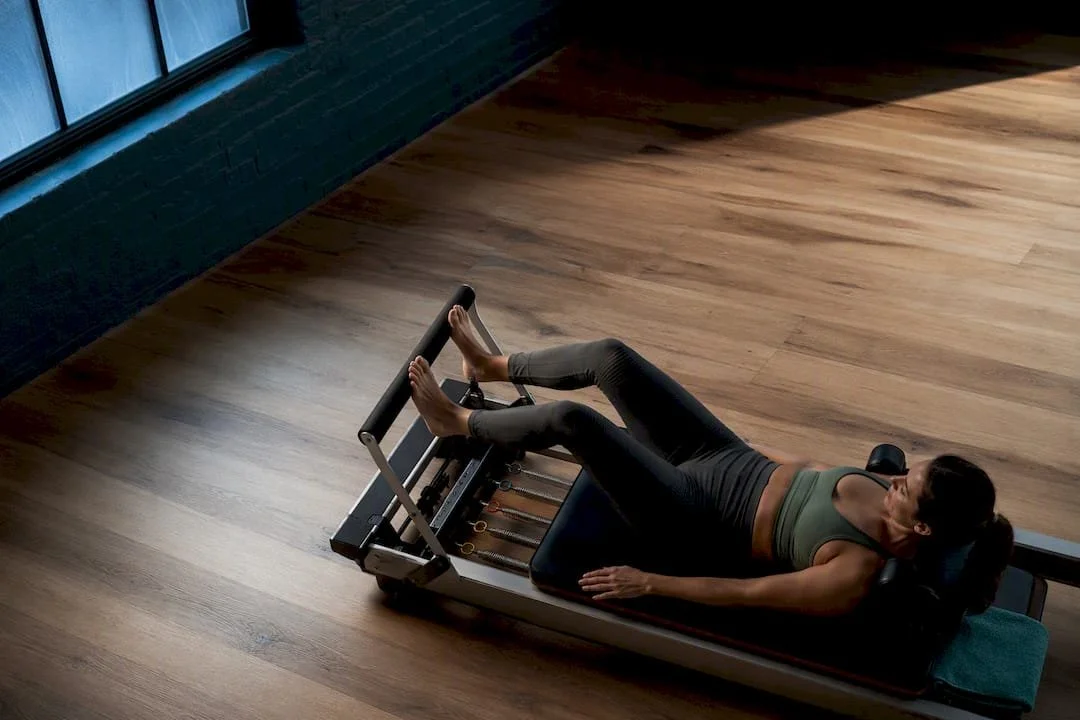
Reformer Pilates strengthens your core, corrects postural habits, increases flexibility, and takes measurable inches off BMI and body fat in as little as eight weeks. It also reduces chronic low back and neck pain, and it tends to lift mood and body image along the way. Most of these changes show up in research programs running two to three sessions a week for six to eight weeks, not overnight.
TL;DR:
Reformer Pilates can lead to measurable body composition changes, like BMI and body fat reduction, after about six to eight weeks of consistent practice.
The core muscles activated through reformer exercises are deep stabilizers that improve spinal load control without building visible bulk.
Postural improvements are significant within two months, especially for sedentary individuals who learn to maintain proper spinal alignment during daily activities.
Regular reformer sessions boost muscular endurance and strength in arms, shoulders, and legs, especially with three sessions weekly.
People with chronic low back or neck pain often experience pain reduction and better movement control, but should seek medical clearance if they have recent or severe spinal conditions.
Amritayogawellness
Build Strength With Reformer Pilates
Amrita Yoga & Wellness offers Pilates classes in Philadelphia for adults seeking core strength, flexibility, posture, and full-body conditioning.
Table of Contents
What Does Reformer Pilates Do to Your Body's Core Muscles?
The reformer's spring resistance forces constant recruitment of the deep stabilizers most exercisers never consciously engage: the transversus abdominis, multifidus, pelvic floor, and diaphragm. These muscles do not build visible bulk. They act as your body's internal bracing system, controlling how your spine handles load during everything from lifting groceries to sitting through a nine-hour workday.
The carriage is the mechanism that makes this different from crunches on a mat. Every time it slides, your body has to resist unwanted movement while still producing the intended one, which is a form of training researchers call anti-movement stability. That is a big part of why supervised reformer programs show consistent gains in trunk flexor strength and endurance over just a few weeks.
Three movement patterns show up constantly in reformer programming:
Footwork on the carriage. Legs press the carriage out against spring tension, building lower-body strength while the core stabilizes the spine against the sliding platform.
The hundred. A pulsing arm and breath sequence performed with the torso curled forward, which hammers the rectus abdominis and deep stabilizers simultaneously.
Short-box sequences. Seated on the box with the strap around the feet, you flex, extend, and rotate the trunk against resistance, which is one of the more direct tests of trunk endurance used in clinical protocols.
Pro Tip: Focus on keeping your ribs from flaring during footwork. If your lower back arches off the carriage, the spring tension is doing the work your core should be doing.
Can Reformer Pilates Improve Posture and Spinal Alignment?
Yes, and the improvement can be dramatic. Years of sitting hunched over a laptop tend to produce a predictable pattern: rounded shoulders, a forward head, and an anteriorly tilted pelvis that flattens the natural curve of the lower back. Reformer work directly counters this because nearly every exercise demands a neutral spine before you're allowed to move, retraining the body to find that position by feel rather than by conscious correction.
A study of sedentary office workers who did an eight-week reformer Pilates program, twice weekly for 60 minutes, found large improvements in postural alignment scores, along with a meaningful jump in body appreciation and a drop in social appearance anxiety. That is a striking result for a desk-bound population, and it lines up with how Pilates principles like centering and precision work as much on the nervous system as on the muscles.
Two ways to track your own progress:
Photograph your side profile against a wall every two weeks. A shrinking gap between your ear, shoulder, and hip landmarks is a real signal of change.
Notice whether you catch yourself slumping less during the workday. That behavioral shift usually precedes visible postural change.
Body Composition, Strength, and Endurance: Realistic Expectations
A 2025 randomized controlled trial tracked overweight and obese women through an eight-week reformer program, supervised sessions three times a week, and found significant drops in BMI and body fat percentage alongside gains in upper-extremity strength, with large effect sizes on both fronts. That is a meaningful result for a low-impact modality often dismissed as "just stretching."
The mechanism is straightforward: springs provide progressive resistance you can dial up as your body adapts, and three sessions a week gives the neuromuscular system enough repeated stimulus to change. If you're not in an obese cohort, expect the same direction of change, strength up, waist down, just don't assume identical magnitude. Individual results depend heavily on starting fitness, diet, and consistency.
What to actually expect over two months:
Noticeable strength gains in arms, shoulders, and legs by weeks three to four.
Modest body composition shifts by week six to eight, more visible in people carrying more excess fat to start.
Muscular endurance, the ability to hold a plank or repeat footwork sets without fatigue, tends to improve before raw strength does.
What the Evidence Shows on Pain Relief and Rehab
Clinical trials on chronic low back and neck pain report meaningful reductions in pain intensity after structured reformer programs, along with improvements in functional interference items like general activity, mood, and sleep quality. Fear of movement and fatigue scores also improved in these trials, which matters because chronic pain often gets worse not from tissue damage but from avoidance behavior that weakens the body further.
The likely mechanisms are proprioceptive: better body awareness, smoother neuromuscular control, and a breathing pattern that shifts the nervous system toward a calmer state during exercise rather than a stressed one.
If you have a diagnosed spinal condition, get medical clearance before starting.
If pain spikes during any exercise rather than easing over sessions, stop and modify with an instructor.
Pro Tip: Chronic pain that improves with movement and worsens with rest is a different pattern than pain triggered by specific movements. Tell your instructor which one you're experiencing before your first session.
Flexibility, Balance, and Mobility Gains From Reformer Work
The carriage's instability is a built-in balance challenge you don't get on a stationary mat. Every rep asks your body to control a moving surface, which trains the small stabilizing muscles around ankles, knees, and hips that matter most for fall prevention as people age.
Assisted stretching is the other half of the equation. Straps and springs let you move into a deeper range than you could unsupported, then add gentle eccentric control on the way back, which builds flexibility without the ballistic risk of forcing a stretch cold. Leg-spring series, lying on your back with feet in straps, work exactly this way, taking the hip through a full range while the core stays anchored.
Reformer practice is consistently linked to improved flexibility and functional balance markers, benefits that show real value as strength alone can't prevent a fall, but better balance and joint control can.
What to Expect: Session Structure and a Realistic Timeline
A typical beginner reformer class opens with breathing and pelvic positioning, moves into footwork and leg work, adds arm and core sequences, and finishes with stretching. Progression happens through spring tension, added repetitions, and more complex movement patterns, usually introduced gradually as your control improves.
Most of the research programs behind these results run six to eight weeks, two to three sessions per week, 50 to 60 minutes each. A six to eight week starter plan looks roughly like this:
Weeks 1 to 2: Learn breathing and neutral spine, light spring tension, focus on form.
Weeks 3 to 4: Postural and alignment changes typically become noticeable here.
Weeks 5 to 6: Strength and muscular endurance gains accelerate.
Weeks 7 to 8: Body composition and pain-related improvements, if applicable, tend to show up last.
Safety, Modifications, and Choosing an Instructor
Reformer Pilates suits most fitness levels, but a few conditions call for caution: recent spinal or joint surgery, an unstable cervical spine, an acute disc herniation, or uncontrolled cardiovascular or blood pressure conditions. If any of these apply to you, get medical clearance and tell your instructor before class.
When picking a studio, look for small class sizes, instructors with rehabilitation or clinical training, and explicit modification cues offered during class rather than after you ask.
Confirm the instructor can name at least two modifications for any exercise on request.
Ask whether the studio offers a private introductory session for first-timers with pain history.
Pro Tip: If you have any chronic pain condition, book a private session before joining a group class. One-on-one time lets an instructor correct your form before habits set in.
How Does Reformer Pilates Affect Your Heart and Breathing?
Reformer Pilates is not primarily a cardio workout, but it is not purely strength training either. Sessions keep your heart rate in a moderate zone through continuous movement between exercises with minimal rest, which produces a mild aerobic training effect over time, especially in faster-paced or flow-style formats.
The bigger respiratory story is breath control. Pilates method built around Pilates principles trains lateral rib breathing, expanding the rib cage sideways while keeping the core engaged, rather than shallow chest breathing common under stress. This pattern activates the diaphragm more fully and tends to shift the nervous system toward a calmer, parasympathetic state during exercise.
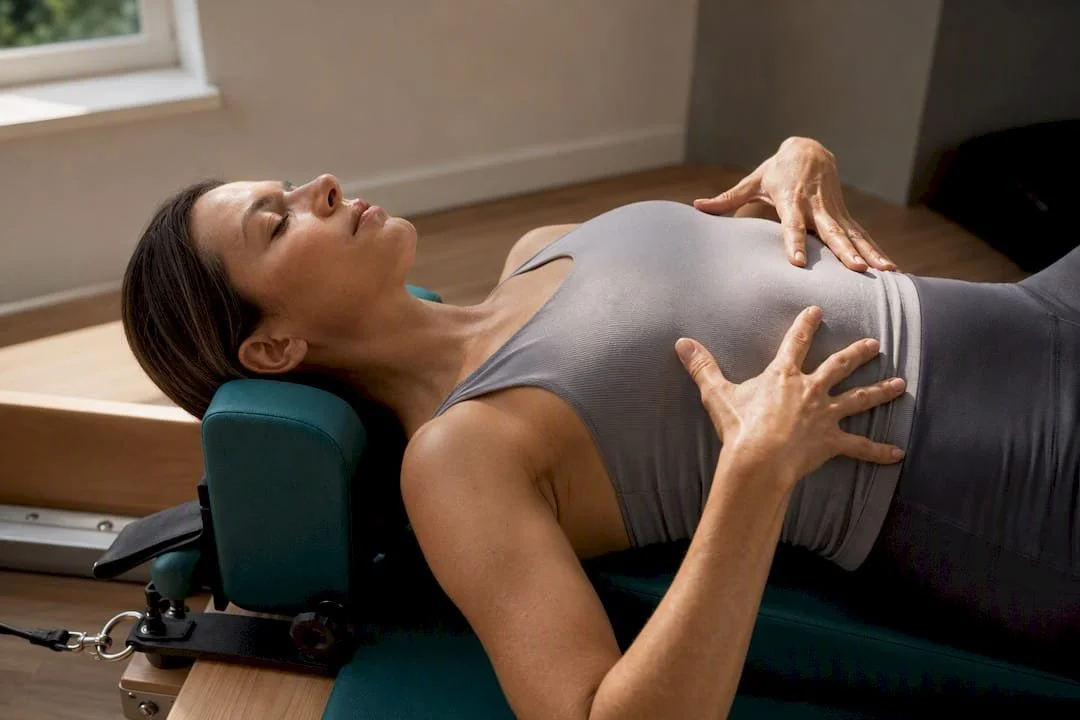
That calming effect is part of why reformer sessions leave many people feeling clearheaded rather than wiped out, unlike high-intensity interval training that spikes heart rate into an anaerobic zone. If your goal is cardiovascular endurance for running or cycling, reformer Pilates works better as a complement than a replacement. If your goal is a workout that builds strength while lowering stress hormones, the breathing component alone makes it worth the time.
People with hypertension or other cardiovascular conditions should still get clearance from a doctor before starting, since spring resistance and certain positions, particularly inverted or Trendelenburg-style exercises, can affect blood pressure and should be modified accordingly.
Does Reformer Pilates Improve Athletic Performance?
Athletes across running, cycling, tennis, and golf increasingly add reformer sessions to their weekly training because it closes a gap that heavy lifting and sport-specific drills leave open: core stability under rotational and multi-directional load. A golfer's swing and a tennis serve both depend on the trunk transferring force from the legs to the arms without leaking energy at the spine, which is precisely what footwork and short-box sequences train.
Functional movement, the ability to squat, hinge, rotate, and reach with good control, tends to improve because reformer exercises rarely isolate a single joint. Most patterns require the hips, spine, and shoulders to coordinate at once, closer to how the body moves in sport and daily life than a seated leg extension machine.
Runners often notice reduced hip and pelvic instability, a common source of knee and lower back pain over long mileage. The adjustable spring resistance also makes it possible to work through a controlled range of motion at low impact, useful during a return from injury when full-intensity training would be premature.
It won't replace heavy strength training for building maximal power, but as a supplement two or three times a week, reformer Pilates fills a genuine gap in most athletic training plans.
Reformer Pilates vs. Mat Pilates and Other Workouts
Mat Pilates and reformer Pilates share the same underlying principles, breath, control, precision, but the reformer changes the experience in two concrete ways: it adds external resistance through springs, and it adds support through the carriage and straps. That combination lets beginners access exercises that would be too advanced on a mat, while also letting advanced practitioners load movements harder than bodyweight alone allows.
Compared with resistance training in a traditional gym, reformer Pilates trains the same muscles through smaller, more controlled ranges and puts far more emphasis on the deep stabilizers that heavy compound lifts tend to skip. Compared with yoga, the reformer is more focused on strength and precise movement, and less on sustained holds or spiritual practice, though both share breath awareness as a core tool.
Compared with high-intensity interval formats, reformer sessions are lower impact on joints and better suited to rehabilitation, but they produce less cardiovascular stress. None of these formats are strictly superior. Mat Pilates costs nothing and travels anywhere; the reformer adds resistance and support a mat can't. For adults managing pain, recovering from injury, or wanting measurable strength changes without joint stress, the reformer tends to close the gap between low-impact and effective faster than mat work alone.
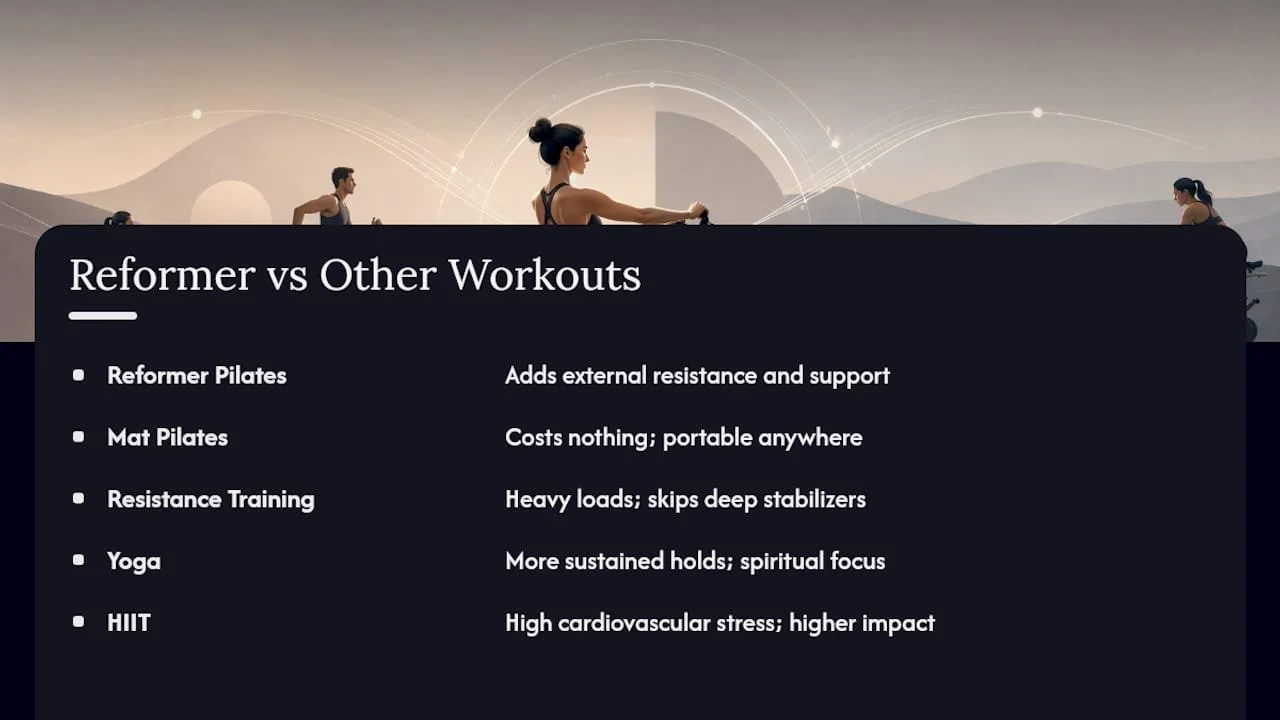
Amrita Yoga & Wellness: A Studio-Level Perspective
Amritayogawellness offers reformer group classes and private sessions for readers who want supervised practice rather than guesswork. First-timers or anyone managing pain should start with a private intro before joining a group. The studio's reformer Pilates blog has beginner resources worth reading before your first session.
— Juiced
Try a Reformer Class or Private Session
Amritayogawellness gives you a structured path into reformer Pilates without the trial-and-error of piecing together a routine from videos or a gym floor you're not sure how to use. A Group Class Drop In at $28 per session lets you test the format with instructor guidance before committing to anything, and if you're managing pain, recovering from an injury, or simply want your form corrected one-on-one, a private session starting at $85 per hour gets you individualized attention from the first move.
Group classes suit people comfortable following cues alongside others and building consistency through a regular schedule. Private sessions suit anyone starting with a pain history, postural concern, or simply wanting faster progress through personalized correction. If you want structured guidance on general fitness programming outside the studio, resources like JustFit Pakistan cover broader training approaches worth knowing about.
Book your first class or private session through Amritayogawellness's in-studio group class page and see which format fits your body's starting point.
Sources
FAQ
How Fast Will I See Changes From Reformer Pilates?
Postural and core control improvements often show up within three to four weeks of consistent practice, while strength, endurance, and body composition changes tend to follow by week six to eight. Most clinical programs behind these results ran two to three sessions weekly for eight weeks.
Can Reformer Pilates Help With Weight Loss?
Reformer Pilates supports weight loss indirectly through muscle building and improved body composition rather than heavy calorie burn alone. An eight-week randomized trial in overweight and obese women found significant reductions in BMI and body fat percentage alongside strength gains.
Is Reformer Pilates Safe for Back Pain?
For many people with chronic low back pain, reformer Pilates is safe and can meaningfully reduce pain intensity and improve function, according to clinical trial results. Anyone with an acute injury, recent surgery, or unstable spinal condition should get medical clearance first and consider starting with a private session rather than a group class.
Is Reformer Pilates Better Than Mat Pilates?
Neither is strictly better. The reformer adds spring resistance and carriage support that make certain exercises more accessible and more progressively challenging, while mat Pilates requires no equipment and builds the same foundational control. Many practitioners use both, mat work between reformer sessions to reinforce the same core principles.
Recommended

Reformer Classes Boost Flexibility: Active Control Backed by Trials
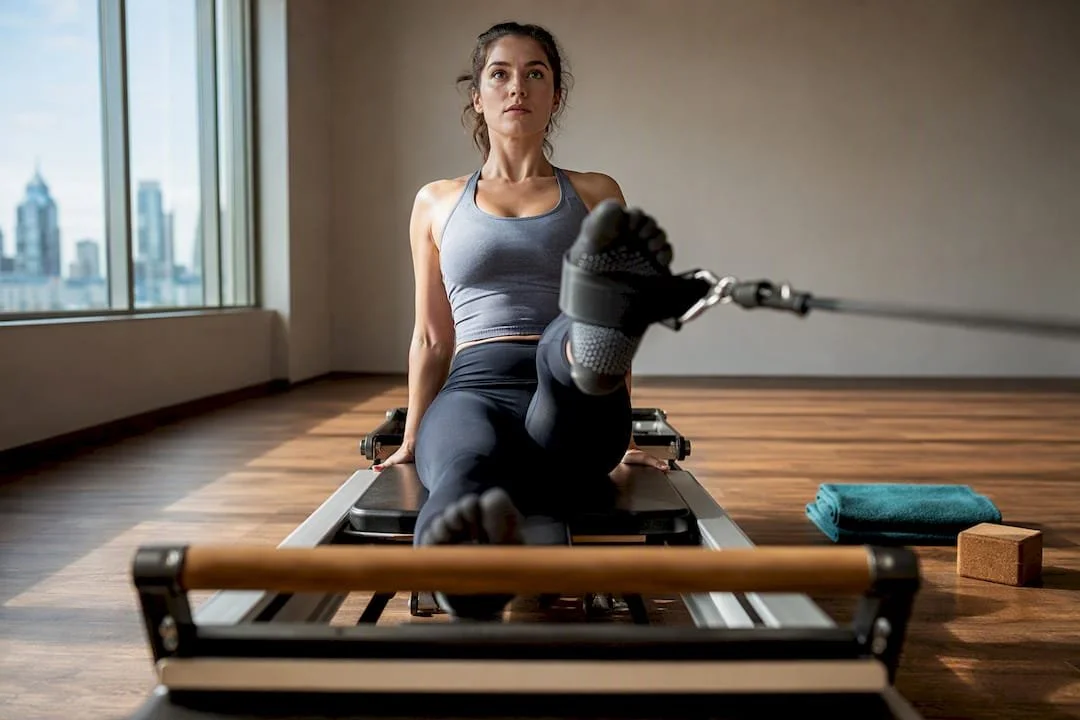
Reformer Pilates can improve your functional flexibility by training strength and control at end range while spring resistance protects your joints along the way. That distinction between merely stretching a muscle and actually controlling it at its longest length is why reformer work holds up better over time than passive stretching alone. Progress is real but gradual, and it depends on showing up consistently and working with a qualified instructor who adjusts spring tension to your body, not the other way around.
TL;DR:
Reformer Pilates improves active flexibility by training strength at end range with adjustable spring resistance, unlike passive stretching that does not teach control.
Clinical evidence shows that consistent reformer training over six to eight weeks can lead to measurable gains in trunk flexibility, muscle strength, and body composition.
Active flexibility exercises on the reformer focus on slow, controlled movements and eccentric loading, which enhances strength and mobility simultaneously.
Most practitioners see meaningful progress with two to three sessions per week, paired with off-day mobility exercises, over several weeks.
Beginners with joint or spinal issues should seek medical clearance and work with qualified instructors to modify spring tension and avoid injury.
Amritayogawellness
Build Flexibility With Reformer Pilates
Explore Amrita Yoga & Wellness for Pilates classes supporting strength, mobility, posture, and flexibility in a community-based Philadelphia studio.
Table of Contents
How Reformer Class Benefits Flexibility Through Machine Mechanics
Active Flexibility vs. Passive Stretching: Why the Reformer Wins Here
Who Gets the Most Out of Reformer Work, and When to Check With a Doctor First
How Often You Need to Practice and What Progress Actually Looks Like
Studio Perspective: Teaching Flexibility With Precision, Not Guesswork
How Reformer Class Benefits Flexibility Through Machine Mechanics
The reformer's sliding carriage, adjustable springs, and foot straps let you move through a joint's full range while resistance meters the effort in both directions. That last part matters more than most people realize. A free-weight stretch or a static hold on the floor gives you gravity and nothing else to work against. The reformer gives you tension you can dial up or down, which means you can hold a deep hip opener or a hamstring stretch under load instead of just sinking into it.
That control is the whole reason reformer class benefits flexibility differently than a typical stretching routine. Healthline's overview of reformer Pilates points to the carriage and spring system as the mechanism behind safe, progressive range-of-motion work, particularly for people who need a joint-friendly option. A 2026 Medscape review takes a more measured stance: reformer training shows real benefits for mobility and core strength, but the evidence base is still thinner than the marketing suggests, and its biggest advantage may simply be the precision and support it offers compared to unsupervised stretching.
The clinical data backs the basic claim. An 8-week reformer program in a randomized controlled trial on overweight women produced measurable gains in trunk flexibility alongside improvements in muscle strength and body composition, using sessions two to three times a week.
What this looks like in practice:
A beginner starts on medium spring tension for leg circles, building control before range.
Over several weeks, the instructor reduces spring tension slightly to demand more active muscular effort at the same stretch depth.
Eccentric-focused sequences, like slowly lowering into a stretch instead of dropping into it, teach the nervous system to tolerate that end-range position under load.
Reformer flexibility signal: The RCT cited above ran participants through sessions multiple times weekly over a period and recorded improved trunk flexibility alongside strength and body composition changes, not flexibility gains in isolation.
Active Flexibility vs. Passive Stretching: Why the Reformer Wins Here
Passive stretching is what most people picture when they think "flexibility." You sit on the floor, reach for your toes, and let gravity and time do the work. It lengthens tissue, but it doesn't teach your body to use that new range.
Active flexibility is different. It's your ability to generate force and maintain control at the outer edge of a joint's range, and it's the kind of flexibility that actually shows up when you're reaching overhead, stepping into a lunge, or twisting to grab something behind you. Reformer springs are built for exactly this. Instead of passively holding a stretch, you're pushing or pulling against resistance while your body is already at a lengthened position, which trains strength and mobility at the same time.
A few exercises illustrate it well:
Long stretch series, where you hold a plank-like position on the carriage while controlling its slide, building strength through shoulder and hip extension.
Footwork with straps, which trains hamstring and hip flexor length while your core stays engaged against spring pull.
Short spine massage, a classic reformer sequence that moves the spine through flexion and extension under light resistance.
Pro Tip: Focus on slowing down the return phase of each movement, not just the push. That eccentric control is where most of the active flexibility gains actually happen.
What a Reformer Class Actually Looks Like
A typical class runs through a predictable arc, and knowing it ahead of time makes the first session far less intimidating.
Warm-up (5 to 10 minutes). Light footwork and pelvic curls on lower spring tension to prepare joints and activate the core.
Technique drills. Instructors cue alignment on foundational moves like the hundred or leg circles before adding range.
Flexibility-focused sequences. This is where longer holds, straps, and deeper carriage slides come in, often paired with breathing cues to help you relax into the stretch without losing control.
Cool-down. Gentler stretches, sometimes assisted by the instructor, to bring heart rate down and reinforce the range gained during class.
Instructors regularly adjust spring tension and range for beginners, older adults, or anyone rehabbing an injury. A newer student might stay on a higher spring setting for stability, while someone with more experience gets pushed toward lower tension and a longer range of motion. The Amrita Yoga & Wellness beginner's guide to reformer classes walks through exactly what a first session tends to involve.
Who Gets the Most Out of Reformer Work, and When to Check With a Doctor First
Reformer classes tend to suit a specific set of people especially well.
Anyone recovering general mobility after a sedentary stretch, since spring resistance offers support that free-weight stretching doesn't.
People managing chronic, non-acute back pain who need controlled core engagement rather than aggressive stretching.
Athletes who need active range of motion for sport-specific movement, not just static flexibility.
Older adults who want low-impact resistance work without pounding joints.
That said, reformer isn't a blanket fix for everyone. Clinical guidance on reformer safety flags certain conditions that need a green light from a doctor first: an unstable spine, recent spinal or joint surgery, uncontrolled cardiovascular conditions, or neurological issues affecting balance and coordination. None of these rule out reformer work permanently, but they do mean you need a clinician's sign-off and a certified instructor who can modify accordingly, not a drop-in class with no supervision.
How Often You Need to Practice and What Progress Actually Looks Like
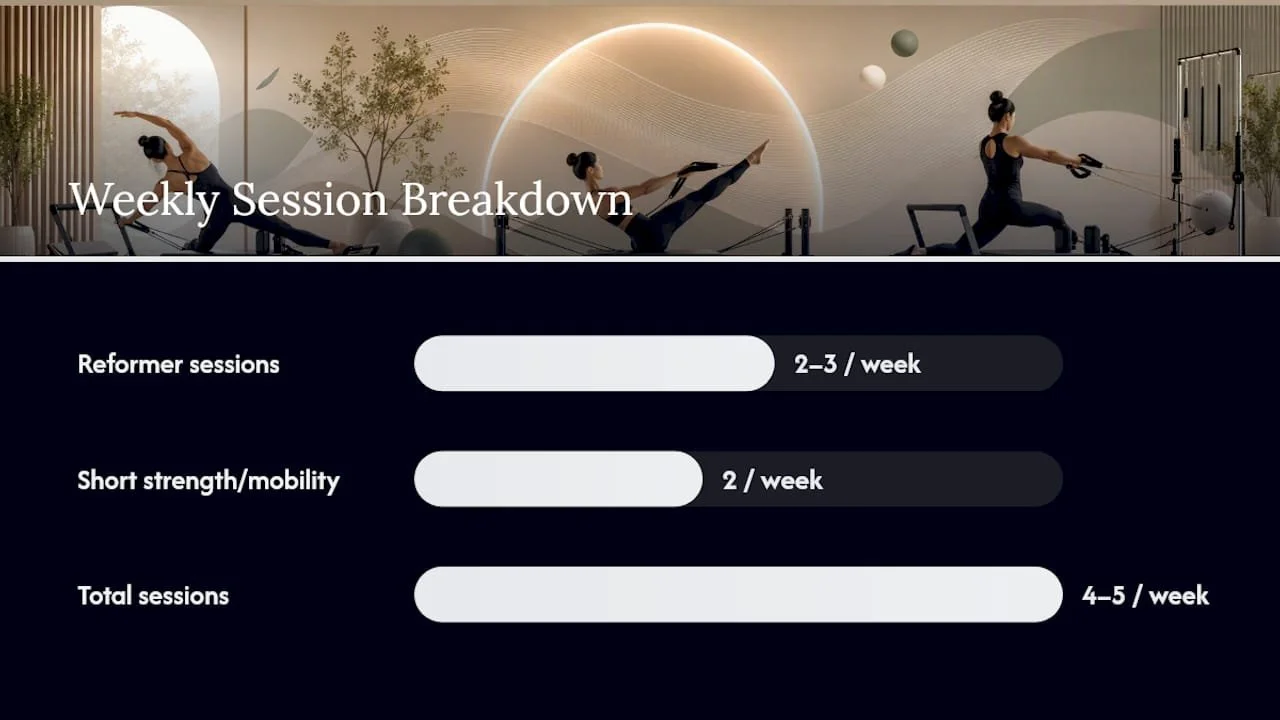
Most clinical and practitioner guidance suggests regular sessions multiple times a week, around half an hour to an hour each, sustained over multiple weeks before consistent changes appear. Balanced Body's guidance on reformer practice backs this cadence for building both strength and mobility, and it lines up with the eight-week trial window used in the Uzun et al. RCT, which recorded flexibility and strength gains on a twice-to-thrice-weekly schedule.
Progress rarely feels dramatic week to week. Look for these signals instead:
Reduced morning stiffness or easier movement into a deep squat or lunge.
A noticeably longer reach in strap-based hamstring or hip flexor work.
Less effort needed to hold form at the end of a stretch sequence.
Pairing reformer sessions with two short strength or mobility sessions elsewhere in your week tends to speed things along, since stronger surrounding muscles support a joint through its new range instead of just passively allowing it.
Getting the Most Out of Every Session
A few habits separate people who see real flexibility gains from those who plateau.
Tell your instructor about any injury or limitation before class starts. They'll adjust spring settings accordingly, and conservative tension at first is almost always the right call.
Move slowly into end range and control the way back out. Depth without control just teaches your body to brace, not to lengthen safely.
Add five to ten minutes of active mobility work at home on off days. Hip openers, ankle circles, and thoracic rotations reinforce what class builds.
Pro Tip: Breathe out as you move deeper into a stretch position. Holding your breath tightens the exact muscles you're trying to lengthen.
Studio Perspective: Teaching Flexibility With Precision, Not Guesswork
Flexibility-focused reformer work is built around precision and accessibility rather than pushing people into ranges they aren't ready for. Progressive programming, where spring tension and range increase gradually over weeks, protects joints while still building the active flexibility that actually transfers to daily movement. Beginners get the most value from starting with an intro session and letting an instructor assess where their range and control currently stand. Studio blog resources on reformer benefits offer a deeper look at how that programming works in practice.
— Juiced
Book an Intro Reformer Class or Join Karma Yoga Club
If everything above has you curious about trying reformer work yourself, the most direct path is an intro-to-reformer session, where an instructor can look at your current range and build a plan around it instead of guessing. This hands-on start is important because flexibility gains depend on getting spring tension and form right from day one, not on pushing hard in a single class.
For anyone planning to make reformer a regular part of their week, the Karma Yoga Club is the practical next step. It's built as an ongoing path to classes and workshops rather than a one-off visit, which matters given that most flexibility gains show up after weeks of consistent practice, not after one session. If you're ready to start, book your intro reformer class through Karma Yoga Club and get paired with an instructor who can tailor spring settings and range to where your body is right now.
Sources
The claims in this article draw on a Medscape review of reformer evidence, Healthline's practical overview, Medical News Today's summary of benefits and limits, and a randomized controlled trial on reformer outcomes. Talk with a clinician first if you have any condition that affects spinal stability or joint health.
FAQ
Does Reformer Pilates Actually Improve Flexibility?
Yes. Clinical trials and reviews show reformer training improves trunk flexibility and joint mobility, particularly when combined with strength work over six to twelve weeks of consistent practice.
How Is Reformer Different From Mat Pilates for Flexibility?
Reformer uses adjustable spring resistance to load a joint at its end range, building active flexibility, while mat Pilates relies mostly on bodyweight and gravity, which some reviews note produces similar overall outcomes depending on your goals and budget.
How Many Reformer Classes Per Week for Flexibility Gains?
Most guidance points to two to three sessions a week, 30 to 60 minutes each, sustained for at least six weeks before changes become noticeable.
Is Reformer Pilates Safe for Beginners With Tight Hips or a Stiff Back?
Generally yes, since spring resistance offers support that unassisted stretching doesn't, but anyone with an unstable spine, recent surgery, or a cardiovascular condition should get medical clearance first.
Where Can I Try a Reformer Class to See if It Fits My Goals?
Amrita Yoga & Wellness offers intro-to-reformer sessions built for beginners, with ongoing access available through the Karma Yoga Club.
Recommended

Looser Hips in 3–6 Weeks: Beginner Pilates Mat Mobility Exercises
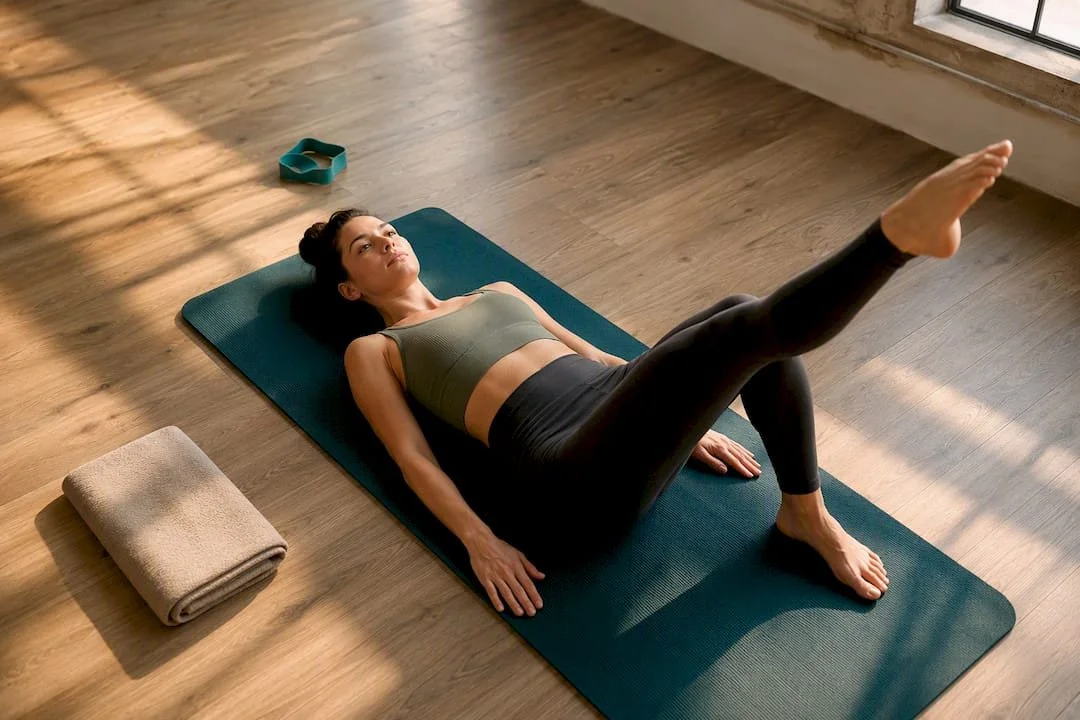
Pilates improves hip mobility when practiced regularly, and you don't need a reformer to see it work. Start with six moves: leg circles, the clam shell, side-lying leg lifts, femur arcs, glute bridges, and quadruped hip circles. Do them routinely several times a week, and many people notice looser hips and steadier balance after a few weeks of consistent practice. Stop and check with a clinician if you feel sharp joint pain, numbness, or new swelling.
TL;DR:
Performing hip mobility exercises two to four times weekly can improve joint function and balance within three to six weeks of consistent practice.
Focus on controlled movements like clam shells and single-leg bridges, which address muscle imbalances that cause hip pain more effectively than stretching alone.
Incorporate minimal equipment or none at all, and aim for short routines such as 10 minutes to sustain progress without risking injury.
Avoid pushing through sharp pain or swelling, and consult a professional if symptoms like numbness or persistent discomfort occur.
Guided classes or working with a physical therapist can help ensure proper form and prevent compensations during exercises.
Amritayogawellness
Build Hip Mobility With Pilates
Explore Pilates at Amritayogawellness in Philadelphia, with classes and wellness practices for beginners through advanced practitioners.
Table of Contents
Pilates Hip Mobility Exercises Step by Step
Before running through the list, know why these particular moves earn a spot. Hip mobility depends on three things working together: the joint's range of motion, the strength of the muscles that control that range, and your ability to stabilize the pelvis while the leg moves. A structured Pilates practice trains all three at once, which is why isolated stretching alone tends to plateau more quickly.
1. Leg circles (single-leg circle)
Lie on your back, one leg extended toward the ceiling, the other bent with the foot flat on the mat. Trace a circle with the raised leg, about the size of a dinner plate, keeping your pelvis still. Exhale as the leg crosses toward the midline, inhale as it opens out. This move is a favorite among Pilates instructors specifically because it moves the hip through rotation while forcing the core to stay quiet, according to Tom's Guide. Beginners should shrink the circle size until the pelvis stops rocking. Advanced practitioners can slow the tempo to one circle per four counts. Watch for the lower back arching off the mat; that's the pelvis compensating instead of staying stable.
2. Clam shell
Lie on your side, knees bent to about 90 degrees, hips stacked. Keep your feet together and lift the top knee like a clamshell opening, then lower with control. Exhale on the lift, inhale on the way down. Beginners can place a small pillow between the knees to limit range early on. To progress, add a resistance loop above the knees or pause for two counts at the top. The most common fault: letting the top hip roll backward instead of isolating the movement to the joint.
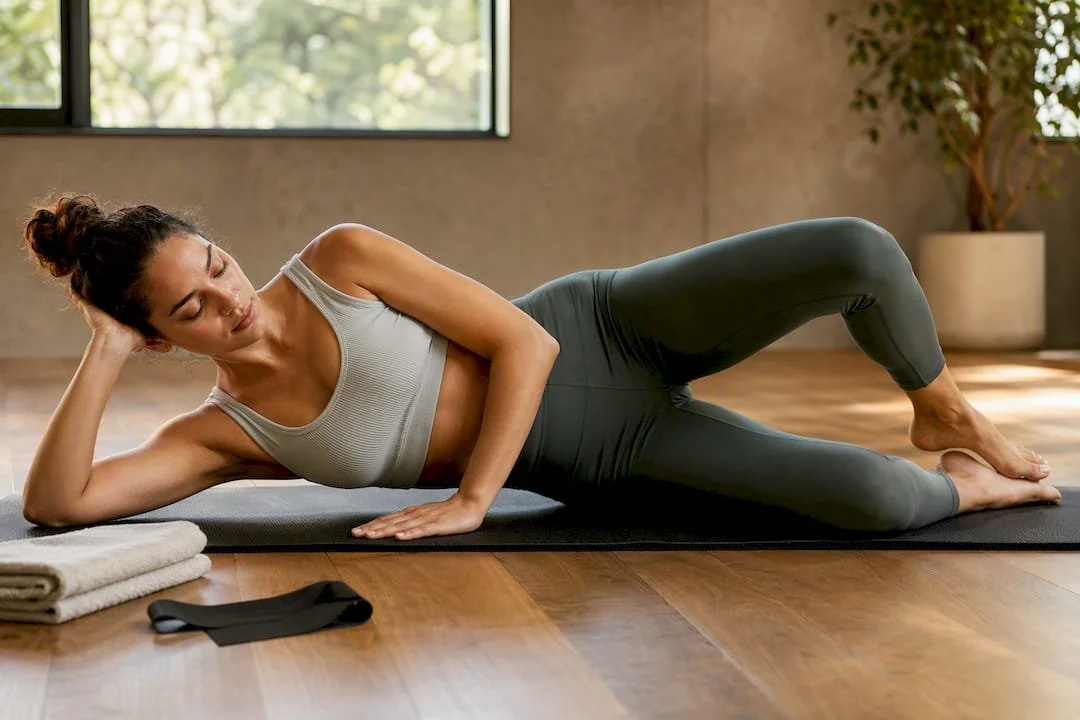
3. Side-lying leg lifts (side kick prep)
From the same side-lying position, extend the top leg long and lift it to hip height, then lower just short of touching the bottom leg. Exhale up, inhale down. This is where single-leg work starts correcting side-to-side imbalances, since most people have one hip that's noticeably weaker in this plane. Beginners keep the range small and the torso still; advanced practitioners add a small forward-and-back kick at the top of the lift. Avoid letting the working leg drift in front of the body, which shifts load away from the glute medius.
4. Femur arcs and toe taps
Lie on your back with knees bent and stacked over hips, shins parallel to the floor. Lower one foot to tap the mat, then return, alternating sides. Exhale as the leg lowers, inhale as it lifts back to start. Beginners can keep both feet closer to the body to reduce lever length. For more challenge, extend the working leg straight before lowering it. The fault to watch for: the lower back losing contact with the mat as the leg drops, which means the range has exceeded what the core can control.
5. Glute bridge and single-leg bridge
Lie on your back, knees bent, feet flat under the knees. Press through the heels and lift the hips until the body forms a straight line from shoulders to knees. Exhale on the lift, inhale as you lower. Once the two-leg version feels easy, extend one leg straight and bridge on the standing leg only. This single-leg variation is one of the more direct ways to expose which hip abductor is underperforming, and correcting that imbalance protects the knees over time. A common mistake is overarching the lower back at the top instead of squeezing the glutes.
6. Quadruped hip extension and hip circles
On hands and knees, extend one leg straight back at hip height, then draw slow circles with the foot before returning to start. Exhale as the leg extends, inhale through the circling motion. Beginners can keep the knee bent and lift only slightly. Advanced versions add a resistance band around the ankle. Watch for the lower back sagging or twisting; the movement should come from the hip joint, not the spine.
Pro Tip: Chase range of motion first when a joint feels stiff and cold, then shift your focus to slow, controlled reps once you can complete the full movement without wobbling. Training control before you've earned range just teaches your body to compensate.
Two Mat Routines You Can Follow Today
You don't need thirty minutes every day to make progress. A short, consistent flow beats an occasional long session, and both routines below use the exercises above.
The 10-minute quick mobility flow
Warm up with 60 seconds of gentle hip circles standing, hands on hips.
Leg circles: 8 circles each direction, per leg.
Clam shells: 12 reps per side, controlled tempo.
Glute bridges: 12 reps, holding the top position for 2 counts on the last 3.
Quadruped hip circles: 6 circles per direction, per leg.
The 20-minute mobility and strength session
Activation: standing marches and hip circles, 2 minutes.
Mobility block: leg circles (10 each direction) and femur arcs (12 per side).
Strength block: single-leg bridges (10 per side), clam shells with a 2 count hold (12 per side), side-lying leg lifts (12 per side).
Cooldown: seated figure-4 stretch, 45 seconds per side, breathing slow.
If a move aggravates a specific spot, swap it for a smaller-range version rather than skipping the joint entirely. Someone managing pregnancy-related pelvic pain, for instance, should shrink range everywhere and lean on guidance like this physical therapy approach to pelvic girdle pain before pushing into bigger ranges.
How Often to Practice and What Progress Looks Like
Two to four sessions a week is the sweet spot for most adults working on hip mobility, with sessions running anywhere from 10 to 30-plus minutes depending on how much time you have. Progress comes from small, steady increases: more reps, longer holds, slower tempo, or shifting from two-leg to single-leg versions of each exercise.
Clinical mobility protocols commonly run sessions of 30 to 60 minutes, two to three times a week, over 8 to 12 weeks, and that structure holds up as a reasonable benchmark even outside a rehab setting. A 2026 systematic review found Pilates-based programs improved functional mobility and balance measures like the Timed Up and Go test, though the researchers flagged variability across studies and urged some caution reading too much into any single result.
Track three things: how far you can move through a range without pinching, how long you can balance on one leg, and whether stiffness or discomfort is easing. Most people notice a real difference in three to six weeks of consistent practice.
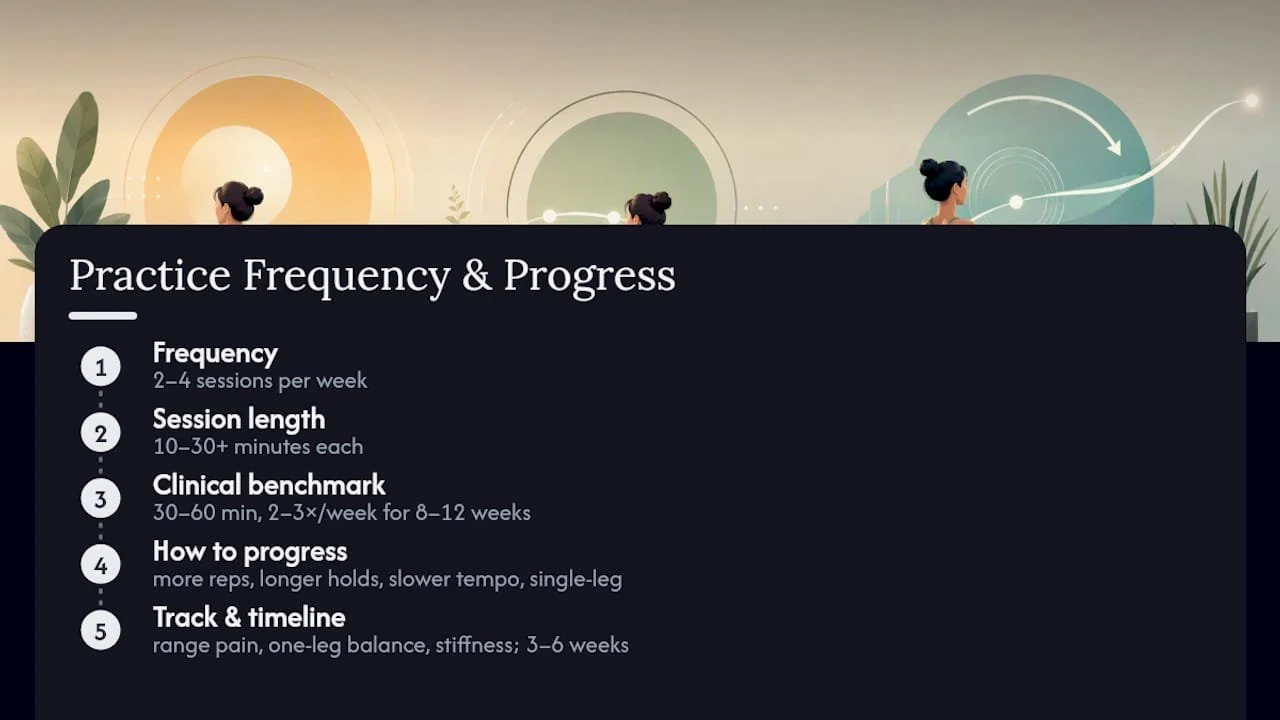
Safety Notes and When to Get Help
Hip mobility work is generally low risk, but certain signals mean you should stop and reassess rather than push through.
Stop immediately for sharp, stabbing joint pain, not the dull ache of muscle fatigue.
New numbness or tingling down the leg needs a clinician's evaluation, not more stretching.
Increased swelling after a session signals the joint needs rest, not repetition.
If you have arthritis or a recent injury, shrink your range before adding reps or resistance.
Working with a certified Pilates instructor or physical therapist helps you scale exercises correctly instead of guessing, especially if you're managing an existing condition. See a physical therapist directly if hip pain has lasted more than a few weeks or limits daily walking.
Why Guided Pilates Classes Make a Difference
Pilates mat and group reformer classes with instructor guidance help ensure correct form and exercise adjustments tailored to individual needs, which is difficult to replicate in solo sessions. Supervised, individualized progressions are especially valuable for people managing pain or neurological conditions, since a trained eye catches compensations before they become habits. Explore different kinds of Pilates for core strength or browse Pilates exercises for all levels for more practice ideas between classes.
An Honest Take on the Hip Mobility Hype
Most articles on hip mobility oversell the timeline and undersell the boring part. The truth: single-leg work is doing more of the heavy lifting than any fancy circuit or trending mobility flow you'll see online. Clam shells and single-leg bridges look almost too simple to matter, but they're the ones correcting the side-to-side imbalance that actually causes hip pain in the first place.
Where conventional advice falls short is treating mobility as a stretching problem. Stretching a stiff hip without strengthening the muscles that control it just gives you a looser joint with the same weak support system underneath. That's not a fix, it's a delay.
If you're starting today, prioritize consistency over intensity. Two focused ten-minute sessions a week for six weeks will outperform one exhausting hour done sporadically. And if pain is part of the picture, get an instructor's eyes on your form before you add reps. Mobility work is one of the few areas of fitness where slower, guided progress genuinely wins.
— Juiced
Sources
FAQ
Does Pilates improve hip mobility?
Yes. Research on Pilates-based programs shows measurable improvements in functional mobility and balance, particularly when practiced consistently over several weeks.
What is the best exercise for hip mobility?
There's no single best move, but leg circles and single-leg bridges are among the most effective because they combine range of motion with the strength needed to control it.
What are some good hip exercises in Pilates?
Clam shells, side-lying leg lifts, femur arcs, glute bridges, and quadruped hip circles all target hip mobility while building the surrounding stabilizing muscles.
What is the 80/20 rule in Pilates?
Definitions vary by instructor, but it commonly refers to spending roughly 80% of effort on controlled, quality movement and 20% on pushing range or intensity, keeping form the priority over speed or reps.
Recommended

Start a Yoga Practice at Home in 10 to 15 Minutes for Beginners
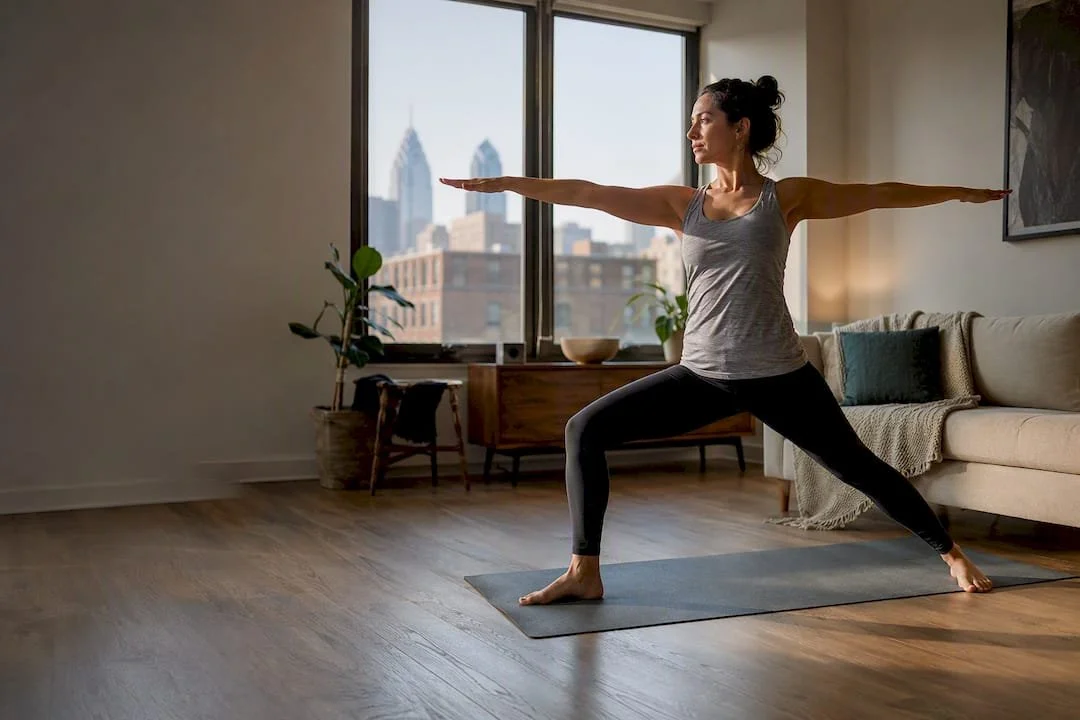
Start today with a few minutes of breathing, then five to seven basic poses, three times each week. Consistency beats intensity for beginners, so short sessions done regularly build more progress than one long class you dread. Use props, stop at any sharp pain, and lean on a guided beginner video until basic alignment feels familiar.
TL;DR:
Practicing yoga three times weekly for 10 to 15 minutes builds consistency, improves posture, balance, and breath awareness faster than infrequent, longer sessions.
Beginners do not need to achieve flexibility first, as flexibility is a result of practice; starting at any level is both acceptable and effective.
A simple home space can be set up with minimal gear by choosing a consistent time, a visible spot for the mat, and avoiding expensive or specialized equipment.
Learning seven basic poses, like Mountain, Downward-Facing Dog, and Child's Pose, covers most beginner classes and helps maintain a balanced practice.
Guided videos and initial in-person classes with clear cues help beginners learn safe alignment and build confidence, especially when combined with feedback from experienced instructors.
Amritayogawellness
Find Your Starting Point
Explore accessible yoga and wellness classes in Philadelphia, with options for beginners and experienced practitioners alike.
Table of Contents
How Do You Start a Yoga Practice the Right Way?
Learning how to start a yoga practice comes down to one habit: showing up for less time, more often. A 15 minute session on Monday, Wednesday, and Friday teaches your body and your schedule more than a single 90 minute class squeezed in once a week. Yoga Journal recommends beginners start with short sessions multiple times per week and gradually increase the duration over the first several weeks.
The physical payoff shows up faster than most people expect. Regular short sessions improve posture, sharpen balance, and train breath awareness in ways that a rare marathon session simply cannot, since the body adapts to repetition, not to occasional intensity. Stress relief follows a similar pattern: the calming effect of slow, controlled breathing compounds when you practice it daily instead of chasing it once in a while.
Here's the part that trips up almost every new student: flexibility is not a prerequisite. It's an outcome. You do not need to touch your toes to start, and Cleveland Clinic frames yoga as something you meet your body where it is, not something you have to earn access to. Waiting until you feel "flexible enough" to start yoga is like refusing to jog until you're already in shape. Skip that trap. Roll out the mat at whatever level you're at right now.
How Do I Set Up a Simple Home Practice Space?
You do not need a dedicated yoga room or $200 in gear to figure out how to begin yoga at home. You need a consistent time, a visible spot for your mat, and about six feet of clear floor.
Pick a time slot tied to something you already do daily. Right after you wake up, right before dinner, or right after you brush your teeth all work because they piggyback on an existing habit instead of asking you to remember a brand-new one. Keep your mat somewhere you'll actually see it. A mat leaning against the bedroom wall is a visual nudge; a mat buried in a closet is a mat you'll forget exists.
Here's what actually matters for gear:
A yoga mat helps with grip, but a folded blanket or a bath towel on carpet works fine for your first few weeks.
Comfortable clothing that lets you move your hips and shoulders freely beats anything technical.
A silenced phone, unless you're using it to play a guided video.
A hardcover book or two can substitute for yoga blocks under your hands or hips.
A bathrobe tie, a scarf, or a leather belt can stand in for a yoga strap when reaching your feet is still out of range.
Check your flooring. Hardwood without a mat can be slick, and thick carpet can throw off your balance in standing poses.
None of this needs to be perfect before you start. It needs to be repeatable.
Which Basic Poses Should Beginners Learn First?
Seven poses will carry you through the vast majority of beginner classes and videos. Learn these and you can follow along with almost any beginner sequence with confidence, because a balanced beginner practice moves the spine in every direction and these poses cover that ground.
Mountain Pose (Tadasana): Feet grounded, shoulders stacked over hips, weight even across both feet. This teaches the standing alignment every other pose builds from.
Cat-Cow: On hands and knees, alternate arching and rounding your spine with your breath. This warms up the spine and syncs movement to breath early.
Downward-Facing Dog: Hips lift up and back, hands and feet grounded, forming an inverted V. Builds shoulder and hamstring strength while stretching the back body.
Low Lunge: One knee forward, the other knee lowered behind you, hips sinking forward. Opens the hip flexors and builds leg stability.
Warrior II: Legs wide, front knee bent, arms extended in opposite directions. Trains balance and leg strength simultaneously.
Cobra: Lying face down, press through the hands to lift the chest while keeping the lower back relaxed. Builds gentle backbend strength without straining the spine.
Child's Pose: Kneeling with the torso folded forward and arms extended or relaxed by your sides. A rest position you can return to anytime.
Savasana: Lying flat on your back, fully relaxed. Trains the nervous system to actually settle down.
Modifications matter more than looking "correct." A block under your front hand in Low Lunge shortens the distance to the floor. A strap looped around your foot in seated stretches closes the gap when your hamstrings are tight. Neither is a shortcut. It's the actual practice.
Pro Tip: If a pose feels unstable, widen your stance before you assume you're "doing it wrong." Most balance issues in beginner poses come from feet placed too close together, not from lack of skill.
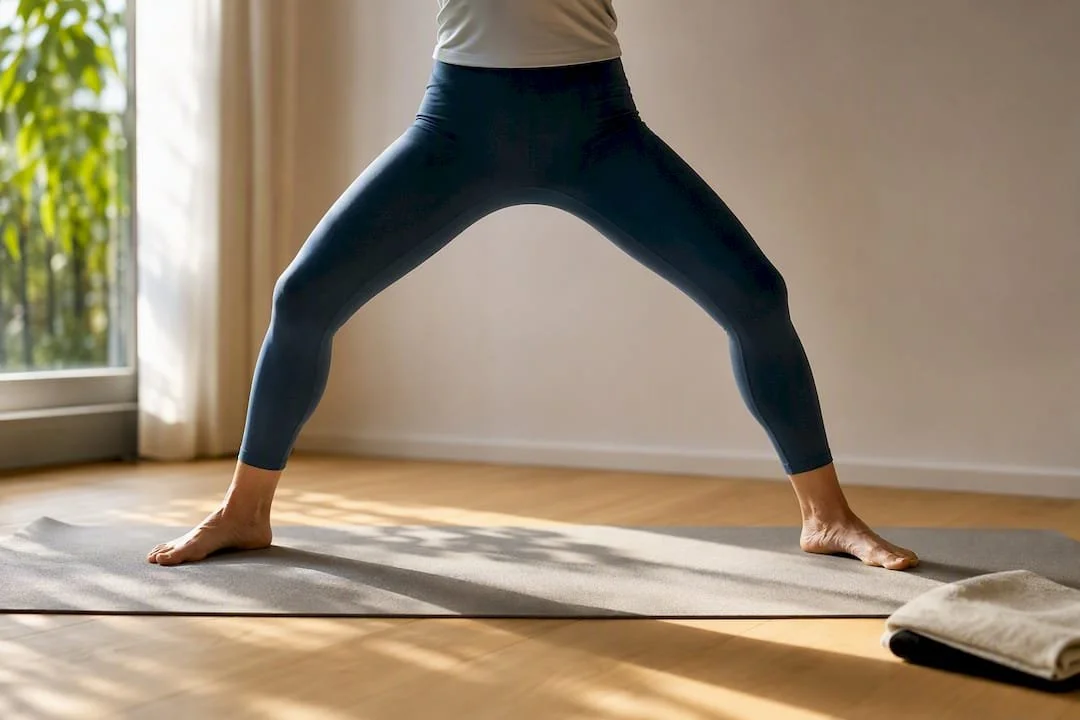
What Does a 10 to 15 Minute Starter Sequence Look Like?
A short, well-ordered sequence beats a long, disorganized one every time. The logic behind sequencing is simple: warm the big muscle groups first, move into standing strength work, then finish on the floor before you rest, which is exactly the structure Yoga Journal recommends for a well-rounded home practice.
Centering breath (1 to 2 minutes). Sit or lie down, close your eyes, and breathe slowly through the nose. This settles your nervous system before you move.
Gentle warm-up (2 to 3 minutes). A few rounds of Cat-Cow, then move into Downward-Facing Dog for three to five breaths.
Standing poses (4 to 5 minutes). Move through Mountain Pose, then Warrior II on each side, then Low Lunge on each side.
Floor work (2 to 3 minutes). Cobra for a few breaths, followed by a modified plank if you have the energy.
Cool-down and Savasana (2 to 3 minutes). Child's Pose, then lie flat in Savasana for at least one full minute.
For your first month, the goal is frequency, not duration. In week one, aim for three sessions of 10 to 15 minutes using this exact sequence. In week two, keep the same frequency but add two minutes to each session, mostly in the standing poses section. In week three, add a fourth session if your schedule allows, and start layering in a guided beginner video once a week to catch alignment details you might be missing on your own. By week four, you should be comfortably practicing four to five times weekly at 20 to 25 minutes, which lines up with the gradual build Yoga Journal outlines for new students.
If you're short on time, cut the sequence to just the breath, one round of Cat-Cow, one standing pose, and Savasana. Five minutes of that beats zero minutes of the full version.
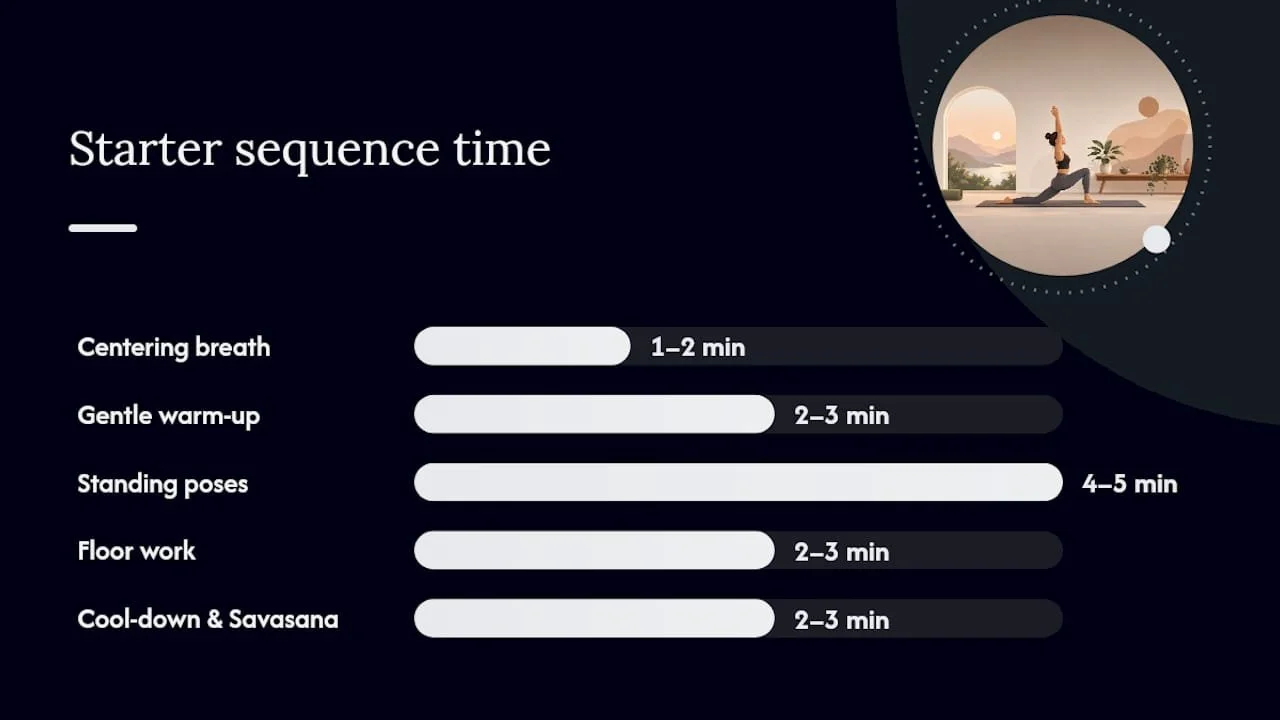
How Do You Know the Difference Between Discomfort and Pain?
Discomfort in yoga feels like effort. A gentle stretch, a slight burn in a muscle you're working, a wobble while you find your balance. Pain feels sharp, shooting, or tingling, and it shows up in a joint rather than a muscle. That distinction is the single most useful safety filter a beginner can learn.
If you feel sharp pain, tingling, or numbness anywhere, come out of the pose immediately and rest in Child's Pose. Don't push through it hoping it'll "work itself out." Cleveland Clinic is direct on this point: beginners should avoid painful positions entirely and lean on modifications instead of forcing a shape that doesn't fit their body yet.
A few alignment cues will keep you safer without needing to memorize anatomy:
Keep your spine long rather than collapsed, even in forward folds.
In lunges and Warrior poses, make sure your front knee tracks over your ankle, not past your toes.
Check yourself in a mirror or a phone video occasionally. What a pose feels like and what it actually looks like are often two different things when you're new.
Bend your knees generously in any forward fold. Straight legs are not the goal; a long spine is.
If you have an existing injury, a joint issue, or a medical condition, talk to your instructor or a clinician before attempting more intensive poses or inversions. Most beginner sequences are low-impact enough for the general population, but "most" is not "all," and your specific history matters more than a generic guide.
How Do You Make a Yoga Habit Actually Stick?
Motivation fades. Systems don't. The most reliable way to keep practicing past week two is to attach your session to something you already do without thinking, a technique sometimes called habit stacking.
Practicing right after brushing your teeth or right before breakfast works because the first habit becomes the trigger for the second one. Anchoring a new routine to an existing daily marker is one of the more reliable tricks for building any habit under real-life time pressure, not just yoga.
A few tactics that hold up in practice:
Lay your mat out the night before, or leave it visible, so the visual cue does the reminding for you.
Start with 5 to 10 minute micro-sessions on your busiest days rather than skipping entirely.
Track your sessions with a simple checkmark on a calendar. The small reward of seeing a streak matters more than it sounds like it should.
Pair practice with a habit you already love, like your morning coffee or an evening podcast.
Build gradually: three sessions weekly for two to three weeks, then push to four or five once it feels automatic rather than effortful.
Loop in a friend for light accountability, or sign up for a short series of guided classes where a set schedule does some of the discipline for you.
Where Can You Find Reliable Beginner Instruction?
Guided beginner videos are genuinely useful early on, not just a fallback. They handle the sequencing decisions for you and repeat alignment cues out loud, which is exactly what a beginner needs while building the habit of paying attention to form.
That said, a handful of in-person classes early in your practice catches things video never will. A teacher can see when your knee is drifting past your ankle in real time. Look for classes labeled "foundational," "gentle," or "beginner," and don't hesitate to tell the instructor beforehand if you'd prefer hands-off adjustments or need specific modifications for an old injury.
Prioritize videos or classes with clear, spoken cues rather than ones that assume you already know pose names.
Ask any instructor directly what modifications they offer for tight hips, hamstrings, or shoulders.
Treat your first few classes as information gathering, not performance.
Amrita Yoga & Wellness's Take on Starting Small
Most beginners overestimate what they need before starting and underestimate what 15 consistent minutes can do. That gap is where most people quit before they ever get a real feel for the practice. Amrita Yoga & Wellness, a yoga and wellness studio based in Philadelphia, sees this constantly across its beginner-focused classes and community programs. Home practice builds the habit; a few in-person sessions add hands-on correction and motivation that video instruction can't replicate. Neither replaces the other. Together, they're how most people actually stick with it.
— Juiced
Ready for Hands-On Guidance? Consider the Karma Yoga Club
Home practice gets you moving. A few sessions with an instructor watching your alignment in real time is what turns a decent home routine into a genuinely safe, effective one. That's the gap Amritayogawellness's Karma Yoga Club is built to close for Philadelphia beginners who've started at home and want the next step.
The membership gives access to beginner-friendly classes alongside a community of people at every stage of practice, not just advanced students who make a newcomer feel behind. A handful of guided sessions can catch the small alignment issues that no video ever will, whether that's a knee tracking wrong in Warrior II or a spine collapsing in a forward fold you thought you'd nailed. If you've been practicing at home and want feedback that actually accelerates your progress, check out Karma Yoga Club membership options and see which class schedule fits your week.
Sources
Yoga Journal's beginner guide covers pacing and progression in detail. Cleveland Clinic addresses safety and modifications for home practice. The Guardian explains why short, frequent sessions outperform occasional long ones. Yoga Journal's sequencing guide breaks down how to structure a balanced home routine.
Yoga for Beginners: The Ultimate Guide to Start Your Practice — Yoga Journal
FAQ
How Many Days a Week Should a Beginner Practice Yoga?
Start with three sessions a week at 10 to 15 minutes each, then build toward four or five sessions of 20 to 30 minutes over your first month or two, based on Yoga Journal's recommended beginner pacing.
Do I Need a Yoga Mat to Start Practicing at Home?
No. A folded blanket or towel on carpet works for your first few weeks; a mat mainly adds grip once you're doing more standing and balance poses regularly.
What Should I Do if a Pose Hurts?
Come out of the pose right away if you feel sharp pain, tingling, or numbness, since beginners should avoid painful positions entirely and rely on modifications instead.
How Long Until Yoga Gets Easier for a Beginner?
Most people notice more ease in balance and breath within two to four weeks of consistent short sessions, though flexibility is an outcome of practice rather than something you need before starting.
Should I Take a Class or Practice Alone When Starting Yoga?
Both work well together: guided videos are effective for learning sequencing at home, while a few in-person classes, like those offered through Amritayogawellness's Karma Yoga Club, add real-time alignment feedback that video can't provide.
Recommended

15 Minute Home Yoga Plan for Adult Beginners, Three Times a Week
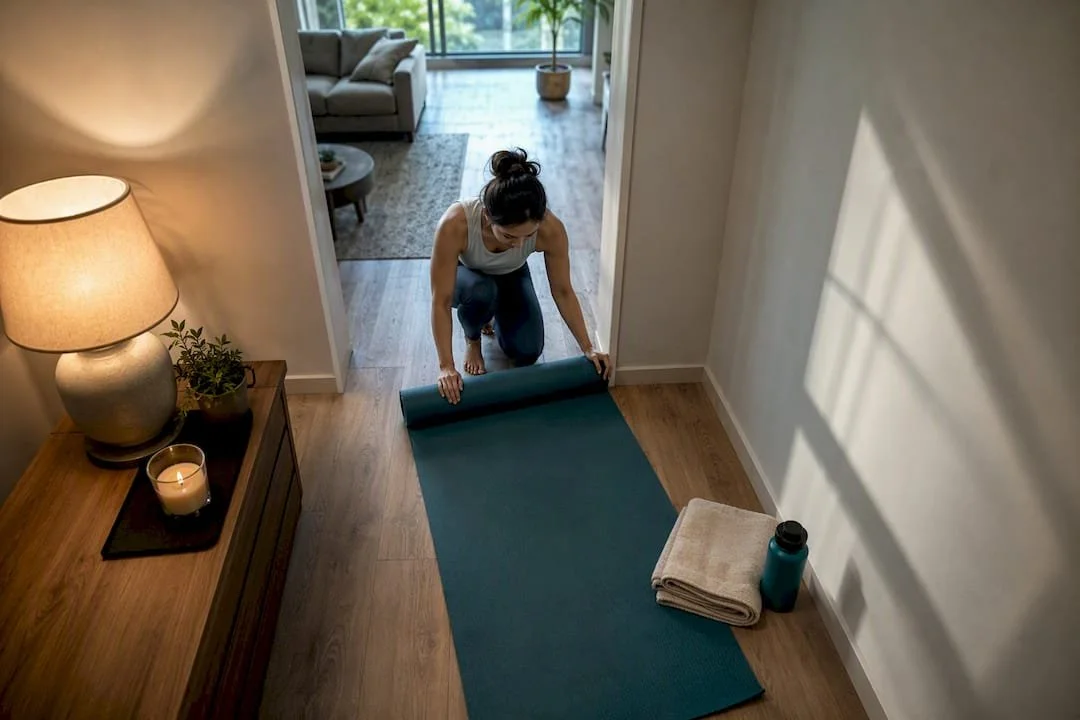
Start with a 10 to 20 minute repeatable sequence, three times a week, using props and modifications wherever a pose feels off. That single habit, more as any fancy studio setup, is what separates people who stick with yoga from people who quit in week two. Roll out a mat somewhere quiet, follow the same short sequence for a few weeks, and skip advanced inversions until you have in-person guidance.
TL;DR:
Practicing the same 15-minute sequence three times a week for several weeks helps build strength and confidence through habit and repetition.
Setting up a dedicated, clutter-free space with a rolled-out mat near a wall encourages consistency and minimizes setup obstacles.
Using simple props like books, towels, or blankets can provide support, prevent injury, and improve the effectiveness of poses without requiring expensive equipment.
Recording yourself performing poses weekly reveals misalignments and form issues that feedback from a mirror or app can’t detect.
After consistent practice, consulting a teacher for a private session or joining beginner classes can correct subtle habits and accelerate progress.
Amritayogawellness
Build Confidence With Guided Yoga
Explore yoga classes, workshops, and wellness offerings at Amrita Yoga & Wellness in Philadelphia, for beginners and experienced practitioners.
Table of Contents
How Do You Set Up a Home Yoga Space?
You don't need a dedicated yoga room. You need about 2 by 2 meters of clear floor, a surface that won't wobble under you, and a spot where you can practice with minimal interruptions.
Firm flooring beats a thick, plush carpet for balance work. A cushy rug lets your ankle roll under you in tree pose; hardwood, tile, or a thin rug under your mat gives your feet something honest to push against. If your bedroom, living room corner, or a hallway nook can fit a mat without you bumping into furniture, that's your spot.
A 15 minute home sequence is far easier to start when your mat is already out. Setup friction, meaning the two minutes it takes to find your mat, clear space, and silence your phone, is often the real reason a planned session never happens.
A few setup habits make a real difference:
Pick a spot near a wall you can use for balance poses like tree pose or standing splits.
Leave your mat rolled out and visible instead of stashed in a closet.
Put your phone on do not disturb before you start, not after you're already distracted.
Give pets or family a heads up so you're not renegotiating your ten minutes halfway through.
Keep the space reserved for practice only, even if it's just a corner you clear for fifteen minutes a day.
Pro Tip: Treat your mat like a doormat, not a suitcase. If it's rolled up in a bag in the closet, you'll skip practice on the days you're tired. If it's already unrolled on the floor, you'll step onto it almost without deciding to.
What Equipment Do You Actually Need to Start Yoga at Home?
A mat is the one thing worth buying before you do anything else. Look for a mat that offers moderate cushioning, enough to protect your knees in low lunge but thin enough that you still feel the floor for balance. Skip the premium mat until you know you'll stick with this for more than a month.
Everything else, you can improvise on day one.
Blocks help you reach the floor in a forward fold or lunge without straining your hamstrings. A stack of hardcover books works nearly as well.
A strap extends your reach in seated forward folds or shoulder stretches. A bathrobe belt or a long towel does the same job.
A blanket cushions your knees in tabletop poses or supports your hips in a seated twist. Any folded towel or throw blanket will do.
Props aren't training wheels you graduate out of. Teachers use blocks and blankets constantly, not because they're weak, but because props protect joints and let a pose work for the body in front of them instead of the body in a photo. If a pose doesn't feel right, reach for a prop immediately rather than pushing deeper into discomfort.
A Simple 15-Minute Beginner Sequence You Can Repeat
This is the sequence to run for your first three or four weeks, unchanged. Repetition, not variety, is what builds the muscle memory and confidence that make yoga feel less awkward each time.
Centering (1 to 2 minutes). Sit cross-legged or on your heels, close your eyes, and breathe slowly through your nose. This is where you set an intention for the session, even something as simple as "I'm here to loosen my shoulders."
Child's pose (1 minute). Knees wide, big toes touching, arms stretched forward. This is your reset pose. Return to it anytime during the sequence if you need a break.
Cat-cow (1 minute, slow and continuous). On hands and knees, arch and round your spine with your breath. Inhale to arch, exhale to round.
Downward dog (30 to 45 seconds). Bend your knees generously if your hamstrings are tight. This isn't a flexibility test.
Mountain pose to standing forward fold (3 rounds). Stand tall, then hinge at the hips and let your torso hang, knees soft.
Low lunge, each side (30 seconds per side). Step one foot back, back knee down, and sink your hips forward gently.
Warrior II, each side (30 seconds per side). Wide stance, arms extended, front knee tracking over the ankle.
Tree pose, each side (20 to 30 seconds per side). Use the wall for support if balance is shaky. That's not a fallback, it's the smart version.
Plank, knees down if needed (20 to 30 seconds). Focus on a straight line from shoulders to knees, not the floor.
Baby cobra (2 rounds, 10 seconds each). Lift just your chest, elbows bent and close to your ribs.
Seated forward fold (1 minute). Legs extended, reach toward your feet without forcing it.
Supine twist, each side (30 seconds per side). Lying on your back, drop bent knees to one side, then the other.
Savasana (2 to 5 minutes). Lie flat, arms loose at your sides, and do nothing at all.
Run through this once and you're close to 15 minutes. Repeat any section that felt good, or shorten the standing series on days you're pressed for time.
How Often Should Beginners Practice Yoga at Home?
Frequency beats duration. A 10 to 20 minute session done three or more times a week builds flexibility and lowers stress more reliably than one long, exhausting Sunday session followed by six days of nothing.
A realistic first month looks like this:
Monday, Wednesday, Friday: the 15 minute sequence above, same order, same poses.
One weekend day (optional): a slightly longer session, 25 to 30 minutes, or a beginner-friendly live class if one is available near you.
Everything else: rest, or a short two minute breathing check-in if you want to stay connected to the habit without a full session.
After three or four weeks of that same sequence, start scaling gradually. Add five to ten minutes to your existing routine, or introduce one new pose at a time rather than overhauling the whole sequence. Fitting short sessions into a packed schedule gets easier once the sequence itself stops requiring thought.
Habit researchers and yoga teachers agree on one trick that works better than willpower: anchor practice to something you already do daily, as outlined in the New Mom Self-Care Checklist: Your Postpartum Guide. Right after you brew coffee, right before your evening shower, right after you close your laptop for the day. The anchor matters more than the exact time of day.
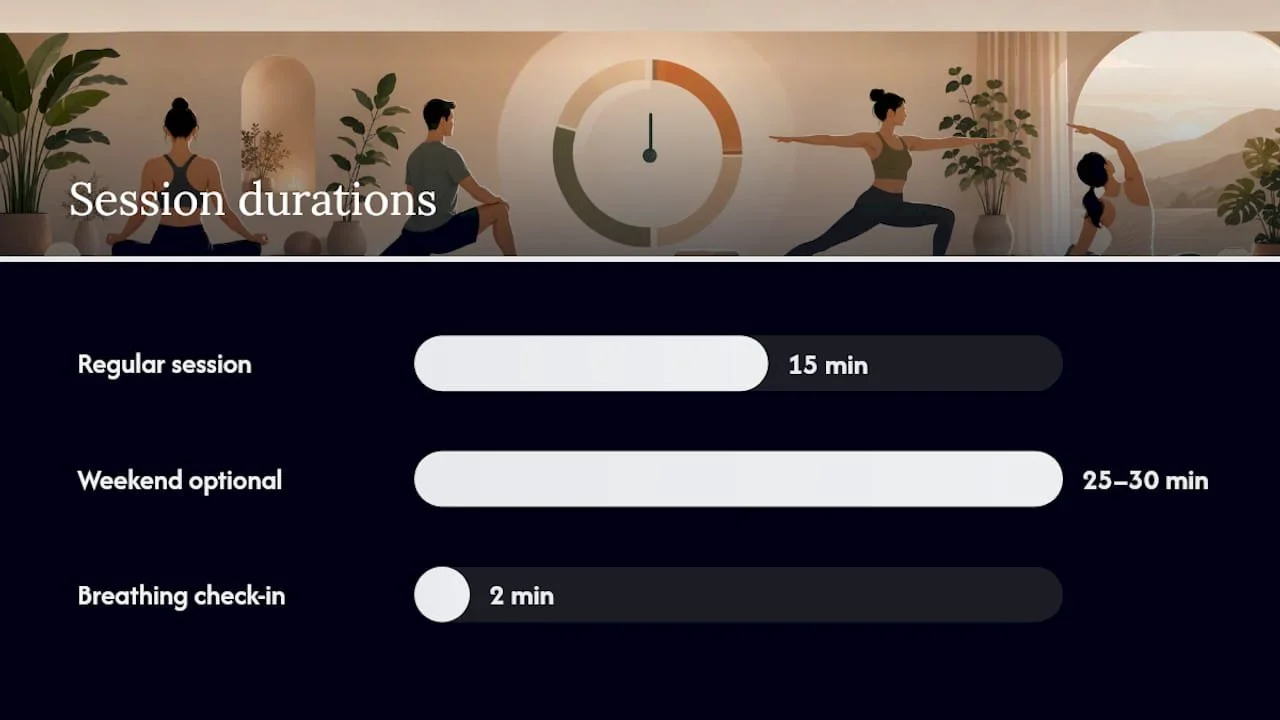
Alignment Basics and When to Use a Modification
Three simple checkpoints cover most beginner poses: ears stacked over shoulders, knees tracking over ankles (not collapsing inward), and a neutral spine rather than an over-arched or slumped one. Check these in a mirror or a phone video during your first few weeks, since it's genuinely hard to feel misalignment from the inside.
There's a real difference between a stretch and a warning sign. Muscle tension that eases as you breathe into it is normal. Sharp, pinching, or joint-specific pain is not, and it means back off or grab a prop immediately.
If your hamstrings scream in a forward fold, bend your knees generously.
If your wrists ache in plank or downward dog, drop to your forearms.
If your shoulder catches in a twist, shrink the range of motion.
If a knee complains in low lunge, add a folded blanket under it.
Beginners should also stay away from unsupported inversions and deep backbends without guidance, since these advanced poses carry real injury risk when attempted alone before you understand proper setup. If a pose consistently feels wrong even with modifications, that's a signal to get in-person feedback rather than push through it solo.
Pro Tip: Film yourself doing warrior II or tree pose once a week. You'll often catch a collapsed knee or a leaning torso on video that you couldn't feel in the moment.
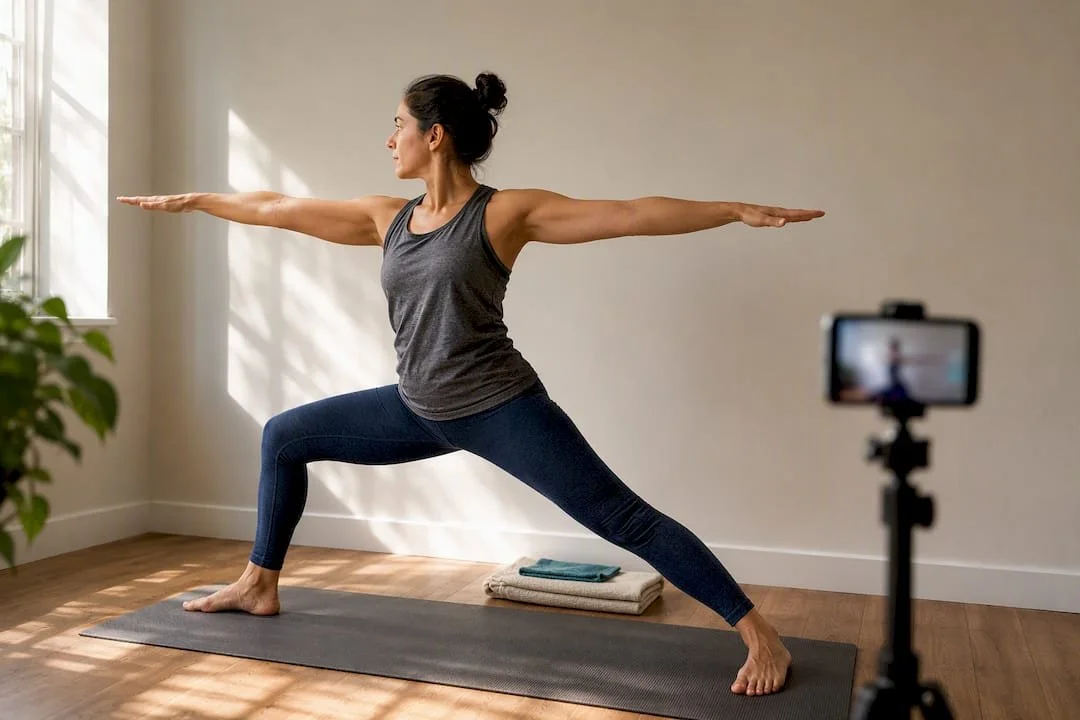
Beginner Mistakes That Derail a Home Practice
Most people don't quit yoga because it's too hard. They quit because of a handful of avoidable setup mistakes.
Starting with 45 minute sessions. It sounds ambitious, but it's also exhausting and easy to skip on a busy day. Shorten to 15 minutes and repeat it more often instead.
Changing the sequence every time. Novelty feels productive, but sticking with one sequence for several weeks builds the familiarity that makes poses start to feel natural.
Skipping the breath and jumping straight into poses. Two minutes of centering isn't filler. It's what tells your nervous system this is different from checking email.
Ignoring pain because "yoga is supposed to be uncomfortable." Discomfort from stretching, yes. Sharp joint pain, no. If it persists past a week of modifications, get in-person feedback before continuing on your own.
How Amrita Yoga & Wellness Supports New Practitioners
Home practice covers a lot of ground, but it has limits. If a pose still feels wrong after a few weeks of modifications, or you're managing a chronic issue like a stiff lower back or a recovering shoulder, a private session or beginner-focused class gives you something video and articles can't: a teacher watching your actual body in real time.
Yoga studios in Philadelphia often offer beginner-friendly classes alongside more advanced styles like hot yoga and aerial yoga, plus private sessions built around specific goals or limitations. Combining occasional studio time with your home routine tends to speed up progress. A single class can catch an alignment habit that would otherwise take months to notice on your own, and you bring that correction straight back into your next home session.
What a Month of Home Practice Actually Looks Like
Nobody's flexibility transforms in four weeks, and if a program promises that, be skeptical. What actually changes is smaller and more useful: your hips complain less in low lunge, your breath stops catching in forward folds, and you stop dreading the two minutes it takes to unroll your mat.
That's the realistic version of "progress," and it's worth trusting even when it doesn't look dramatic. Keep sessions short. Keep the sequence the same longer than feels necessary. The boredom of repetition is doing more for you than novelty would.
Once you hit that one month mark, consider booking a single in-person class or private session, not because your home practice failed, but because a teacher's eyes on your alignment can save you months of reinforcing a small habit that isn't quite right.
— Juiced
Ready to Take Your Practice Off the Mat and Into a Studio?
Home practice builds the habit. A studio class or private session at Amrita Yoga & Wellness builds the correction and community that a solo routine can't offer on its own. If you've been running the same 15 minute sequence for a few weeks and want a teacher's eyes on your alignment, or you're curious about styles like hot yoga or aerial yoga that genuinely require in-person instruction, that's the natural next step.
Some yoga studios also host wellness workshops beyond the mat, including tarot readings for readers who want to pair their physical practice with a little reflection and intention-setting. Booking a single class, private session, or workshop is a low-pressure way to see how in-person guidance sharpens what you've already started building at home.
Where This Advice Comes From
Cleveland Clinic's beginner pose guide for foundational poses and modification cues.
Cleveland Clinic's home practice safety guidance on avoiding advanced poses alone.
International Yoga Conference's setup and sequence guide for space setup and frequency recommendations.
Yoga International's beginner's guide for centering and sequence repetition advice.
Sources
FAQ
How Long Should a Beginner Practice Yoga at Home?
Aim for sessions lasting about 10 to 20 minutes, practiced regularly each week. Consistent short sessions build more flexibility and stress relief than occasional long ones.
Do I Need a Yoga Mat to Start Practicing at Home?
A mat is the one piece of gear worth buying, ideally of moderate thickness to cushion without losing stability in standing poses.
What Yoga Poses Should Beginners Learn First?
Start with mountain pose, tree pose, forward fold, a modified plank, cobra, and child's pose, since these cover balance, strength, and flexibility without requiring advanced flexibility.
Is It Safe to Do Yoga Alone at Home?
Most beginner poses are safe to practice alone with proper modifications, but unsupported inversions and deep backbends should wait until you've had in-person instruction.
How Do I Stay Motivated to Practice Yoga at Home?
Keep the same short sequence for three to four weeks, leave your mat visible instead of packed away, and anchor practice to an existing daily habit like your morning coffee.
When Should I Take an In-Person Yoga Class Instead of Practicing Alone?
If a pose still feels off after modifications, or you want alignment feedback, a beginner class or private session at a local yoga studio can fill that gap.
Recommended

Learn 3–5 Words Before Class: Yoga Terms for Beginners
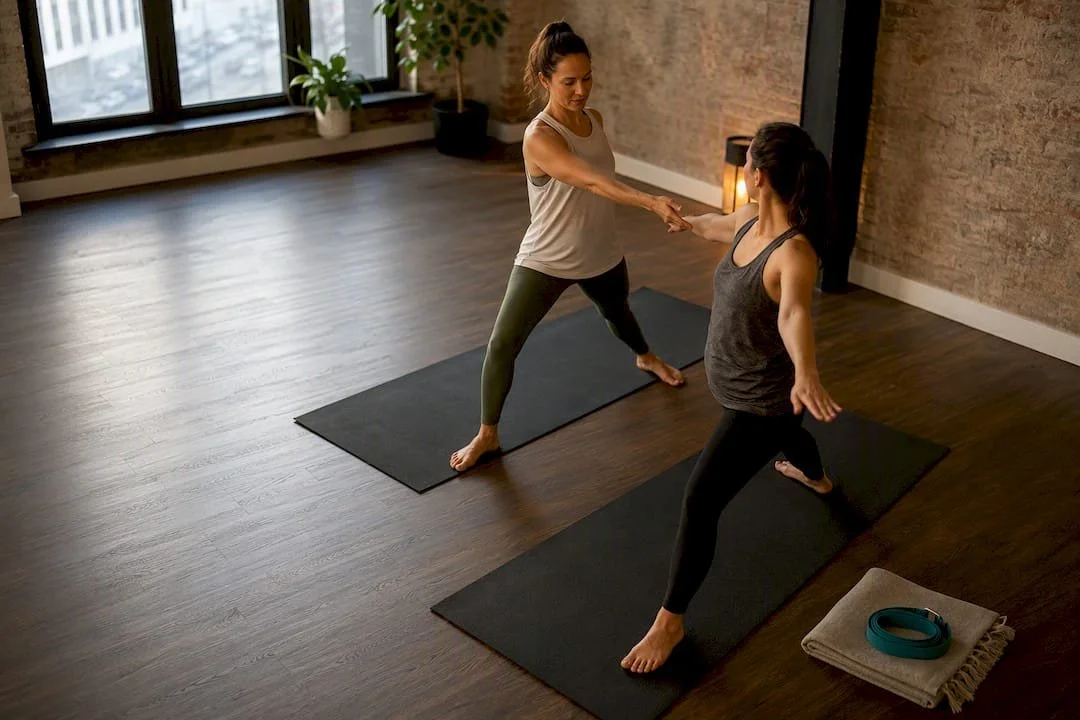
This glossary covers the yoga terms you'll actually hear in a beginner class, translated into plain, usable English. Learn three to five words before your first session, lean on props and modifications whenever a pose feels off, and treat the rest as vocabulary you'll pick up naturally. If you'd rather learn these terms in person, beginner sessions are available where an instructor walks you through them live.
TL;DR:
Most beginner classes emphasize core terms like asana, pranayama, and savasana, which can be learned quickly through basic practice and familiarization.
Learning Sanskrit names involves recognizing common prefixes and suffixes, making unfamiliar pose names easier to decode with practice.
Props, such as blocks and straps, are accessible tools used to improve alignment and support, not signs of inability or failure.
Starting with slower styles like Hatha or Restorative helps beginners build confidence in alignment and vocabulary before trying faster-paced classes.
Focusing on a few key terms each week and practicing with props and modifications enhances safety, confidence, and understanding in yoga sessions.
Amritayogawellness
Build Confidence In Your First Class
Explore yoga, Pilates, barre, tai chi, massage therapy, workshops, and retreats through Amrita Yoga & Wellness in Philadelphia.
Explore Amrita Yoga & Wellness
Table of Contents
What Do Common Yoga Terms Mean for Beginners?
You don't need to memorize Sanskrit before your first class. You need about twenty words that show up over and over, and a sense of when each one will come up so it doesn't catch you off guard. Plain-English breakdowns of these terms consistently show up in beginner glossaries, and the core list barely changes from studio to studio.
Asana: A pose or posture. Your teacher might say "come into your asana" or just name the pose directly.
Pranayama: Breathing exercises. Often taught at the start or end of class, sometimes as its own segment.
Vinyasa: A flow that links movement to breath, one breath per motion. You'll hear it as both a style name and an instruction ("vinyasa here" means flow through a mini sequence).
Savasana: Final relaxation pose, lying flat on your back. This closes almost every class, no exceptions.
Namaste: A closing greeting, often paired with palms pressed together at the heart. It signals class is wrapping up.
Drishti: A fixed focal point for your eyes, used to steady balance poses like Tree or Warrior III.
Mantra: A word or phrase repeated silently or aloud, sometimes used during meditation portions.
Mudra: A hand gesture, often used in seated meditation or pranayama work.
Bandha: An internal muscular lock or engagement, most commonly the core (uddiyana bandha) in flow classes.
Prana: Life force or breath energy. You'll hear it referenced in pranayama instruction.
Modification: A simpler or supported version of a pose. Teachers offer these constantly, and taking one is never a step down.
Props: Blocks, straps, bolsters, and blankets used to support your body in a pose.
Flow: A sequence of poses linked together, usually moving with breath.
Hold: Staying in a pose for a set number of breaths instead of moving through it.
Transition: The movement between two poses, like stepping from Downward Dog into a lunge.
Alignment: How your joints and bones stack in a pose, aimed at both safety and effectiveness.
Inhale/Exhale: Breath cues tied directly to movement. Teachers will say "inhale, lift" or "exhale, fold" constantly.
Chaturanga: A low plank pose, common in Vinyasa transitions between Downward Dog and Cobra or Upward Dog.
Om: A chanted sound sometimes used to open or close a class, symbolizing unity or grounding.
How Are Sanskrit Pose Names Built?
Sanskrit pose names look intimidating until you notice they're built from a small, repeating set of parts. Once you learn those parts, unfamiliar names stop being a wall and start being readable, the same way knowing "photo" and "graph" helps you decode new English words.
Most pose names end in asana (pose) and start with a descriptive prefix. Common prefixes include adho (downward), mukha (face), supta (reclined), urdhva (upward), vrksa (tree), vira (hero or warrior), and trikon (triangle).
Adho Mukha Svanasana breaks into adho (downward) + mukha (face) + svana (dog) + asana (pose): Downward-Facing Dog.
Tadasana is tada (mountain) + asana: Mountain Pose.
Uttanasana is ut (intense) + tan (stretch) + asana: Standing Forward Fold.
Balasana is bala (child) + asana: Child's Pose.
Virabhadrasana is Virabhadra, a warrior figure from Hindu mythology, + asana: Warrior Pose.
Trikonasana is trikon (triangle) + asana: Triangle Pose.
Pro Tip: Say the name in syllables and don't sweat the accent. Teachers care that you're trying, not that you sound fluent in Sanskrit.
Which Beginner Poses Should You Know First?
Ten poses cover most of what a beginner class throws at you. Each one below pairs its English and Sanskrit name with a single alignment cue and one easy modification, drawing on the same short, repeatable sequences Kaiser Permanente recommends for people learning at home.
Mountain (Tadasana): Stand tall, weight even across both feet. Modification: stand with feet hip-width apart for more stability.
Downward-Facing Dog (Adho Mukha Svanasana): Press hands flat, lift hips up and back. Modification: bend your knees generously to protect tight hamstrings.
Child's Pose (Balasana): Hips reach back toward heels, arms extended forward. Modification: place a bolster under your torso for support.
Plank (Phalakasana): Keep hips level with shoulders, don't let them sag. Modification: drop to your forearms or knees.
Cobra (Bhujangasana): Lift your chest using back strength, not just your arms. Modification: keep elbows bent and stay low.
Warrior II (Virabhadrasana II): Front knee tracks over the front ankle. Modification: shorten your stance if balance feels shaky.
Tree (Vrikshasana): Fix your gaze on one point to steady balance. Modification: keep your lifted foot's toes on the floor for support.
Forward Fold (Uttanasana): Bend from the hips, not the lower back. Modification: bend your knees or rest hands on blocks.
Bridge (Setu Bandha Sarvangasana): Press feet flat, lift hips without straining the neck. Modification: place a block under your sacrum.
Savasana: Let your whole body go heavy on the floor. Modification: place a blanket under your head or knees for comfort.
Props aren't a fallback for people who "can't do yoga properly." Cleveland Clinic lists blocks, straps, and bolsters as standard tools for making poses accessible and improving alignment, regardless of experience level.
Why Do Beginners Use Yoga Props?
Blocks, straps, bolsters, and blankets exist to close the gap between where your body is right now and where a pose wants it to go. That gap is normal, not a failure, and reaching for a prop is often the more advanced move because it keeps your alignment honest instead of forcing a stretch you're not ready for.
Blocks: Place one under your hands in a forward fold if the floor feels miles away.
Straps: Loop one around your foot in a seated forward fold to extend your reach without rounding your back.
Bolsters: Tuck one under your torso or hips in restorative poses to let tight areas soften gradually.
Blankets: Fold one under your knees in kneeling poses or under your head in Savasana for comfort.
Pro Tip: If a pose causes sharp pain anywhere, stop immediately and ask for a chair-supported variation. Sharp pain is your body's way of overriding the instruction, and no cue overrides that.
Which Yoga Style Should Beginners Try First?
Not every style moves at the same pace, and picking the wrong one on day one can sour you on yoga entirely when the real issue was just a mismatch.
Hatha: Slower pace, poses held longer. A gentle entry point for learning alignment without rushing.
Vinyasa: Breath-linked flow, faster pace. Fun once you know the basics, overwhelming before you do.
Restorative: Long, prop-supported holds designed to calm the nervous system. Excellent for stress or poor sleep.
Yin: Passive stretches held for minutes at a time, targeting connective tissue rather than muscle.
Iyengar: Precision-focused, heavy on props and alignment detail. Great for beginners who want to understand the "why" behind each cue.
Start with Hatha, Restorative, or Iyengar. Save hot yoga and fast Vinyasa for once your body knows the shapes, since heat and speed both raise the injury stakes for unfamiliar poses. Amrita Yoga & Wellness's guide to types of yoga breaks down more of these style differences if you want a fuller picture before booking.
How Can You Learn Yoga Vocabulary Without Flashcards?
You'll absorb this vocabulary faster in a room than from a screen, but a small routine speeds it up either way.
Pick three to five terms per week instead of trying to learn all twenty at once.
Jot down one new word after each class while it's still fresh.
Repeat the term silently to yourself the next time you hear it in class.
Use a prop the moment a cue mentions one, so the word and the action link together.
Practice a ten-minute sequence at home using essential beginner poses to reinforce both the shapes and their names.
How Amrita Yoga & Wellness Teaches Beginner Vocabulary
Vocabulary is built into the pose itself, naming both the English and Sanskrit terms as instructors cue alignment and offer modifications. Beginners get props from the first class, not as a last resort, and a community focus means questions about a term or a pose are always welcome, mid class or after.
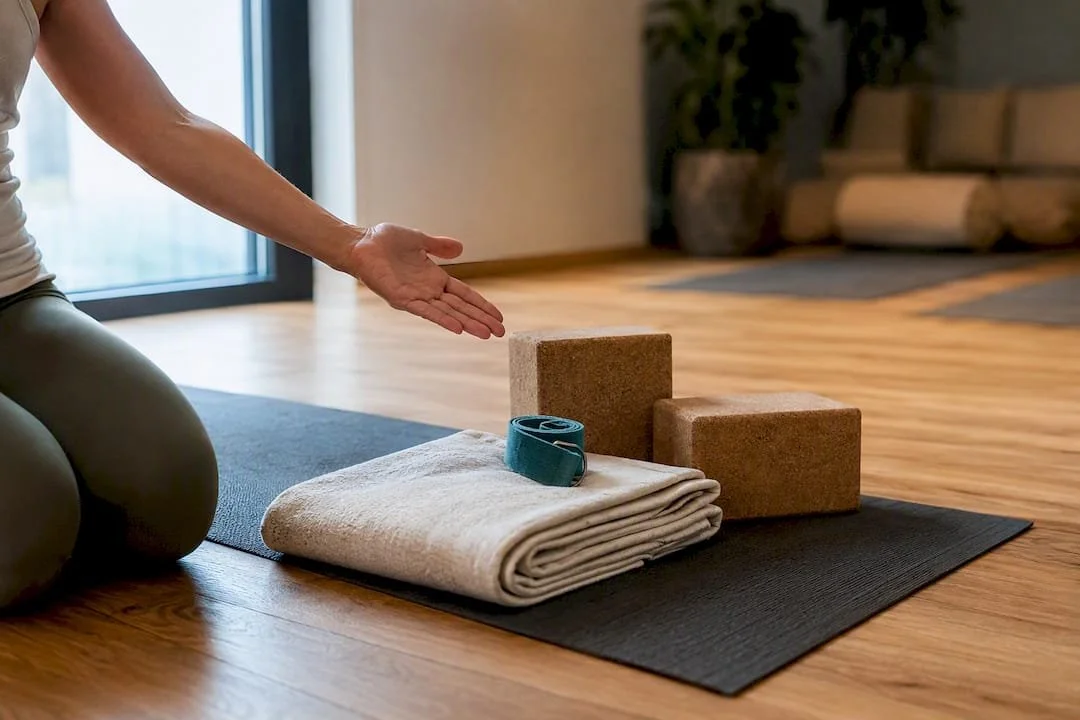
Ready to Practice These Terms in Person?
A beginner class does three things a glossary can't: it puts a real body in front of you correcting your alignment, it shows you exactly when to grab a block, and it lets you hear these terms cued in real time until they stop sounding foreign.
Beginner-friendly sessions run across styles, from slower Hatha classes to prop-supported Restorative work, so you can match the pace to how new this all feels. If pelvic or joint concerns are part of your picture, this guide to pelvic girdle pain covers safe movement adjustments worth reading before you step on the mat. For something outside the physical practice entirely, the studio's tarot reading sessions are a low-pressure way to get familiar with the space before your first class. Check the current class schedule at Amrita Yoga & Wellness and book a beginner session to start putting these words into motion.
Where Can You Learn More About Yoga Terms?
Cleveland Clinic: safety context for props and modifications.
Yoga: plain-English breakdowns of Sanskrit terms.
Kaiser Permanente: beginner pose demos and sequences.
YogaBasics: deeper Sanskrit vocabulary reference.
Why This Beginner Glossary Skips the Jargon Overload
Most yoga glossaries try to teach you fifty terms at once, and that's backwards. The instinct to be thorough actually works against beginners, because a wall of Sanskrit is exactly what makes new students freeze up mid class instead of following the cue.
The smarter approach, and the one this glossary follows, is triage: learn the core yoga words that show up in nearly every class before touching the rarer ones. Everything else, including the pose-name prefixes, you can pick up by pattern recognition once you've got the core words locked in. That's also why prop use and modification language matter as much as pose names. A student who knows what "modification" means and reaches for a block without hesitation is going to have a better, safer class than one who's memorized ten Sanskrit terms but freezes when their hamstrings won't cooperate. Vocabulary is a tool for following instruction safely, not a fluency test.
— Juiced
Sources
FAQ
What Are the Most Important Yoga Terms for Beginners?
Asana, vinyasa, savasana, namaste, drishti, and pranayama cover most of what you'll hear in a first class. Learn those six before worrying about anything else.
How Do You Pronounce Sanskrit Yoga Pose Names?
Break the word into its parts (like adho, mukha, and asana) and say each syllable slowly. Teachers accept approximations, so precision matters far less than trying.
What's the Difference Between Asana and Vinyasa?
Asana refers to an individual pose or posture, while vinyasa describes a flowing sequence that links multiple poses together with breath.
Do Beginners Need to Use Yoga Props?
Yes. Blocks, straps, bolsters, and blankets make poses more accessible and help protect your wrists, hamstrings, and lower back from strain, according to Cleveland Clinic.
Which Yoga Style Is Best for a First Class?
Hatha, Restorative, or Iyengar classes suit most beginners best, since they move slower and give you time to absorb both alignment and vocabulary before speeding things up.
Recommended

3 Weekly Hot Yoga Sessions Cut Body Fat About 6%: Weight Loss Evidence
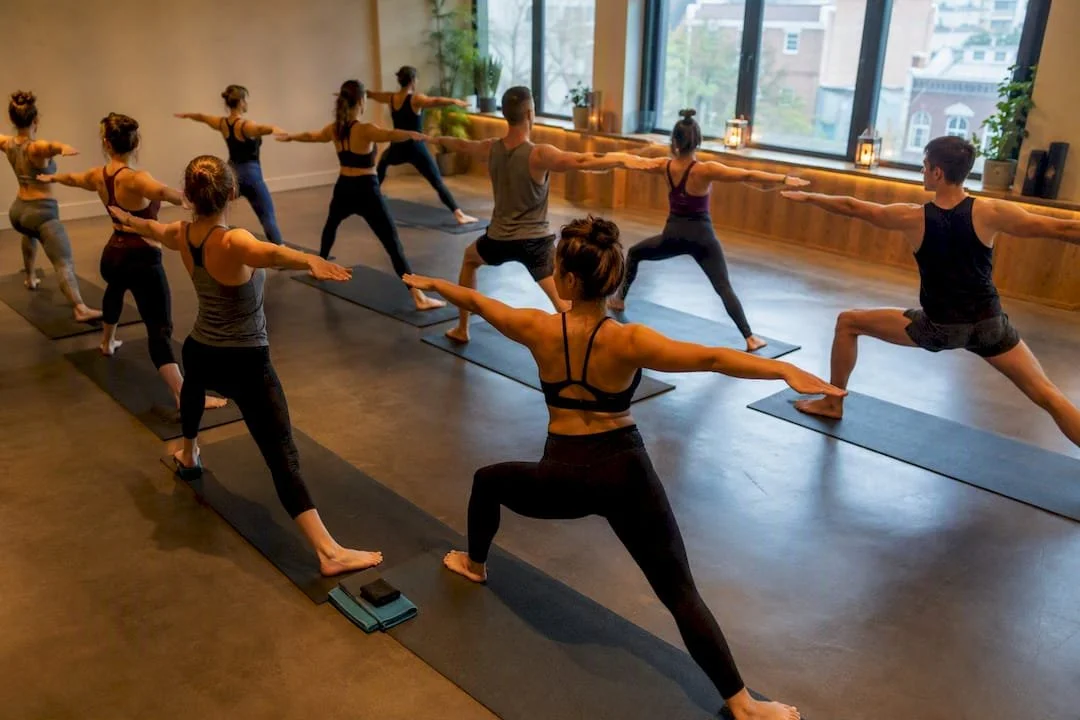
Hot yoga can help reduce body fat, but only when it's practiced consistently and stacked alongside a real diet plan and other forms of exercise. It is not a standalone fat-loss tool. A single 90-minute session burns a moderate amount of calories, comparable to a brisk walk, not the 1,000-calorie figure some studios still advertise. The sections below cover realistic calorie numbers, what long-term studies actually found, and who should talk to a doctor before turning up the heat.
TL;DR:
Hot yoga burns approximately 300 to 460 calories in a 90-minute class, but this varies widely depending on effort, experience, and body size.
Fat loss results require at least three sessions per week over six months, combined with a healthy diet and other forms of exercise.
Heavy sweating during class mainly indicates water loss, which is quickly regained; it does not directly reflect fat burning.
Individuals with heart conditions, heat intolerance, or on certain medications should seek medical advice before practicing hot yoga.
Building heat tolerance gradually over weeks is essential, starting with 2 to 3 sessions weekly and increasing frequency only if tolerated well.
Amritayogawellness
Build A Consistent Hot Yoga Practice
Amrita Yoga & Wellness offers hot yoga and other wellness practices for Philadelphia adults building sustainable routines.
Table of Contents
Benefits of Hot Yoga for Weight Loss: What the Calorie Numbers Really Show
Sweat is not the same as fat loss, and that distinction matters more than almost anything else in this conversation. A soaked t-shirt after a 105-degree class mostly reflects water leaving your body through evaporation, not triglycerides being burned off. You'll regain most of that weight the moment you rehydrate.
The real number to care about is energy expenditure, and it's lower than the marketing suggests. In a standardized 90-minute Bikram session, men burned an average of 460 calories and women burned an average of 330, according to Colorado State University research covering the study. That is a meaningful workout, roughly on par with a fast-paced hour on a treadmill, but it's nowhere near the four-figure claims some class flyers still print.
Lab-based measurements back this up with a bit more nuance. A separate study using expired-gas analysis found session energy expenditure ranging from 179 to 478 kcal, with a mean around 286 kcal across a mixed group of novice and experienced practitioners. That spread is wide, and it tells you something practical: your fitness level, effort, and how deeply you move into each posture change the number by more than 250 calories in either direction.
A few factors drive that variance:
Experience level. Practitioners who've been doing hot yoga for years tend to work harder and hold poses longer, pushing their output toward the higher end of the range.
Class length and style. A 60-minute flow burns less than a 90-minute Bikram sequence with the same postures repeated at higher intensity.
Body size and composition. Larger bodies generally expend more energy performing the same movements, a basic principle of exercise physiology that applies here as anywhere else.
Room temperature and humidity. Higher heat increases cardiovascular strain and heart rate, which nudges energy cost up, though the effect is smaller than most people assume.
On average, a standardized 90-minute hot yoga class burns somewhere between 300 and 460 calories, depending on your sex, effort, and experience. That range sits in the light-to-moderate intensity category as classified by the American College of Sports Medicine, not the "torch everything" zone some instructors imply.
Heat does increase your body’s energy use slightly as it works to regulate core temperature and circulate blood to the skin for cooling. However, this thermoregulatory cost is a small part of the total energy burned. Most calories burned come from muscular work of holding and moving through postures, rather than the ambient heat itself. Heat raises your heart rate and makes the class feel harder, which is a different thing entirely from raising your metabolic rate afterward in any lasting way.
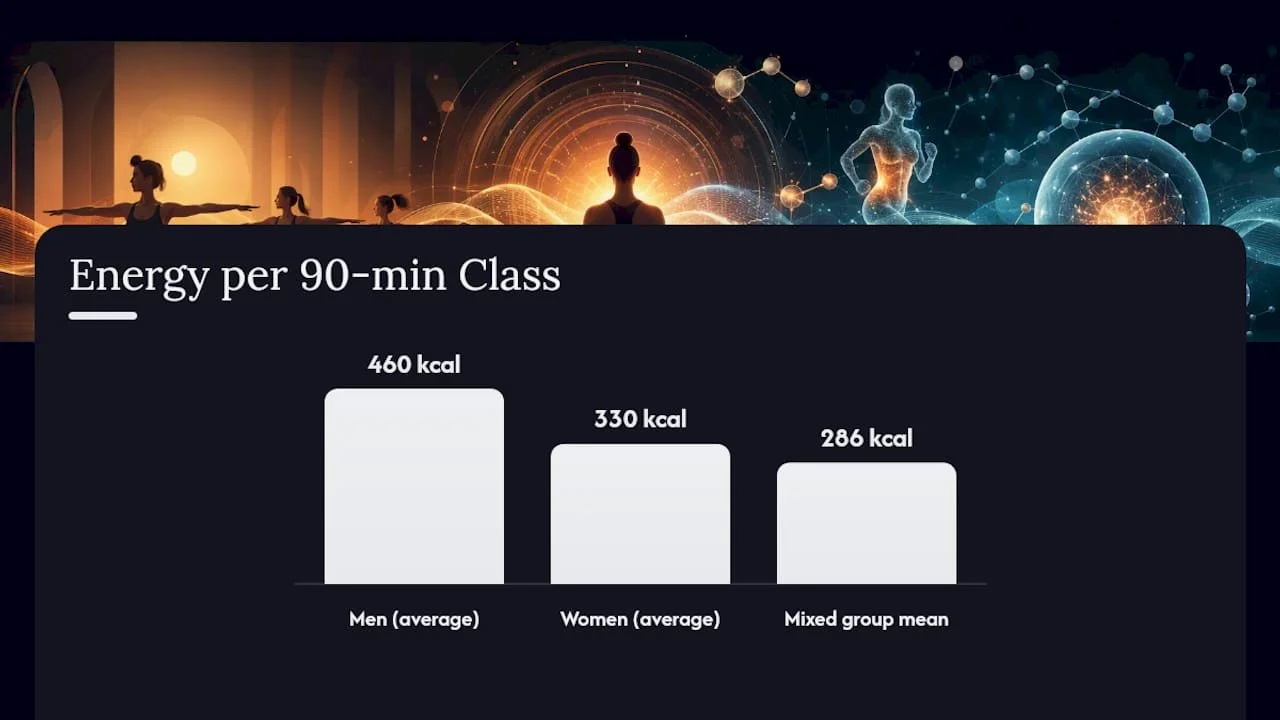
What the Research Actually Says About Hot Yoga and Fat Loss
Short-term lab studies measure something different from long-term body-composition studies, and mixing the two up is where a lot of hot yoga claims go wrong. The acute studies, the ones using expired-gas analysis or heart-rate monitors during a single class, tell you how many calories one session burns and how hard your cardiovascular system is working. They do not tell you whether three months of classes will change how you look or how much fat you're carrying.
For that, you need longitudinal data, and there's less of it than you'd expect for a practice this popular. The most cited example: a six-month Bikram program with three 90-minute sessions per week produced an average body-fat reduction of about 6.07% at six months in adult women, with roughly 3.71% already visible at the 45-day mark. That's a real, measurable change, and it held up across different age groups in the sample.
Notice the conditions attached to that result. Three sessions a week. Ninety minutes each. Six months of adherence. That's a demanding schedule, and it's the schedule that produced the result, not a casual once-a-week habit.
A broader systematic review paints a more mixed picture. Researchers reviewing 43 studies covering 942 participants found consistent improvements in flexibility, balance, and some cardiometabolic markers, but inconsistent evidence for body-composition change across the literature. The review's authors flagged real methodological weaknesses in many of the underlying trials, including small sample sizes and a lack of intensity-matched comparison groups.
A related critical review of Bikram-specific trials found similar patterns: modest weight or BMI improvements in some obese participants over 8 to 12 week interventions, alongside stronger and more reliable gains in strength, balance, and flexibility. Functional fitness improves fairly reliably. Body composition change is less certain and appears to depend heavily on how often and how long people practice.
| Study type | What it measured | Main finding |
|---|---|---|
| Acute lab study | Calories burned per session | 179 to 478 kcal, mean near 286 kcal |
| Six-month longitudinal trial | Body-fat percentage over time | ~6.07% average reduction at 6 months, 3 sessions/week |
| Systematic review (43 studies) | Flexibility, balance, metabolic markers, body composition | Strong support for flexibility and balance; mixed evidence for fat loss |
| Bikram-specific critical review | Weight, BMI, strength, flexibility | Modest weight/BMI change in some groups; consistent functional gains |
There's also an adherence angle that rarely makes it into the calorie discussion. Research out of Harvard notes that heated yoga may reduce depressive symptoms in adults, and lower stress tends to support the kind of consistency that weight management actually requires. A class that helps you sleep better and stress less is doing indirect work even on days it doesn't torch many calories.
Read together, the evidence points to a fair conclusion: hot yoga and weight loss are connected, but the connection strengthens with frequency and time, and it's stronger for fitness markers than for fat loss specifically.
Who Sees the Biggest Benefits, and Who Should Be Careful
Not every body responds to heated yoga the same way, and that's worth knowing before you commit to a schedule.
People starting from a sedentary baseline tend to see the most dramatic early changes. Trial participants who were previously inactive or classified as overweight showed larger relative improvements in fitness and modest weight changes compared to already-active participants, a pattern common across most exercise interventions, not unique to heat.
People with cardiovascular disease need medical clearance first. A heated room pushes heart rate up faster than a room-temperature class, and that added cardiac demand is a real consideration for anyone with existing heart conditions.
People with heat intolerance or a history of fainting should approach cautiously. Studio temperatures commonly run between 90 and 105 degrees Fahrenheit, and that range raises real dehydration and heat-illness risk for susceptible individuals.
Anyone on diuretics or beta blockers should ask their doctor before regular hot yoga. Both drug classes interact with the body's ability to regulate fluid and heart rate under heat stress.
Watch for warning signs during and after class: dizziness, nausea, confusion, a racing heart that doesn't settle, or skin that stops sweating despite the heat. Any of these warrants stepping out of the room immediately, and recurring symptoms deserve a conversation with a clinician.
Mayo Clinic's guidance on hot yogaechoes this: yoga supports a weight-loss plan well when it's paired with regular aerobic exercise and a sound diet, but the heat component specifically calls for extra caution in anyone with heart or heat-related health issues.
How to Build Hot Yoga Into a Weight-Loss Plan
Consistency, not intensity, is what separates people who see body-composition change from people who just feel sore for a few weeks.
Start with 2 to 3 sessions a week for your first month. This gives your body time to acclimate to the heat without triggering burnout or overload symptoms.
Progress toward 3 sessions a week for at least six months. That's the schedule tied to the roughly 6% body-fat reduction seen in longitudinal research, and shorter commitments simply haven't shown the same effect.
Pair classes with dedicated aerobic or resistance training. Major exercise guidelines call for a substantial volume of weekly moderate-intensity activity for weight maintenance, a target that hot yoga alone, even at three sessions a week, is unlikely to fully cover. Adding two strength sessions or a couple of brisk walks fills that gap.
Build an actual energy deficit through food, not just sweat. No amount of heat exposure substitutes for eating in a way that supports fat loss. Track intake loosely for a couple of weeks if you're unsure where you stand.
Track body-fat percentage and functional markers, not just the scale. A pound of muscle and a pound of fat weigh the same but look completely different on you. Strength gains, flexibility, and how your clothes fit tell you more than a number that fluctuates with hydration daily.
Pro Tip: Give yourself two to four weeks of shorter or less frequent heated sessions before jumping into a full 90-minute class three times a week. Heat tolerance builds gradually, and rushing it is the fastest way to end up dizzy on the mat instead of building a habit that lasts.
Getting Ready for Class: A Safety Checklist Worth Following
Hydration strategy matters more in a heated room than almost any other variable you control. Start drinking water several hours before class rather than chugging a bottle right before you walk in, and add electrolytes if you're sweating heavily or taking a class longer than 60 minutes. Plain water alone, in large volumes, can occasionally dilute sodium levels during intense heat exposure.
What you eat beforehand matters too. A light snack with some carbohydrate an hour or two before class works better than a heavy meal, which can sit uncomfortably once you start folding forward in 100-degree heat. Skip alcohol the night before if you can. It compounds dehydration in a way that catches people off guard.
Wear moisture-wicking fabric, never cotton, which gets heavy and clingy once soaked.
Bring a towel for your mat and one for yourself; heated floors get slippery fast.
Tell your instructor about any injury or condition before class starts, not mid-pose.
Sit or lie down immediately if you feel light-headed. Skipping a pose is always better than pushing through dizziness.
Rehydrate steadily for the hour after class rather than trying to replace all fluid loss at once.
Pro Tip: If you notice a headache, unusual fatigue, or dark urine hours after a class, that's your body telling you rehydration didn't go far enough. Treat it as a signal to adjust your water intake before your next session, not something to push through.
Our hot yoga safety guide covers overheating symptoms and recovery steps in more depth, and our pre-class preparation checklist walks through nutrition timing if you want a more detailed plan before your first heated class.
Where Amrita Yoga & Wellness Fits Into This Picture
The studio offers hot yoga programming alongside pilates, barre, tai chi, and massage therapy for students of various levels. Classes include heat acclimation and modification options, following an evidence-informed pacing rather than treating the heat as a gimmick.
This section reflects the editorial view of Juiced, drawing on the physiological and clinical research summarized throughout this article. For related reading, see our guides on essential hot yoga safety tips and mastering hot yoga step by step.
Setting Realistic Expectations With Hot Yoga
Hot yoga earns its place in a weight-loss plan, but it earns that place slowly, and only with real consistency behind it. Expect flexibility and balance gains within weeks. Expect meaningful fat-loss numbers only after months of regular practice paired with solid nutrition and other movement. Anyone with a heart condition, heat sensitivity, or a fainting history should talk to a doctor before starting. Track body-fat percentage and strength, not just the number on the scale, and give the process the six months the research actually calls for.
— Juiced
Start Your Hot Yoga Practice the Safe Way
The studio uses a beginner-first approach that acclimates participants to the heat gradually instead of starting with full 90-minute Bikram-style classes. Hot yoga classes include instructor guidance on modifications, hydration timing, and pacing, helping first-timers build tolerance.
New students are walked through what to expect before the heat even turns on, and instructors check in on modifications throughout class rather than leaving you to figure it out alone. If tarot readings or other wellness workshops sound like a better entry point into the studio community first, you can explore our tarot reading sessions before committing to a full class schedule. Either way, the next step is simple: book your first class and let us guide the pacing from there.
This article is general information, not a substitute for advice from a qualified doctor. Consult a qualified healthcare professional about your own circumstances before acting on anything here.
Sources
Researcher: hot yoga yields fitness benefits (Colorado State University coverage of Bikram study)
Physiological responses to Bikram yoga in novice and experienced practitioners (laboratory study)
Mayo Clinic Q and A: Hot yoga for weight loss and overall health
FAQ
How many calories does a hot yoga class actually burn?
A standardized 90-minute session burns roughly 300 to 460 calories on average, with lab studies showing a range as wide as 179 to 478 kcal depending on effort and experience.
Can Bikram yoga alone help you lose weight?
Bikram yoga can support fat loss when practiced three times a week for six months or longer, a schedule tied to an average 6.07% body-fat reduction in one longitudinal study, but it works best paired with diet and other exercise.
Is sweating a lot in hot yoga a sign of fat loss?
No. Heavy sweating reflects water loss through evaporation, not fat being burned, and most of that weight returns once you rehydrate.
Who should avoid hot yoga or modify their practice?
People with heart disease, heat intolerance, a history of fainting, or those taking diuretics or beta blockers should consult a doctor first, since heated rooms raise cardiovascular and dehydration risk.
How often should I practice hot yoga for weight-loss results?
Start with 2 to 3 sessions a week to build heat tolerance, then aim for 3 sessions a week for at least six months, which matches the frequency used in studies showing measurable body-fat change.
Recommended

3–5mm Base Hot Yoga Mats Studio Teachers Trust for 95°F Classes
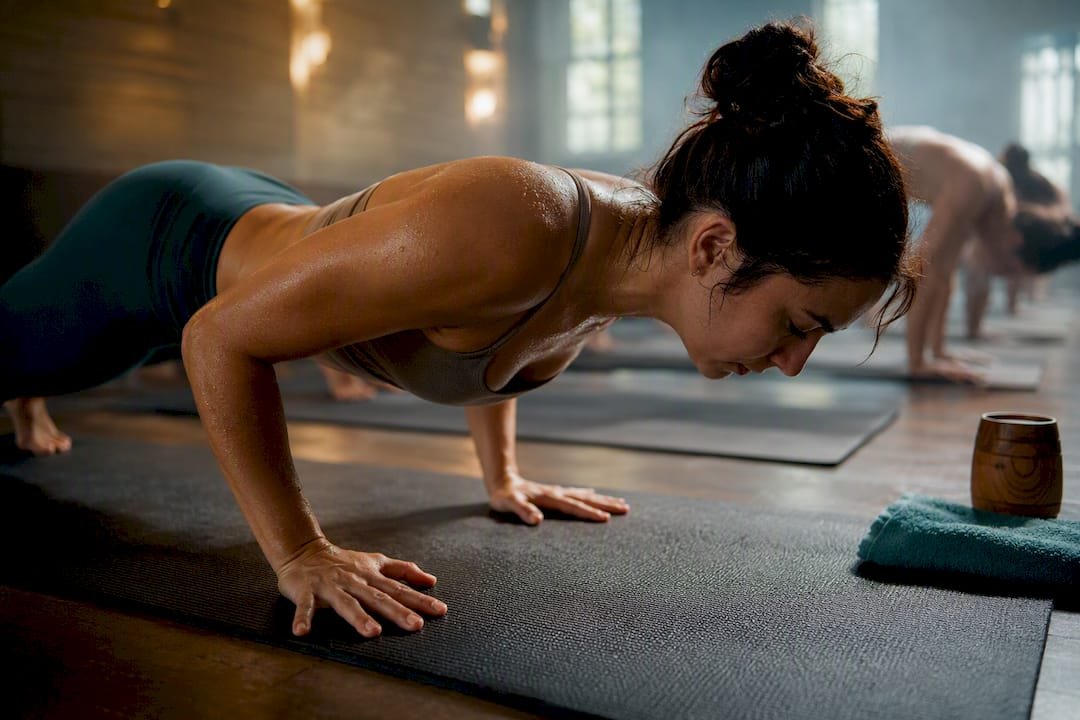
The mats that hold up in hot yoga combine a dense natural-rubber base with a moisture-absorbing top, whether that's cork, microsuede, or a purpose-built sweat-activated polymer. Thinner PVC "sticky mats" feel grippy dry but turn into a slip hazard the moment sweat hits them. The trade-off is weight and price against portability, and the right maintenance routine matters almost as much as the material itself.
TL;DR:
Mats with moisture-absorbing surfaces like cork or microsuede increase grip as they get wet, which is essential for safety in high-temperature rooms.
A dense rubber base between 3 to 5mm thick prevents slipping and provides stability during dynamic sequences, especially during transitions.
Regular, gentle cleaning is critical to maintaining grip over time, with cork requiring mild soap and water and rubber mats tolerating light sprays.
Thicker mats up to 6mm offer added joint cushioning but can destabilize balance during single-leg poses, making medium thickness ideal for most practitioners.
Price and durability often outweigh initial cost, as mid-range rubber-microsuede mats tend to last longer and perform better than budget options for frequent hot yoga practice.
Amritayogawellness
Find Your Hot Yoga Practice
Amrita Yoga & Wellness offers hot yoga classes alongside diverse practices for adults seeking physical, mental, and spiritual well-being in Philadelphia.
Table of Contents
What to Look for in Hot Yoga Mats
Most mat failures in a heated room come down to five things, and you can check for all of them before you buy.
Grip behavior when wet is the one that actually matters in a 95 degree room. A mat that feels tacky in the store but relies on texture alone often turns slick within twenty minutes of sweating. Look for mats explicitly built to increase traction as they absorb moisture rather than resist it.
Base density and weight keep a mat from creeping across a hardwood or polished concrete floor during transitions like chaturanga to downward dog. A thin, light mat shifts. A dense rubber base, generally in the 3 to 5mm range, stays anchored because it has enough mass to resist the sliding force of a moving body.
Thickness sets the balance between cushioning and stability, covered in more detail below.
Material safety deserves real scrutiny given how much skin contact and heat exposure a hot yoga mat sees. Certifications like OEKO-TEX and PVC-free labeling signal a manufacturer has tested for off-gassing, which matters more in a heated room than a cool studio because heat accelerates chemical release from cheap synthetics.
Maintenance needs vary a lot by material, and skipping this step is the fastest way to kill a good mat's grip.
Sweat-activated tops need regular gentle cleaning, not heavy scrubbing
Cork surfaces respond to mild soap and water, never harsh solvents
Natural rubber degrades faster under direct sun or high heat storage
Towel systems require washing after nearly every session to stay hygienic
Pro Tip: Test a mat's wet grip before committing to a full class. Mist the surface with water and try a downward dog. If your palms slide even slightly, that mat will likely betray you halfway through a heated vinyasa flow.
How Materials and Surface Texture Affect Grip When Wet
The base and the top layer of a mat do different jobs, and hot yoga performance depends on getting both right.
Natural rubber is the workhorse base material for serious hot yoga mats. A dense rubber slab, typically 3 to 5mm thick, anchors the mat to the floor through sheer weight and surface friction. That density is what keeps a mat from bunching under your feet during a fast-paced flow, an issue insiders flag as being just as important as the top surface itself.
Cork has become a favorite top layer because it gets grippier, not slicker, as it absorbs moisture. It's also naturally antimicrobial, which matters when you're rolling out a mat you sweat through three or four times a week. Cork needs gentler care than rubber. A dedicated cork mat typically calls for wiping with mild soap rather than any alcohol-based cleaner, since harsh chemicals strip the natural cork surface over time.
Microsuede and microfiber tops, often paired with a rubber base, work through absorption. As sweat spreads across the surface, the fabric wicks it away from your skin's contact point, which paradoxically increases traction instead of reducing it. Some manufacturers now build dedicated sweat-activated PU layers designed specifically to grip better the wetter they get, letting practitioners skip a towel entirely.
TPE, EVA, and basic PU mats are the budget and travel-friendly end of the spectrum. They weigh less, cost less, and pack down small, but most lose grip fast once moisture hits them. If portability is your top priority, this trade-off might be worth it, but expect to pair the mat with a towel.
Towel-on-mat systems solve the slip problem by adding a highly absorbent layer on top of any base mat. They work, but they add a hygiene step (washing the towel after every session) and an extra piece of gear to carry, unpack, and keep from sliding around on top of the mat itself.
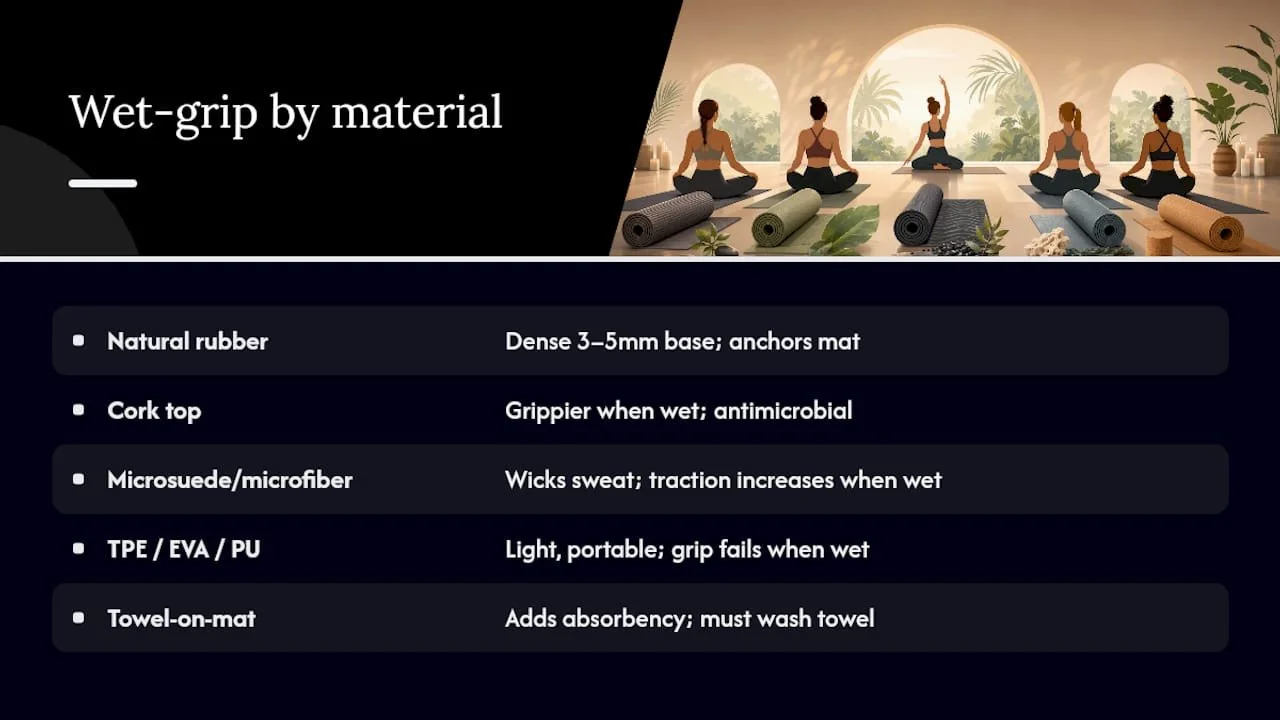
What Thickness Works Best for Heated Classes?
Thickness controls the trade-off between cushioning your joints and staying balanced through standing poses, and hot yoga tends to punish the wrong choice more than a cooler class would.
3 to 4mm mats offer the most stability for balance-heavy sequences and are the default choice for daily hot yogis who prioritize a solid connection to the floor.
4 to 6mm mats strike a middle ground, giving knees and hips a bit more cushion while still keeping most of the floor feedback intact. This range works well for studio regulars taking multiple classes a week.
6mm and thicker mats cushion joints well but can wobble underfoot during single-leg balances like tree pose or half-moon, since the extra foam compresses unevenly under a shifting foot.
Beginners with sensitive knees often lean toward the thicker end, and that's a reasonable call for kneeling positions. Just know that the added foam changes how transitions like plank to child's pose feel, since a thicker mat sinks rather than holds firm. If joint comfort during kneeling poses is your main concern, pairing a mid-range mat with the safety guidance for heated classes covers modifications that reduce knee strain without needing extra padding.
How to Clean and Maintain a Hot Yoga Mat for Better Grip
Sweat buildup clogs the microscopic texture that gives a mat its traction, and maintenance is consistently cited as the single biggest factor in long-term grip performance, often outweighing the initial material choice. A mat that started out perfect can turn slippery within a few months if it never gets properly cleaned.
Wipe down after every session. A damp microfiber cloth or a light spray of water removes surface sweat before it dries into the mat's texture.
Deep clean weekly. Use a mild soap and water solution, following whatever the manufacturer specifies for that particular material.
Skip the harsh chemicals. Alcohol-based or heavily scented cleaners strip the natural properties out of cork and rubber, degrading exactly the grip you're trying to preserve.
Break in new rubber and cork mats gradually. A few light sessions before jumping into a full heated class lets the surface texture settle without excessive strain.
Watch for the warning signs of a dying mat: a permanent loss of tackiness even after cleaning, visible thinning in high-traffic spots, or delamination where layers start to peel apart.
Pro Tip: Store your mat rolled with the top surface facing outward, away from direct sunlight. UV exposure and folded storage both accelerate the breakdown of rubber and cork faster than regular use does.
Which Mat Approach Fits Your Practice?
Different combinations of base and top layer suit different practice styles, and matching your habits to the right one saves both money and frustration.
Dense rubber base with an absorbent top is the strongest all-around choice for towel-free hot yoga, since it handles both the sliding problem and the wet-grip problem at once.
Cork top over a rubber base suits eco-conscious practitioners who want antimicrobial properties and sweat-activated grip without synthetic materials.
Microsuede or dedicated sweat-activated tops work well for anyone who wants near-instant tack the moment sweat starts, without waiting for a break-in period.
Lightweight TPE or travel mats paired with a towel make sense if you move between studios or travel often, though you're trading some grip reliability for portability. Practitioners who bounce between different studio floors tend to find multi-layer setups hold up more consistently across varying surfaces than single-layer travel mats do.
Thin PVC sticky mats are the one combination worth actively avoiding for hot yoga. They feel grippy in a cool showroom and turn genuinely dangerous once real sweat hits them.
What Amrita's Teachers Have Learned About Hot Yoga Mats
Years of watching students set up for heated classes teaches you things no spec sheet will. Teachers consistently notice the same pattern: students who mist their mat lightly before a hot class, rather than relying on the surface alone, get better traction through the first twenty minutes, before their own sweat takes over the job.
Mid-range thickness tends to work best for group studio classes where floors vary between hardwood and rubber flooring underlayment. That range gives enough cushion for kneeling poses without sacrificing the stability standing sequences demand. For readers who want a closer look at specific picks suited to studio floors and climate, the studio's mat guide breaks down options by practice style. None of this replaces trying a mat yourself under real heat and real sweat, which is exactly why testing one in a live class beats guessing from a product photo.
Comparing Popular Hot Yoga Mat Categories
Rather than chase specific brand names, it helps to think in terms of categories, since most mats worth considering fall into a handful of buckets. Premium natural-rubber-and-cork combinations sit at the top of most testing roundups for wet grip, though they carry a higher price and more weight to carry to class. Mid-tier rubber-and-microsuede mats show up constantly in gear comparisons because they balance grip, weight, and cost reasonably well for someone taking two or three heated classes a week. Budget synthetic mats built from TPE or basic PU dominate the entry-level market, and they're fine for occasional heated sessions but tend to disappoint anyone practicing hot yoga several times a week. The pattern across nearly every roundup is the same: mats explicitly marketed for hot yoga, rather than general-purpose mats, consistently outperform on wet-grip tests because manufacturers design the top layer around moisture rather than treating it as an afterthought.
What a Hot Yoga Mat Actually Costs
Expect real variation depending on material and construction. Basic TPE or foam mats sit at the low end and often lose grip fast under heat and sweat, making them a poor long-term value even at a lower upfront price. Mid-range rubber-and-microsuede combinations occupy the middle tier and tend to deliver the best balance of durability and performance for regular practitioners. Premium natural-rubber-and-cork mats sit at the top of the market, reflecting both the material cost and the more involved manufacturing process cork requires.
Value for money in hot yoga isn't really about the sticker price. A cheap mat that needs replacing every few months because it delaminates or loses tack costs more over a year than a well-made mat that holds up through two or three years of regular heated practice. Factor in how often you practice: someone taking hot yoga four or five times a week wears out a mat far faster than an occasional practitioner, which changes the math on what "worth it" actually means for your specific habits.
How Often Should You Replace a Hot Yoga Mat?
Practice frequency drives wear far more than calendar time does. A mat used in hot yoga four or five times a week faces constant moisture cycling, repeated flexing, and heat exposure that a once-a-week practitioner's mat never sees, and that difference shows up in the surface long before the base breaks down.
Daily or near-daily hot yogis often notice a meaningful drop in tackiness within six to twelve months, even with good maintenance. Occasional practitioners, taking one or two heated classes weekly, can often stretch a quality mat past the two-year mark. The clearest signs it's time to replace a mat are a permanent loss of grip that cleaning doesn't restore, visible thinning where your hands and feet land most, and any delamination or peeling at the edges. Pushing a worn-out mat past that point isn't just uncomfortable. It's genuinely how slips and falls happen mid-flow, particularly during transitions where your hands bear sudden weight.
The Real Lesson on Hot Yoga Mats: Construction Beats Marketing
Most mat marketing leans hard on buzzwords like "extra grip" or "non-slip technology" without explaining what's actually happening at the material level, and that gap is where a lot of practitioners get burned, literally sliding out of poses they've held fine for months. The honest answer is boring: base density and top-layer absorption do almost all the work, and everything else is packaging.
Conventional advice tends to fixate on thickness as the main buying decision, when in a heated room, wet-grip behavior matters more than cushioning for most practitioners under 40 without joint issues. A 4mm mat with the wrong top surface will fail you faster than a 6mm mat with the right one. If you're choosing between two mats and can only weigh one factor, weigh how the surface behaves once it's actually wet, not how it feels in a dry showroom.
The other underrated piece is maintenance discipline. A well-built mat with sloppy cleaning habits degrades just as fast as a mediocre mat, maybe faster, since absorbent surfaces clog with residue if you skip regular washing. Buy for the material, then commit to the cleaning routine that material demands.
— Juiced
How Amrita Yoga & Wellness Can Help You Find the Right Mat
Reading about grip and density only gets you so far. Amrita Yoga & Wellness gives you the one thing a product page can't: a chance to test a mat's real wet-grip performance in an actual heated room, mid flow, alongside a teacher who can tell you if your setup is working or fighting you.
Regular hot yoga classes double as a low-stakes way to try different mat types before committing to one, since you'll feel the difference between a sweat-activated top and a basic synthetic surface within a single session. If you're curious about how astrology-informed pose sequencing pairs with your practice, the studio's wellness partners cover that connection in more depth. For readers who want personalized guidance beyond mat selection, tarot sessions are also available as part of broader wellness offerings. Curious where to start? Book a tarot reading or reach out to a wellness studio directly to ask about class times and in-studio mat recommendations tailored to your practice.
Sources
Recommended

15 Minute Chair Yoga for Obese Beginners: 6 Week Strength Plan
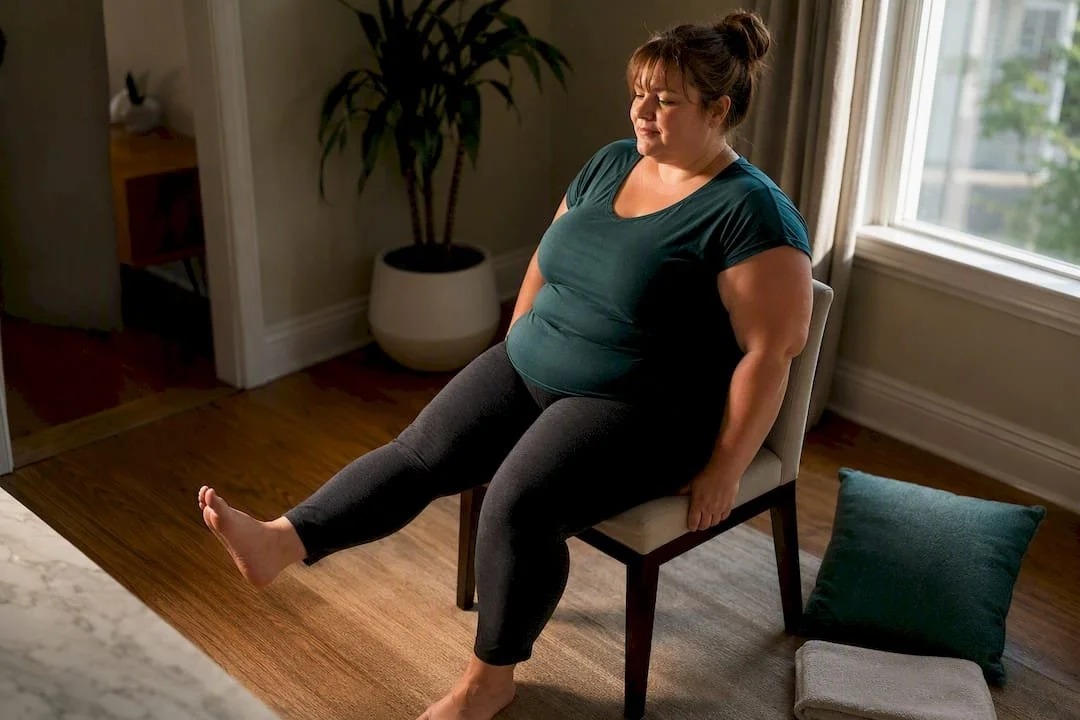
Chair yoga is a safe, low-impact way for obese beginners to start moving, provided you use a stable chair and a few simple modifications. Grab a sturdy armless chair, clear a few feet of floor space, and try the 10 to 15 minute sequence below today. If you have a major medical condition, recent surgery, or uncontrolled blood pressure, check with a clinician before you begin.
TL;DR:
Chair yoga improves flexibility, balance, and pain management, especially for limited mobility, with noticeable progress in sit-to-stand ability and joint comfort within weeks.
The recommended routine involves short sessions focusing on gentle movements, with modifications for comfort and safety, emphasizing consistency over intensity.
Progress tracking should prioritize functional markers like ease of standing and sleep quality rather than scale weight, which advances slowly.
Anyone with recent surgery, uncontrolled blood pressure, or severe osteoporosis should consult a healthcare professional before starting, and avoid sharp pain or dizziness during practice.
Combining regular practice with supportive studio classes or private instruction enhances safety, correctness, and motivation for long-term success.
Amritayogawellness
Find Your Supportive Wellness Practice
Explore accessible yoga and wellness classes in Philadelphia, with options for beginners and experienced practitioners seeking community and personal growth.
Table of Contents
What Chair Yoga Actually Does for Your Body and Mind
Chair yoga will not melt away pounds on its own, and you should walk in knowing that. What it does deliver is more useful in the first month than any number on a scale: looser joints, an easier time getting up from the couch, and a nervous system that stops running at full throttle by 3 p.m.
Controlled research on adapted seated exercise programs shows measurable gains in flexibility, balance, and pain scores among people with limited mobility, which is exactly the population chair yoga is built for. Several of the same seated exercise programs that produced those mobility gains also improved walking speed and functional capacity, meaning the benefits carry over into ordinary tasks like climbing stairs or carrying groceries.
The mental side matters just as much, maybe more, for a beginner trying to build a habit. Yoga interventions consistently show reduced stress markers and better sleep, and better sleep is one of the strongest predictors of whether someone sticks with an exercise routine at all. Poor sleep drives cravings and stress eating; fix the sleep, and the eating often follows.
Here's the part nobody wants to hear about calorie burn: it's modest. A person weighing 185 pounds burns roughly 133 calories in 30 minutes of light activity like gentle stretching or seated movement, according to Harvard Health's activity tables. That's not a number that erases a meal. What it does is stack with other changes, since more daily movement (what exercise scientists call non-exercise activity thermogenesis, or NEAT), lower stress hormones, and better sleep all nudge your body toward easier weight management over weeks and months rather than days.
Watch these markers instead of the scale during your first few weeks:
How easily you go from sitting to standing without pushing off with your hands
Whether your pants feel looser around the waist, even before the scale moves
How many times you wake up at night
Your energy level in the mid-afternoon slump
Whether stiffness in your knees or lower back eases when you get out of bed
Pro Tip: Take a waist measurement and a "sit to stand" count (how many times you can rise from the chair in 30 seconds) on day one. Retest in three weeks. Those two numbers move faster than body weight and they'll keep you motivated when the scale lies to you.
Is Chair Yoga Safe for Larger Bodies? Precautions to Know
Chair yoga is generally safe for obese beginners, but "generally safe" is not the same as "safe for everyone in every condition." A handful of red flags mean you stop and call a doctor before you do another session.
Talk to a clinician first if you have any of the following:
New or unexplained chest pain, shortness of breath at rest, or a recent cardiac event
Surgery within the last six weeks, especially abdominal, joint, or spinal procedures
Severe osteoporosis or a history of spinal compression fractures
Uncontrolled high blood pressure or uncontrolled diabetes
Significant joint replacement hardware that limits your range of motion
Once you're cleared to move, the next skill is telling the difference between productive discomfort and a warning sign. A little muscle fatigue, mild warmth in the working muscle, or a stretch sensation at the end of a range of motion are all normal. Sharp pain, a pinching feeling in a joint, dizziness, tingling down an arm or leg, or pain that lingers sharply for more than a day after class are not normal, and they mean you back off or skip that move next time.
Pacing matters more for beginners carrying extra weight than most fitness content admits. Your joints are managing more load per movement, so soreness the day after your first session is common and usually fades within 48 to 72 hours. Soreness that gets worse instead of better, or that shows up as swelling around a joint, is your body asking for a lighter version.
A few modifications solve most of the problems beginners run into:
Widen your foot stance on any seated pose that asks for balance. A wider base is a more stable base, full stop.
Shorten the range of motion. A quarter turn in a seated twist counts. Nobody is grading you on depth.
Use the chair back for support during side bends or twists instead of reaching for full extension.
Keep a wall within arm's reach, or have someone nearby, for any move that involves standing up from the chair.
Pro Tip: If a move asks you to lift both arms overhead and that spikes your heart rate uncomfortably fast, lift one arm at a time instead. Alternating sides cuts the cardiovascular demand of a pose without cutting the benefit.
Setting Up a Safe Chair Yoga Practice at Home
The right chair changes everything about how a session feels. Skip the wheeled office chair, the recliner, and anything with armrests that block your hips from moving freely. A plain, sturdy dining chair without arms, placed on a non-slip floor or a thin mat under the feet, is the gold standard. Your feet should rest flat on the floor with your knees roughly level with your hips. If they're not, stack a folded towel or a small cushion under your feet, or slide a firm cushion onto the seat to raise you up.
Clothing should let you move without pulling or riding up. Loose, breathable layers work better than compression gear for a first session, and closed-back shoes or bare feet grip the floor better than slides. Keep water within reach. Chair yoga sessions run shorter than a typical gym workout, but you can still work up a sweat, especially once you add the standing modifications from the routine below.
A few optional extras make the practice more comfortable without costing much:
A resistance band or loop, useful once you're ready to add light strength work to seated leg lifts
A wall positioned near the chair for balance support during standing transitions
An extra cushion or folded blanket for lumbar support if your lower back needs it during forward folds
A 15-Minute Chair Yoga Routine for Beginners
This sequence takes about 15 minutes and needs nothing but your chair, a little floor space, and comfortable clothes. Move slowly, breathe through your nose when you can, and treat every "easier" note below as a completely valid way to do the pose. There's no version of this that's the wrong one.
Seated marching (1 minute). Sit tall, feet flat, hands resting on your thighs. Lift one knee a few inches off the seat, lower it, then the other, building a steady rhythm. Gentle modification: lift your heel instead of your whole knee if hip flexion feels tight. Easier modification: tap your toes without lifting the leg at all, just to warm up the hip joint.
Shoulder rolls (1 minute). Roll both shoulders up, back, and down in slow circles, five times, then reverse direction. Add a big exhale on the downward part of the roll. Gentle: smaller circles. Easier: one shoulder at a time.
Seated cat cow (2 minutes). Hands on knees, inhale and arch your back, lifting your chest and looking slightly up. Exhale and round your spine, tucking your chin. Repeat six to eight times, moving with the breath. Gentle: keep the arch and round small, just enough to feel your spine shift. Easier: focus only on the exhale round, skipping the arch if your lower back is sensitive.
Seated side bend (1 minute). Anchor your right hand on the seat or your thigh, reach your left arm overhead, and lean gently to the right. Hold for two breaths, then switch sides. Gentle: keep the reaching arm bent instead of straight overhead. Easier: skip the arm reach entirely and just lean your torso to the side.
Seated twist (1 minute). Sit tall, place your right hand on the outside of your left knee, and gently twist your torso to the left, looking over your shoulder. Hold two breaths, then switch. Gentle: twist only from the ribs up, keeping hips square. Easier: place both hands on your thighs and just turn your head and shoulders slightly.
Seated leg lifts (2 minutes). Extend one leg straight out, hold for a breath, then lower it without letting your foot slam down. Do six to eight lifts per leg. Gentle: keep a slight bend in the knee instead of straightening fully. Easier: lift the leg just an inch or two off the floor rather than extending it out.
Seated knee extensions with a squeeze (1 minute). Same setup as the leg lift, but pause at the top and squeeze your thigh muscle for a full breath before lowering. This builds strength faster than a fast, bouncy lift.
Assisted sit to stand or mini squat (2 minutes). Scoot to the front edge of the chair, feet hip-width apart. Lean forward slightly, push through your heels, and stand up, using your hands on your thighs or the chair arms if needed. Sit back down with control. Repeat five to eight times. Gentle: do a "mini squat" instead, hovering an inch above the seat before sitting back down fully. Easier: stand up and sit down using both hands fully braced on the chair or a nearby wall for support.
Seated marching with arm swings (1 minute). Combine the marching from step one with opposite arm swings, right knee up as left arm swings forward. This builds coordination without any impact. Gentle: slow the pace way down. Easier: march only, no arms.
Heel and toe lifts (1 minute). Feet flat, lift both heels off the floor, hold, then lower and lift both sets of toes instead. This wakes up circulation in the lower legs, which matters if you sit for long stretches during the day.
Seated forward fold (1 minute). Feet wide, hinge forward from your hips over your thighs, letting your arms hang or rest on your shins. Breathe here for three to five breaths. Gentle: only fold halfway, resting hands on knees. Easier: skip the fold and instead round forward just a few inches while seated tall.
Chest opener and breath (1 minute). Clasp your hands behind the chair back or interlace fingers behind you, gently lifting your chest. Hold for three breaths, then release into a short body scan, noticing how your shoulders, jaw, and hands feel before you stand up.
Pro Tip: Do this sequence at the same time every day for the first week, right after coffee or right before dinner. The specific time matters less than the repetition. Habits form around cues, not motivation.
Your 6-Week Plan to Build Strength and Confidence
Progress in chair yoga is not linear, and it shouldn't be. The plan below adds time and intensity gradually, based on research showing that short, frequent sessions build better adherence and functional gains than occasional marathon workouts.
Weeks 1 and 2: build the habit. Do the 15 minute routine once a day, focusing entirely on form rather than speed or repetition count. Your only job here is showing up. Skip a day if you're sore, but come back the next one.
Weeks 3 and 4: add volume. Extend sessions to 20 to 25 minutes by adding a second round of the strength moves (leg lifts, knee extensions, sit to stand) or holding poses like the side bend and twist for an extra breath. If the mini squat felt easy in week 2, try the full sit to stand more often, using less hand support each time.
Weeks 5 and 6: build flow and consider standing options. Link poses together with fewer pauses between them, shorten your rest between rounds, and consider adding a short second micro-session later in the day, five minutes of marching and breathing while you're on a phone call, for example. If your balance feels solid and a clinician has cleared you, add light standing poses near the chair for support, like a standing forward fold with hands on the seat.
Track progress with something other than the scale:
Sit-to-stand repetitions in 30 seconds, retested every two weeks
How many rounds of leg lifts you complete before your form breaks down
Whether you need the chair back for balance during twists, or can hold position without it
Sleep quality and how many times you wake during the night
If you plateau, or a specific move consistently causes joint pain rather than muscle fatigue, that's the signal to work with an instructor for one-on-one adjustments rather than pushing through alone.
Breathing Techniques to Pair With Your Practice
Breath is not decoration in chair yoga. It's the mechanism that keeps a session gentle instead of accidentally strenuous. The basic rule: inhale as you lengthen or open (reaching an arm up, arching in cat cow), exhale as you fold, twist, or engage a muscle (rounding your spine, lifting into a sit to stand).
Box breathing is a simple pattern worth learning: inhale for four counts, hold for four, exhale for four, hold for four. Repeat for one minute during the cool-down. Skip the "hold" portions and just breathe in and out slowly if you have a respiratory condition like COPD or asthma, since breath holding can feel uncomfortable for some people with lung conditions.
Diaphragmatic breathing means breathing so your belly rises more than your chest. Rest one hand on your stomach during the seated forward fold and feel it push into your hand on the inhale. This activates the parasympathetic nervous system, the "rest and digest" side, which is part of why gentle movement combined with slow breath measurably lowers stress hormones in controlled studies.
Close every session with a 60 second body scan: eyes closed or soft gaze, attention moving from your feet up to your scalp, just noticing without judging. For more structured practice, Amrita Yoga & Wellness has a library of mindfulness activities for stress relief that pair well with a movement cool-down.
Pro Tip: If you catch yourself holding your breath during a pose (a common habit under physical effort), that's usually a sign the pose is slightly too intense. Ease back until the breath flows naturally again.
Why Studio Support Makes a Real Difference
A home routine gets you moving, but a trained eye catches things you can't see in yourself, like a hip that's rotating during a "seated" twist or a knee tracking wrong during a sit to stand. A Philadelphia studio built around accessible practice offers beginner-level classes designed for exactly this stage of a fitness path.
Private sessions matter most for anyone managing joint pain, a past injury, or a health condition that needs individualized pacing, since a private instructor can rebuild the entire sequence around your specific limits rather than asking you to modify a group class on the fly. Group formats matter too, for a different reason: showing up alongside other beginners removes the isolation that often kills a new habit before it takes hold.
Whether you're working through the routine above at home or ready for guided instruction, the goal is the same one this whole guide has pushed toward: consistent, safe movement that respects the body you're in today.
Small Wins Add Up Faster Than You Think
The biggest mistake I see beginners make isn't skipping a workout. It's dismissing a real win because it doesn't look like the "before and after" photos everyone else posts. Standing up from a chair without using your hands, for the first time in years, is a genuine physical achievement. Sleeping through the night after a session is a genuine physical achievement. Neither shows up on a scale, and both matter more for long-term health than a number ever will.
Tie your practice to something you already do every day, coffee, brushing your teeth, a lunch break, so you're not relying on willpower to remember. On the days you can't do the full 15 minutes, do three minutes of seated marching and breath work instead of nothing. A short session that happens beats a perfect session that doesn't. Compare yourself only to the person who started this practice, not to anyone else's pace.
— Juiced
Ready for Guided Support? Here's How Amrita Yoga & Wellness Can Help
A home routine gets you started, but a room full of people moving at your pace, with an instructor who actually corrects your form in real time, gets you further, faster. A local studio runs beginner-friendly classes built for exactly the stage you're at now, plus private sessions for anyone who needs modifications tailored to a specific joint issue, a recent surgery, or a health condition that a group class format can't fully accommodate.
Your first class at a studio like this usually starts with a short conversation about what you can and can't do comfortably, so the instructor can adjust poses before you ever hit the mat. Private sessions go a step further, building a sequence around your body instead of asking you to adapt someone else's. And if part of your wellness routine includes a little reflection and stress relief beyond the physical, the studio's tarot reading sessions are worth checking out as a complementary way to slow down and check in with yourself. Book a beginner class or a private session to see how a guided, supportive setting changes what your practice can do.
Sources
The safety and mobility claims in this guide draw on controlled research into adapted, seated exercise programs, including studies on physical function in older adults and functional gains from seated programs. Stress and sleep claims come from yoga research on stress reduction and sleep quality. Calorie estimates are based on Harvard Health's activity tables, and the progression plan's emphasis on short, frequent sessions is grounded in adherence research on short, frequent exercise programs.
This article is general information, not a substitute for advice from a qualified doctor. Consult a qualified healthcare professional about your own circumstances before acting on anything here.
Functional improvements following seated exercise programs (PMC3193654)
Calories burned in 30 minutes for people of three different weights — Harvard Health
Adherence benefits of short, frequent group exercise programs (PLOS One)
Recommended

Start Pole Dancing in Philadelphia Safely With a 6–8 Week Beginner Series
Yes, Philadelphia has beginner-friendly pole fitness classes, and the fastest way in is a structured beginner series or a new-student trial pass rather than dropping into an open-level class cold. Prioritize studios that name a specific beginner track, spell out their instructor safety and spotting policy, and keep class sizes small enough for hands-on correction. Book the earliest available start date once you find one that checks those boxes.
TL;DR:
Structured beginner series or private lessons are the safest and most effective entry points for new pole students, emphasizing safety and personalized progression.
Studios should have clear, published beginner tracks, small class sizes, and transparent safety and cancellation policies, with instructor qualifications easily accessible.
Expect to pay around $16 to $40 per class depending on the format, with bundle packages often offering better value than drop-ins, and plan for a 60 to 90-minute class duration.
Consistent attendance and cross-training in flexibility, core, and strength exercises significantly improve progress and help overcome common plateaus within the first few weeks.
Building community through beginner cohorts and local events reinforces motivation, while realistic expectations position beginners to treat the first month as skill-building rather than talent or flexibility-based.
Table of Contents
Pole Dancing Classes in Philadelphia: Types and Where to Start
Not every pole class serves the same goal, and picking the wrong entry point is the main reason beginners quit after one awkward session. Philadelphia's pole fitness studios generally offer a handful of formats, each built for a different outcome.
Beginner series: A structured 6 to 8-week course (sometimes shorter, around 4 to 6 weeks) that walks new students through grip, spins, and basic climbs in order, week by week.
Open-level drop-in classes: Mixed-experience sessions where you practice alongside intermediate students. Fun once you have fundamentals, disorienting if you don't.
Heels classes: Choreography-focused, built around fluid movement and performance rather than tricks on the pole itself.
Conditioning and strength classes: Bodyweight and resistance work targeting the shoulders, core, and grip strength pole work demands.
Flexibility classes: Splits, backbends, and mobility drills that make advanced pole positions accessible sooner.
Private lessons: One-on-one instruction with a coach, useful for faster, personalized progress or for anyone who gets nervous in a group setting.
Each format produces a different kind of fitness. Beginner series and conditioning classes build raw strength and coordination. Heels classes develop performance quality and confidence in front of others. Flexibility work supports both.
For someone who has never touched a pole, the clearest entry point is a progressive beginner series rather than an open drop-in. Structured beginner series and private lessons provide personalized progressions that build confidence and safety habits before you're thrown into a mixed-level room. Private coaching works well too, especially if scheduling flexibility matters more to you than the social element of a group class.
How to Choose a Pole Fitness Studio in Philly
A good studio makes its beginner path obvious. A weak one buries it, or doesn't have one at all. Before you hand over a card number, run through this checklist.
Does the studio publish a beginner series? Look for a named, multi-week track, not just "all levels welcome" language.
Are instructor certifications or training backgrounds listed? You don't need a framed diploma, but you should be able to find who teaches and what their background is.
What's the student-to-instructor ratio? Smaller classes mean more hands-on spotting and correction, which matters most in your first few sessions.
What's the spotting and safety policy? Ask directly. A studio that can't answer in one sentence probably hasn't thought it through.
Does the schedule fit your actual week? A perfect studio you can attend once a month won't get you anywhere.
Is pricing transparent, with a clear cancellation or makeup-class policy? Vague pricing pages or "call us for rates" language is often a sign of inconsistent scheduling.
Watch for red flags: no visible beginner track, safety information that's vague or missing entirely, and reviews mentioning frequent last-minute cancellations. Studios with clear public information, dedicated class descriptions, and visible schedules tend to run tighter, more reliable programs, a pattern that shows up consistently in how studio pages present their offerings to new students.
Pro Tip:Email or call before booking and ask, "What happens if I've never touched a pole?" A studio with a real beginner program will have a rehearsed, specific answer. One that doesn't may be improvising your safety plan in real time.
What Pole Classes Cost and How Schedules Typically Work
Beginner series in most cities run for multiple weeks, with individual classes typically lasting around an hour to an hour and a half. That timeframe is intentional. Pole work builds slowly through repeated exposure to the same grips and positions, and rushing it is how people get frustrated or hurt.
Pricing generally follows a few predictable shapes:
Drop-in classes: Roughly $20 to $40 per session, best for testing a studio before committing.
Beginner series bundles: A discounted rate for the full multi-week course, usually cheaper per class than paying drop-in each week.
Multi-class passes or monthly memberships: Better value if you plan to attend consistently.
Private lessons: The highest per-hour rate, but the fastest personalized progress.
New-student specials and trial passes are common in the fitness industry generally, and class catalog and scheduling platforms show that studios routinely sell these passes specifically to attract new students. Do the cost-per-class math before you commit to a package: a $99 six-class beginner series works out to $16.50 per class, often cheaper than three drop-ins. If you're not sure you'll stick with it, a single drop-in or a short trial pass is the lower-risk way to test the waters before buying a bigger bundle.
Getting Ready for Your First Pole Class
Most reputable studios follow the same safety fundamentals: instructors teach progressively rather than pushing tricks before you're ready, spotting is standard for climbs and inversions, and nobody should force you into a range of motion that feels wrong. A one-hour introductory class typically spends its time on pole contact points and foundational grips rather than jumping straight into spins or climbs, which is exactly the pacing a first-timer needs.
What to wear matters more in pole than almost any other fitness class, because grip depends on skin contact.
Bring shorts and a fitted tank top; bare skin on your legs and arms is what lets you actually hold the pole.
Skip lotion or oil the day of class; it makes the pole dangerously slick.
Bring water and a small towel; you'll sweat more than you expect.
Pro Tip:Spend five minutes before class on wrist circles, shoulder rolls, and a few bodyweight squats. It won't make you strong overnight, but it wakes up the joints pole work leans on hardest. For steady progress, aim for two to three sessions per week with rest days between, rather than cramming once a week and stalling out.
How Amrita Yoga & Wellness Fits Into Your Pole Journey
Pole strength doesn't come from pole class alone. The shoulders, core, and grip endurance pole work demands respond well to cross-training, and that's where a broader wellness studio earns its keep even if it doesn't teach pole itself.
At Amrita Yoga & Wellness, the class catalog includes formats that can support fitness elements beneficial to pole progress, such as Pilates mat and reformer classes for core stability, barre classes for postural alignment and stabilizer strength, and flexibility-focused sessions to improve mobility in hips and shoulders.
Pilates reformer work in particular targets the same core musculature pole instructors constantly cue, and Pilates for core strength is a natural complement if you're serious about advancing past beginner tricks. If you're not ready to book a pole class yet, starting with a beginner-friendly mobility session or a private coaching consult at a wellness studio can be a supportive way to build a foundation.
The Social Side of Pole Classes in Philadelphia
Pole studios tend to build community faster than most fitness spaces, largely because progress is visible and shared. When you land your first spin or hold an invert for the first time, the people next to you usually notice and celebrate it with you. That kind of immediate, physical feedback loop creates camaraderie that a treadmill row never will.
Beginner series amplify this because the same small group progresses together for the full six or eight weeks. You're not a stranger dropping into a room of regulars. You're part of a cohort learning the same moves at the same pace, which softens the awkwardness of being new. Many students describe their beginner series classmates as the reason they kept showing up on weeks they wanted to skip.
Philadelphia's pole community also extends beyond the studio floor. Local showcases, themed classes, and informal meetups give more experienced students a reason to stay connected, and many studios encourage beginners to watch or attend these events even before performing themselves. That visibility, seeing what's possible two or three levels ahead, tends to keep motivation high during the slower early weeks when progress feels incremental.
The inclusivity angle matters too. Pole fitness spaces in Philadelphia generally emphasize body diversity and skill diversity over a single aesthetic, which is part of why the format has grown into a mainstream fitness option rather than a niche one.
How You Advance From Beginner to Intermediate Pole
Progression in pole is sequential by necessity. You can't safely attempt an invert before you've built the grip strength and body awareness a beginner series teaches, and most instructors won't let you skip ahead regardless of how motivated you feel in week two.
A typical path looks like this: beginner series first, covering basic spins, sits, and climbs. From there, most students move into a low intermediate or "level 2" class that introduces inverts, more demanding transitions, and combos that string multiple moves together. Instructors generally use informal skill checks, can you climb cleanly, can you invert with a spot, to decide when a student is ready to move up, rather than a fixed calendar date.
Repetition matters more than most beginners expect. Progressive modules paired with supplementary strength and flexibility training accelerate safe skill gain far more reliably than trying to muscle through an advanced move before your body is ready for it. Structured, sequential series also tend to keep students enrolled longer than irregular drop-in attendance, since a defined progression gives you something concrete to work toward each week rather than a vague sense of "getting better eventually."
Plateaus are normal. Most students hit one around week four or five of their first series, right when the easy early gains taper off and the harder combinations start requiring real strength. Sticking with consistent attendance through that stretch is usually what separates students who advance from those who stall out.
What a Typical Pole Class Looks Like
A standard pole class runs 60 to 90 minutes and follows a fairly consistent rhythm regardless of studio. Expect roughly 10 to 15 minutes of warmup, cardio, dynamic stretching, and grip activation, followed by the technical portion of class where the instructor introduces or reviews specific moves.
The middle chunk of class, usually the longest segment, is spent drilling those moves with instructor feedback and spotting. In a beginner series, this section builds directly on the previous week rather than starting fresh each time, which is part of why consistent attendance matters so much early on. Instructors typically break the pole work into small segments: a spin, then a sit, then a combination linking the two, rather than teaching everything at once.
Class usually closes with 10 to 15 minutes of cooldown stretching, targeting the shoulders, hip flexors, and hamstrings that took the brunt of the session's load. Some studios end with a few minutes of free practice time, letting students run through what they just learned without instruction.
Total time commitment per class, including the drive and a quick shower after, realistically runs closer to two hours once you factor in the mats-off, sweaty nature of the workout. Planning your week around that full window, not just the class time itself, keeps expectations realistic from the start.
COVID-19 Safety Practices at Philadelphia Pole Studios
Pandemic-era safety protocols have loosened considerably at fitness studios generally, and pole studios in Philadelphia are no exception. Most no longer require masks or vaccination proof as a blanket policy, though individual studios set their own rules based on current local health guidance and owner discretion.
What has stuck around, largely because it was good practice, is stronger emphasis on shared-equipment hygiene. Pole studios routinely wipe down poles, mats, and grip aids between classes, partly for illness prevention and partly because sweat and grip residue affect pole traction for the next student. Many studios also kept smaller class caps that started as distancing measures and stayed in place because instructors realized closer ratios simply improved teaching quality and safety spotting.
If you have specific health concerns, whether related to respiratory illness, immune sensitivity, or anything else, the right move is to call the studio directly and ask what their current policy looks like. Policies vary by studio and change with local health guidance, so don't assume a class page written months ago still reflects today's rules. A studio that answers this question clearly and without hesitation is generally the same kind of studio that takes its physical safety and spotting policies seriously too.
What Beginners Get Wrong About Starting Pole
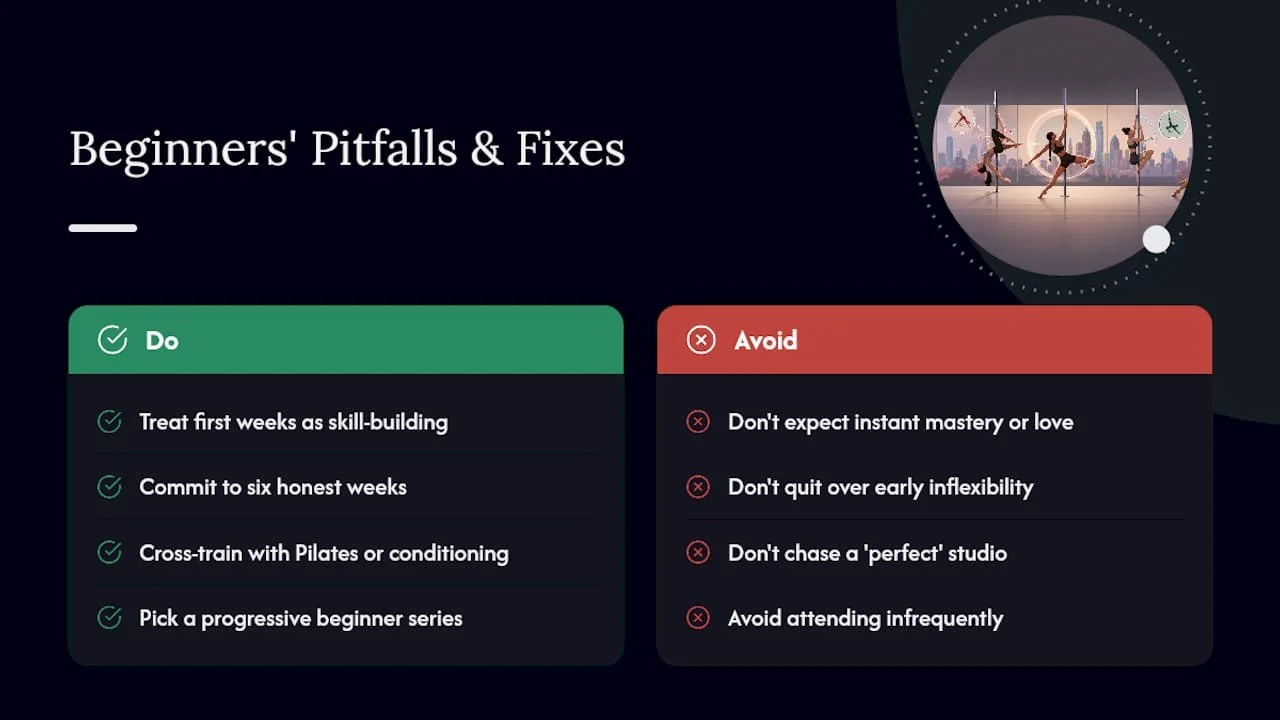
The biggest misconception about pole fitness in Philadelphia isn't about the studios. It's about what beginners expect from themselves in the first month. Most people walk into their first class assuming they'll either love it immediately or discover they're "not flexible enough" to continue. Neither reaction reflects reality. Pole is a skill built through repetition, not a talent you either have or lack, and the students who stick with it are usually the ones who treated the first few weeks as pure skill acquisition rather than a referendum on their fitness level.
Conventional advice tends to overemphasize finding the "best" studio, as though one perfect option exists in a city with this many gyms and wellness spaces. The bigger lever is consistency and cross-training. A solid beginner series at an average studio, paired with two Pilates or conditioning sessions a week, will outperform a superstar studio attended once a month. Prioritize a program with real progression and spotting, build supporting strength elsewhere, and give it six honest weeks before judging whether it's for you.
— Juiced
If pole isn't quite the right starting point yet, or if you want to build strength and flexibility before your first class, Amrita Yoga & Wellness offers Pilates, barre, and flexibility-focused sessions that can help prepare your body for demanding physical activities involving the shoulders and core. You can also explore the studio's broader wellness offerings, including its tarot readings, as part of a well-rounded approach to physical and mental well-being. For general guidance on choosing the right beginner-friendly class format across any discipline, this overview of fitness class types is a useful starting point.
Sources
Recommended

Science Backed, Practice Proven: Why Yoga Helps Body and Mind in Weeks
Systematic reviews and studies show yoga lowers stress, improves sleep and balance, and eases back pain. See which gains show in weeks and which take 2–3...
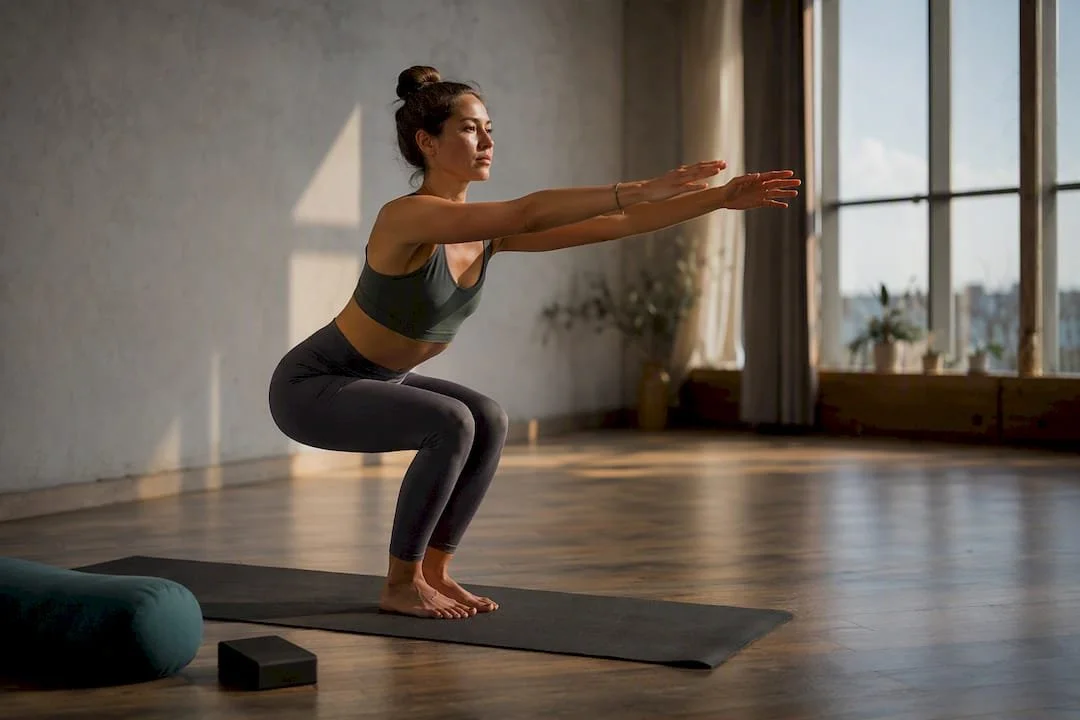
Yoga is good because it produces measurable improvements in physical function and mental wellbeing, backed by clinical reviews and neurophysiological studies. Flexibility, balance, and strength gains are well documented, and so are reductions in perceived stress, better sleep, and calmer mood. The evidence is strongest for stress relief, balance, and chronic low back pain, according to the NCCIH, while gains in cardiovascular and metabolic markers are real but more modest.
TL;DR:
Consistent yoga practice can improve sleep and reduce perceived stress within a few weeks, especially through breathing exercises.
Strength, flexibility, and balance gains typically require two to three months of regular practice and are most noticeable with weekly sessions.
Yoga offers meaningful relief for chronic low back pain and some benefit for knee osteoarthritis and headaches, but it should complement medical treatment.
Small reductions in blood pressure, cholesterol, and blood sugar may occur, yet yoga is unlikely to outperform aerobic exercise for cardiovascular health.
Starting with beginner classes, using props, and practicing daily short sessions with proper modifications enhances safety and habit formation.
Table of Contents
Physical Benefits: Strength, Flexibility, Balance, and Function
Mental and Emotional Benefits: Stress, Mood, Sleep, and Cognition
Pain and Chronic Conditions: Low Back Pain, Arthritis, Headaches
Cardiovascular and Metabolic Effects: Blood Pressure, Lipids, Blood Sugar
How Yoga Actually Works: Breath, Nervous System, and Mechanics
What Actually Changes When Someone Starts Practicing Regularly
Why Yoga Is Good: The Full Range of Benefits
Yoga touches nearly every system researchers have bothered to measure, though not all of it holds up equally well under study.
Physical: better flexibility, core strength, joint stability, and balance
Mental: lower perceived stress, improved mood, and more consistent sleep
Pain relief: meaningful help for chronic low back pain, some benefit for knee osteoarthritis and headaches
Cardiovascular and metabolic: small reductions in blood pressure, occasional improvements in cholesterol and blood sugar
Mindfulness and behavior: better body awareness, which often nudges people toward healthier eating and activity habits
Lifestyle: community, routine, and a reason to show up consistently
Most people notice sleep and stress changes within a few weeks. Flexibility and strength gains take longer, often two to three months of regular practice. The strongest evidence points to stress reduction, balance, and low back pain relief. Cardiovascular and cognitive claims are promising but still developing.
Physical Benefits: Strength, Flexibility, Balance, and Function
Yoga builds strength differently than lifting weights does. Holding a plank, warrior pose, or chair pose isometrically loads muscles for extended periods, which improves endurance strength even without added resistance. Moving slowly between poses also trains stabilizer muscles that a typical gym routine skips entirely.
Flexibility gains show up in study after study, and they're not just about touching your toes. Harvard Health notes that yoga improves functional movement, meaning the kind of mobility that makes bending, reaching, and twisting in daily life easier and safer.
Balance improvements matter most for older adults, where falls are a leading cause of injury. Poses like tree pose and standing splits train the small stabilizing muscles around the ankles and hips that balance depends on. Two to three sessions a week tends to produce noticeable balance gains within a couple of months, though even a short daily practice adds up faster than most people expect.
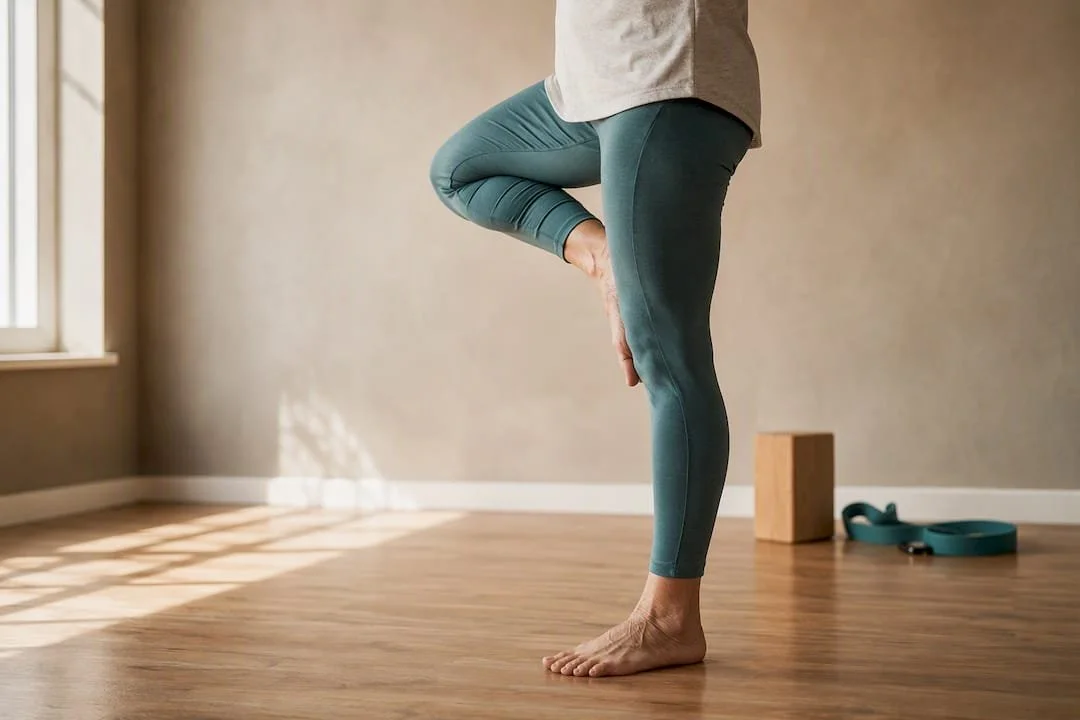
Mental and Emotional Benefits: Stress, Mood, Sleep, and Cognition
Stress reduction is where yoga's evidence base is most convincing. Studies consistently show lower perceived stress and better sleep quality among regular practitioners, and the NCCIH lists it among the practice's best-supported effects.
The mechanism traces back to breathing. Controlled breathwork increases heart rate variability, a marker of how well your nervous system shifts between stress response and recovery, and stronger HRV is tied to better parasympathetic regulation. That's the physiological basis for why a slow breath in a tense moment actually works.
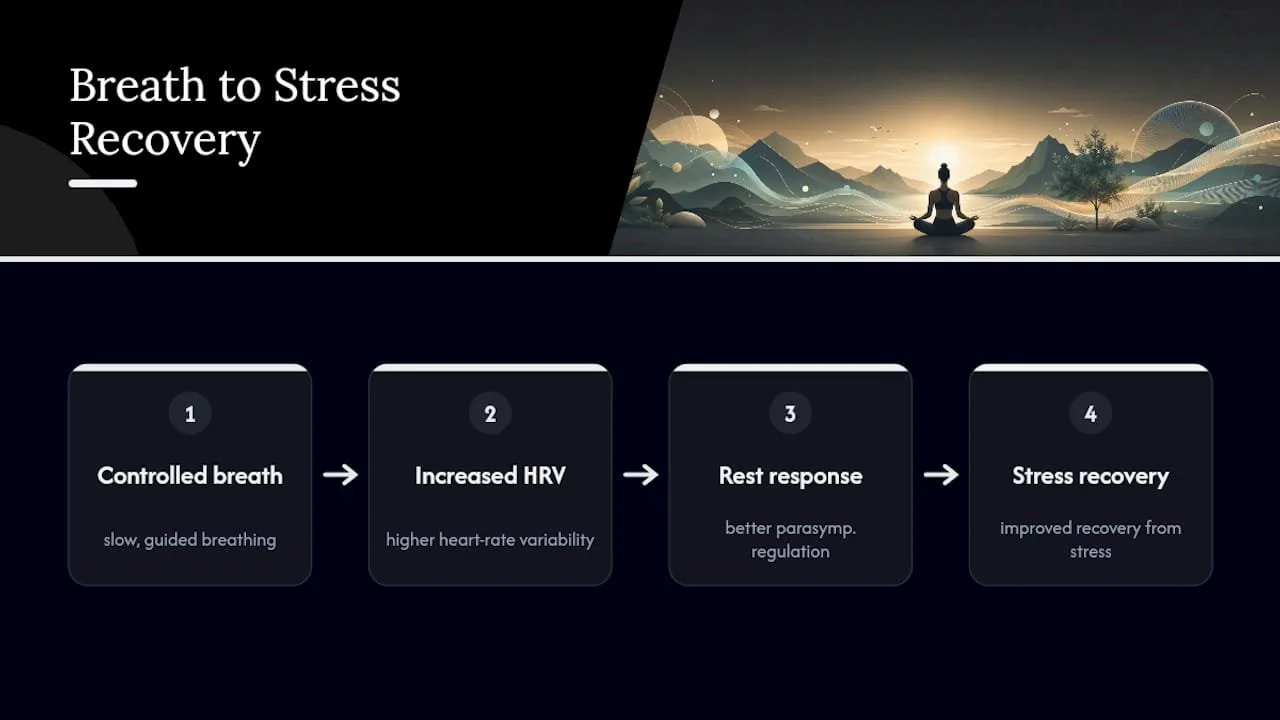
There's a brain component too. Neuroimaging research on long-term practitioners found less gray matter loss in regions tied to positive emotion compared with non-practitioners, suggesting sustained practice may help protect emotional processing as people age.
For anxiety and depression, yoga functions best as an adjunct, not a replacement. It can meaningfully ease symptoms alongside therapy or medical treatment, but it isn't a universal fix, and no credible source frames it that way.
Pain and Chronic Conditions: Low Back Pain, Arthritis, Headaches
Chronic low back pain is where yoga has earned its clearest clinical footing. Systematic reviews and clinical guidance identify it as a recommended option for some cases of persistent low back pain, putting it in the same conversation as physical therapy for certain patients.
The picture is softer but still encouraging for other conditions. Research points to benefits for knee osteoarthritis, along with relief for migraines and tension headaches, though the effect sizes vary more across studies than they do for back pain.
None of this means yoga replaces medical care. It works best layered onto a treatment plan a clinician has already reviewed, especially for anyone managing arthritis flares or headache disorders that need medication management alongside movement.
Cardiovascular and Metabolic Effects: Blood Pressure, Lipids, Blood Sugar
Smaller trials show yoga can lower blood pressure and improve lipid or glucose markers in some groups, though the effect sizes are modest and vary by study population. Harvard Health notes the practice shows enough promise on cardiovascular risk factors that it's sometimes folded into cardiac rehabilitation programs.
That said, don't expect yoga to outperform vigorous aerobic exercise on heart health metrics. If you're managing hypertension or diabetes, yoga is a reasonable complement to your existing plan. It's rarely enough on its own.
How Yoga Actually Works: Breath, Nervous System, and Mechanics
The breath is doing more work than most people realize. Slow, controlled breathing (pranayama) stimulates the vagus nerve and increases parasympathetic activity, which is the nervous system's built in brake pedal. That's the same principle singers and speakers rely on when they use breathing and relaxation techniques to steady nerves before a performance.
Regular practice also appears to downregulate the HPA axis, the stress hormone loop that governs cortisol release, based on findings summarized by the Greater Good Science Center. On the physical side, sustained stretching and controlled loading improve connective tissue mobility and strengthen postural muscles, which explains a lot of the pain relief and balance gains discussed earlier.
Study designs vary widely across styles, from restorative yoga to power vinyasa, so not every finding generalizes across the board.
How to Start Yoga Safely and Build a Habit That Sticks
Start with frequency over intensity. Short daily or near-daily sessions tend to outperform infrequent long ones for building mindfulness, better sleep, and steadier mood.
Match the class to your level. A beginner-friendly hatha or gentle flow class builds a foundation before you try hot yoga or aerial work.
Tell your instructor about injuries or conditions. A qualified teacher will offer modifications instead of pushing you into a pose that aggravates an old injury.
Use props and take rest days. Blocks, straps, and the occasional child's pose prevent the sprains and strains that come from forcing range of motion you don't have yet, a principle covered in more depth in guidance on aerial yoga safety.
Pro Tip: Add two minutes of slow breathing before your first few classes. The stress relief kicks in faster than the flexibility gains, so it's the quickest way to feel a difference.
What the Research Actually Supports (and Where It's Thin)
The strongest signal comes from systematic reviews and summaries from sources like NCCIH and the HRV literature on breathwork, both of which point to consistent, replicated findings on stress, sleep, and balance.
Where the evidence gets thinner: sample sizes in many yoga trials are small, follow-up periods are often short (weeks, not years), and "yoga" itself covers wildly different interventions, from restorative sessions to vigorous power classes. That heterogeneity makes it hard to say a single style produces a specific effect size.
When you see a bold new yoga claim, ask what kind of yoga, how many people, and for how long. If those answers aren't stated, treat the claim as promising at best.
What Actually Changes When Someone Starts Practicing Regularly
The consistent thing we see in the classroom isn't dramatic. It's small and cumulative: someone starts sleeping through the night again, stops bracing their shoulders at their desk, or finally touches their toes without wincing. Mobility and stress relief usually show up before strength does, which matches what the research on breathwork and HRV would predict.
Beginner classes and breathwork focused sessions tend to be where people notice the fastest shifts, partly because the nervous system responds before the muscles catch up. If you want to test any of this yourself, our beginner classes and membership through the Karma Yoga Club are built around that same principle: consistency over intensity, and support over solo effort.
— Juiced
Sources
Recommended

Instructor Tested Pilates Reformer Outfits to Keep Your Form Visible
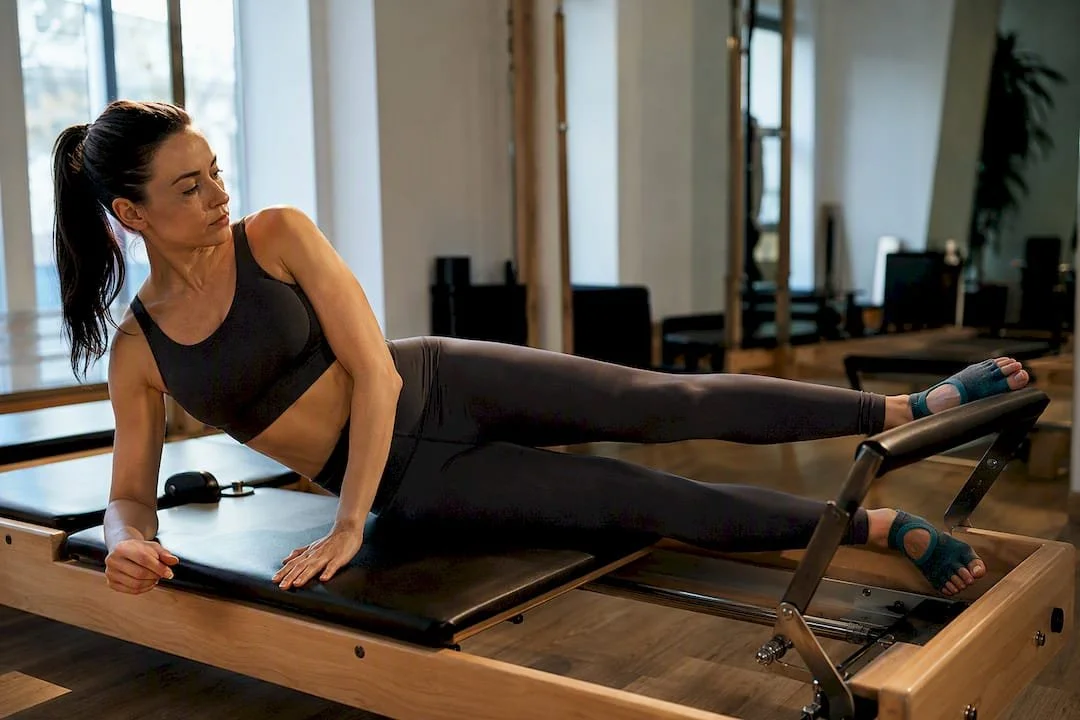
For Pilates reformer class, wear a fitted top, fitted leggings or bike shorts, and grip socks (or bare feet if your studio prefers that). The fit matters more than the brand. Your instructor needs a clear view of your shoulders, spine, and hips to correct your form, and anything loose can shift, ride up, or catch on the carriage while you're moving through it. Confirm your studio's footwear rule before you show up.
TL;DR:
Fitted, supportive tops are essential to allow instructors to properly monitor your shoulder, spine, and hip alignment during exercises.
High-waisted leggings or bike shorts with four-way stretch prevent slipping or riding up, ensuring stability throughout various reformer movements.
Grip socks provide traction and hygiene benefits, especially for beginners, whereas bare feet might offer better feedback but depend on studio policy.
Avoid clothing with zippers, snaps, or metallic details, as these can snag on springs or press into your back during specific exercises.
Test your outfit at home beforehand by hinging and rolling to ensure nothing slips or feels uncomfortable, helping you focus on the workout itself.
Table of Contents
What to Wear to Pilates Reformer: The Pack-and-Go Checklist
Here's the short version, so you can grab what you need and get out the door.
A fitted top (tank, tee, or sports bra with real support)
Fitted leggings or bike shorts that won't slide down when you move
Grip socks, or confirmation that your studio allows bare feet
A water bottle
A hair tie or two, even if your hair is already tied back
A couple of extras are worth tossing in your bag but aren't strictly required. A light, zipper-free layer helps if the studio runs cool before class starts, and a small towel comes in handy if you tend to sweat through a session. Before your first class, check the studio's beginner reformer guide or call ahead to confirm the footwear policy and whether grip socks are sold on-site. That one phone call saves you from showing up in the wrong socks.
Tops: What Support and Fit to Choose
A fitted tank, a snug tee, or a sports bra with real support works best on the reformer. You'll spend a good chunk of class lying flat, rolling through your spine, or holding positions upside down, and a loose shirt does not cooperate with any of that. It falls toward your face during a roll-up, bunches under your arms during side work, and hides exactly the alignment cues your instructor is trying to watch.
That last point matters more than most people realize. Instructors rely on seeing your ribcage, shoulder blades, and hip position to give useful corrections, and baggy clothing makes that job noticeably harder. If they can't see your alignment, they can't fix it.
For chest support, look for a built-in-bra top or a clasp-free sports bra. Standard bras with a back closure or an underwire can dig into your back during supine exercises, which gets uncomfortable fast when you're lying on a padded carriage for 45 minutes. If your studio feels cool before class begins, consider wearing a light, zip-free layer like a cropped sweater or soft wrap top that you can remove once you warm up. Avoid clothing with zippers that may cause discomfort during exercises.
Bottoms: Leggings, Bike Shorts, and How to Test Coverage
High-waisted leggings or bike shorts with four-way stretch are the standard, and for good reason. They move with your body through hip hinges, rolls, and deep stretches without sliding down or riding up, which is exactly what you need when you're constantly shifting between lying, kneeling, and standing on the reformer.
Length is a matter of preference. Full-length leggings and capri-length bike shorts both work fine, as long as the fabric has real stretch and a matte finish. Avoid loose joggers, wide-leg pants, or anything with a shiny, slippery surface. Loose fabric can catch on the reformer's springs, straps, or foot bar, and shiny leggings tend to slip against the vinyl carriage pad in a way that throws off your balance mid exercise.
Skip anything with a back zipper, snap, or heavy hardware too. It presses into your spine every time you lie down, and after the fifth rollback, you'll wish you'd left it in the drawer.
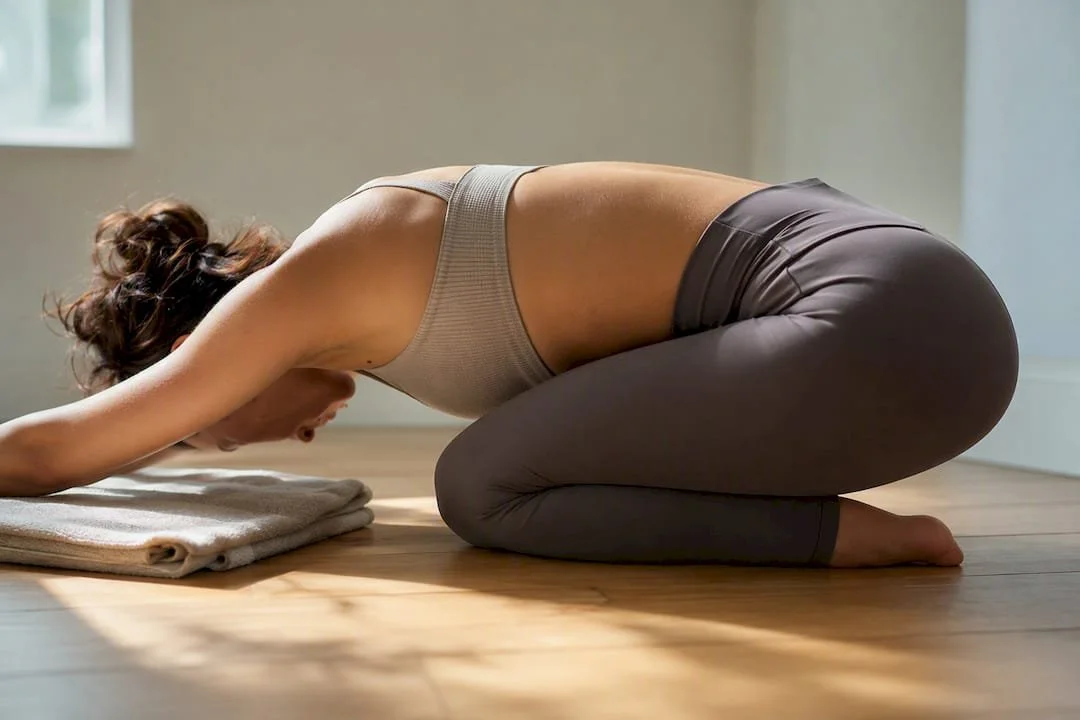
Here's a trick worth doing before you ever set foot in class: test your leggings at home. Hinge forward, roll down through your spine, and lie flat on the floor. If anything slips, rides up, or feels tight across the waistband, leave them for a different workout.
Grip Socks or Bare Feet: How to Decide
Most reformer studios land in one of two camps: they either require grip socks or they leave the choice up to you. Grip socks give you traction on the carriage and foot bar, which matters when your feet are pressing against a moving surface, and they solve the hygiene question that comes with a shared studio mat. For beginners especially, that extra grip can be the difference between a stable footbar push and a foot that slides at the worst moment.
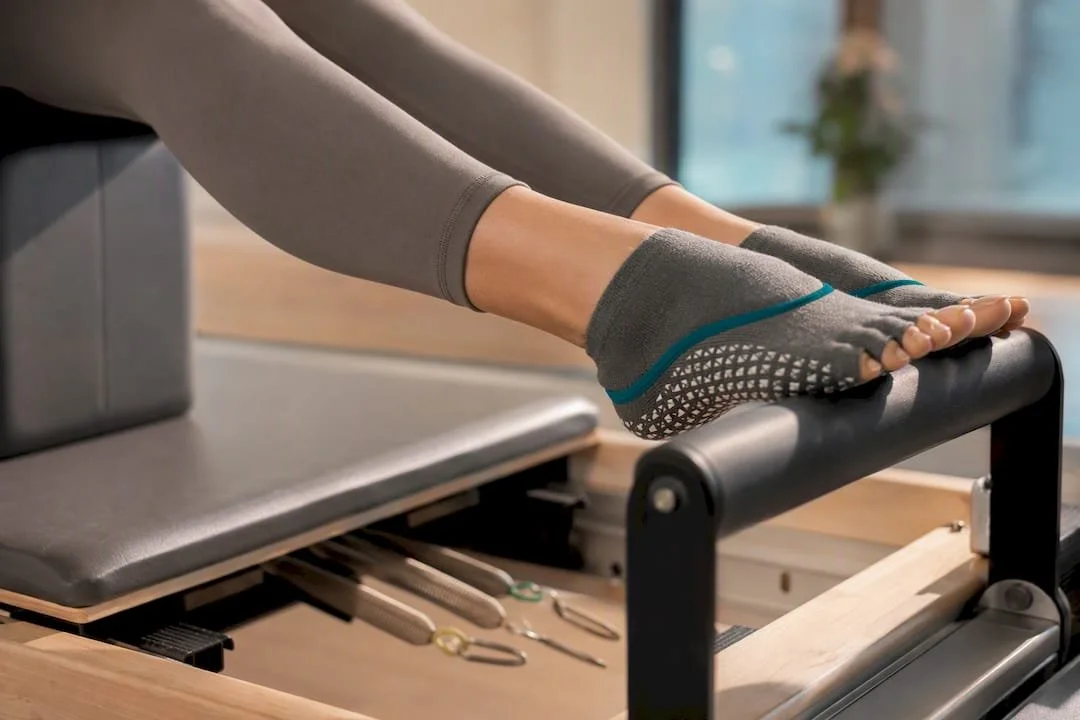
Bare feet have their own case. Some instructors actually prefer it, because bare skin gives you more direct feedback on foot position and pressure distribution, especially useful once you're comfortable with the machine. Whether that's an option at all comes down to studio policy, not personal preference.
What you should never wear: regular cotton socks or sneakers. Cotton socks slide on the carriage's vinyl surface with almost no traction, and sneakers just don't belong on reformer springs or a padded platform built for bare or gripped feet. If you show up without socks, don't panic. Many studios keep a small stock of grip socks for sale at the front desk for exactly this situation, but it's worth checking ahead so you're not stuck deciding on the spot.
Fabric and Fit: What Actually Prevents Slipping and Chafing
The material matters as much as the cut. Moisture-wicking, four-way-stretch blends with a matte finish are the gold standard for reformer class, because shiny, slick fabrics tend to slide against the carriage pad in a way that throws off small stabilizing movements you don't even notice you're making.
Flatlock seams are worth seeking out too. Bulky seams that feel fine standing up can dig into your skin uncomfortably once you're lying flat for a spine stretch or a set of leg circles. Minimal hardware, meaning no clasps, zippers, or metal grommets, keeps supine work comfortable instead of turning your lower back into a pressure point.
If you're taking a heated or infrared class, go lighter. A breathable, lightweight blend beats a heavier compression fabric when the room temperature is working against you before you've even started your warm up.
What to Avoid on the Reformer
A short list saves you a lot of trial and error. Skip these:
Zippers, snaps, or metal trim on leggings or shorts, which can snag on springs or press into your spine during supine exercises
Jewelry, especially rings, bracelets, and long necklaces, for the same snagging and pressure reasons
Heavy perfume or oiled skin, which can make grip socks or bare feet slide against the equipment
Baggy tops or wide-leg pants that hide your alignment and catch on the foot bar
Quick swaps fix all of it: seamless underwear instead of visible-line briefs, a zip-free pullover instead of a hoodie, and a slip-resistant, matte-finish fabric instead of anything glossy.
Hair, Accessories, and Small Comfort Items
Tie your hair back, full stop. A low ponytail or bun keeps it from sliding around against the headrest, which becomes genuinely distracting during headrest-supported exercises like the hundred. Bring a spare hair tie anyway, because the first one always seems to snap mid class.
A small towel and a water bottle round out the essentials. If the studio tends to run cold between exercises, thin socks for your hands or feet during rest periods can help, though most people don't need them once class gets moving. Skip jewelry entirely, and only bring gloves if your specific studio recommends them for grip.
Studio Checklist: Confirm the Rules Before You Show Up
A quick email or a look at the studio's website settles most of the guesswork. Ask about grip-sock requirements, how early to arrive, and whether socks are available for purchase if you forget yours.
For a first class, pack simply: a photo ID if you're a new client, a water bottle, grip socks or a plan to go barefoot, and enough time to arrive 10 to 15 minutes early. That buffer matters more on the reformer than in a typical group fitness class, since the instructor usually walks new students through machine setup before the session starts. If you want a fuller walkthrough of what a first class actually looks like, the beginner reformer guide covers what to expect once you're on the carriage, and the reformer mechanics breakdown is worth a skim if you're curious how the machine actually works before you try it.
Instructor Insight: What We Notice From the Studio Floor
The same wardrobe issues show up over and over. A loose top flips over someone's face during a roll-up. Shiny leggings slide half an inch on the carriage pad during a footwork series, just enough to throw off alignment. A bracelet catches on a spring during a hundred set. None of these are dramatic, but they all pull focus away from the actual exercise.
Clear sightlines are not a small thing for an instructor. Watching how your ribs move during breathing, how your hips track during a bridge, or whether one shoulder is riding higher than the other is how corrections actually happen in real time. Fitted, matte-finish clothing simply lets us do that job better. Community threads on the topic, including a long Reddit discussion among regular practitioners, land on the same consensus independently: fitted leggings, a snug top, and grip socks. That's not a coincidence. It's what actually works on the machine.
Style-Conscious Outfits That Still Work in Class
You don't have to choose between looking put together and moving safely. A monochrome set in a matte charcoal or navy reads polished under studio lighting and photographs well if you're heading straight to brunch after. A cropped rib-knit tank over high-waisted bike shorts in a muted sage or terracotta feels more considered than a plain black kit without sacrificing function. Neutral gray or black grip socks pull any outfit together instead of standing out as an afterthought.
One fashion roundup even featured reformer-ready pieces built around exactly this idea, matte finishes and tailored fits that photograph well. Just do the hinge-and-roll test in the fitting room before buying. Trend never beats fit.
Why the "Cute Outfit" Advice Online Misses the Point
Search "Pilates reformer attire" and you'll get a wall of shopping guides pushing color-coordinated sets and influencer-approved brands. Most of it skips the actual reason fit matters, which has nothing to do with aesthetics and everything to do with what your instructor can see and what your body does on a moving carriage.
Here's what gets underestimated: the cost of getting it wrong isn't just looking sloppy, it's losing corrections you're paying for. If your instructor can't see your shoulder blade position because your shirt has ridden up over your ears, that's a cue you don't get. If your leggings slip half an inch during footwork, you're compensating with muscles you didn't mean to engage, and you won't know it until your back is sore the next day. The gear matters because the class is built around real-time feedback, not because anyone cares what brand is on your waistband. Buy what fits, test it before class, and spend your actual money on the sessions instead of the outfit.
— Juiced
Try a Reformer Class at Amrita Yoga & Wellness
Group reformer classes suitable for beginners are offered in Philadelphia, so you don't have to figure out machine setup or footwear policy alone on your first visit. Instructors typically guide new students through the carriage, springs, and foot bar before the workout starts, and grip socks may be available if you show up without a pair.
If you're ready to put this checklist to use, book a class and bring the fitted top, leggings, and socks you just picked out. Curious what else the studio offers beyond the mat? Browse tarot readings as a low-key way to round out a wellness day, or head to the class schedule to find a reformer session that fits your week.
Sources
What to Wear to Pilates Reformer Class? — The Pilates Circuit
What to Wear to Pilates (2026): Complete Studio Outfit Guide | Pilates Collective Club
What to Wear to Pilates: Smart, Safe Outfit Guide — ThinkPilates
Recommended

One to Three Minute Studio Tested Openings for Yoga Teachers
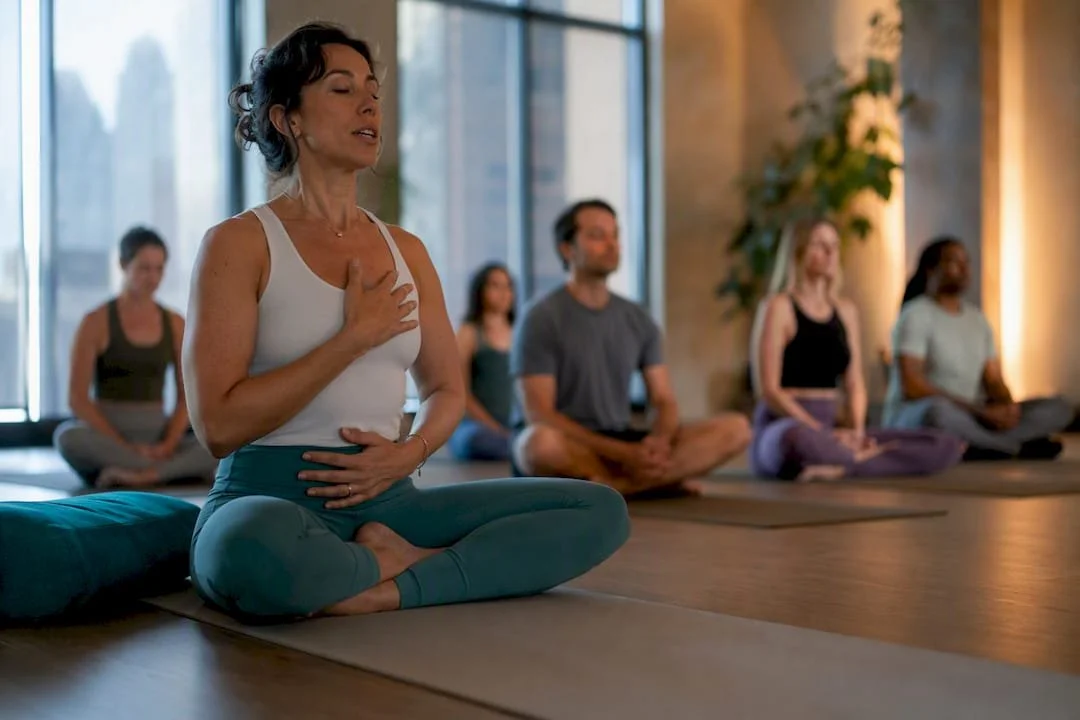
The single best opening for most classes is simple: arrive early enough to set the room, then start with a one to three minute welcome that pairs one breath cue with a short, plain-language intention. It works for vinyasa, restorative, and beginner rooms alike because it asks nothing complicated of the nervous system before movement begins. Longer scripts and elaborate framing almost always cost you more than they give back.
TL;DR:
Starting class with a one to three-minute breath cue and plain-language intention helps calm nervous systems and is suitable for all room types, from beginner to restorative.
The choice of opening depends on the class format and energy, with options like breath awareness, lying down or standing poses, and silence, each fitting different class goals.
Arriving 20 to 25 minutes early, setting the environment, rehearsing cues aloud, and having a clear backup plan enhance the effectiveness of the opening.
Teachers should focus on timing, simplicity, and trusting familiar scripts, as consistency builds confidence and regulatory effect more than a perfect wording.
Supporting tools such as scripted openings, props, and pre-class preparation help new teachers establish a calm, welcoming atmosphere quickly.
Table of Contents
Six Ways to Begin a Yoga Class, and When Each One Works
Every teacher eventually builds a short list of go-to openings. Which one you reach for should depend on the room's energy, the class format, and how much time you've actually got before the sequence needs to start moving.
Here are six reliable options, each suited to a different kind of room:
Sitting breath awareness. Have students find any comfortable seat, cross-legged or on a block, and spend 60 to 90 seconds noticing the breath without changing it. Works well for mixed-level classes where a few students need a moment to physically arrive. Modification: offer a chair or bolster for anyone whose knees complain about the floor.
Lie-down Savasana start. Students lie flat, palms up, and simply let gravity take over for two or three minutes before you say much of anything. Best for restorative or evening classes where the goal is to slow people down before you speed anything up. Modification: a rolled blanket under the knees relieves lower-back tension immediately.
Standing Tadasana or Mountain start. Everyone stands, feet grounded, arms relaxed, and you cue one deep breath with a slight lift through the chest. This suits energizing morning classes or any format where you want the room upright and alert from minute one. Modification: hands can rest on the hips instead of at the sides for anyone with shoulder tightness.
Child's Pose or kneeling start. A grounding, accessible shape that works even for students arriving stressed or rushed from traffic. It signals safety fast. Modification: widen the knees and stack forearms for anyone whose hips are tight.
Breathwork-only opening. Skip the pose entirely and lead two to five minutes of a simple technique, such as extended exhale breathing, before any physical movement starts. This fits workshops and breath-focused sessions where the whole point is nervous-system regulation, not stretching.
Silence or guided arrival. Say almost nothing. Let the room settle on its own for 30 to 60 seconds, then speak. It sounds risky the first few times you try it, but a coherent case exists that silence and a single grounding breath calm a room more effectively than a long rehearsed script, because the teacher's own settled state becomes the cue.
None of these require props beyond a mat, though blocks and bolsters make the seated and lying options accessible to more bodies. Pick one based on what the room needs that day, not on habit alone.
Copy-Ready Opening Scripts You Can Use Tonight
Scripts save you from freezing in front of a room, and they give you something concrete to adapt once you know your own voice. These three are built for different time budgets and can flex for beginner, mixed-level, or restorative rooms with small word swaps.
One-minute script. "Welcome, everyone. Find a comfortable seat or lie down, whatever your body wants right now. [Pause three seconds.] Take one breath in through the nose, and let it go slow. That's it. We'll ease into movement from here." This works when you're short on time or the room is already calm from a busy studio hallway.
Three-minute script. "Hi, I'm glad you're here. Quick logistics: mats face this direction, props are along the wall if you want them, and anything I offer today is optional. [Pause.] Let's settle in. Find your seat, close your eyes if that feels good, or keep a soft gaze down. [Guide two slow breaths, four counts in, six counts out.] Now let's take one gentle movement together, a slow roll through the spine, just to say hello to the body before we build." The optional line matters most in beginner or trauma-informed rooms, where permission to opt out lowers the stakes of the whole hour.
Five-minute script. "Welcome. Before we move, let's take a moment to arrive. [Guide 90 seconds of breath, in for four, out for six.] Today's theme, if it's useful to you, is steadiness. Not perfection, just steadiness. [Pause five seconds.] Let's bring that into the body with a gentle seated twist, first to the right. [Cue movement.] From here we'll build into our sequence." For restorative classes, swap the seated twist for a longer stillness and add a short guided body scan instead of movement.
Bracket any line you might cut on a rushed day, and keep an inclusive backup phrase ready, something like "modify anything, skip anything, this is your practice," so you're never caught explaining a modification mid-cue.
Studio-Backed Preparation Checklist Before Students Arrive
What happens before a single student walks in usually decides how the opening lands. Teachers who arrive 20 to 25 minutes early give themselves enough runway to set the room, adjust the lighting, and settle their own nerves before performing calm for a room full of strangers.
The checklist that actually matters looks like this:
Arrive 20 to 25 minutes before start time. Anything less and you're setting up while students are already unrolling mats, which reads as disorganized even if you're not.
Dim the lights if your studio allows it, and set the temperature slightly warmer than feels comfortable to you standing still, inspired by the techniques in Doors of Love and Light: Energize your space using love and light. Students in stillness feel cold faster than a moving teacher.
Lay out props before the door opens: blocks, bolsters, and blankets stacked where students can grab them without asking.
Rehearse your sequence out loud, even just once, standing in the empty room. Saying cues aloud catches the awkward phrasing that looks fine on paper but trips your tongue in real time.
Keep a small notecard at the front of your mat with your opening line and your sequence's key transitions. Nobody minds a teacher who glances at notes.
Test your playlist and speaker connection before anyone arrives, and set the tempo to match the class energy you're building toward, not the energy in the room right now.
If a new student has emailed ahead, greet them by name at the door. It costs you nothing and it changes their entire experience of walking into a room of strangers.
Pro Tip: Keep a one-line fallback ready for the days you're running behind: "We're going to skip the long version today and go straight into movement, breath first." Students rarely notice a shortened opening; they do notice a flustered teacher trying to cram everything in anyway.
Adjusting the Opening for Class Style and Length
A vinyasa class at 6 a.m. and a restorative class at 8 p.m. need different front doors. Matching the opening to the format, not just to your personal favorite, is what makes a sequence feel intentional instead of copy-pasted.
For a vinyasa or power class, a standing Tadasana opening with one strong breath cue builds the energy you're about to ask for. Budget 60 to 90 seconds; anything longer stalls momentum the class came for.
For a restorative or yin class, the lying Savasana or seated breath opening fits better, and you can afford two to four minutes since the whole session runs slower. Rushing a restorative opening defeats the format's purpose before it starts.
For a beginner class, Child's Pose or a simple seated check-in works best because it's physically accessible and doesn't ask for balance or flexibility before trust has been built. Spend up to three minutes here explaining, briefly, what to expect, since a short who/what/where/why/how outline in under a minute prevents mid-class confusion later. A related beginner-friendly sequence guide can help you plan the modifications that follow.
For a short drop-in class of 45 minutes, keep the opening under 90 seconds no matter the style. You simply don't have room for a five-minute arrival before the sequence needs to start.
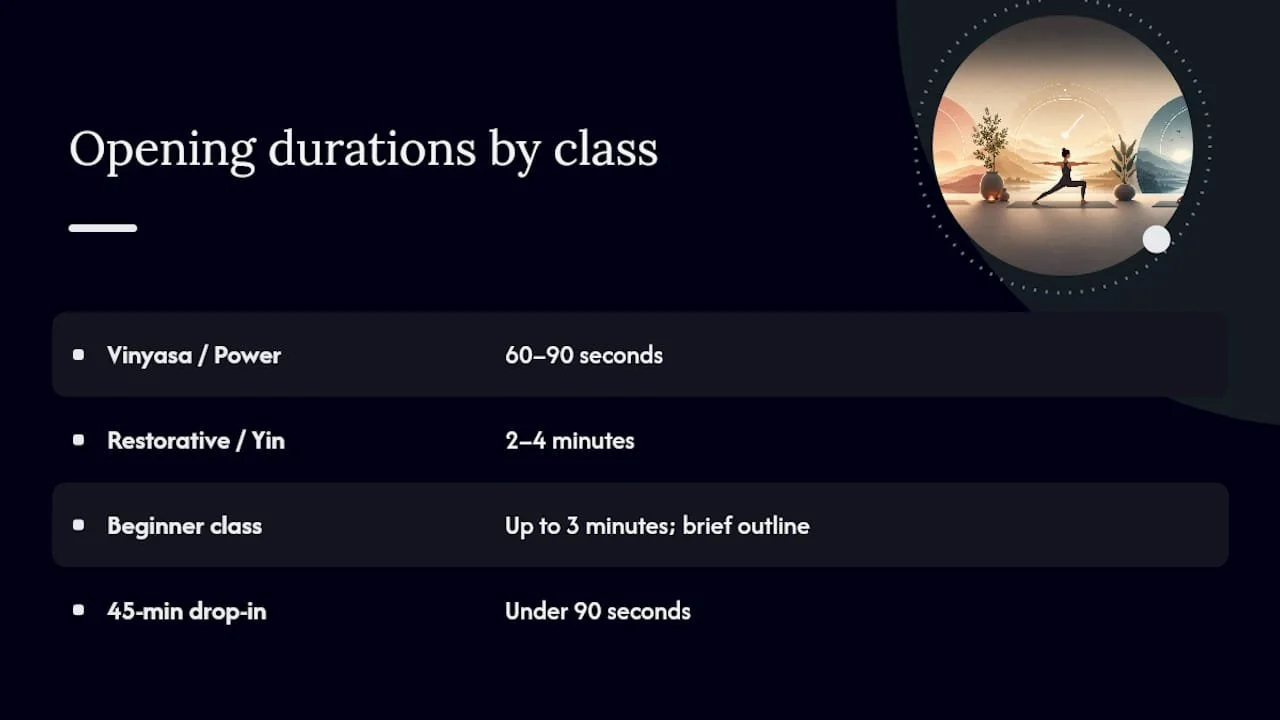
For late arrivals or noisy rooms, don't restart your opening. Fold latecomers in with a quiet gesture toward open space and keep going. For mixed-ability rooms, offer the modification once, briefly, rather than narrating every option out loud.
Cueing, Voice, and the Language That Actually Lands
The words matter less than most new teachers think. The order and pacing matter more.
Cue in this sequence: breath first, then gross alignment, then refinement. Telling a room to "breathe, feel your feet on the ground, then notice if your shoulders are near your ears" respects how attention actually works, one layer at a time, instead of dumping five instructions into a single sentence.
Choice-based wording changes how safe a room feels. Inclusive teaching guidance recommends language that hands students the option rather than the order: say "you might" or "if it feels right" instead of commanding a shape. A few swaps worth memorizing:
Instead of "close your eyes," try "close your eyes, or soften your gaze toward the floor."
Instead of "sit up straight," try "find a seat that feels steady for you."
Instead of "everyone lie down," try "come to lying down, or stay seated if that serves you better."
Pause length matters more than most teachers realize. A three-second pause after a cue feels like plenty from the front of the room and barely registers from the back. Count to five in your head before you speak again; it will feel slow to you and just right to everyone else.
On voice: support your cues from the diaphragm rather than the throat, and slow your speaking pace by roughly a fifth compared to normal conversation. A teacher who treats silence as an active tool rather than dead air tends to calm a room faster than one filling every second with words. That single habit, pairing your own settled breath with a deliberate pause before speaking, does more to regulate a room's energy than any clever phrasing you could write in advance.
Common Opening Mistakes and Quick Fixes
Most opening problems come from adding, not subtracting. Here's what to cut and what to do instead.
Apologizing for anything. "Sorry, I'm a little behind today" only tells students to worry. Fix: skip the apology and start the breath cue anyway.
Over-explaining the sequence ahead. A long preview of everything coming in the next hour delays the part students actually came for. Fix: give one sentence of direction, then move.
Info overload in the first minute. Bundling logistics, theme, breathing instructions, and a joke all before the first pose leaves nothing memorable. Fix: pick one thread, either theme or logistics, not both.
Losing your place mid-cue. If your sequence slips your mind, don't scramble. Fix: drop into a simple pose, Child's Pose works, reset your own breath audibly, and pick back up from there.
Long asides for mixed-experience rooms. Explaining every modification for every body type out loud turns three minutes into eight. Fix: state the modification once, briefly, and trust students to take what they need.
How We Open Class at Amrita Yoga & Wellness
Most instructors at a yoga studio start the same practical way: arrive early enough to set the room without rushing, then open with a short welcome, one breath cue, and a plain-spoken line about what the hour holds. We've watched newer teachers gain real confidence once they stop trying to write the perfect opening and instead lean on a short, repeatable structure. Students settle faster, questions drop, and the room trusts the pace within the first minute. If you're building your own version, our guide on running an aerial yoga class from setup to close walks through a similar pre-class rhythm you can borrow from.
What New Teachers Get Wrong About the Opening
Most advice on beginning a class treats the opening like a performance moment, something to script perfectly and deliver flawlessly. That framing is backwards. The teachers who open a room well aren't the ones with the smoothest monologue; they're the ones who arrived early enough to not be rushing, and who trust a short breath cue over a clever line.
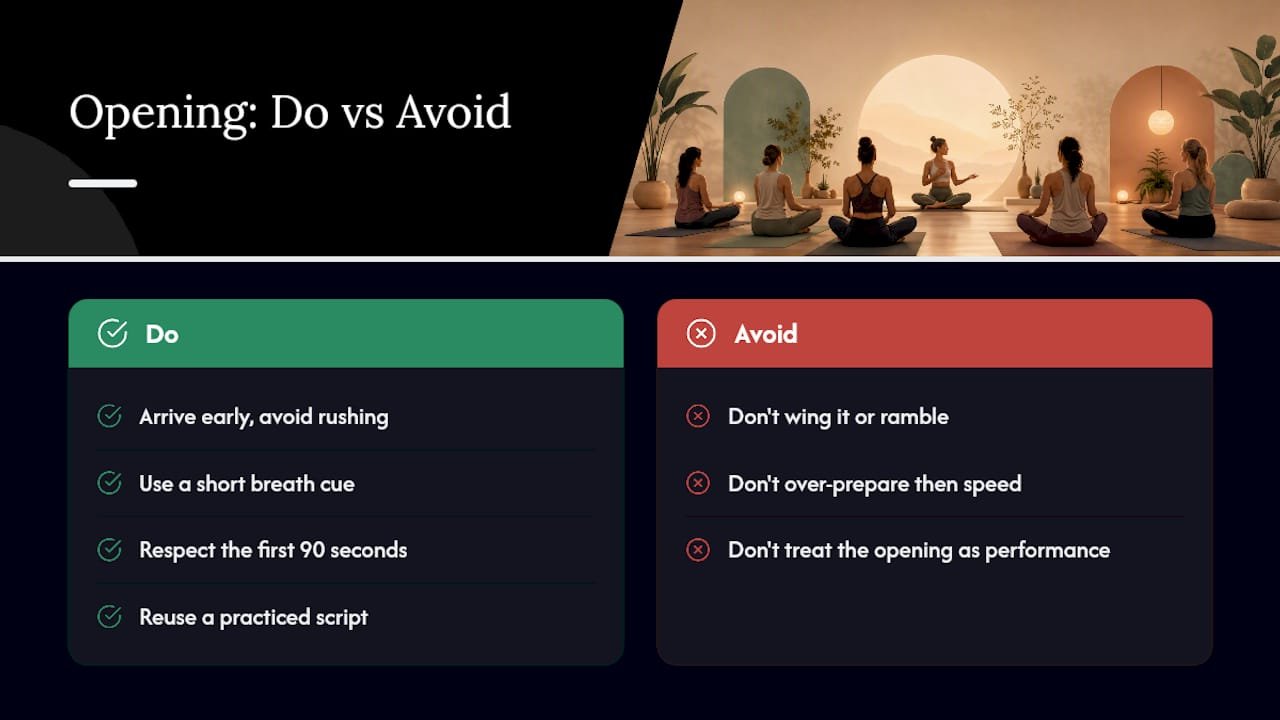
The overlooked piece is timing discipline. New teachers tend to either under-prepare the opening, winging it and rambling, or over-prepare it, writing a paragraph they then recite too fast because nerves speed everyone up. Both fail for the same reason: neither respects that the first ninety seconds exist to regulate a nervous system, not to entertain. A room doesn't need your best writing. It needs your steadiest breath.
If there's one piece of conventional advice worth pushing back on, it's the idea that every class needs a fresh, original opening. Reusing a script isn't lazy. It's the same reason pilots use checklists: repetition under low stakes builds reliability for the moments that matter more, further into the sequence, where your attention should be on the room, not on remembering your own words.
— Juiced
Amrita Yoga & Wellness: Support for Teachers Building Their Craft
Trainee teachers seeking more than scripts on a page can look for mentoring conversations and practical workshops built around front-of-room skills, things that are hard to learn from a manual alone.
Beyond class openings, our studio also hosts sessions like tarot readings for teachers looking to build out a broader wellness practice or add a reflective ritual to their own routine. If that kind of offering fits where you're headed next, you can check upcoming tarot reading sessions and see what's currently scheduled at the studio.
Sources
How to Teach Your First Yoga Class: The Complete New Teacher's Guide | FLOW Yoga Sequence Builder
How to start your yoga class with confidence | Sage Rountree
The most powerful cue in yoga might be silence — Yoga Teacher Journey
Recommended

Start in 5 Minutes: Easy Yoga Routine with 3, 5 and 10 Minute Variants
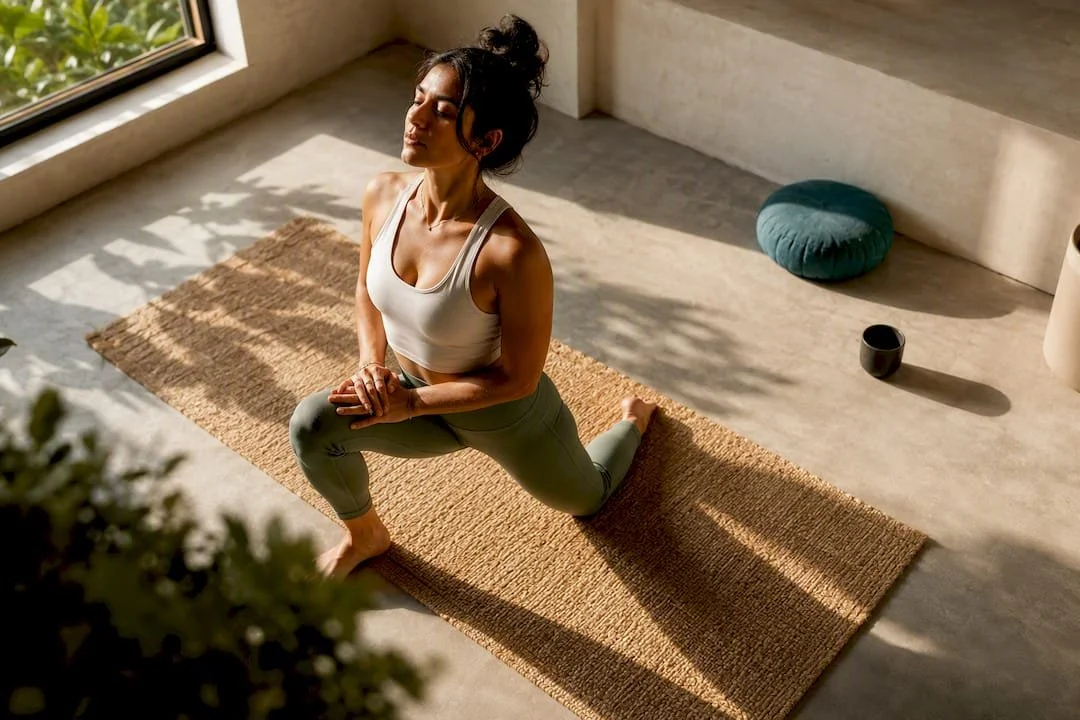
The fastest way into a daily practice is a five-pose, five-minute flow: Mountain Pose, Cat-Cow, Downward Dog, Child's Pose, and a seated forward fold. It needs nothing but floor space, works whether you're stiff from a desk chair or just woke up, and stretches to ten minutes or shrinks to three depending on your day.
TL;DR:
A five-minute yoga flow can be scaled to fit any schedule or energy level, with variations for 3, 5, or 10 minutes that target key areas.
Modifications like kneeling versions of poses and aid tools such as yoga blocks can help prevent strain without compromising the benefits.
Consistency, even with brief daily sessions, is more effective for building flexibility and reducing stress than sporadic, longer practices.
Beginners should avoid forcing deeper stretches and prioritize breathing and modifications to prevent pain and injury during poses.
A short routine can serve as a gateway to more advanced classes and longer practices once the habit and confidence are established.
Table of Contents
What Is an Easy Yoga Routine, and Why Start With One?
An easy yoga routine is a short, low-intensity sequence built from beginner-friendly poses. No handstands, no pretzel-level bending. Just a handful of shapes that loosen your spine, hips, and shoulders while slowing your breathing down.
The term gets thrown around loosely online, but the actual practice behind it has a name: a "grounding" or "foundational" sequence, the kind yoga teachers use to open nearly every class regardless of style. That's useful to know, because it means the five-pose flow below isn't a shortcut version of "real" yoga. It's the same architecture every Vinyasa, Hatha, or restorative class is built on, just condensed.
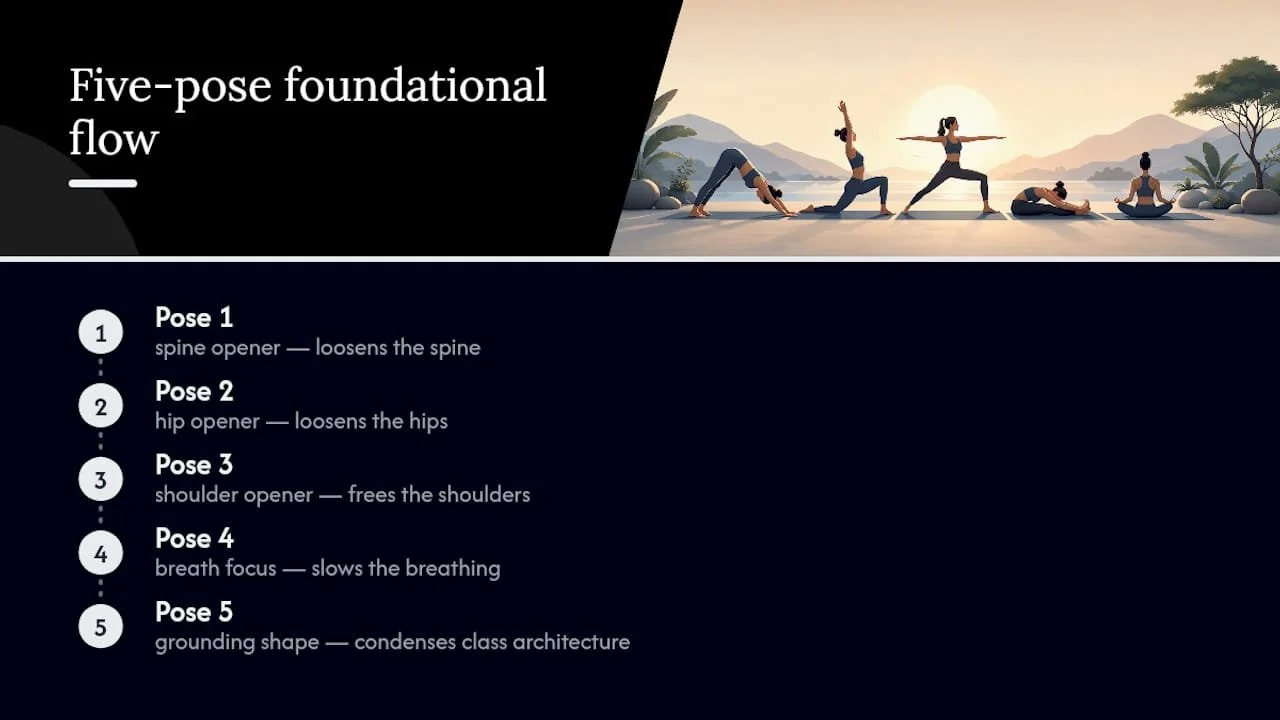
Step-By-Step Easy Yoga Routine (5 to 10 Minutes)
Run through this in order. Each pose gets two or three breaths at minimum; extend any of them if it feels good.
Mountain Pose (30 to 45 seconds). Stand with feet hip-width apart, weight even across both heels. Roll your shoulders back and down. Inhale to lengthen through the crown of your head, exhale to soften your jaw. This is your reset button, not a throwaway warm-up.
Cat-Cow (6 to 8 rounds). Come to hands and knees. Inhale, drop your belly, lift your chest and tailbone (Cow). Exhale, round your spine toward the ceiling, tuck your chin (Cat). Move slow enough that breath and motion land together.
Downward-Facing Dog (5 to 8 breaths). From hands and knees, lift your hips up and back, forming an inverted V. Bend your knees generously if your hamstrings are tight. You should feel a stretch through the backs of your legs, not a burn in your shoulders.
Low Lunge (5 breaths per side). Step your right foot forward between your hands, lower the back knee down. Inhale to lift your chest, exhale to sink your hips forward slightly. Switch sides.
Standing Forward Fold to rise (3 breaths). Feet hip-width, fold forward with soft knees, letting your head hang heavy. Inhale, roll up one vertebra at a time to standing.
Child's Pose (30 to 60 seconds). Kneel, big toes touching, knees wide or together, and fold your torso down between your thighs, arms stretched forward or resting alongside your body. Breathe into your lower back.
Seated Forward Fold (30 to 60 seconds). Sit with legs extended, hinge forward from your hips, hands resting wherever they land. This is your cooldown, not a flexibility test.
Turning this into 3, 5, or 10 minutes: For a 3-minute version, keep just Cat-Cow, Child's Pose, and the seated fold. For the full 5-minute flow, run the sequence above once through. For 10 minutes, repeat the standing sequence (steps 1 through 5) twice before moving into Child's Pose and the seated fold, and this doubled structure mirrors how longer beginner flows are typically built and repeated.
Why Each Pose Made the List (And How to Modify It)
Every pose in this flow earns its spot by targeting a specific area beginners tend to hold tension.
Mountain Pose: goal is postural awareness, not stretch. Alignment cue: stack ears over shoulders and hips. Modification: practice seated in a chair with feet flat, spine tall.
Cat-Cow: goal is spinal mobility. Cue: lead the movement with your breath, not your muscles. Modification: do it seated in a chair, hands on knees, arching and rounding your upper back.
Downward Dog: goal is a full-body stretch through the shoulders, spine, and hamstrings. Cue: press firmly through your palms so weight doesn't collapse into your wrists. Modification: bend both knees deeply, or skip it and use a wall, hands pressed flat while you fold forward at the hips.
Low Lunge: goal is hip flexor release. Cue: keep your front knee tracking over your ankle, not past your toes. Modification: place a folded blanket under the back knee, and keep your hips squared and neutral to avoid compensating through your lower back.
Child's Pose: goal is rest and gentle hip opening. Cue: let your forehead relax toward the floor or a block. Modification: widen your knees if your belly needs room, or sit on a pillow for height.
Seated Forward Fold: goal is hamstring release without strain. Cue: bend your knees as much as needed to keep your back straight. Modification: sit in a chair and fold forward over your thighs instead.
Pro Tip: Keep a yoga block or a thick book within reach. Sliding it under your hand in Low Lunge or under your seat bones during the forward fold takes real strain off your joints without changing what the pose is doing for you.
How Long Should Your Routine Be Today?
Energy levels shift day to day, and your routine should shift with them. Here's how to match duration to how you're actually feeling:
3-minute reset (low energy, seated or in bed): Cat-Cow for 8 rounds, followed by Child's Pose and a seated forward fold. No standing required.
5-minute morning flow: the full seven-pose sequence above, run once, moving briskly between poses.
10-minute fuller practice: repeat the standing portion twice, adding a slow Chair Pose hold before Low Lunge for extra strength work, and this longer version follows the same repeatable structure that 10-minute beginner sequences are typically built around.
No-standing variant (travel, injury, limited mobility): Cat-Cow, Child's Pose, seated forward fold, and a seated spinal twist, all done on a mat, bed, or even a chair.
Making Five Minutes a Daily Habit
Pick a fixed trigger. Right after you brush your teeth, right before coffee, right after you close your laptop. The specific time matters less than the consistency of pairing it with something you already do without thinking.
Start with a genuinely tiny goal, 3 minutes, not 20. You're building a habit, not training for a retreat.
Add a minute or two per week once the short version feels automatic, rather than jumping straight to a longer flow.
Track it somewhere visual, a wall calendar, a habit app, a checkmark on a sticky note. Seeing a streak is its own motivation.
Tell a friend or join a class occasionally. Social accountability catches the days willpower alone won't.
Consistency beats duration here. Practices as short as 3 to 10 minutes a day are enough to build flexibility and take the edge off daily stress, and doing five minutes every day outperforms one long session on a Sunday you'll probably skip anyway.
Common Mistakes That Turn Easy Yoga Into Hard Yoga
Sharp, stabbing pain means stop immediately. A dull stretch or mild muscle burn is normal and expected. That distinction is the single most important thing to know before you roll out a mat.
Beyond pain, a few habits quietly undermine beginners:
Holding your breath during effortful poses like Low Lunge, which spikes tension instead of releasing it.
Letting your lower back sag in Cow Pose or Downward Dog instead of engaging your core slightly.
Forcing a deeper stretch than your body offers that day, especially in forward folds.
Skipping modifications out of pride, then paying for it in sore knees or wrists the next morning.
Pro Tip: If you have a knee, hip, or back condition, or you're pregnant, run this routine by a doctor or physical therapist first. It's a gentle sequence, but "gentle" and "appropriate for every body" aren't the same thing.
How Amrita Yoga & Wellness Supports Beginners Past the Basics
A five-minute home flow is a great entry point, but it's not the ceiling. Beginner-friendly classes are available in Philadelphia across styles from restorative to hot yoga, plus pilates and tai chi, for anyone ready to build on what they've started at home.
Browse the beginner yoga routine breakdowns on the studio blog for more relaxation-focused sequences.
Read 7 essential poses for beginners for deeper cueing on the shapes covered above.
Check the daily yoga practice tag for habit-building posts and upcoming beginner classes.
If balance work in longer flows feels shaky, safe balance progressions for adapting standing poses are worth reviewing before adding poses like Tree or Warrior III.
A Short Word on Keeping This Approachable
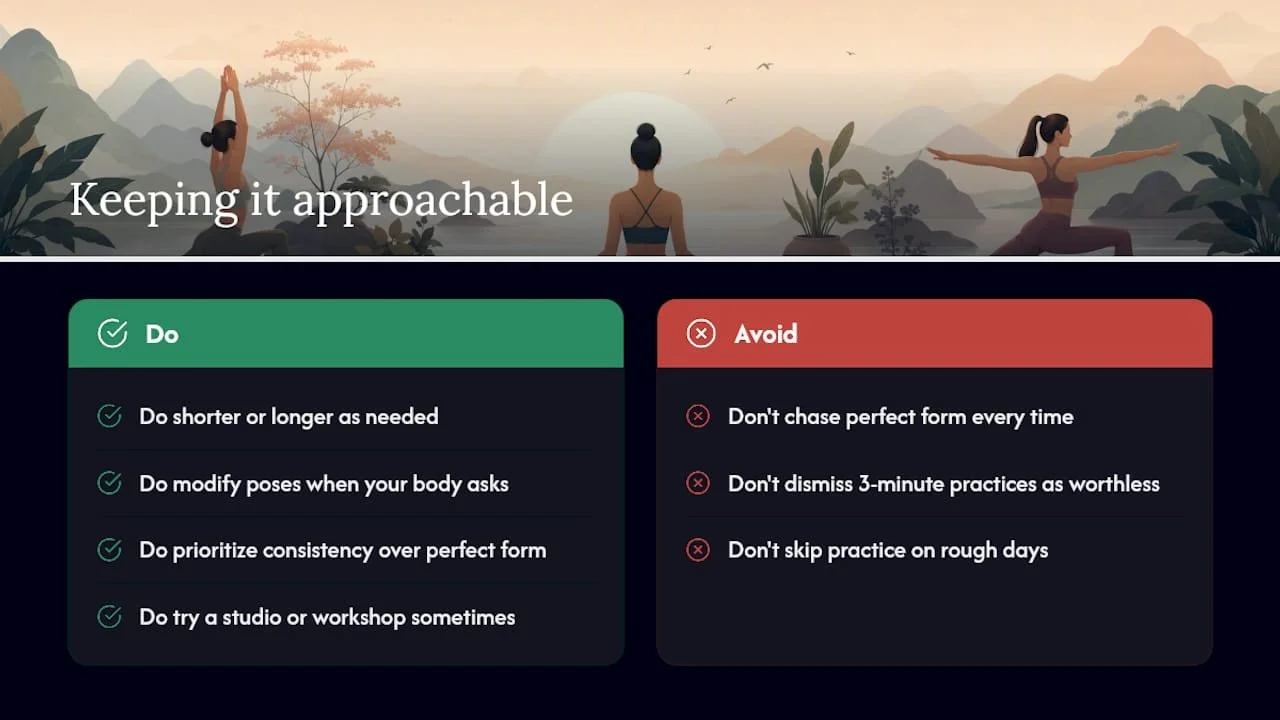
Nobody's grading your Downward Dog. The whole point of an easy routine is that it flexes with you, shorter on rough days, longer when you've got the time, modified whenever your body asks for it. Consistency wins over perfect form every single time.
Some mornings you'll do the full ten minutes. Other mornings, three minutes of Cat-Cow before coffee is the win. Both count. If you're craving structure or community beyond your living room, a studio like Amritayogawellness or a curious flip through its tarot readings and workshop offerings might be the next small step worth taking.
— Juiced
Sources
Recommended

Start Practicing Yoga Safely: 10–20 Minute Routines for Beginners
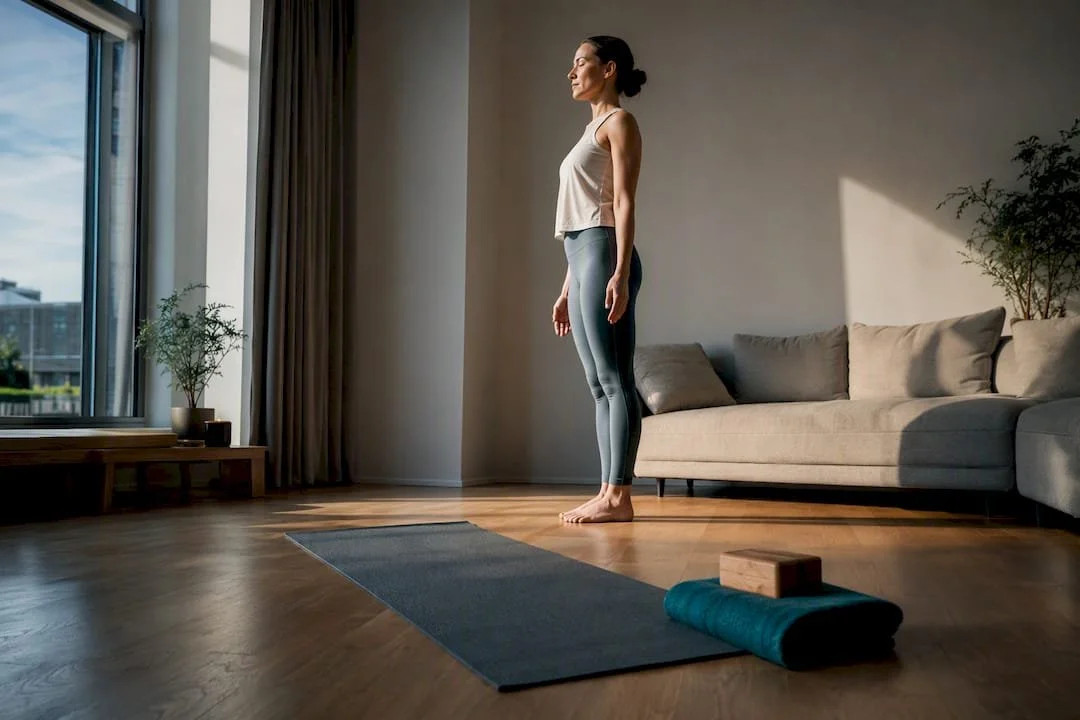
Start with one 10 to 20 minute session this week: pick a beginner-friendly style like Hatha or gentle flow, follow a short guided routine, and pay more attention to your breath and joint alignment than how deep you stretch. Move within your own comfort range, stop the moment you feel joint pain rather than muscle stretch, and don't worry about how long you practice. Showing up twice this week beats one perfect hour.
TL;DR:
Starting with two 10-minute sessions focusing on breath and alignment helps prevent injury and build confidence before progressing to longer practice.
Home practice is accessible and cost-effective but benefits from occasional instructor guidance to correct alignment and prevent developing bad habits.
Essential poses like mountain, downward dog, and warrior II provide foundational shapes that teach proper body mechanics and prevent strain.
Modifications such as bending knees or using household props make poses accessible and safe for beginners with limited flexibility or balance.
Consistency of short, manageable practice sessions over four weeks is more effective for building skill and confidence than infrequent, lengthy sessions.
Table of Contents
How to start yoga: home practice, studio class, or virtual sessions
Breathing and alignment basics to learn before anything else
How to start yoga: home practice, studio class, or virtual sessions
The right starting format depends less on discipline and more on what kind of feedback you need. Home practice wins on flexibility and cost. You can roll out a mat during a lunch break with no drive, no schedule, no audience. But nobody is watching whether your knee caves inward in warrior II.
Studio classes solve that blind spot. A teacher walking the room catches misalignment before it becomes a habit, which matters most in your first few weeks. Virtual and live-streamed classes sit in the middle: you get instruction and pacing, but no hands-on correction.
Here's a quick way to decide:
Recovering from injury or unsure about a health condition? Book a private session or beginner studio class first.
Comfortable moving your body and mainly want convenience? Home practice with a recorded beginner routine works fine.
Want structure without cost? Try a hybrid: one studio or virtual class weekly, plus short home sessions.
Looking for something gentle? Restorative yoga or chair yoga beats a fast-paced flow for a true first exposure.
Hatha and slow flow classes are usually the gentlest entry points because poses are held longer, giving you time to think through alignment instead of chasing a rhythm you don't know yet.
Setting up a home space and the gear you actually need
You don't need a home studio. You need about six feet of clear floor, ideally near a wall for balance poses, in a spot quiet enough that you're not stepping around a dog or a kid's toy mid pose.
Clear the space. Six feet by four feet is plenty. Push furniture back so you're not catching a table corner in downward dog.
Get a mat or a thick towel. A yoga mat is worth the $20 to $40 investment eventually, but a folded towel on carpet works for your first sessions.
Add water within reach. You'll want it, especially in warmer rooms or hot yoga styles.
Grab household substitutes for props. A hardcover book or two stacked works as a block; a bathrobe belt or necktie substitutes for a strap; a folded blanket cushions your knees in kneeling poses.
Wear clothes you can move in. Nothing restrictive at the hips or shoulders.
Keep gear in one bin or corner. Removing the setup step is what actually makes you practice on a busy Tuesday.
A dedicated, clutter-free space with minimal equipment is genuinely enough to start. Anything more is optional polish, not a requirement.
Breathing and alignment basics to learn before anything else
Most new practitioners fixate on how a pose looks and ignore the two things that actually make yoga work: breath and alignment. Get these right first and everything else improves faster.
Breathe through your nose in a slow, steady rhythm, and pair breath with movement: inhale as you lift or open the chest, exhale as you fold or release. This pairing is standard across beginner guidance because it naturally slows you down and keeps you from rushing transitions.
Alignment basics matter just as much:
Keep your spine neutral rather than arched or collapsed.
Stack joints directly over each other (wrists under shoulders, knees over ankles).
Use a soft micro-bend in the knees and elbows instead of locking them straight.
Check yourself in a mirror or a phone video occasionally; it's the fastest way to catch a habit you can't feel from the inside.
Instructor-led alignment work early in your practice reduces injury risk and makes your practice sustainable long term, which is exactly why a class or two in your first month pays off even if you mostly practice at home.
Pro Tip: If a pose creates a pulling sensation along a muscle, that's a stretch. If it creates a sharp or pinching feeling in a joint, that's pain. Back off immediately when it's the second one.
Core beginner poses to learn first
These eight poses show up in almost every beginner class for a reason: they teach the fundamental shapes your body will use in nearly everything else. Yoga Journal and clinical guides both point to this same foundational set.
Mountain pose. Stand tall, feet hip-width apart, weight even across both feet. Mistake to avoid: locking the knees. Modification: stand with your back against a wall to feel a neutral spine.
Cat-cow. On hands and knees, arch and round your spine with the breath. Mistake: moving too fast. Modification: place a folded blanket under the knees.
Downward dog. Hips lift up and back, hands shoulder-width apart. Mistake: flat back with straight legs forcing a rounded spine. Modification: bend the knees generously.
Plank with knee option. Shoulders over wrists, body in one line. Modification: drop to the knees to reduce load.
Warrior II. Front knee bent over the ankle, arms extended. Mistake: letting the front knee drift past the toes. Modification: shorten your stance.
Tree pose. Foot rests on the standing leg, hands at heart or overhead. Modification: keep the toes of the lifted foot on the floor for balance.
Forward fold. Hinge from the hips, not the waist. Modification: bend the knees generously or hold blocks under the hands.
Child's pose. Hips back toward heels, arms extended forward. This is your rest pose anytime you need one.
Hold each pose for 3 to 5 breaths rather than watching a clock. Save backbends and any inversion (headstand, shoulder stand) for guided instruction. Attempting those alone in week one is where most avoidable injuries happen.
Simple routines to follow right now
You don't need to design a sequence from scratch. Here's a 10-minute flow you can do today:
1 minute: Seated, eyes closed, slow breathing.
2 minutes: Cat-cow, 8 to 10 rounds.
4 minutes: Mountain pose into forward fold, downward dog, plank with knees down, repeat twice.
2 minutes: Child's pose.
1 minute: Lying flat, savasana.
For a 20 to 25 minute session, add warrior II on both sides and tree pose, and hold each standing pose slightly longer as your comfort grows. This is a natural progression once the 10-minute version feels easy.
A typical beginner studio class follows a nearly identical arc at a larger scale: centering and breathwork, a warm-up, a standing sequence, floor work, cool-down, and savasana, usually across 60 minutes. Knowing that structure in advance means nothing in your first class will feel unpredictable.
Pressed for time? Cut the routine down to just the standing sequence and savasana. A short session done consistently beats a long one done rarely.
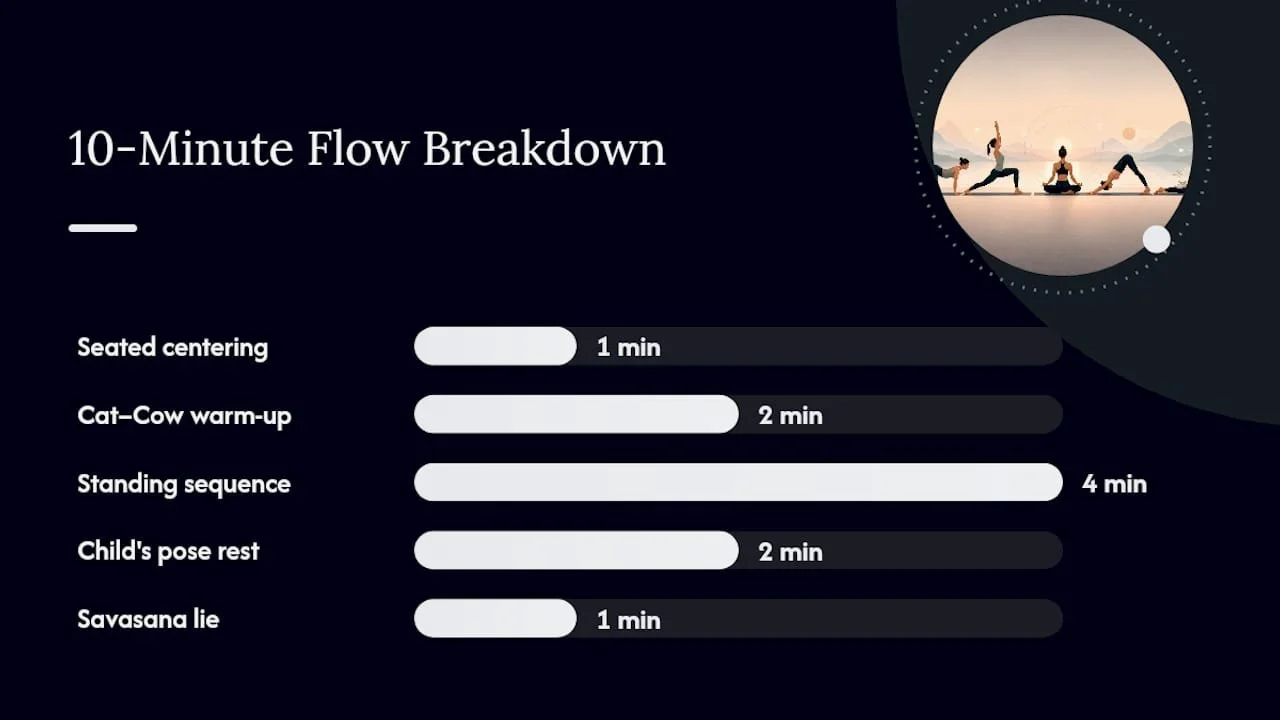
Safety rules and when to bring in a professional
Certain sensations mean stop immediately, not push through:
Sharp or pinching joint pain, especially in the knees, lower back, or wrists.
Dizziness or lightheadedness.
Unusual shortness of breath outside of normal exertion.
Common, safe modifications solve most beginner discomfort: a chair for balance poses, blocks to bring the floor closer to your hands, or knees down instead of a full plank.
If you're managing arthritis, recovering from surgery, or have another chronic condition, talk with a healthcare professional before starting so your routine fits your actual limitations, not a generic one.
Pro Tip: When you're unsure whether you can handle a pose as shown, take the easier modification. You can always progress next week; you can't undo a strained joint.
Choosing your first class and studio etiquette
Look for classes explicitly labeled Beginner, Foundations, or Gentle. Check the class length and description before booking. A 45-minute Gentle Hatha class and a 75-minute Vinyasa flow are not interchangeable first experiences.
Arrive 10 minutes early and tell the teacher you're new; this lets them watch your alignment and offer modifications during class.
Mention any injuries or physical limitations before the class starts, not mid-pose.
Studios typically provide mats and blocks; bring your own water bottle and a small towel.
If you have a specific concern, like an old injury, a private session gets you individual attention a group class can't.
A 4-week starter plan that actually sticks
Consistency beats intensity for beginners. Two to three sessions of 15 to 30 minutes per week builds real skill without burning you out before month two.
Week 1: Two 10-minute home sessions, focused purely on breath and the eight foundational poses.
Week 2: Three sessions, adding warrior II and tree pose. Consider one studio or virtual class.
Week 3: Extend two sessions to 20 minutes; keep one at 10 for busy days.
Week 4: Three sessions at 20 to 25 minutes; notice which poses feel easier than week one.
Anchor practice to an existing habit, like right after brushing your teeth, and lay out your mat and clothes the night before so there's no decision to make in the morning.
Many beginners notice a calming effect after the very first session, better sleep within a couple of weeks, and real flexibility gains by weeks four to eight of consistent practice. Soreness in week one is normal; sharp pain is not.
Who's behind this guide, and where to practice next
This guide comes from Juiced, a contributor covering practical, safety-first guidance for Amrita Yoga & Wellness. The recommendations here draw on clinical safety sources and established beginner curricula, not guesswork, because a first yoga experience should build confidence rather than risk an injury that ends it early.
Amrita Yoga & Wellness runs beginner classes designed around exactly this kind of gradual, alignment-focused start, including a free beginner class for anyone trying yoga for the first time. If you'd rather build confidence at home first, the studio's blog covers confidence-building tips for new practitioners and a ready-made relaxation routine you can follow tonight.
If breathwork and stillness practices interest you beyond the mat, Amrita Yoga & Wellness also hosts wellness workshops, including tarot reading sessions, for readers who want to build a broader self-care routine alongside their physical practice.
A teacher's honest take on your first month
Most beginners I've seen come into a first class convinced they're too stiff, too uncoordinated, or too far behind to belong there. Almost none of that turns out to be true. The people who stick with yoga aren't the naturally flexible ones. They're the ones who showed up twice a week even when the poses felt clumsy.
The single most useful thing you can do tonight has nothing to do with poses: lay your mat out and set your clothes by the door before bed. Removing that morning decision is what actually gets people onto the mat on day three, when motivation alone usually fails.
If you want a low-pressure way to test the waters, the free beginner class exists for exactly this reason: to let you find out what your body can do before you decide anything else.
— Juiced