Looser Hips in 3–6 Weeks: Beginner Pilates Mat Mobility Exercises
Pilates improves hip mobility when practiced regularly, and you don't need a reformer to see it work. Start with six moves: leg circles, the clam shell, side-lying leg lifts, femur arcs, glute bridges, and quadruped hip circles. Do them routinely several times a week, and many people notice looser hips and steadier balance after a few weeks of consistent practice. Stop and check with a clinician if you feel sharp joint pain, numbness, or new swelling.
TL;DR:
Performing hip mobility exercises two to four times weekly can improve joint function and balance within three to six weeks of consistent practice.
Focus on controlled movements like clam shells and single-leg bridges, which address muscle imbalances that cause hip pain more effectively than stretching alone.
Incorporate minimal equipment or none at all, and aim for short routines such as 10 minutes to sustain progress without risking injury.
Avoid pushing through sharp pain or swelling, and consult a professional if symptoms like numbness or persistent discomfort occur.
Guided classes or working with a physical therapist can help ensure proper form and prevent compensations during exercises.
Amritayogawellness
Build Hip Mobility With Pilates
Explore Pilates at Amritayogawellness in Philadelphia, with classes and wellness practices for beginners through advanced practitioners.
Table of Contents
Pilates Hip Mobility Exercises Step by Step
Before running through the list, know why these particular moves earn a spot. Hip mobility depends on three things working together: the joint's range of motion, the strength of the muscles that control that range, and your ability to stabilize the pelvis while the leg moves. A structured Pilates practice trains all three at once, which is why isolated stretching alone tends to plateau more quickly.
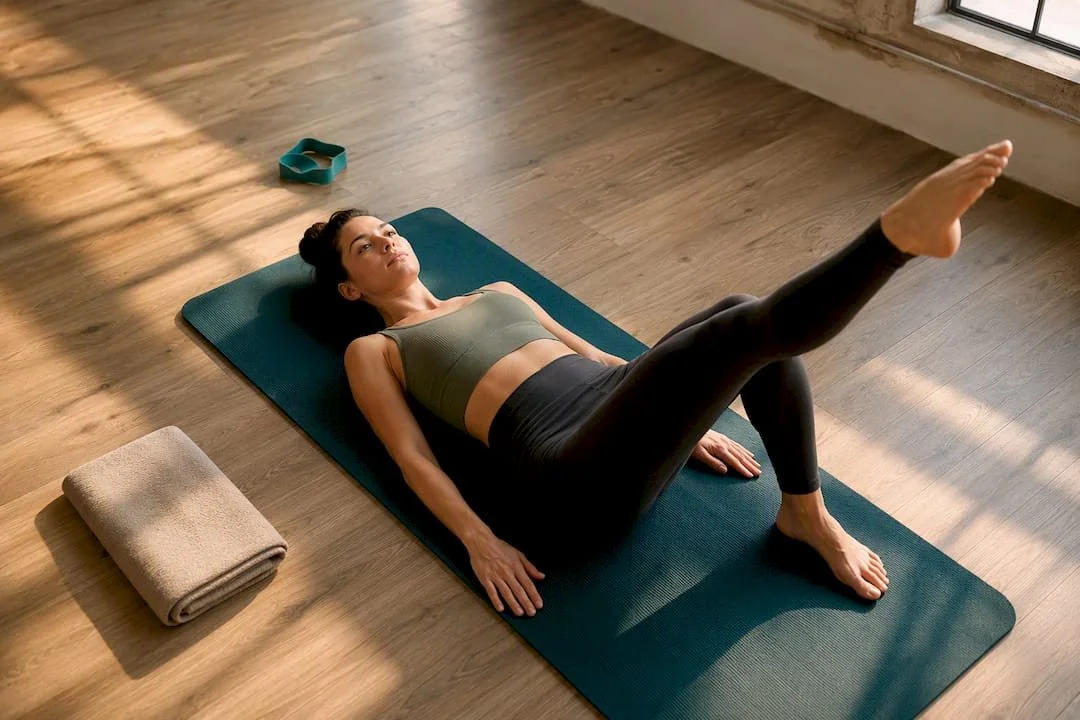
1. Leg circles (single-leg circle)
Lie on your back, one leg extended toward the ceiling, the other bent with the foot flat on the mat. Trace a circle with the raised leg, about the size of a dinner plate, keeping your pelvis still. Exhale as the leg crosses toward the midline, inhale as it opens out. This move is a favorite among Pilates instructors specifically because it moves the hip through rotation while forcing the core to stay quiet, according to Tom's Guide. Beginners should shrink the circle size until the pelvis stops rocking. Advanced practitioners can slow the tempo to one circle per four counts. Watch for the lower back arching off the mat; that's the pelvis compensating instead of staying stable.
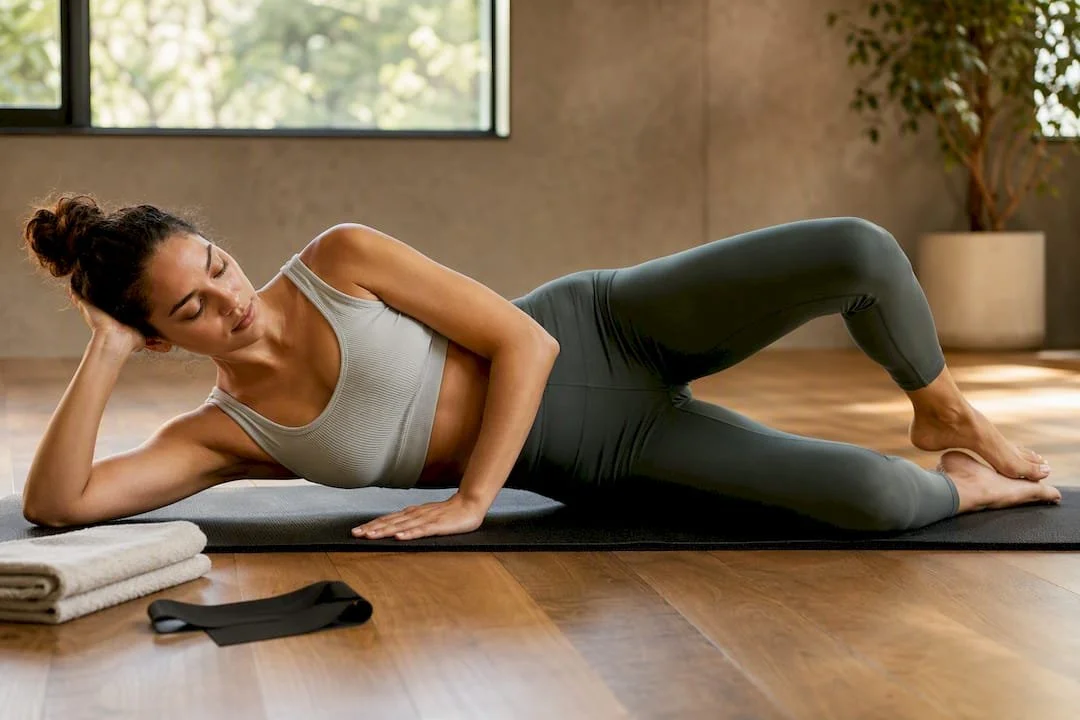
2. Clam shell
Lie on your side, knees bent to about 90 degrees, hips stacked. Keep your feet together and lift the top knee like a clamshell opening, then lower with control. Exhale on the lift, inhale on the way down. Beginners can place a small pillow between the knees to limit range early on. To progress, add a resistance loop above the knees or pause for two counts at the top. The most common fault: letting the top hip roll backward instead of isolating the movement to the joint.
3. Side-lying leg lifts (side kick prep)
From the same side-lying position, extend the top leg long and lift it to hip height, then lower just short of touching the bottom leg. Exhale up, inhale down. This is where single-leg work starts correcting side-to-side imbalances, since most people have one hip that's noticeably weaker in this plane. Beginners keep the range small and the torso still; advanced practitioners add a small forward-and-back kick at the top of the lift. Avoid letting the working leg drift in front of the body, which shifts load away from the glute medius.
4. Femur arcs and toe taps
Lie on your back with knees bent and stacked over hips, shins parallel to the floor. Lower one foot to tap the mat, then return, alternating sides. Exhale as the leg lowers, inhale as it lifts back to start. Beginners can keep both feet closer to the body to reduce lever length. For more challenge, extend the working leg straight before lowering it. The fault to watch for: the lower back losing contact with the mat as the leg drops, which means the range has exceeded what the core can control.
5. Glute bridge and single-leg bridge
Lie on your back, knees bent, feet flat under the knees. Press through the heels and lift the hips until the body forms a straight line from shoulders to knees. Exhale on the lift, inhale as you lower. Once the two-leg version feels easy, extend one leg straight and bridge on the standing leg only. This single-leg variation is one of the more direct ways to expose which hip abductor is underperforming, and correcting that imbalance protects the knees over time. A common mistake is overarching the lower back at the top instead of squeezing the glutes.
6. Quadruped hip extension and hip circles
On hands and knees, extend one leg straight back at hip height, then draw slow circles with the foot before returning to start. Exhale as the leg extends, inhale through the circling motion. Beginners can keep the knee bent and lift only slightly. Advanced versions add a resistance band around the ankle. Watch for the lower back sagging or twisting; the movement should come from the hip joint, not the spine.
Pro Tip: Chase range of motion first when a joint feels stiff and cold, then shift your focus to slow, controlled reps once you can complete the full movement without wobbling. Training control before you've earned range just teaches your body to compensate.
Two Mat Routines You Can Follow Today
You don't need thirty minutes every day to make progress. A short, consistent flow beats an occasional long session, and both routines below use the exercises above.
The 10-minute quick mobility flow
Warm up with 60 seconds of gentle hip circles standing, hands on hips.
Leg circles: 8 circles each direction, per leg.
Clam shells: 12 reps per side, controlled tempo.
Glute bridges: 12 reps, holding the top position for 2 counts on the last 3.
Quadruped hip circles: 6 circles per direction, per leg.
The 20-minute mobility and strength session
Activation: standing marches and hip circles, 2 minutes.
Mobility block: leg circles (10 each direction) and femur arcs (12 per side).
Strength block: single-leg bridges (10 per side), clam shells with a 2 count hold (12 per side), side-lying leg lifts (12 per side).
Cooldown: seated figure-4 stretch, 45 seconds per side, breathing slow.
If a move aggravates a specific spot, swap it for a smaller-range version rather than skipping the joint entirely. Someone managing pregnancy-related pelvic pain, for instance, should shrink range everywhere and lean on guidance like this physical therapy approach to pelvic girdle pain before pushing into bigger ranges.
How Often to Practice and What Progress Looks Like
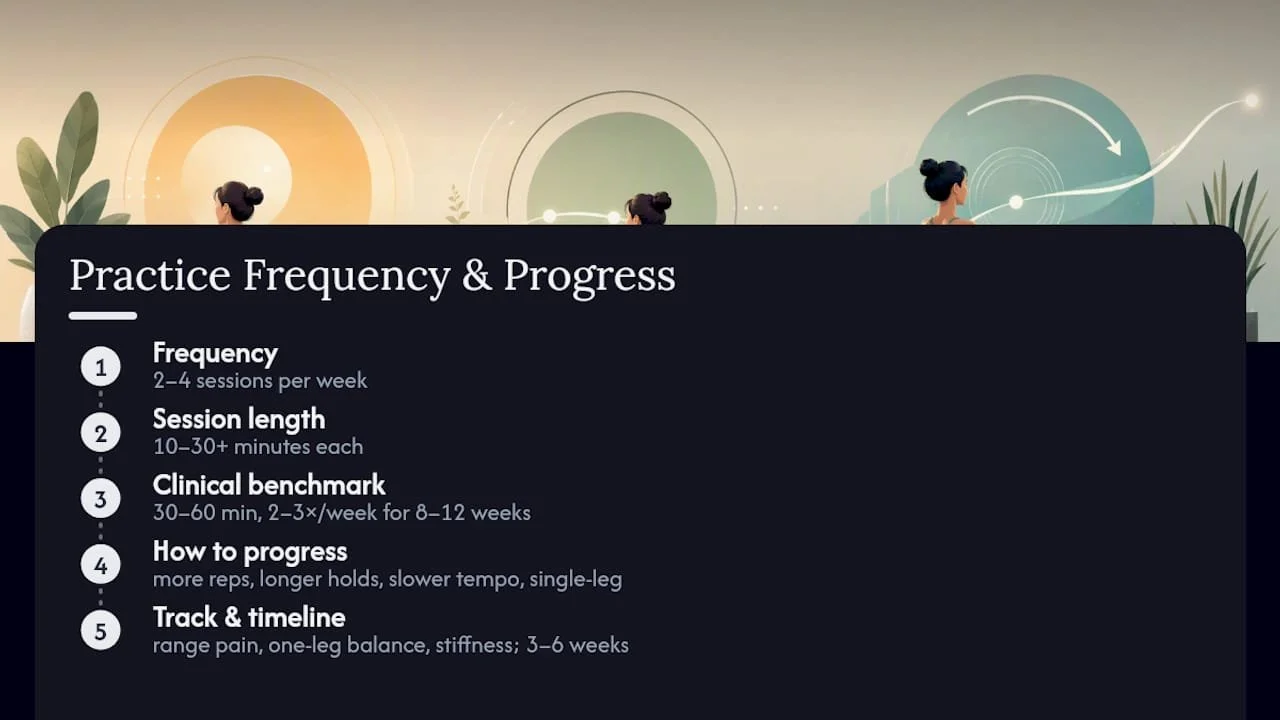
Two to four sessions a week is the sweet spot for most adults working on hip mobility, with sessions running anywhere from 10 to 30-plus minutes depending on how much time you have. Progress comes from small, steady increases: more reps, longer holds, slower tempo, or shifting from two-leg to single-leg versions of each exercise.
Clinical mobility protocols commonly run sessions of 30 to 60 minutes, two to three times a week, over 8 to 12 weeks, and that structure holds up as a reasonable benchmark even outside a rehab setting. A 2026 systematic review found Pilates-based programs improved functional mobility and balance measures like the Timed Up and Go test, though the researchers flagged variability across studies and urged some caution reading too much into any single result.
Track three things: how far you can move through a range without pinching, how long you can balance on one leg, and whether stiffness or discomfort is easing. Most people notice a real difference in three to six weeks of consistent practice.
Safety Notes and When to Get Help
Hip mobility work is generally low risk, but certain signals mean you should stop and reassess rather than push through.
Stop immediately for sharp, stabbing joint pain, not the dull ache of muscle fatigue.
New numbness or tingling down the leg needs a clinician's evaluation, not more stretching.
Increased swelling after a session signals the joint needs rest, not repetition.
If you have arthritis or a recent injury, shrink your range before adding reps or resistance.
Working with a certified Pilates instructor or physical therapist helps you scale exercises correctly instead of guessing, especially if you're managing an existing condition. See a physical therapist directly if hip pain has lasted more than a few weeks or limits daily walking.
Why Guided Pilates Classes Make a Difference
Pilates mat and group reformer classes with instructor guidance help ensure correct form and exercise adjustments tailored to individual needs, which is difficult to replicate in solo sessions. Supervised, individualized progressions are especially valuable for people managing pain or neurological conditions, since a trained eye catches compensations before they become habits. Explore different kinds of Pilates for core strength or browse Pilates exercises for all levels for more practice ideas between classes.
An Honest Take on the Hip Mobility Hype
Most articles on hip mobility oversell the timeline and undersell the boring part. The truth: single-leg work is doing more of the heavy lifting than any fancy circuit or trending mobility flow you'll see online. Clam shells and single-leg bridges look almost too simple to matter, but they're the ones correcting the side-to-side imbalance that actually causes hip pain in the first place.
Where conventional advice falls short is treating mobility as a stretching problem. Stretching a stiff hip without strengthening the muscles that control it just gives you a looser joint with the same weak support system underneath. That's not a fix, it's a delay.
If you're starting today, prioritize consistency over intensity. Two focused ten-minute sessions a week for six weeks will outperform one exhausting hour done sporadically. And if pain is part of the picture, get an instructor's eyes on your form before you add reps. Mobility work is one of the few areas of fitness where slower, guided progress genuinely wins.
— Juiced
Sources
FAQ
Does Pilates improve hip mobility?
Yes. Research on Pilates-based programs shows measurable improvements in functional mobility and balance, particularly when practiced consistently over several weeks.
What is the best exercise for hip mobility?
There's no single best move, but leg circles and single-leg bridges are among the most effective because they combine range of motion with the strength needed to control it.
What are some good hip exercises in Pilates?
Clam shells, side-lying leg lifts, femur arcs, glute bridges, and quadruped hip circles all target hip mobility while building the surrounding stabilizing muscles.
What is the 80/20 rule in Pilates?
Definitions vary by instructor, but it commonly refers to spending roughly 80% of effort on controlled, quality movement and 20% on pushing range or intensity, keeping form the priority over speed or reps.