The Amrita Journal
Explore thoughtful stories, practical wellness guidance and inspiring ideas to support your movement, mindfulness and everyday wellbeing at Amrita.
Full-Body Conditioning Class Types: How to Choose
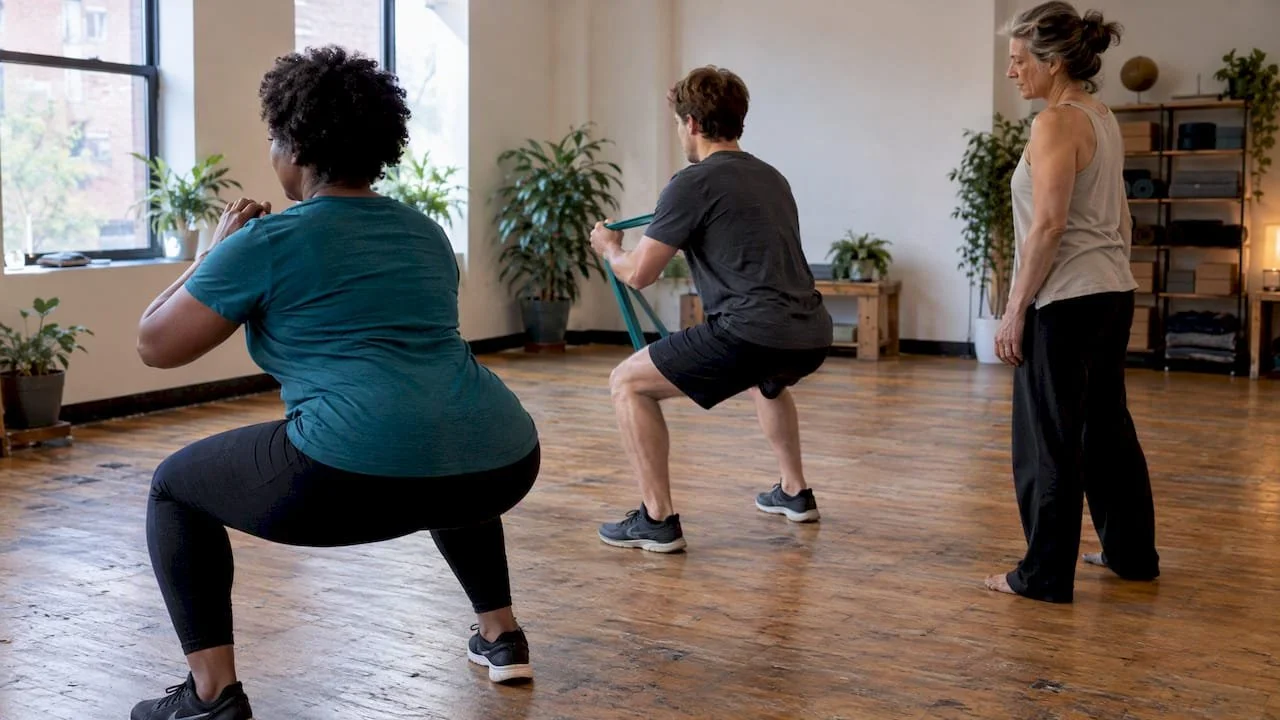
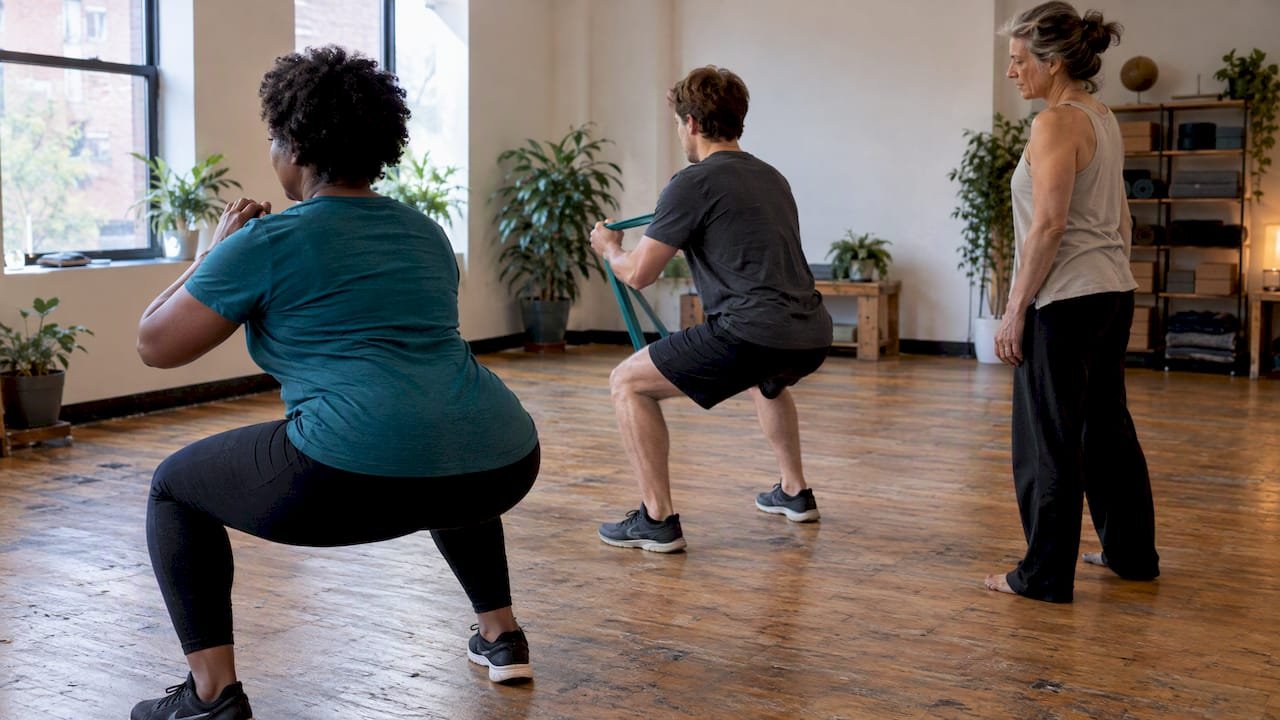
A full-body conditioning class trains strength, cardio, mobility and balance in a single session. The main types are strength and circuit classes, HIIT, Pilates (mat and reformer), yoga (including hot, sculpt and aerial), barre and tai chi. The best one for you is the one that fits your current fitness, your joints and your schedule, because you only get results from a class you keep attending.
Below, we sort the class types by what they train, show what a week might look like, and explain how to start safely. We teach yoga, Pilates, barre and tai chi at our Philadelphia studio, so we say plainly where each style shines and where another is a better fit.
Amritayogawellness
Find a Conditioning Class That Fits
Explore yoga, Pilates, barre and tai chi classes at our Philadelphia studio to find a practice that suits your goals and preferences.
TL;DR
"Full-body conditioning" is a goal, not one class. Strength, cardio, mobility and balance can come from very different formats.
Federal-style targets are simple: the WHO guidelines call for aerobic activity plus muscle-strengthening work on 2 or more days a week for adults.
Pilates, yoga, barre and tai chi are low-impact ways to condition everything, with alignment coaching built in. HIIT and circuits add more cardio load.
Pick by consistency first. A class you enjoy and attend beats a harder one you skip.
Beginners and anyone returning from injury should talk to a physician and choose an instructor who offers modifications.
Table of Contents
What a conditioning class is supposed to do
Conditioning is the broad physical preparation of your body. In practice that means five qualities: muscular strength, muscular endurance, cardiovascular fitness, mobility and balance. A well-rounded class touches most of them. A narrow one trains one or two very well.
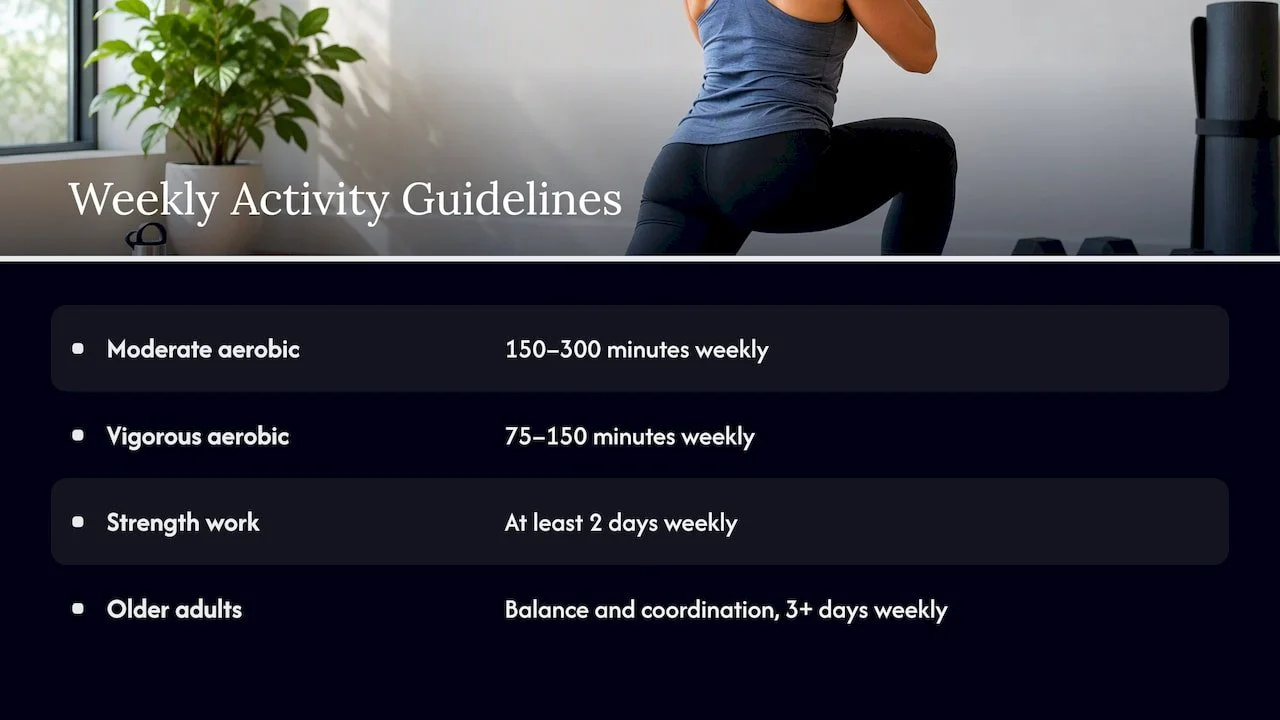
The WHO 2020 guidelines are a useful yardstick. For adults 18 to 64 they recommend 150 to 300 minutes of moderate aerobic activity (or 75 to 150 of vigorous activity) per week, plus muscle-strengthening that works all major muscle groups on at least 2 days. Older adults are advised to add multicomponent activity with balance and coordination work on 3 or more days a week.
The main full-body conditioning class types
| Class type | Main focus | Impact | Good for | Watch for |
|---|---|---|---|---|
| Strength or circuit | Muscle strength, endurance | Low to moderate | Building strength with weights and bodyweight | Rushing load before form is solid |
| HIIT | Cardio, power | Often high | Short, intense sessions | Recovery time between sessions |
| Mat Pilates | Core, posture, control | Low | Beginners, desk workers, injury return | Needs careful cueing to get alignment right |
| Reformer Pilates | Resistance-based strength, flexibility | Low | Strength with joint support | Smaller classes, book ahead |
| Yoga (flow, hot, sculpt, aerial) | Mobility, strength, balance, breath | Low to moderate | Flexibility with strength and stress relief | Heat and inversions need pacing |
| Barre | Legs, glutes, core endurance | Low | Muscular endurance, posture | Small, repeated movements fatigue fast |
| Tai chi | Balance, coordination, calm | Very low | All ages, balance and falls prevention | Slow pace feels easy until you try it |
Here is how each plays out in a real class.
Strength and circuit classes
These use dumbbells, kettlebells, bands and bodyweight, moving through stations or timed rounds. They are the most direct route to the muscle-strengthening part of the guidelines. A good coach will teach the four basic patterns of pushing, pulling, squatting and hinging before loading them heavily.
The trade-off is that big, fast circuits can reward intensity over technique. If you are new, ask how the instructor scales moves.
HIIT
High-intensity interval training alternates hard efforts with short rests. It is efficient for cardio and the format is changing: industry coverage of group fitness trends reports 60-minute HIIT classes losing ground to 30 to 45 minute formats, with growing demand for programming that blends strength, recovery and breathwork.
HIIT suits people who already have a base of fitness and enjoy pushing. It is not the only way to condition your heart, and it is a poor starting point if you are coming back from an injury.
Mat Pilates
Pilates was developed by Joseph Pilates in the early 20th century, largely as a method of injury recovery. Mat classes use your body weight, sometimes with small props, to train the deep core, hips, back and shoulders with slow, controlled repetitions.
It is a strong first choice if you want low-impact conditioning that improves posture. If you want a deeper look, our guides to mat Pilates for core strength and flexibility and seven different kinds of Pilates go through the options.
Reformer Pilates
The reformer is a sliding carriage with springs. The springs add adjustable resistance and can also assist a movement, so the same machine can be gentle for a beginner and demanding for an experienced client. That makes group reformer classes a flexible full-body format: legs, arms, core and back all work against resistance while the frame supports the spine.
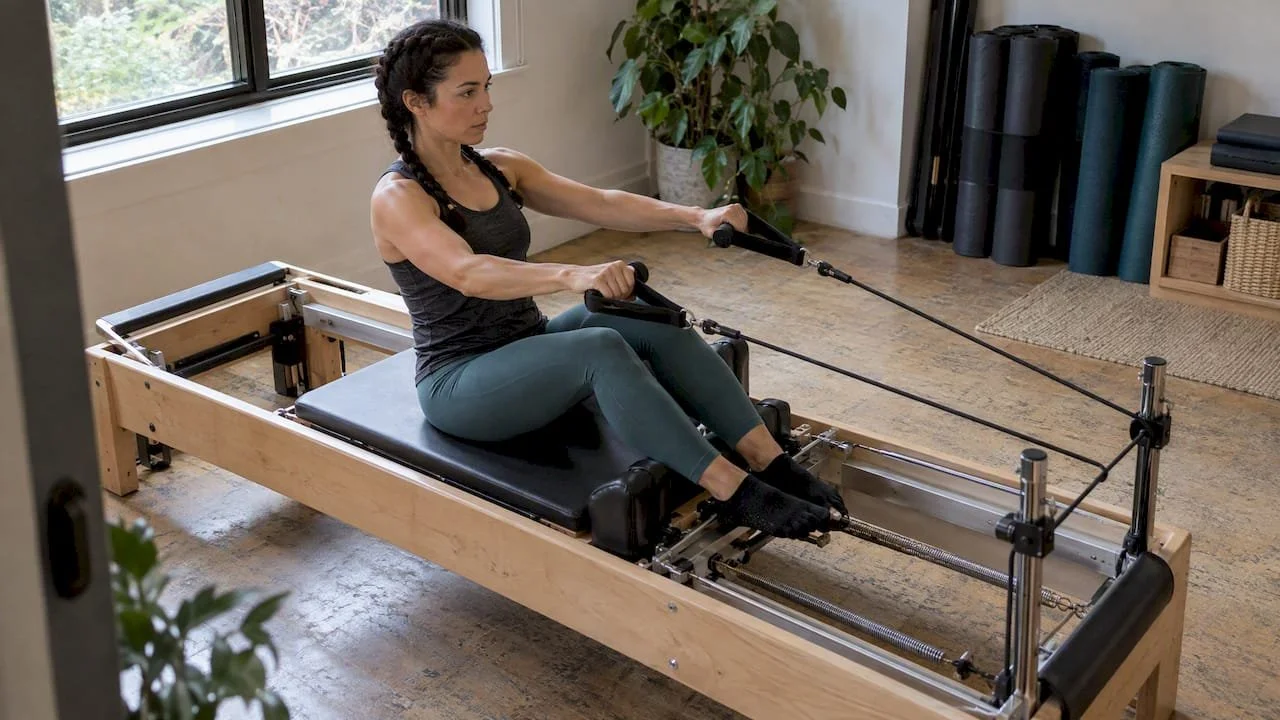
We explain what happens in class in What Is a Pilates Reformer Class? and what the machine does for you in What Does a Pilates Reformer Do for Your Body?.
Yoga: flow, hot, sculpt and aerial
Yoga trains mobility, balance and bodyweight strength together, with breathing woven in. Within it you will find real variety:
Flow or vinyasa: continuous movement linked to breath, a moderate cardio load plus strength in the legs, shoulders and core.
Hot yoga: the same postures in a heated room. Many people like the sense of loosening up, but you should build up gradually and hydrate.
Yoga sculpt: poses combined with light weights for a more strength-focused session.
Aerial yoga: a fabric hammock supports your weight, which can take pressure off joints and add core and grip work.
If you are choosing between yoga and Pilates, the Cleveland Clinic's comparison of yoga and Pilates is a balanced read. In short, Pilates leans toward core control and strength, yoga toward flexibility, balance and mind-body practice. Many people do both.
Barre
Barre borrows from ballet, Pilates and strength work. You use small, repeated movements, often at a bar with light weights and bands, to fatigue the legs, glutes, arms and core. It builds muscular endurance and posture without jumping or heavy loading. Expect a good burn and a lot of precision.
Tai chi
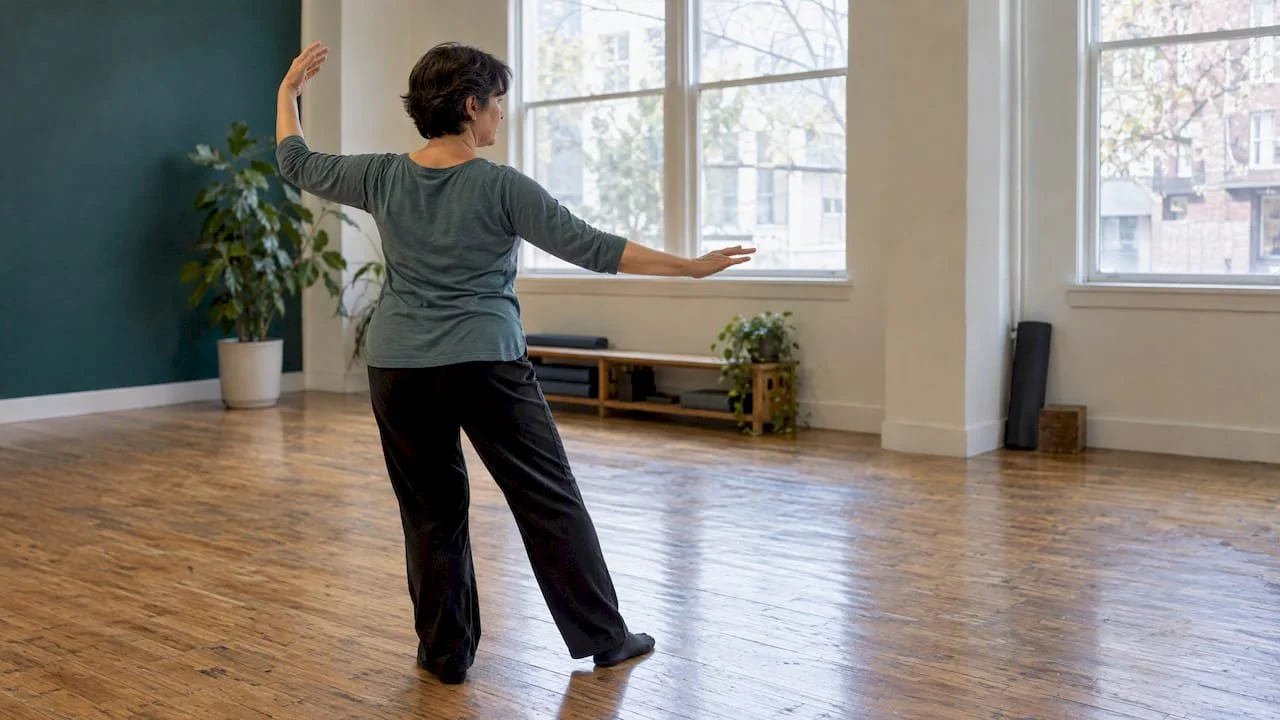
Tai chi is slow, flowing movement with weight shifting, coordination and breath. It is the gentlest entry on this list and the most directly aimed at balance. For older adults, the WHO guidance on multicomponent activity with balance training is the reason classes like this earn a place in a weekly plan.
Match the class to your goal
Start with what you want from the next three months, not with what is trending.
You want to build strength and a base: pick one strength or reformer class a week for the strength element, then add a gentler class for mobility.
You want a sweat and a cardio boost: a HIIT or flow class, with a slower day in between for recovery.
You sit most of the day and want better posture: mat or reformer Pilates plus yoga for hips and shoulders.
You are returning from an injury: Pilates, yoga or tai chi with an instructor who offers modifications, after a conversation with your physician or physical therapist.
You are stressed and sleeping badly: yoga, Pilates or breathwork. The Cleveland Clinic notes that mind-body options like yoga and Pilates are increasingly used for stress and sleep, and advises choosing activity you enjoy so you will stick with it.
You are 65 or older, or training for balance: include balance and multicomponent work. This guide on balance training for seniors covers safe exercises for preventing falls.
A sample week of full-body conditioning
This is an example, not a prescription. Adjust it to your level and check with your doctor if you have a health condition.
| Day | Class | What it covers |
|---|---|---|
| Monday | Reformer or strength class | Resistance for all major muscle groups |
| Tuesday | Rest or a walk | Recovery |
| Wednesday | Yoga flow or hot yoga | Mobility, balance, moderate cardio |
| Thursday | Barre or mat Pilates | Muscular endurance, core |
| Friday | Rest | Recovery |
| Saturday | Tai chi, aerial yoga or a longer flow class | Balance, coordination, joint-friendly work |
| Sunday | Breathwork or an easy stretch | Downshift |
Two strength-focused sessions meet the 2-day muscle-strengthening line in the WHO guidance. Add brisk walking or a more aerobic class to move toward the weekly aerobic targets.
How to start safely
Most conditioning injuries are not caused by one type of class. A review of fitness-center injuries on PubMed Central describes musculoskeletal problems as multifactorial, tied to overuse, too little recovery and poor technique. The advice that follows from that is practical:
See a professional first if you are injured or managing a condition. Talk to your physician or physical therapist before you begin. The Cleveland Clinic's Pilates overview advises exactly that, then finding an instructor who offers personalized modifications instead of one uniform pace.
Learn alignment in a guided class. The same source advises beginners to start with guided classes so they learn correct form.
Progress in small steps. Moving too quickly is a leading cause of soreness and injury, even in people who are already fit.
Protect recovery days. Overuse is as risky as bad form.
Tell the instructor before class about injuries, pregnancy, or medical conditions so they can offer alternatives.
Where breathwork fits
Breathwork is not a conditioning class in the strength sense, but it can round out a week. A meta-analysis of randomized controlled trials found that structured breathwork can improve self-reported stress, anxiety and depression, though results depend on the protocol. It is cumulative: regular practice predicts more than one dramatic session. Treat it as a complement to training, not a replacement for medical care if you are struggling with anxiety or depression. In that case, speak with your doctor or a licensed mental health professional.
Our perspective: variety, guidance and a pace you can keep
We run a Philadelphia studio built around yoga, Pilates, barre and tai chi, so we see the same pattern every week. People arrive with a goal like "full-body conditioning" and an assumption that it must be hard. The ones who are still coming six months later usually did not choose the hardest class. They chose the one where the instructor knew their name, offered an easier or tougher version of each move and made the room feel welcome.
That is why we design classes for every level, from first-timers to experienced practitioners, and why we offer hot yoga, aerial yoga, mat Pilates, group reformer, barre and tai chi under one roof. You can mix a strength-leaning reformer class with a restorative yoga evening and a community class, without joining three different places. Alignment cues and modifications are part of how we teach, because good form is what lets you progress without paying for it in sore joints.
Our honest advice: try two or three styles before you commit to one. Notice how you feel the next morning and which class you look forward to. Then build your week around that.
— Juiced
Try a class at Amrita Yoga & Wellness
If you are in Philadelphia and want to test a few styles, you do not need to commit to a membership first. Our drop-in options include a Group Class Drop In at $28 per session, a Community Class Drop In at $11 per session, and Nurtured Beginnings at $35 per pass for newcomers. A livestream drop-in is $19 per session.
When you settle on a rhythm, the monthly plans on the same page include Earth at $119 per month, Water at $139, Air at $149 and 1 Month Unlimited Group Classes at $169. If you would rather have personalized guidance, private yoga and Pilates sessions start from $85 per hour. You can see what is on right now in our class schedule, and our studio policies cover booking and cancellations.
FAQ
What is a body conditioning class?
It is a group session designed to build several fitness qualities at once, usually strength, endurance, cardio, mobility and balance. Formats vary widely, from weighted circuits to reformer Pilates to yoga. Check the class description to see which qualities it emphasizes.
What are the different types of full-body workouts?
The most common are strength or circuit training, HIIT, Pilates, yoga, barre and tai chi. Strength and HIIT lean toward power and cardio. Pilates, yoga, barre and tai chi are lower impact and emphasize control, mobility and balance.
How many conditioning classes should I take each week?
The WHO guidelines call for muscle-strengthening on at least 2 days a week for adults, alongside aerobic activity. Many people reach that with two to four classes mixed with walking and rest days. Start lower if you are new and build gradually.
Is Pilates or yoga better for full-body conditioning?
Neither is better for everyone. Pilates leans toward core strength and controlled resistance work, while yoga adds more flexibility, balance and breath practice. Many people alternate them across a week.
Can beginners or people with injuries join conditioning classes?
Often yes, but speak with your physician or physical therapist first, then pick a guided class where the instructor offers modifications. Tell the instructor about any injury before class begins.
Sources
WHO 2020 guidelines on physical activity and sedentary behaviour (PMC)
The Benefits of Exercise for Mental Health, Cleveland Clinic
Effect of breathwork on stress and mental health: a meta-analysis, Scientific Reports
Recommended
Pilates Exercises for Better Posture: A Practical Routine
Pilates can improve posture, and the research supports it. The catch is that it works through steady, well-executed practice, not through a single magic move. The exercises below strengthen the muscles that hold your spine, ribs and shoulders in place. They also teach you to feel where your body is in space. Do them with good form two or three times a week and you have a realistic plan.
Amritayogawellness
Build Better Posture Through Pilates
Explore Amritayogawellness’s Pilates and yoga offerings in Philadelphia to find a practice that supports strength, mobility and body awareness.
TL;DR
A 2024 systematic review found that Pilates improves postural alignment in adults. Programs typically ran 8 to 16 weeks, with 50 to 60 minute sessions twice a week.
The most useful moves for posture are the pelvic tilt, shoulder bridge, chest opener, swan, swimming, thread the needle and the seated side stretch.
Quality beats quantity. Breathing, rib control and shoulder-blade position matter more than how many reps you do.
Pain, injury, pregnancy or visible asymmetry such as a curved spine call for a professional's input first. A private session is a sensible start.
Table of Contents
What Pilates does for posture
Posture is not a position you hold by force. It is the result of muscles that support the spine, a rib cage that stacks over the pelvis, and shoulder blades that sit comfortably on the back. Long hours at a desk or phone tend to tighten the chest and hip flexors and leave the upper back and deep abdominals underused.
Pilates addresses this from several angles at once:
Deep core strength. Most exercises load the muscles around the trunk and pelvis, which support the spine.
Back-body strength. Extension work such as the swan and swimming builds the muscles along the spine and between the shoulder blades.
Mobility. Rotation and side-bending exercises restore movement to a stiff upper back.
Body awareness. Slow, controlled movement teaches you to notice slumping before it becomes a habit.
The 2024 review linked above reports that Pilates reduced forward head posture, increased thoracic curve (rounded upper back) and anterior pelvic tilt in adults compared with inactive controls. That is the best evidence we have, and it is encouraging. It is still a review of programs lasting weeks, so treat it as a guide to pace and patience, not a promise of a particular result.
One honest caveat from clinical guidance: physiotherapy-based Pilates guidance from an NHS trust notes there is no strong evidence that Pilates beats other exercise for reducing pain, and that you should choose something you enjoy. For posture, the best exercise is the one you will keep doing.
The principles that make the exercises work
The same guidance stresses that Pilates depends on the quality of muscle activation, not just on copying shapes. These cues apply to every exercise below.
Keep the ribs soft
Don't poke your ribs forward to look "tall." That rigid, military stance creates tension instead of support. Picture a spring between your ribs and hips under gentle, constant tension, so the rib cage stays stacked over the pelvis.
Lower the shoulder blades
If your shoulders creep toward your ears, the neck is compensating for weak core support. Glide the shoulder blades down and slightly in, and keep the collarbones broad.
Breathe into the sides and back of the ribs
Breath sets the rhythm of Pilates and keeps the ribs mobile. If you want to go deeper, our guides on Pilates breathing techniques and the benefits of Pilates breathing explain how to coordinate inhale and exhale with each movement.
Neutral spine, not a flat back
Readers often ask whether to press the lower back flat or keep a neutral spine. For most posture work, aim for neutral: the natural, gentle curves of your spine, with the pelvis neither tucked nor arched. Pelvic tilts, below, are how you learn to find that position and then move out of it and back with control.
Best Pilates exercises for posture
Each move below targets a specific part of the posture chain. Start with the first three if you are new.
1. Pelvic tilts
Targets: lower back awareness, deep abdominals.
Lie on your back with knees bent and feet flat, hip-width apart. Exhale and gently roll the pelvis so the lower back melts toward the floor. Inhale and return to neutral. Do 8 slow repetitions. Your goal is to feel the pelvis move independently of the legs and ribs.
2. Shoulder bridge
Targets: glutes, hamstrings, back of the body.
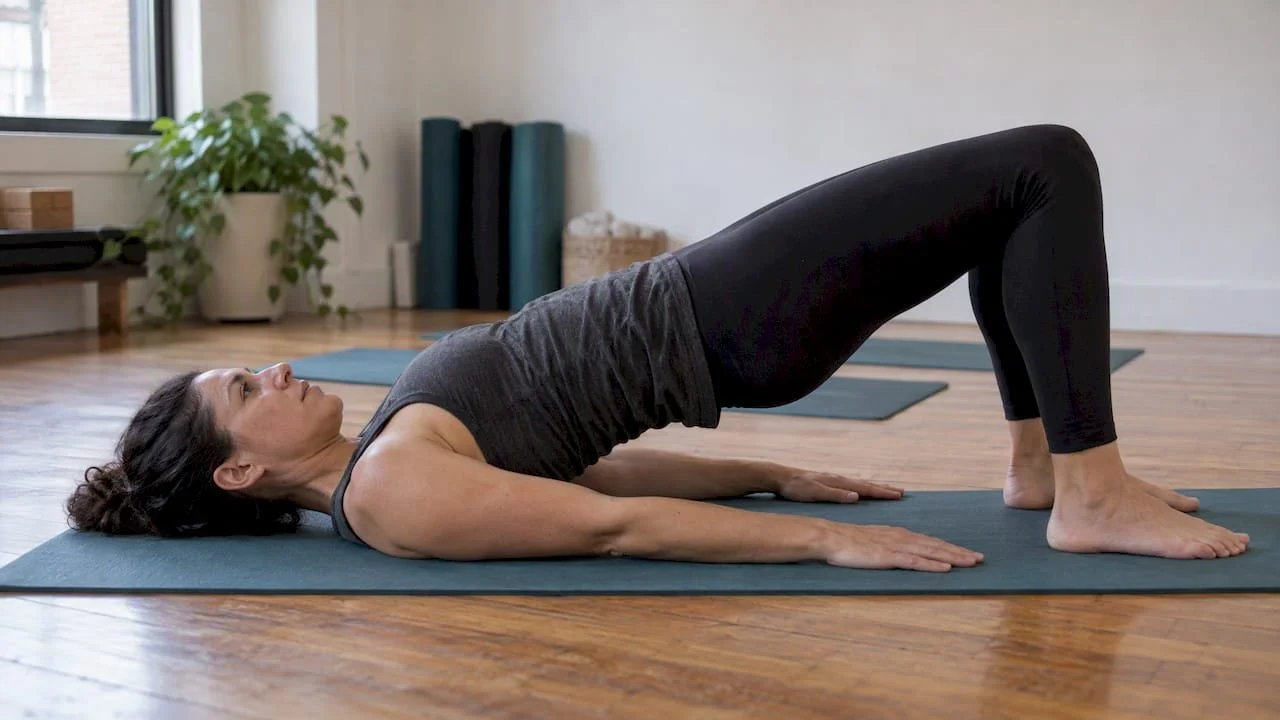
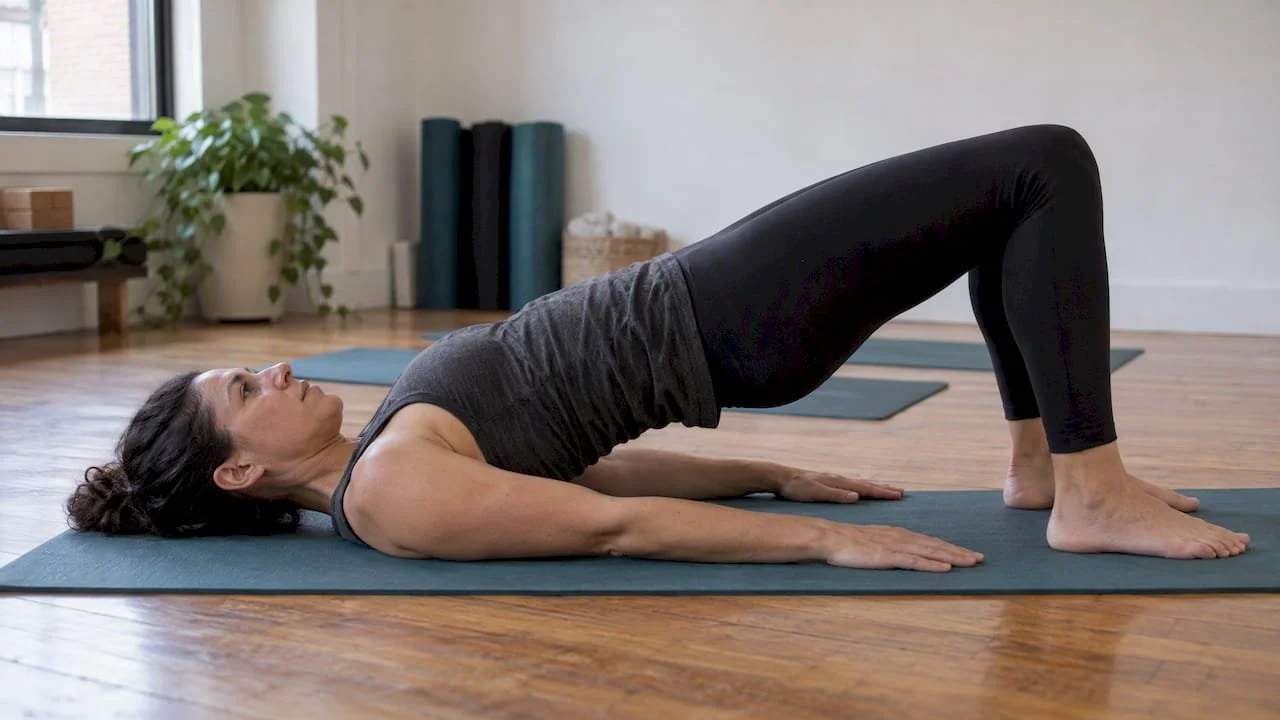
From the same position, press into your feet and peel your spine off the mat one vertebra at a time until your body forms a diagonal line from shoulders to knees. Hold for a breath, then roll down slowly. Keep the ribs soft and avoid arching. Do 5 to 8 repetitions. Strong glutes help the pelvis stay level when you stand and sit.
3. Chest opener
Targets: chest, front of the shoulders, upper back.
Lying on your back or sitting tall, open your arms wide with palms facing up. Think of the collarbones spreading while the shoulder blades slide down. Hold for about a minute with natural breathing. This counters the forward-rounded shoulders that come with typing and scrolling.
4. Swan (back extension)
Targets: muscles along the spine, upper back.
Lie on your stomach with hands under your shoulders. Draw the navel gently up, and lift the chest a few inches, keeping the neck long and the gaze down. Lower with control. Start with 3 to 5 repetitions. Small and controlled beats high and strained.
5. Swimming (or opposite arm and leg reach)
Targets: back extensors, glutes, shoulder stabilizers.
On your stomach, lift opposite arm and leg a little, then switch in a steady rhythm. If swimming is uncomfortable for your lower back, reach one arm and the opposite leg along the floor on all fours instead. Both versions teach the trunk to stay steady while the limbs move.
6. Thread the needle
Targets: thoracic rotation, shoulders.
On hands and knees, slide one arm under the other, turning the chest toward the floor, then open the same arm toward the ceiling. Do 5 each side. Many people with desk-bound upper backs find this the most noticeable release. A similar open-the-book rotation is among three Pilates-inspired desk-worker moves that a Pilates trainer recommends for restoring thoracic rotation and opening the chest.
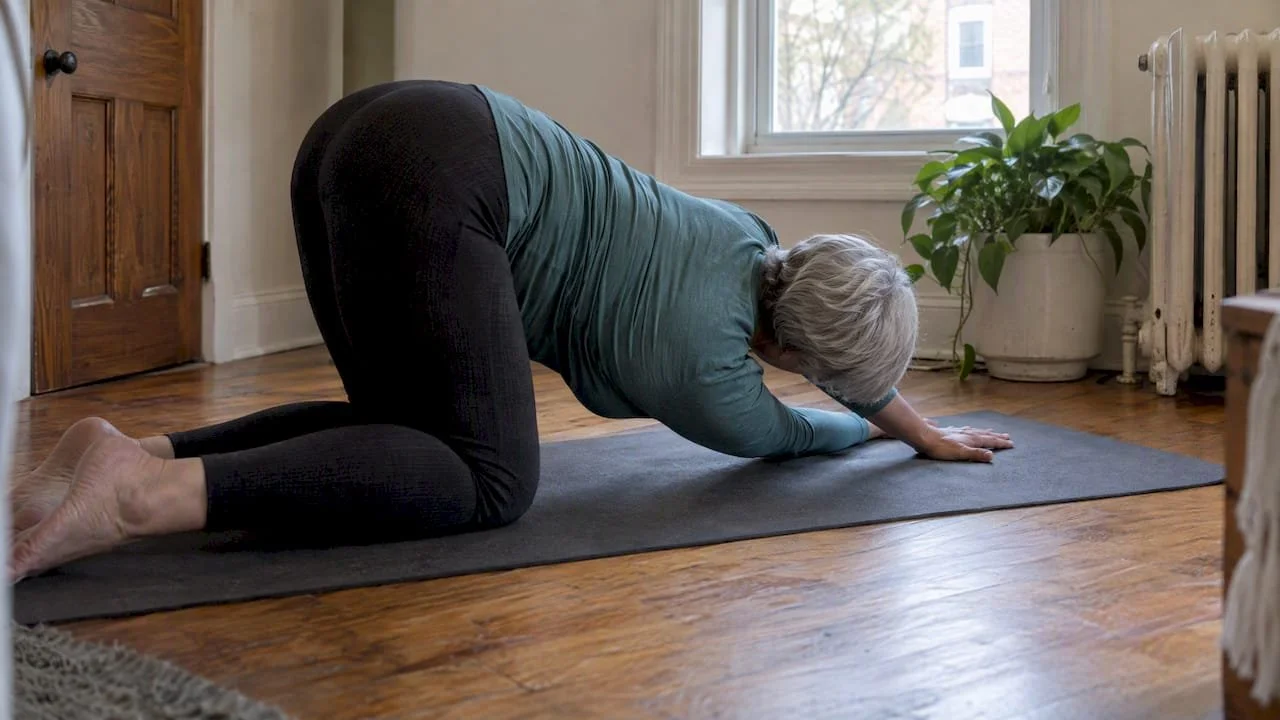
7. Seated side stretch
Targets: the sides of the trunk, rib mobility.
Sit tall, inhale to lengthen, then exhale and bend sideways over one hip, keeping both sitting bones grounded. Return on the inhale. Do 5 each side. It is easy to do at a desk, which is why we suggest it as a break between meetings.
8. Forearm plank
Targets: the whole trunk, shoulder blades.
Hold a plank on your forearms or with knees down for 20 to 30 seconds, keeping the shoulder blades wide and the ribs drawn in. If the shoulders hunch toward the ears or the lower back sags, rest or make it easier. Quality over time.
A 15-minute Pilates routine for posture
Use this three times a week, or a shorter version on busy days.
| Order | Exercise | Dose |
|---|---|---|
| 1 | Pelvic tilts | 8 slow reps |
| 2 | Shoulder bridge | 6 reps |
| 3 | Chest opener | 1 minute |
| 4 | Thread the needle | 5 per side |
| 5 | Swan | 4 reps |
| 6 | Swimming or opposite arm and leg reach | 20 to 30 seconds, twice |
| 7 | Forearm plank (knees down if needed) | 20 seconds, twice |
| 8 | Seated side stretch | 5 per side |
Move slowly, breathe through every rep, and stop short of fatigue that changes your form. Two short sessions a week plus a few seated breaks in the workday will do more than one heroic session on Sunday.
Sitting itself matters too. WHO advice on staying active suggests short 3 to 5 minute movement breaks every 20 to 30 minutes to reduce long periods of sitting. Pair your routine with that habit.
How often and how long until you notice a change
The studies in the 2024 review generally used programs of 8 to 16 weeks, with sessions of 50 to 60 minutes twice a week. That is a good benchmark: expect to commit a couple of months before judging results. Early signs are usually subtle. You may catch yourself sitting taller without effort, or find your neck less tired at the end of the day.
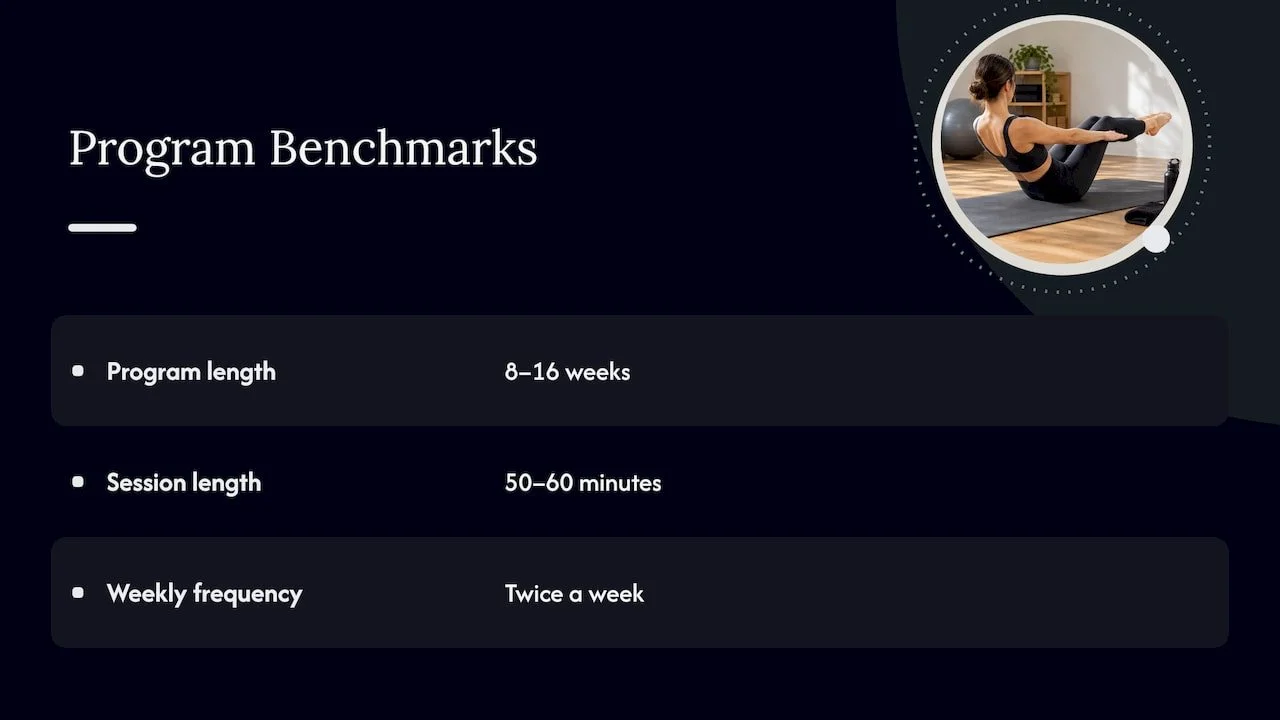
Pilates also fits into general health guidance. For adults, WHO recommends 150 to 300 minutes of moderate aerobic activity a week plus muscle-strengthening on at least 2 days. Pilates counts as muscle-strengthening, so it can cover that second half. Walking, cycling or swimming can supply the aerobic part.
Mat or reformer for posture?
Both work. Mat Pilates uses your body weight and is easy to practice at home. The reformer adds spring resistance and support, which can make it easier to feel the right muscles working and to adjust the load as you progress. Some people find the springs help them learn shoulder-blade control more quickly. Others prefer the simplicity of the mat. Choose the one you will attend consistently, which echoes the clinical guidance above.
Safety: when to adjust, and when to see a professional
Pilates is highly modifiable, and the difference between progress and injury often lies in the range of motion you choose. If a move hurts, shrink it. Do not push into a classic position because the instructor or a video does it.
Specific situations call for a professional's input before you start:
Pain that persists or spreads. If symptoms worsen or travel into your arms or legs, stop and see your doctor or a physical therapist. Guidance from the Dudley Group NHS Foundation Trust on acute low back pain says the same.
Injury, existing conditions or pregnancy. The NHS Pilates guidance advises checking with a healthcare professional first. If you are postpartum and think you have abdominal separation, NHS physiotherapy advice says to avoid movements that make the abdomen dome or bulge until you are assessed.
Osteoporosis or low bone density. Forward-flexing moves and loaded twists can be inappropriate. A daily 5 to 10 minute posture plan built around osteoporosis safety is a useful reference, and your physician should confirm what suits you.
Visible asymmetry or suspected scoliosis. A one-size-fits-all class may not be enough here. Seek one-to-one clinical or specialized instruction.
Pilates is not a treatment for a specific disease. It supports good movement habits. Think of it as a complement to medical care, not a substitute.
Our perspective: posture is a skill you practice
At Amrita Yoga & Wellness we see posture as something you learn, not something you are handed. Most people who come to us for "better posture" already know they slouch. What they lack is a felt sense of the alternative, and a low-pressure place to practice it.
That is why we focus on beginner approachability and on detailed guidance in class. We would rather you do a smaller version of a move with the right muscles working than a bigger version with your neck doing the job. Our studio offers mat Pilates, group reformer classes and private sessions alongside yoga, barre and tai chi, so you can combine strength work with mobility and breath. Our own writing on starting Pilates safely and on improving your Pilates routine covers modifications and habits in more detail.
Our honest advice: pick a rhythm you can sustain, twice a week for a couple of months, and let community and routine carry you on the days motivation dips.
— Juiced
Practice with us in Philadelphia
If you would like an instructor to watch your form, our studio is in Philadelphia. Our group class page lists the options:
Community Class Drop In: $11 per session
Group Class Drop In: $28 per session
Nurtured Beginnings pass: $35 per pass
1 Month Unlimited Group Clases: $169 per month
If you have a specific concern, such as one shoulder sitting higher or a stiff upper back, a private session lets an instructor tailor the exercises to you. One to One Sessions start from $85 per hour. You can also read about each style on our class descriptions page.
Frequently asked questions
Can you fix posture with Pilates?
Pilates can substantially improve posture for many adults. The systematic review cited above found improvements in forward head posture and related measures. Results depend on your specific pattern and how consistently you practice. Structural conditions need a medical evaluation.
What exercise is best for correcting posture?
There is no single best exercise. The shoulder bridge, chest opener, swan and thread the needle together cover the glutes, back, chest and upper-back rotation. Clinical guidance notes that the best choice is the one you enjoy and will repeat.
Is it better to do Pilates with a flat back or a neutral spine?
For posture, aim for neutral. Use pelvic tilts to learn the difference between a tucked, flat position and a gentle natural curve. Then keep the ribs soft and the spine supported. Some exercises call for a deliberate tuck, and a good instructor will tell you when.
How long does it take for Pilates to improve posture?
Studies typically used 8 to 16 weeks of training, with sessions twice a week. You may feel taller or less tense sooner. Lasting change comes from repetition, so judge progress over months, not days.
Should I see a professional first?
Yes if you have pain, a recent injury, are pregnant or postpartum, or have a condition such as osteoporosis or scoliosis. Ask your doctor or physical therapist what is safe, then look for an instructor who can modify the work for you.
Sources
Effects of Pilates on Body Posture: A Systematic Review (PMC)
Diastasis Recti following Pregnancy (Bedfordshire Hospitals NHS Trust)
Recommended
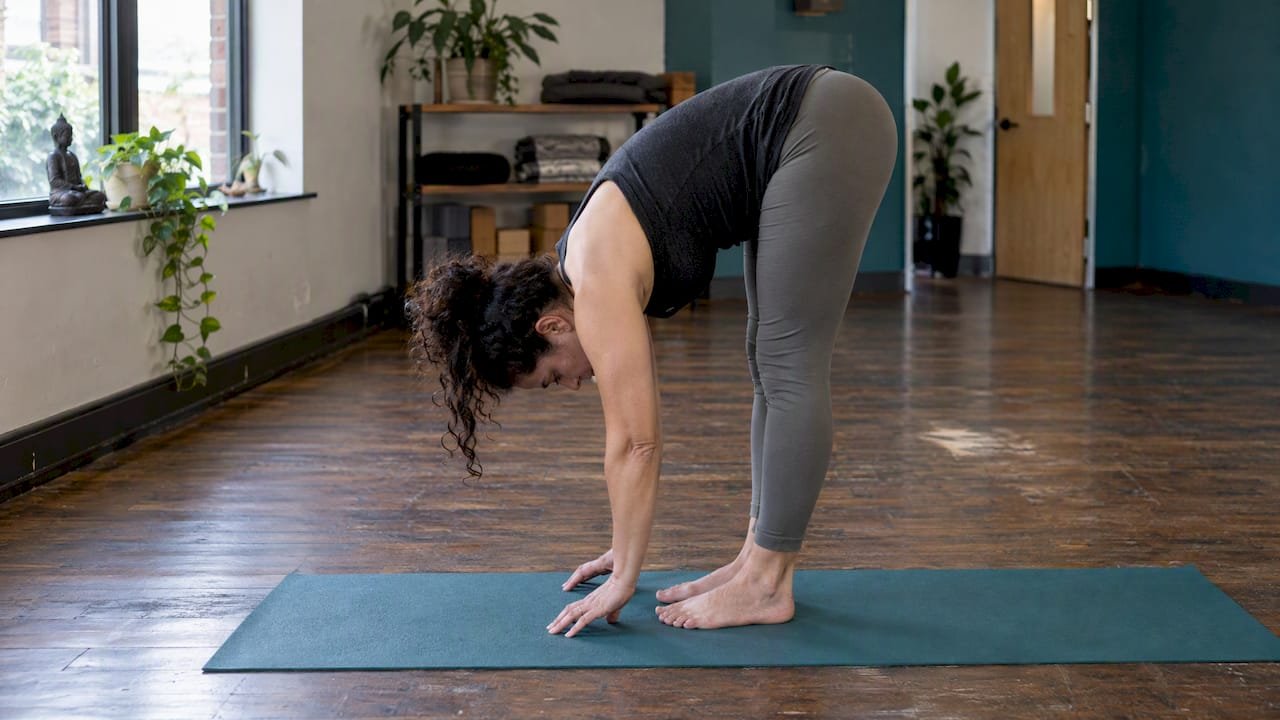
Physical Flexibility: 9 Benefits for Adults, From Sleep to Balance
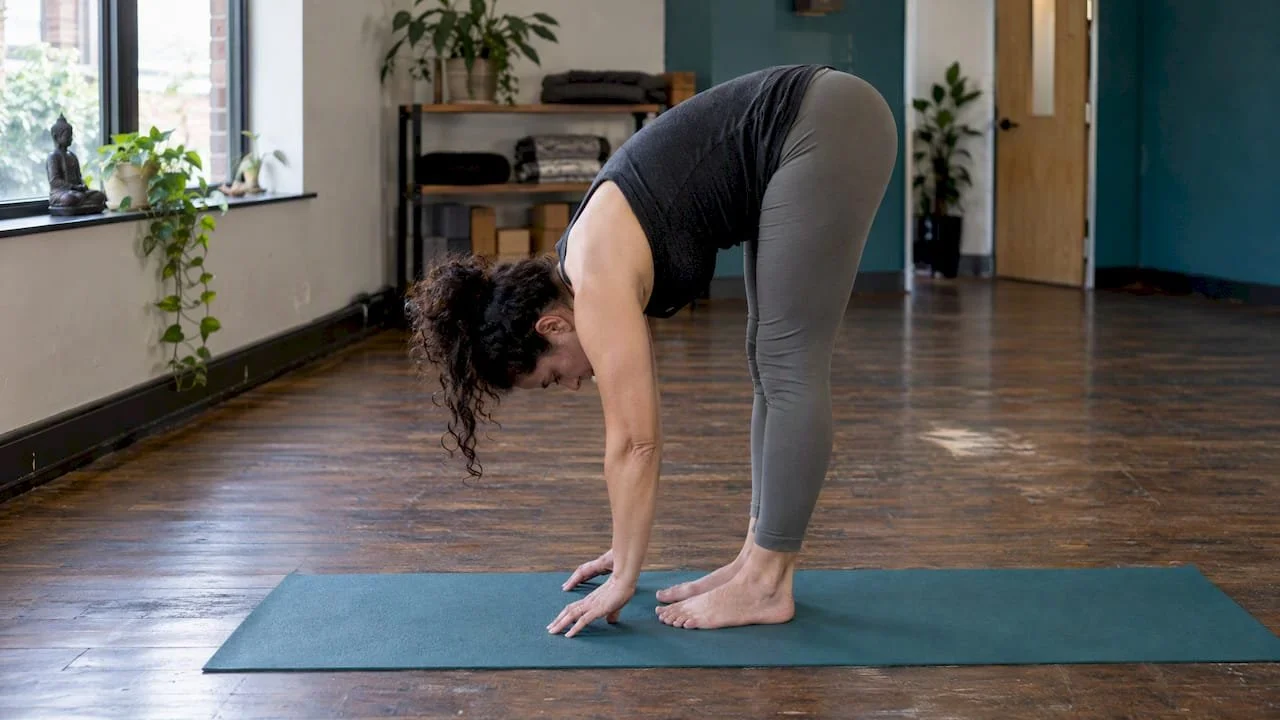
Physical flexibility improves everyday mobility, posture, joint health, and athletic performance, lowers injury risk, and helps you unwind after stress. Cleveland Clinic and Mayo Clinic both back regular stretching, and we teach beginner-friendly classes at Amrita Yoga & Wellness in Philadelphia if you want guided practice.
TL;DR:
Warm up with five to ten minutes of movement, then hold static stretches gently for about 30 seconds after exercise; stop if pain occurs.
Range of motion gains fade without maintenance, so stretch briefly each day or schedule dedicated flexibility sessions two to three times weekly.
Aim for similar mobility on both sides rather than extreme flexibility, because imbalances can make your body compensate and increase injury risk.
Stretching supports circulation and can ease movement, but it does not replace aerobic exercise; add it alongside strength and cardio, not instead.
Amritayogawellness
Build Flexibility With Guided Practice
Amrita Yoga & Wellness offers beginner-friendly yoga classes in Philadelphia, supporting a regular practice for mobility and flexibility.
Table of Contents
1. Nine flexibility benefits you can expect
1. Easier daily mobility. Greater range of motion makes reaching, bending, and stooping less straining. Think of grabbing a pan from a high shelf or tying a shoe without a grunt. Adults who sit most of the day notice it first. Cleveland Clinic links flexibility to easier everyday movement.
2. Better athletic performance. Moving through a fuller range lets you generate power more efficiently. A golfer swinging a club or a recreational pitcher throwing a ball needs hips and shoulders that rotate freely. Cleveland Clinic cites both examples. Weekend athletes and gym regulars benefit most.
3. Lower injury risk. Muscles and tendons that move through a full range handle load without excessive strain. UC Davis Health notes that flexible hamstrings help stabilize the knee and can help prevent ACL tears. Runners and field-sport players should pay attention here.
4. Better posture and alignment. Hours at a desk shorten hip flexors and chest muscles and pull the spine out of line. Lengthening those tight muscles helps the spine stack more naturally and eases the aches that follow. Office workers and drivers gain the most.
5. Healthier joints. Stretching boosts blood flow and the quantity of synovial fluid, the natural lubricant inside joints. Hips and knees, which carry your weight all day, benefit most. UC Davis Health describes this effect directly.
6. Faster recovery and less soreness. Improved circulation helps muscles return to their resting state after hard work. A gentle post-workout stretch is a simple example. Anyone who trains regularly can use it.
7. Better balance and fall prevention. Flexible ankles, hips, and calves let you recover when you stumble. Harvard Health says flexibility exercises can help prevent balance problems and back pain. Older adults may especially benefit.
8. Stress relief and mental clarity. Slow stretching with steady breathing calms the nervous system and gives your mind something quiet to focus on. A brief evening session may work for people with busy, noisy days.
9. Greater comfort in daily function. Fewer stiff mornings, less tension in the neck and lower back, and easier movement through ordinary tasks add up. Everyone from new parents to retirees feels the difference.
2. How flexibility produces these benefits
Flexibility is a joint's ability to move through its full range of motion, as the National Institute on Aging puts it. When muscles lengthen well, joints glide instead of grinding against tight tissue, which is why daily movement feels easier.
Stretching also increases blood circulation and nutrient supply to joint structures, and it boosts synovial fluid, according to UC Davis Health. Think of that fluid as oil for the hinges you use most.
There is a coordination piece too. Mayo Clinic stresses that symmetry matters more than extreme flexibility: even mobility on both sides is the goal, because imbalances are a risk factor for injury. If your left hip opens far more than your right, your body compensates somewhere else.
3. When and how often should you stretch?
Current guidance separates two jobs. Harvard Health favors dynamic movement for warm-ups and static stretching as a cool-down, when muscles are warm and supple. Mayo Clinic's stretching basics agree and add that you should warm up first, hold gently for about 30 seconds, and skip the bouncing.
Consistency decides whether gains last. Mayo Clinic warns that range-of-motion improvements can start fading quickly without maintenance, so aim for brief daily stretches or dedicated sessions two to three times weekly.
Warm up with 5–10 minutes of leg swings, arm circles, and easy marching before activity.
Hold static stretches for about 30 seconds after exercise, breathing slowly.
Add regular flexibility sessions to your routine.
Stop at mild tension. Pain means ease off.
4. Simple ways to add flexibility work to your week
You do not need a big block of time. The American Heart Association notes that yoga combines stretching and relaxation and improves balance, strength, and flexibility, and it also points to pilates as a good option. Four formats that work:
Yoga classes for breath-led stretching you can scale to your level.
Pilates, mat or reformer, for controlled range of motion.
Dynamic mobility drills before workouts.
Static stretching after workouts.
Try these micro-routines. At your desk, try neck rotations, a seated spinal twist, and a standing calf stretch (the NHS shows several you can do at home). After a workout, stretch your hamstrings, hips, chest, and shoulders. Always warm up first, breathe steadily, and keep your movements smooth. For pose ideas, browse our yoga poses library.
5. Does flexibility help circulation and your heart?
Stretching raises blood flow to the muscles and joints you are working, and UC Davis Health notes it can also help with blood pooling. After a long flight or a day on your feet, that gentle pump helps your legs feel lighter.
The cardiovascular link is mostly indirect, and we want to be straight about that. Flexibility work is not a substitute for aerobic exercise. What it does is make it easier to stay active. When your hips, calves, and shoulders move comfortably, walking, cycling, and swimming feel better, and you are more likely to keep doing them. The American Heart Association recommends varied activity, with flexibility work alongside strength and cardio rather than instead of them.
A practical way to use this: finish a brisk walk with calf, hamstring, and hip flexor stretches while your heart rate settles. The slow pace gives your body a gradual transition from effort to rest, and the habit tends to stick because it feels good.
6. How flexibility supports breathing
Your ribcage, chest, shoulders, and spine all move every time you inhale. When your upper back is stiff and your chest muscles are tight, from hours hunched over a laptop, for example, your breathing often turns shallow and stays high in the chest.
Posture is the bridge here. Cleveland Clinic explains that lengthening tight muscles helps align the spine, and a more open, upright frame leaves more room for the ribs to expand. Many people notice they can take a fuller breath after a few minutes of chest and upper-back stretching.
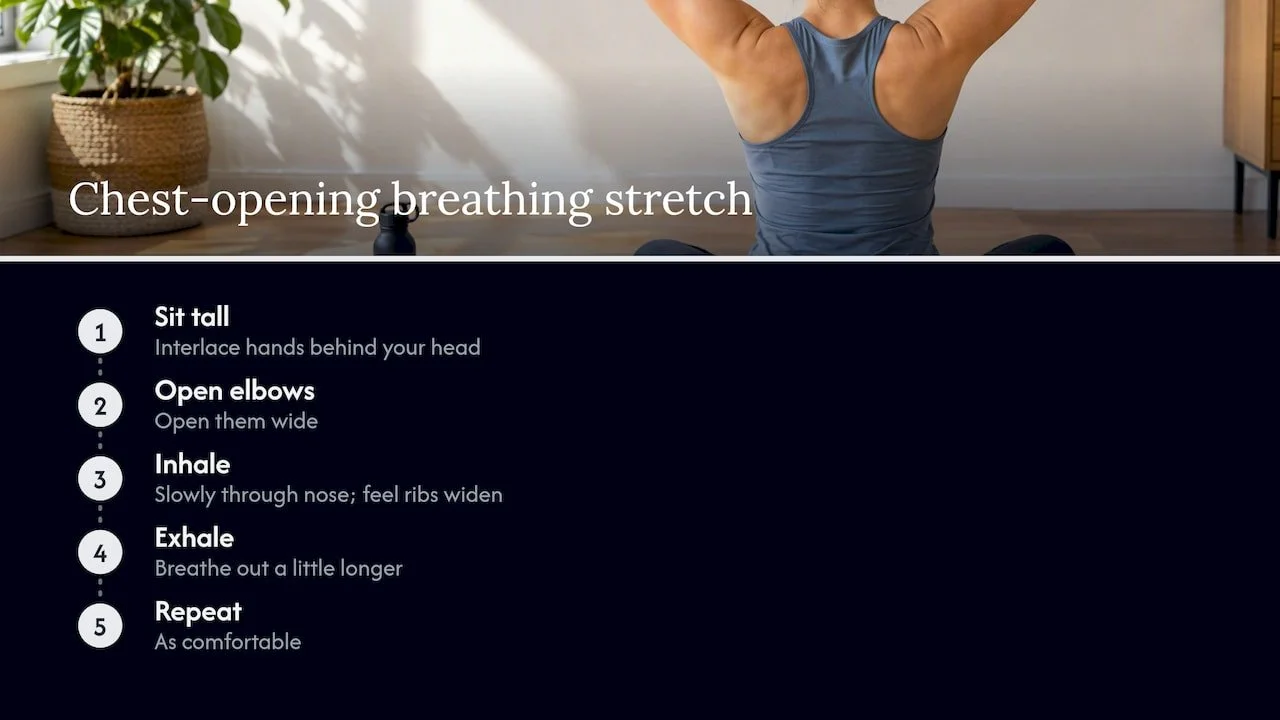
Mayo Clinic also advises practicing breathing during stretches. Try this: sit tall, interlace your hands behind your head, and open your elbows wide. Inhale slowly through the nose and feel your ribs widen sideways, then exhale for a little longer. Repeat as comfortable.
None of this treats a lung condition. If you have asthma or another respiratory issue, talk with your clinician before changing your routine. For healthy adults, though, combining open-chest stretches with slow breathing is an easy way to feel less cramped.
7. Can stretching help you sleep better?
Evening stretching will not replace good sleep habits, but it fits well into a wind-down routine. Slow, gentle holds paired with deep breathing give your body a signal that the day is over, and they ease the muscle tension that builds up from sitting, lifting, or stress.
Alberta Health Services describes stretching as a mindfulness practice that connects mind and body, promotes relaxation, and helps manage stress. Since stress is a common reason people lie awake, that calming effect is the most plausible route to better rest.
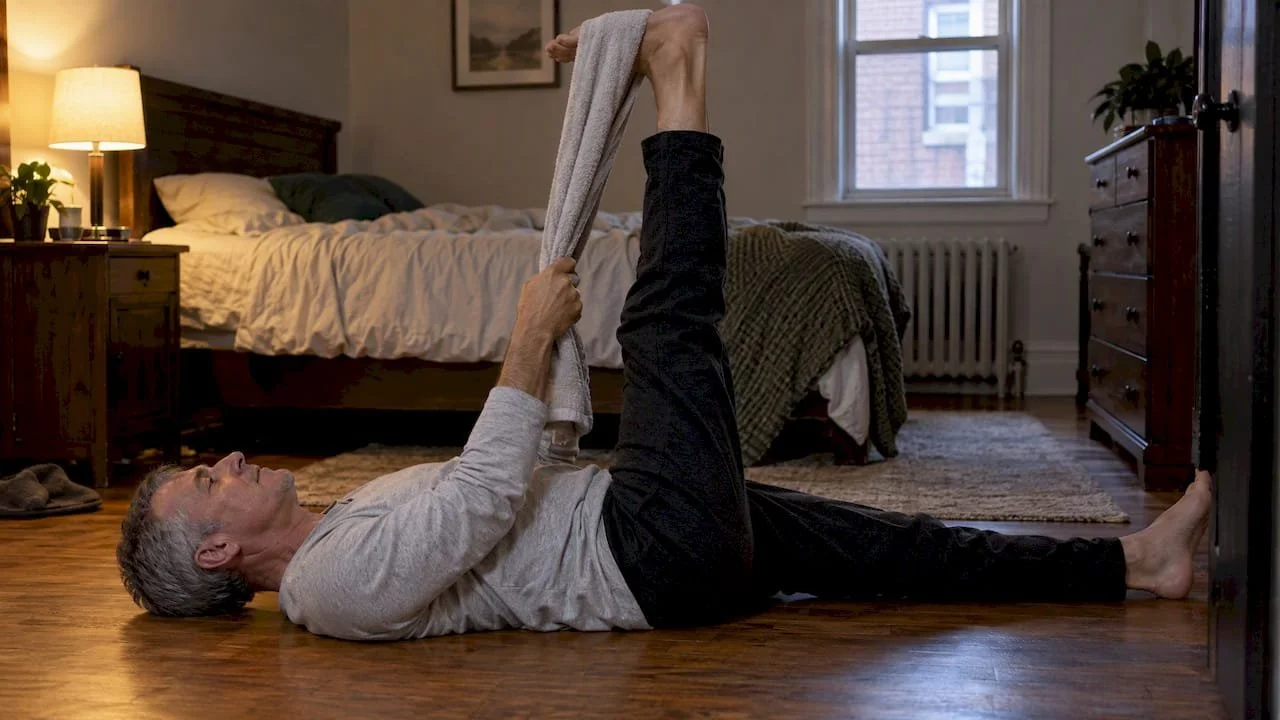
A simple bedtime sequence could include: a reclined hamstring stretch with a strap or towel, a gentle knees-to-chest hold, a supine spinal twist on each side, and child's pose. Keep the lights low and your breath slow, and stay within comfortable range. Skip anything intense, since vigorous effort close to bedtime can have the opposite effect.
If you like to add sound, mindfulness tips for yogis pair well with a quiet evening practice.
8. How stretching builds the mind-body connection
When you hold a stretch, you cannot rush it. You notice where tension lives, how your breath responds, and when your body says enough. That attention to sensation is the core of mindfulness, and stretching delivers it without any special equipment.
Alberta Health says stretching can improve mental health through this mind-body connection, in addition to loosening tight muscles and improving range of motion. People often report that the clearest-headed moment of their day comes right after a slow stretching session.
Yoga is the most familiar way to practice this, because it pairs movement with breath and a calm focus. If your mind tends to race, try counting your exhales during each hold, or silently naming the muscle you feel releasing. Both give your thoughts something simple to do.
We cover related ideas in our post on mindfulness activities for stress relief and clarity, and our guide to meditation for stress relief pairs naturally with a flexibility routine. Together they can turn a brief habit into a reset for both body and mind.
9. Why flexibility matters for healthy aging
Independence depends on ordinary movements: getting out of a chair, reaching a high cabinet, stepping into a car, turning your head to check traffic. Each one needs a certain amount of mobility, and that range tends to shrink if you do not use it.
The NHS says strength and flexibility exercises together help maintain bone density, improve balance, and reduce joint pain, and that flexibility supports everyday tasks and may reduce fall risk. Harvard Health likewise ties flexibility exercises to fewer balance problems and less back pain. Alberta Health adds that regular stretching is needed for lasting benefits, so the habit matters more than any single session.
The encouraging part is that it is never too late to begin. Gentle, supported practice works well for older adults, and our blog on senior yoga exercises offers a starting point. For classes aimed at joint comfort and range of motion, see our guides on yoga for mobility.
10. Community and consistency make flexibility stick
The people we see keep their gains are rarely the ones who stretch the hardest. They are the ones who show up, week after week, to a room where nobody is judging how far they can reach. Props, modifications, and a friendly teacher make a beginner feel welcome, and that welcome is what keeps people coming back.
— Juiced
11. Build flexibility with us at Amrita Yoga & Wellness
We offer group yoga and pilates classes with modifications for every level, plus private sessions when you want one-on-one attention. Ready to start?
Browse our class schedule and pick a time that fits your week.
Book a drop-in or membership on our in-studio group page.
FAQ
What are the main benefits of being flexible?
Flexibility improves range of motion, which makes daily movement easier and helps lower injury risk. It also supports better posture, joint health, balance, and recovery after exercise. Harvard Health says flexibility exercises can prevent injuries, back pain, and balance problems.
What is flexibility exercise?
Flexibility exercise is any movement that lengthens muscles and increases how far your joints can move, such as stretching, yoga, or pilates. The American Heart Association lists yoga and pilates among activities that keep the body fit. Warm up first and avoid bouncing.
How often should I stretch for lasting results?
Brief daily stretching or dedicated sessions at least two to three times a week works best. Mayo Clinic warns that gains can fade quickly without maintenance, so steady practice beats occasional long sessions.
Should I stretch before or after exercise?
Use dynamic movements like leg swings to warm up, then save static stretches for after your workout or a separate session. Harvard Health recommends static stretching when muscles are warm and supple.
Is there a benefit to being flexible if I am not an athlete?
Yes. Everyday tasks like reaching, bending, and sitting comfortably all depend on mobility. Cleveland Clinic says better flexibility makes these movements easier and less straining and supports better posture.
Sources
Recommended
Energy Healing: 4 Steps and Evidence for Philadelphia Beginners
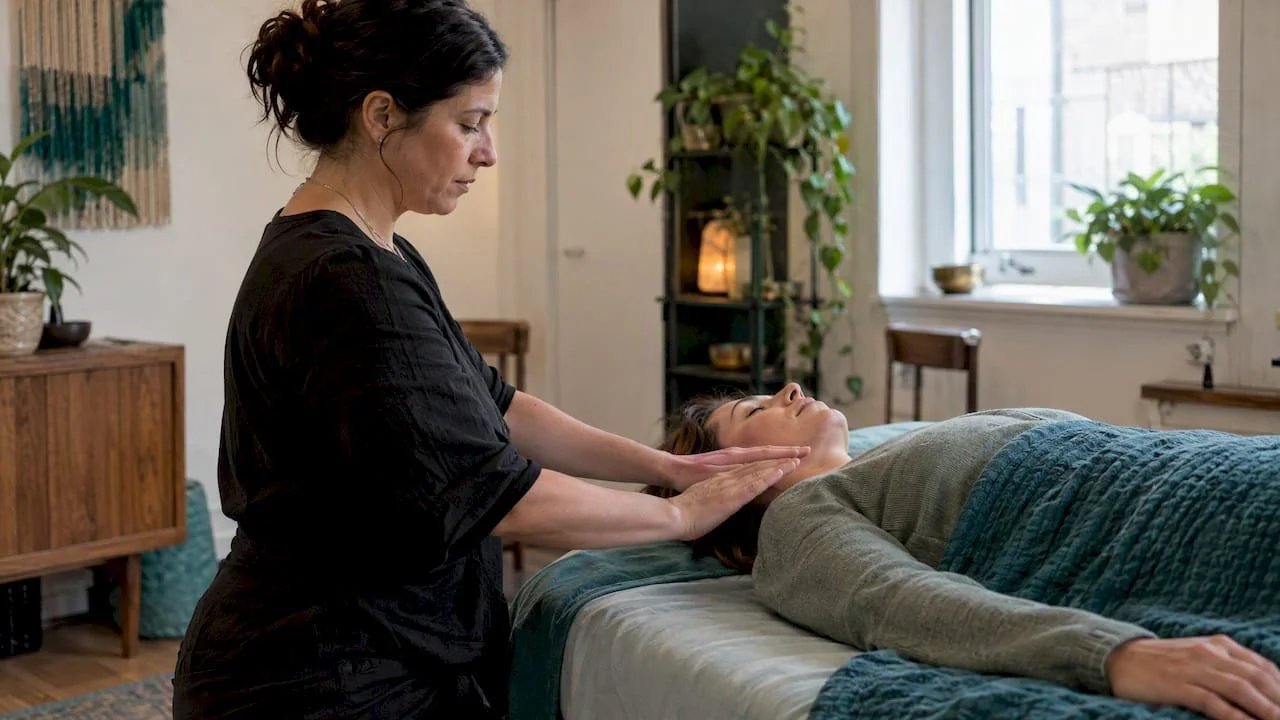
Energy healing is a group of hands-on and hands-off practices built on the idea that the body has an energy field that can be balanced. For beginners, the realistic payoff is relaxation and some symptom support, not a cure. Major health authorities treat these methods as complementary, meaning they work best alongside conventional medical care.
TL;DR:
Client reports from Zoom sessions showed statistically significant gains in relaxation and wellbeing and lower pain, supporting remote appointments when local care is unavailable.
Reiki trials suggest possible relief for pain, anxiety, and depression alongside standard care, but most studies are low quality and outcomes are not guaranteed.
At least 113 Member States use acupuncture; improper treatment can cause infection or organ injury, so choose a trained practitioner who uses sterile needles once.
Choose by goal: qigong or tai chi for self directed movement and breath, acupuncture or massage for pain, and Reiki for gentle stress support.
Try one session, note how you feel that evening and next morning, and leave if a practitioner promises cures or tells you to stop medication.
Amritayogawellness
Explore Gentle Movement in Philadelphia
Amrita Yoga & Wellness offers tai chi, yoga, and other classes for people exploring movement and wellbeing in Philadelphia.
Table of Contents
What types of energy healing are there?
Energy healing is an umbrella, and the methods under it look quite different. Here are the ones you will meet most often:
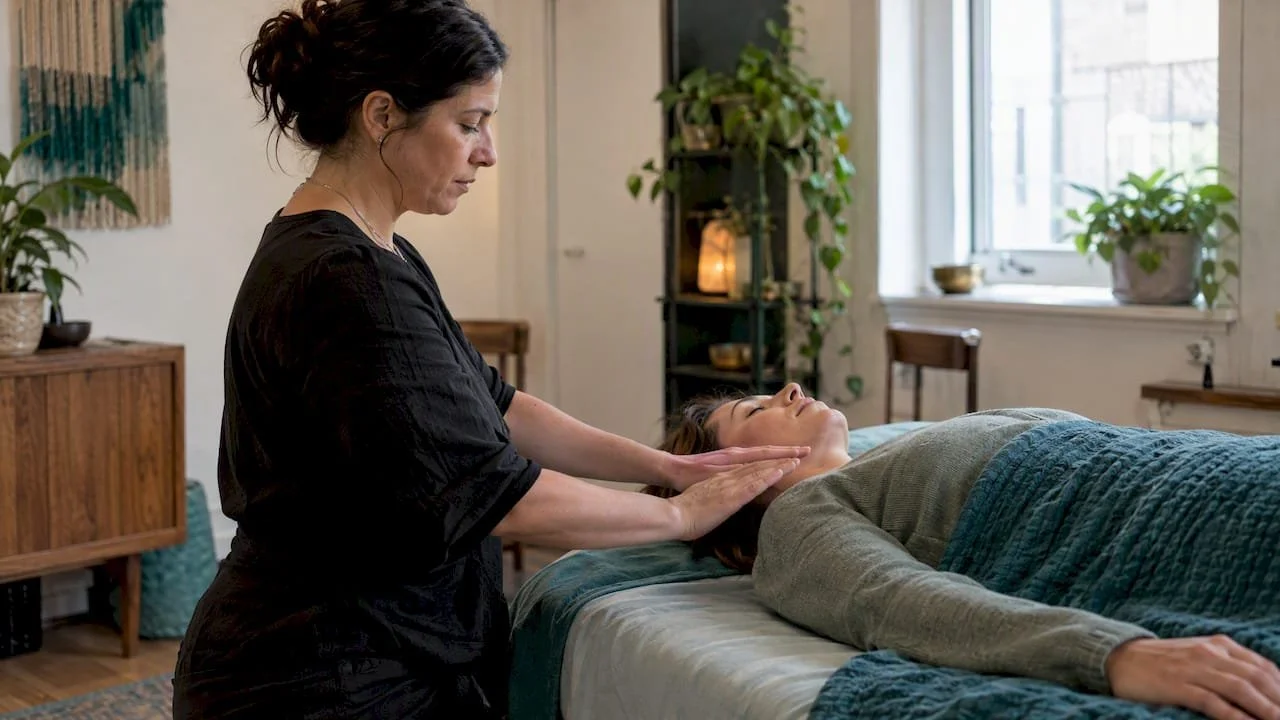
Reiki: A practitioner places their hands on or just above your body to direct what they describe as healing energy. Some traditions include an "attunement," a ceremony in which a teacher passes the practice to a student.
Acupuncture: A needle-based technique from traditional Chinese medicine, inserted at specific points. It is one of the most widely used methods and is often sought for pain.
Qigong and tai chi: Slow movement, posture, and breath work meant to cultivate qi, the life energy these traditions describe. You do these yourself rather than receiving them.
Therapeutic Touch, Healing Touch, and pranic healing: Noninvasive biofield therapies in which the practitioner works in or near your energy field, often without direct contact.
Other modalities: Crystal healing, sound healing, EFT (tapping), polarity therapy, and reflexology. Many practitioners blend several of these in a single session.
The simplest way to sort them is by who does the work. In Reiki and biofield therapies, you receive. In qigong and tai chi, you practice. Acupuncture sits in the middle: a trained person treats you, but the method is procedural rather than purely energetic. If you want a gentle movement route into the same ideas, our guide to types of meditation practices shows how breath and attention work connect to these traditions.
What happens during an energy healing session?
Most sessions follow a predictable arc, whatever the method:
Intake and intention-setting. The practitioner asks what brings you in and what you hope to feel afterward.
Centering. They take a quiet moment to settle themselves, and you get comfortable, usually lying down or seated and fully clothed.
Energy work. Hands, sound, or other tools are used for the main portion, which can vary in length.
Closing and grounding. The practitioner signals the end, and you rest, sip water, and talk through what you noticed.
Distance matters less than you might expect. A study of client experiences with virtual energy healing found that sessions delivered over Zoom produced statistically significant increases in relaxation and well-being and decreased pain. Participants described relaxation, release, and a sense of connection, so a video session can be a reasonable way to start if no good practitioner is nearby.
Common sensations include warmth, heaviness, tingling, deep calm, or an emotional release. Some people feel nothing dramatic, and that is normal. Afterward, drink water, eat lightly, and give yourself a quiet hour if you can.
What does the evidence say, and how safe are these methods?
The honest summary is encouraging but modest. The National Center for Complementary and Integrative Health (NCCIH) describes Reiki as a complementary approach that directs healing energy through the practitioner's hands. Clinical trials suggest it may help manage symptoms such as pain, anxiety, and depression alongside conventional care, but most studies are not of high quality, and Reiki has not been shown to cure physical disease.
Evidence for acupuncture, yoga, tai chi, massage, and relaxation techniques shows promise for some pain conditions, though trial quality and safety reporting vary, according to an NCCIH-summarized review. In plain terms, the signals are real enough to take seriously and weak enough that you should not expect guaranteed results.
Safety depends on the method:
Noninvasive practices such as Reiki, sound work, and tai chi carry low physical risk. The main danger is skipping needed medical care.
Acupuncture is a procedure. The World Health Organization's 2019 global report notes it is used in at least 113 Member States and stresses sterile, single-use needles and trained practitioners. Infection and injury to internal organs are possible when it is done improperly.
Medical conditions deserve a conversation with your primary care provider first. Energy work should add to treatment, never replace it.
For people managing serious illness, NCCIH's digest on cancer symptoms points out that some complementary approaches may ease symptoms and treatment side effects when used in addition to standard care, and it cautions against swapping standard treatment for unproven methods.
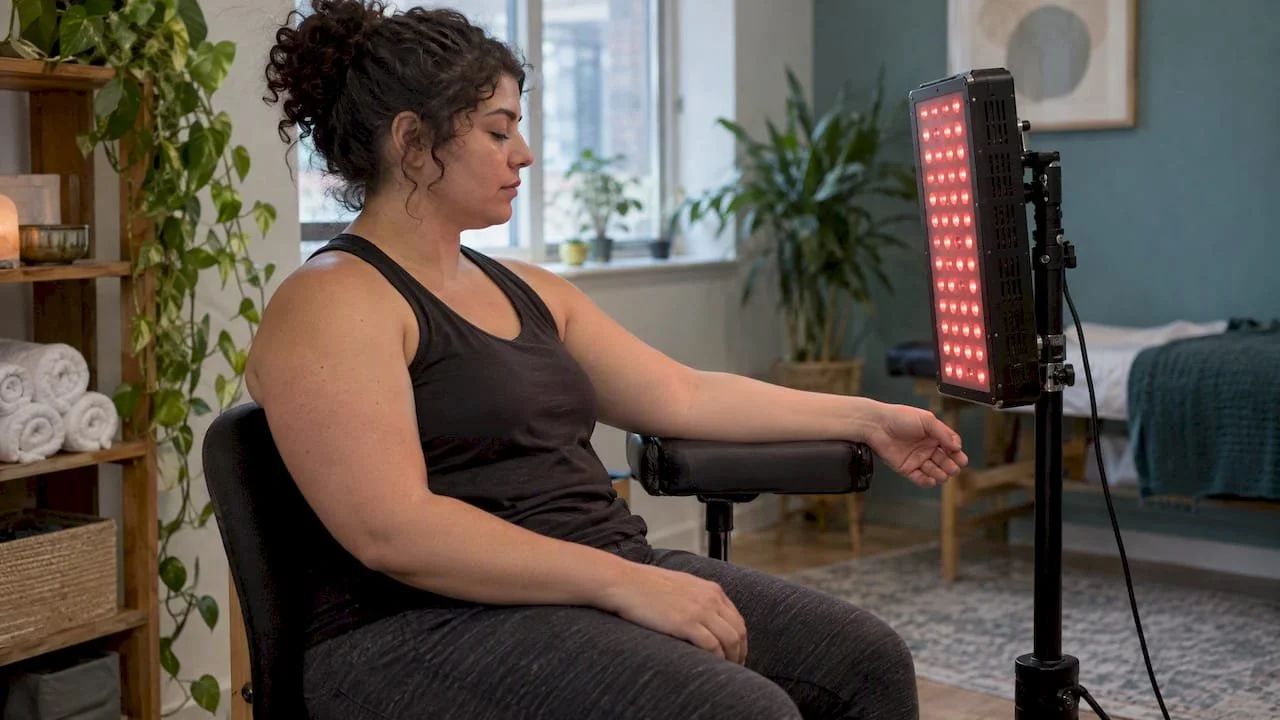
Device-based options exist too. A partner clinic explains the basics of photobiomodulation and related light sessions if you are curious how technology-assisted approaches differ from hands-on ones.
How do you choose a method or practitioner?
Start with your goal, then filter by practical details.
Stress reduction: Reiki or another gentle biofield session.
Movement and breath: Qigong or tai chi, which you can practice daily on your own.
Pain support: Acupuncture or massage, discussed with your doctor first.
Emotional release: EFT tapping or therapeutic touch.
Then check cost, session length, local versus virtual availability, and the practitioner's training. Hygiene matters most for needle-based work. Ask before you book: What training do you have? What will the session involve? What outcomes are realistic? How do you work alongside medical care?
Pro Tip: Book one session, write down how you feel that evening and the next morning, and decide afterward whether to continue.
That single-session trial keeps the stakes low and your expectations honest. If a practitioner promises to cure a disease or tells you to stop medication, treat that as a reason to walk away.
Why we treat energy work as one part of a wider practice
We are committed to wellness that is accessible and inclusive, and that shapes how we see energy healing. For most newcomers, the doorway is not a dramatic ritual. It is learning to slow down, breathe, and notice the body. Breathwork, massage, Ayurvedic experiences, and beginner-friendly classes all build that skill, and they pair naturally with energy-focused sessions. If you are curious about combining them, ask our staff, and our notes on mindfulness practice are a good place to begin.
— Juiced
Where can you try relaxing, energy-aware care in Philadelphia?
If you want to explore in a calm, welcoming setting, we offer several complementary options. Shirodhara and Abhyanga are Ayurvedic experiences designed for deep relaxation, with Shirodhara at $90 per session and Abhyanga at $120 per session. We also run breathwork classes and offer massage therapy. These are wellness practices for relaxation and self-care, not medical treatments. Browse our class schedule or book directly through the ayurvedic therapies page.
This article is general information, not a substitute for advice from a qualified doctor. Consult a qualified healthcare professional about your own circumstances before acting on anything here.
FAQ
What types of energy healing are there?
The most common types are Reiki, acupuncture, qigong and tai chi, and biofield therapies like Therapeutic Touch and pranic healing. Others include crystal healing, sound healing, EFT, polarity therapy, and reflexology. Many practitioners combine several in one session.
How much is an energy healing session?
Prices vary widely by method, practitioner, and location, so ask for the cost before you book. Our own Ayurvedic sessions are listed at $90 for Shirodhara and $120 for Abhyanga.
How do you do energy work?
Beginners usually start with a guided practice such as tai chi, qigong, or breathwork, which you can learn in a class and repeat at home. For hands-on methods like Reiki, you book a session with a trained practitioner. NCCIH notes Reiki is best used alongside conventional care.
Is energy healing safe?
Noninvasive methods carry low physical risk, but they should never replace medical treatment. Acupuncture requires a trained practitioner and sterile, single-use needles, according to the WHO global report.
Sources
Recommended
10 Benefits of Mindfulness, With Research and a Practice for Each
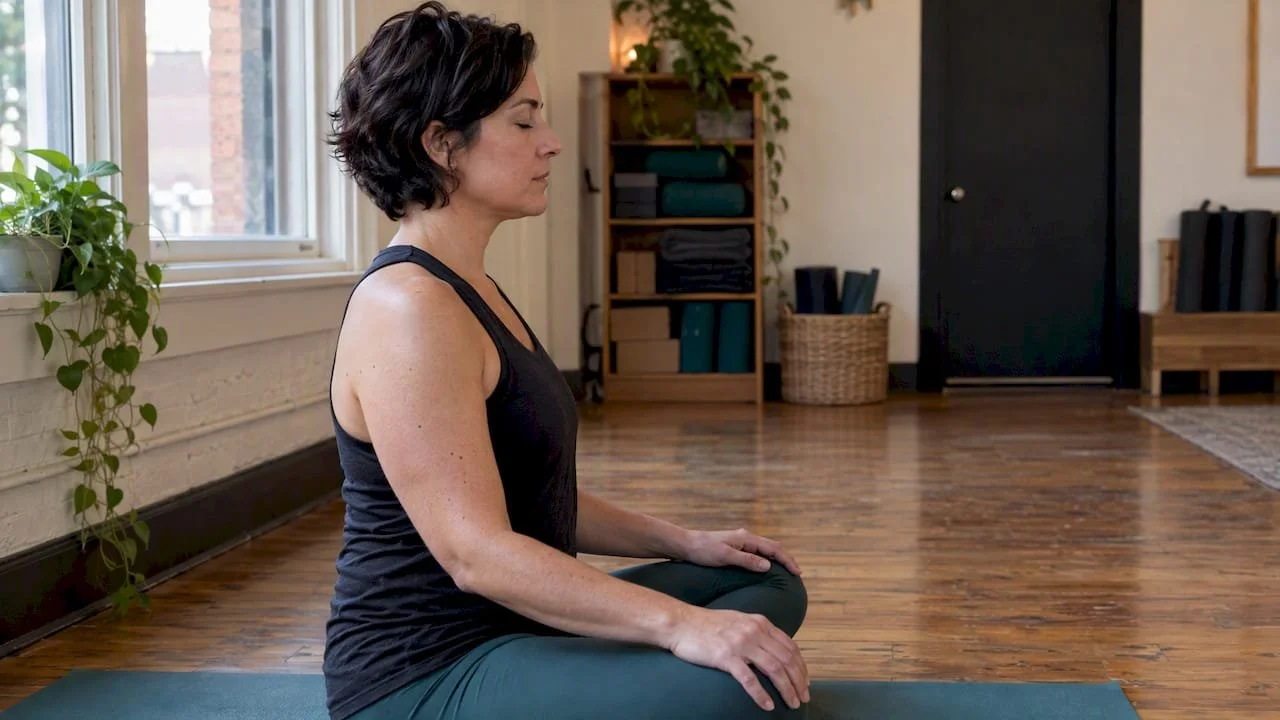
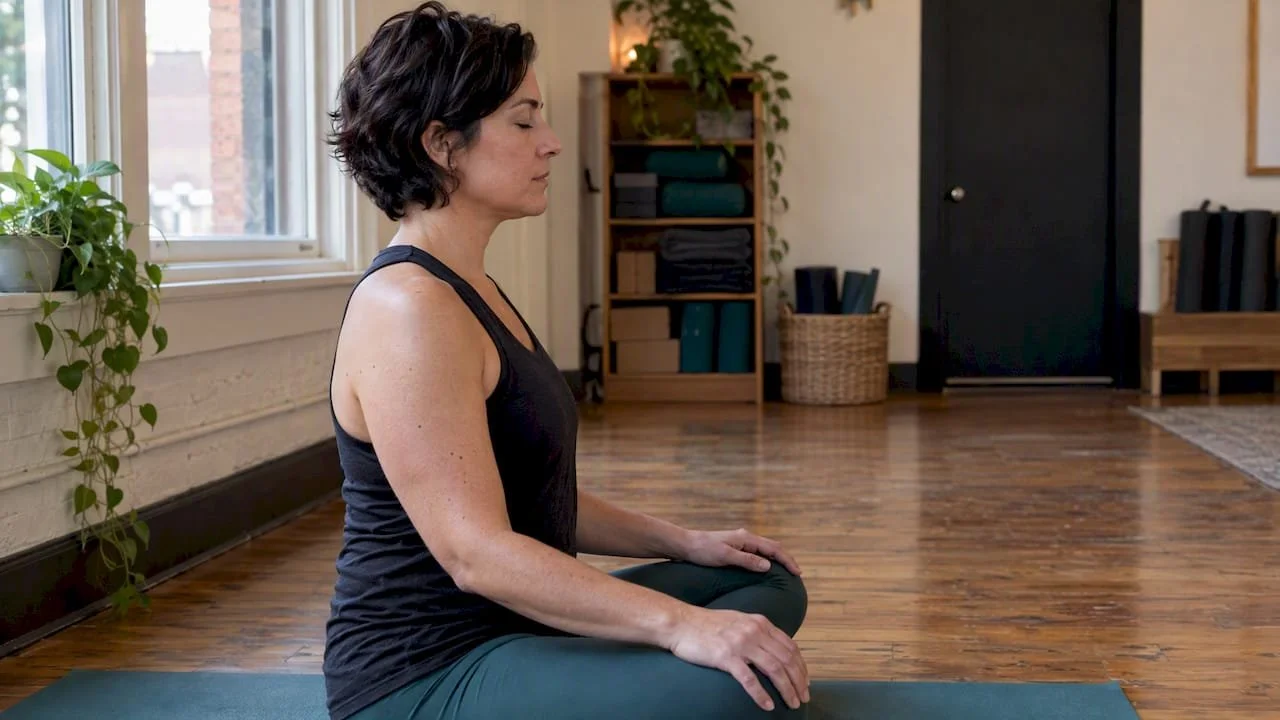
Mindfulness practice is linked to benefits including reduced stress, less anxiety, fewer depressive symptoms, sharper attention, better sleep, stronger emotional regulation, and healthier daily habits. A large individual participant data meta-analysis and WHO guidance both treat mindfulness as an evidence-based, scalable practice. Below, we break down what each benefit looks like in daily life, what the research actually shows, and how to start practicing today.
TL;DR:
Pooled trials found a modest reduction in psychological distress, with a standardized mean difference of −0.32 one to six months after programs ended.
Teacher led, group based courses, often structured as eight weeks of sessions, produced more consistent outcomes than casual or unguided solo practice.
Evidence cited does not establish mindfulness effects on pain, daily functioning, or cardiovascular measures such as blood pressure, and certainty differs by outcome.
Start with three to five minutes of breathing or sensory attention, attach it to an existing daily habit, and track sleep or mood.
For significant anxiety, depression, or other mental health symptoms, use mindfulness alongside care from a licensed clinician, not as a replacement.
Amritayogawellness
Make Space for Mindful Practice
Explore yoga and wellness offerings at Amrita Yoga & Wellness, a Philadelphia studio with classes, workshops and practices for varied experience levels.
Table of Contents
1. Mindfulness benefits explained, one by one
Each of these ten benefits comes with a simple way to picture it in your own day, plus a note on the evidence behind it. Results vary from person to person, and teacher-led, group-based programs tend to produce more consistent outcomes than practicing alone.
Reduced stress. Mindfulness training helps you notice a stress reaction as it starts, a tight chest before a hard conversation, a racing mind before a deadline, rather than being swept into it. Harvard Health describes this as developing equanimity: the capacity to feel an emotion without being overwhelmed by it, which is central to better stress management.
Reduced anxiety. Instead of trying to force worry away, mindfulness teaches you to observe anxious thoughts as passing mental events. A meta-analysis of mindfulness-based interventions found an average reduction in anxiety symptoms with a standardized mean difference of about −0.35 across study populations, a small-to-moderate effect.
Reduced depressive symptoms and improved mood. Practicing mindfulness regularly, even a short daily sit before checking your phone, builds a habit of noticing low mood early instead of spiraling with it. The same analysis found depression scores dropped by a comparable margin, with a standardized mean difference near −0.33.
Improved attention and focus. People who practice mindfulness report catching their mind wandering sooner and returning to the task faster, whether that's reading a report or listening to a partner. Our blog on mindfulness for mental clarity covers simple practices that support this kind of attentional control, which Harvard Health also links to the stress-reduction effects of mindfulness training.
Better sleep. A short body scan or breathing practice before bed can quiet the mental replay that keeps many people awake. A systematic review and meta-analysis on mindfulness-based interventions found post-intervention improvements in sleep quality, alongside other lifestyle measures.
Pain management. Mindfulness practice may help you notice sensations and your reactions to them. The evidence provided here does not establish its effects on pain or daily function.
Improved emotional regulation and resilience. A regular practice gives you a pause button between a trigger, an unexpected criticism, a frustrating commute, and your reaction to it. Over weeks, that pause becomes a trained skill rather than an occasional accident, which is part of why structured mindfulness programs show more consistent benefits than casual, unguided practice.
Interpersonal connection and compassion. Paying closer attention to your own internal state may help you notice your reactions during conversations.
Healthier daily habits and brain-health links. The same 2024 systematic review found mindfulness-based interventions associated with increased physical activity, reduced alcohol use, and higher rates of tobacco cessation, likely because stronger emotion regulation and attentional control make it easier to follow through on healthier choices.
Possible physical-health benefits. The evidence provided here does not establish effects on cardiovascular markers such as blood pressure.
Across these benefits, teacher-led, group-based programs show more consistent effects in the evidence cited here than less structured practice.
2. How to start a mindfulness practice that works
You do not need an extended period of silence to begin practicing. A consistent practice can be easier to sustain than an occasional long one.
Micro-practice (3 to 5 minutes): sit or stand still, breathe naturally, and name five things you notice through your senses right now, then return to your breath until the time is up.
Starter practice: find a quiet spot, close your eyes, bring attention to the breath at the nostrils or belly, and when your mind wanders, gently label it "thinking" and return to the breath.
Pair it with an existing habit: attach your practice to something you already do daily, right after you brush your teeth or before your morning coffee, so you do not rely on willpower alone.
Track one or two outcomes: jot a quick note on sleep quality or mood each morning for a few weeks so you can see change instead of guessing at it.
Many structured protocols, including MBSR and MBCT, consist of eight weeks of group sessions, with guided practice and discussion. Teacher-led formats like MBSR (Mindfulness-Based Stress Reduction) and MBCT (Mindfulness-Based Cognitive Therapy) are the most-studied versions of this approach, which is part of why a class or small group often produces steadier results than a solo app routine. Our posts on mindfulness practice and step-by-step guidance for everyday calm walk through a full starter plan if you want more structure than the outline above.
Pro Tip: If you want more structure, consider a guided class or teacher-led course. The cited evidence reports more consistent effects for teacher-led, group-based programs.
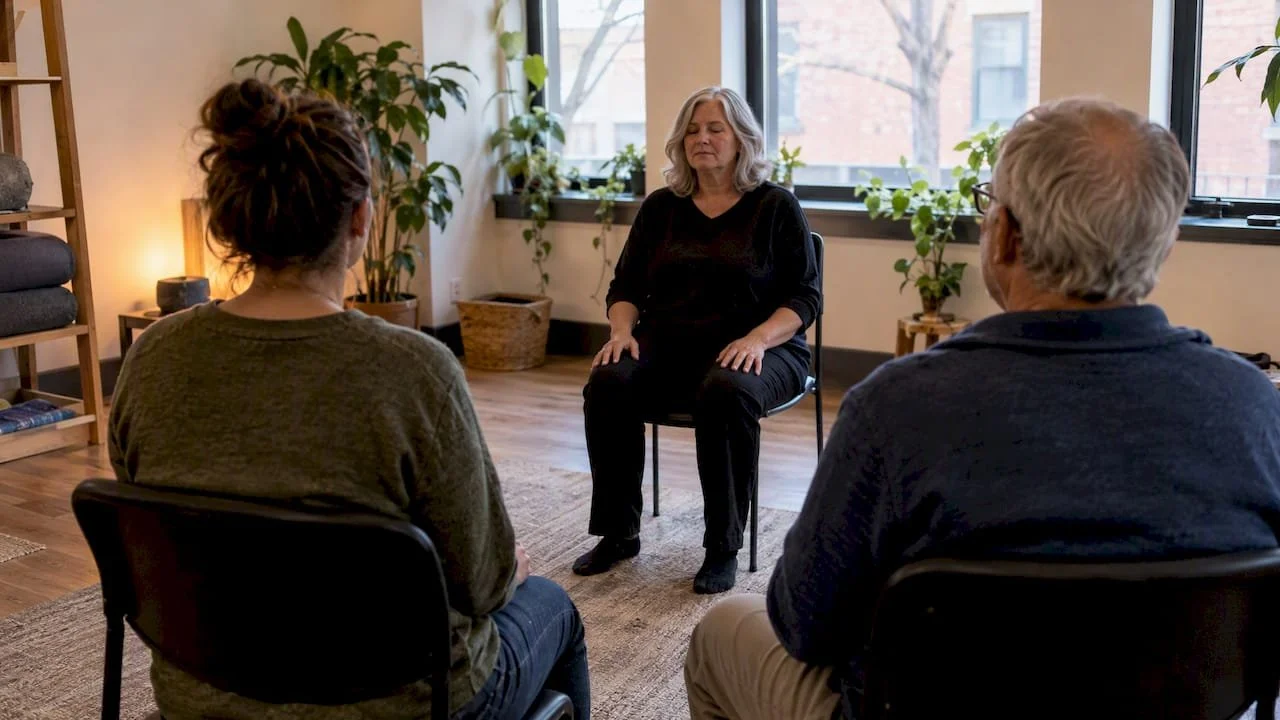
3. What the research actually shows about mindfulness
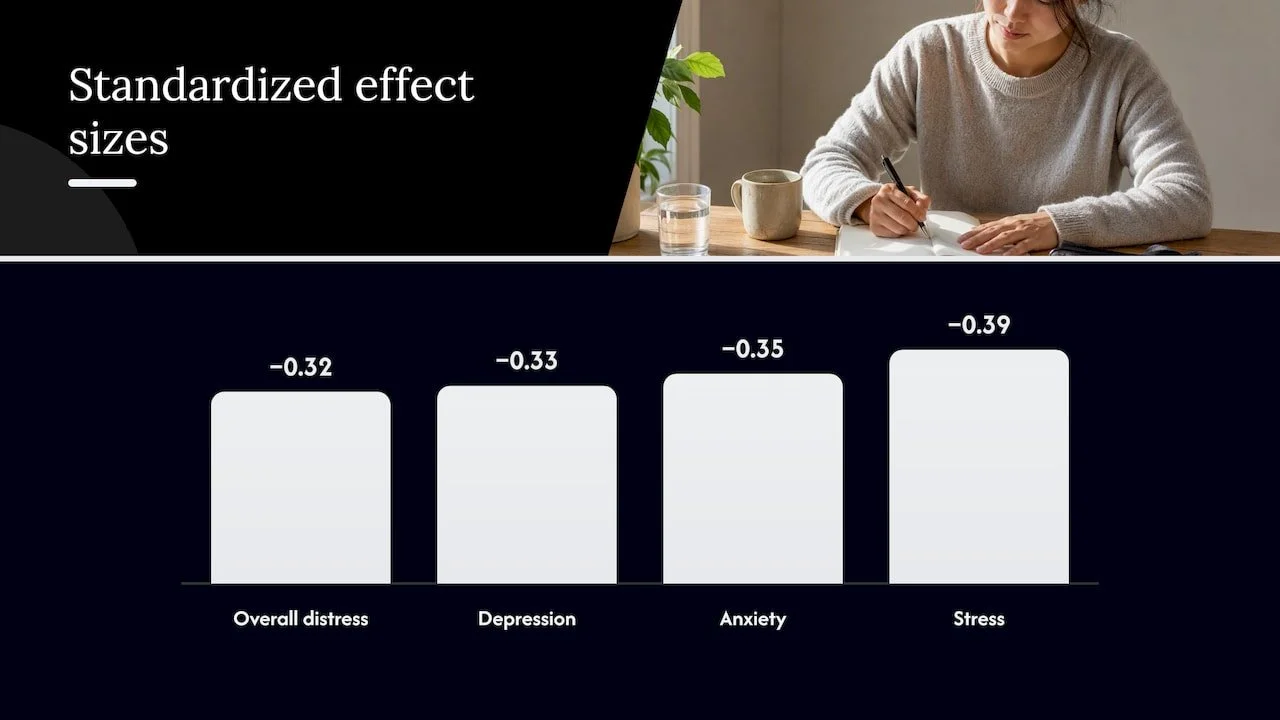
The clearest evidence comes from an individual participant data meta-analysis pooling results from randomized controlled trials of mindfulness-based programs. It found a small-to-moderate average reduction in psychological distress one to six months after a program ended, with a standardized mean difference of −0.32. In plain terms, the analysis found a modest average reduction in distress, with more consistent effects for teacher-led, group-based programs.
Structured psychological self-help interventions that incorporate mindfulness techniques are evidence-based, scalable tools that can expand access to care for conditions like anxiety and depression. World Health Organization
A standardized mean difference of −0.32 in psychological distress reflects a real but modest average effect, consistent with similar findings in university student populations, where separate meta-analyses found standardized mean differences near −0.33 for depression, −0.35 for anxiety, and −0.39 for stress across several studies.
Other reviews add to the picture, with varying levels of certainty. The 2024 review on lifestyle and brain health reported post-intervention improvements in sleep quality and physical activity. None of this means mindfulness is a cure-all. The findings suggest potential benefits across several areas, but the strength of evidence varies by outcome.
4. Making mindfulness part of an ordinary week
The benefits above stop being theoretical when you try a short practice in everyday life. We find the easiest way in is small: breath awareness before a class, or a body scan while waiting for water to boil, rather than waiting for a perfect, quiet hour that rarely shows up. Guided settings tend to help more than solo attempts, since a teacher's cues keep attention anchored when your own mind wanders. If you are managing significant anxiety, depression, or other mental health symptoms, mindfulness practice works best alongside, not instead of, care from a licensed clinician. Pairing breath work with movement, like yoga, is one of the more natural ways to build the habit, and if you want that kind of guided structure, the options below are a reasonable place to start.
— Juiced
5. Guided mindfulness support at Amrita Yoga & Wellness
We built our class schedule around the idea that mindfulness sticks best with structure and company, not willpower alone. Whether you are new to practice or returning after a long break, a teacher-led setting gives you the cues and accountability that solo practice often lacks.
Drop into a Group Class or Community Class to try guided breath and movement work without committing to a membership.
Join from home with a Livestream Class Drop In if an in-studio visit is not practical yet.
Book a One to One Session for individualized pacing and attention.
Explore our Ayurvedic therapies, including Shirodhara and Abhyanga, for a deeper, body-based approach to stress relief.
Browse our full class and monthly experience schedule to find a session that fits your week and reserve your spot.
This article is general information, not a substitute for advice from a qualified doctor. Consult a qualified healthcare professional about your own circumstances before acting on anything here.
FAQ
What are the main benefits of mindfulness?
The benefits supported by the evidence cited here include reduced stress, anxiety, and depressive symptoms, along with better attention, sleep, and emotional regulation. A large individual participant data meta-analysis found these effects were small-to-moderate on average and more consistent in teacher-led group programs.
How long does it take to see benefits from mindfulness?
Many structured programs run for eight weeks and show measurable improvements in psychological distress within one to six months of completion, according to pooled trial data. Short daily practice, even a few minutes, can produce noticeable changes in stress awareness sooner than that, though formal programs tend to show steadier results.
Can mindfulness help with sleep problems?
Yes. A systematic review and meta-analysis found mindfulness-based interventions were associated with improved sleep quality, and separate research on insomnia patients found mindfulness added to conventional treatment improved related anxiety and depression scores as well.
Is mindfulness backed by scientific research?
Mindfulness is supported by multiple systematic reviews and randomized controlled trials, and the World Health Organization recognizes structured self-help interventions that incorporate mindfulness techniques as evidence-based tools for expanding access to mental health care. Certainty varies by outcome, with stronger evidence for stress, anxiety, and sleep than for some physical-health markers.
What is the easiest way to start practicing mindfulness?
Start with a short daily practice, such as focused breathing or noticing things through your senses, and attach it to an existing habit like your morning coffee. Guided classes or teacher-led courses, including in-studio or livestream options, tend to produce more consistent results than practicing alone from the start.
Sources
Recommended
Try Mind, Body, and Spirit Practices in 1 Minute
Mind body spirit practices are activities that train attention, move the body, and connect you to meaning beyond daily tasks, all at once. Common examples include meditation, yoga, tai chi and qigong, breathwork, journaling, mindful eating and movement, massage, and acupuncture. Each targets a different piece of well-being, and most beginners find it easiest to start with one small practice before adding more. Short starter routines follow below so you can try one today.
TL;DR:
A review of 41 trials with 2,993 participants found moderate evidence that mindfulness eases anxiety and depression at 8 weeks and 3 to 6 months.
Pair a practice of one or five minutes with two weekly sessions of 15 to 60 minutes; extend duration only after shorter sessions feel automatic.
Choose meditation or breathwork for racing thoughts, gentle yoga or qigong for stiffness, and seated versions when mobility is limited.
Chair yoga, slow qigong, and seated breathing can accommodate limited mobility or chronic pain; shorten sessions and change any movement that causes strain or dizziness.
Link a brief practice to an existing daily cue, such as brushing your teeth or waiting for coffee, so starting does not depend on memory.
Amritayogawellness
Find a Practice That Fits You
Explore yoga, tai chi, breathwork workshops, and other wellness offerings at Amrita Yoga & Wellness in Philadelphia.
Table of Contents
1. Examples grouped by what they train
Not every practice does the same job, so it helps to sort them by what they primarily target: the mind, the body, the spirit, or all three together.
Mind-focused practices train attention and emotional regulation. Meditation with a breath anchor asks you to notice each inhale and exhale and gently return focus when your thoughts wander. Breathwork uses patterned breathing, such as slow exhales or box breathing, to calm the nervous system. Journaling, especially a few lines of reflection before bed, helps process emotions and spot patterns in mood or stress.

Body-focused practices build physical awareness and function. Gentle yoga styles, like restorative or chair yoga, improve flexibility and balance without high impact. Tai chi and qigong combine slow, flowing movement with breath control, which supports joint mobility and coordination. Mindful walking or dance invites you to feel each step or motion instead of moving on autopilot.
Spirit-focused practices connect you to meaning, values, or something larger than the daily to-do list. This might look like a short ritual at the start of your day, a devotional practice tied to your own beliefs, contemplative journaling about purpose, or a nature-based ritual like sitting outside and naming what you notice.
Combined practices work on all three levels at once. Yoga and tai chi or qigong blend movement, breath, and often a contemplative quality. Expressive movement, such as free-form dance, lets emotion move through the body. Mindful eating, where you slow down and notice taste, texture, and fullness, turns a routine meal into a grounding practice.
Meditation and breathwork suit people who feel mentally scattered or anxious and want a quiet, low-equipment entry point.
Yoga, tai chi, and qigong fit those who prefer to work through the body, including older adults or anyone managing joint stiffness, since poses and flows can be modified for mobility limits.
Journaling and ritual work well for people who process emotions better in writing or symbolic action than through movement.
Mindful eating is a natural starting point for anyone who already eats three times a day and wants to build a practice without adding a new time block.
2. Try these 1, 5, and 15-minute starter routines
You do not need an hour to start. Short, repeated practices build skill and consistency faster than occasional long sessions, since frequent short reps train attention and body awareness more reliably than sporadic marathon sessions, according to research on practice frequency.
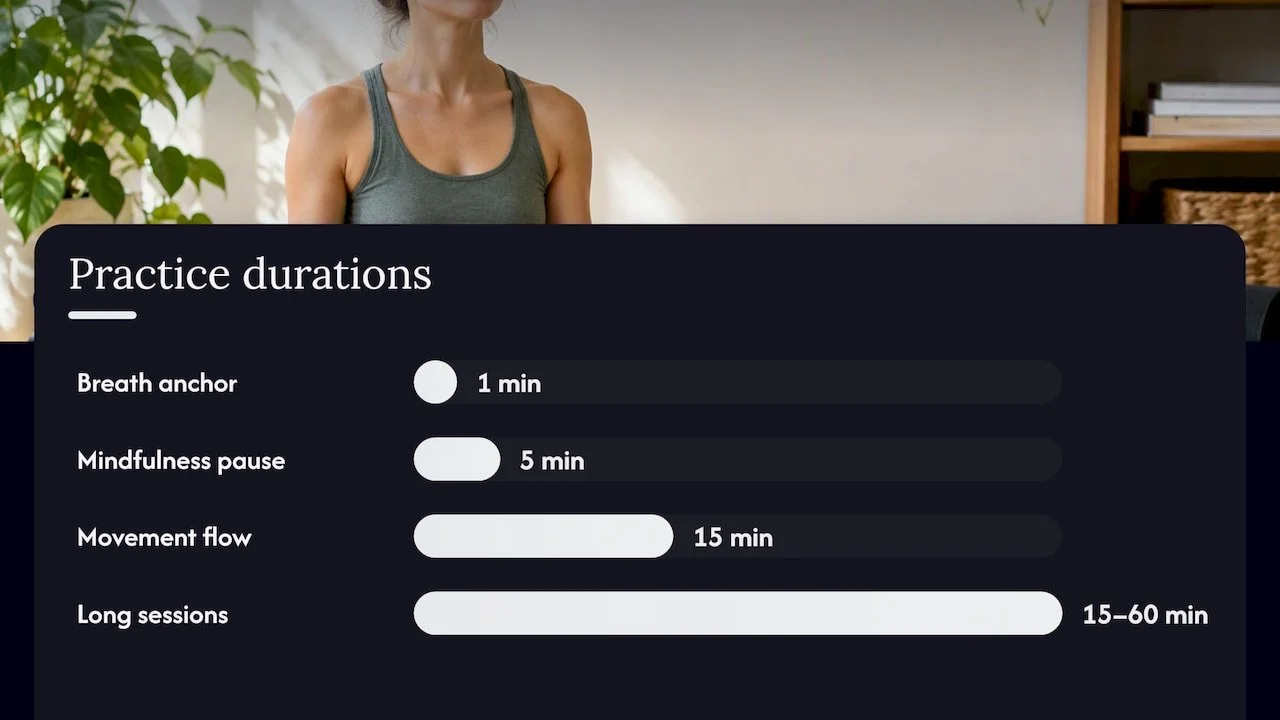
One minute, breath anchor: sit or stand, inhale for four counts, exhale for six, and repeat for one minute, letting the longer exhale signal your body to settle.
Five minutes, mindfulness pause: pick an anchor such as your breath or the feeling of your feet on the floor, notice when your mind wanders, silently label it "thinking," and return to the anchor.
Fifteen minutes, gentle movement flow: move through a few basic yoga poses or a short qigong sequence, linking one breath to each movement, slowing down whenever balance feels shaky.
For a simple weekly structure, pair a daily one or five-minute micro-practice with two longer 15 to 60-minute sessions, like a yoga or tai chi class, each week. Increase duration only once the shorter version feels automatic, and modify any pose or breath pattern that causes strain or dizziness. Our in-house guide to meditation styles and beginner yoga guidance offer more detail if you want to go deeper on either track.
Pro Tip: Attach your micro-practice to something you already do daily, like brushing your teeth or waiting for coffee to brew, so you never have to remember to start it.
3. What the evidence and major frameworks say
Mindfulness-based meditation programs show moderate strength of evidence for reducing anxiety and depression symptoms at 8 weeks and again at 3 to 6 months, based on a review of 41 trials with 2,993 participants. Most of these trials were short and varied in design, so results point to a real but modest effect rather than a cure.
A review of 41 trials involving 2,993 participants found moderate evidence that mindfulness meditation programs ease anxiety and depression symptoms within 8 weeks, according to the NCBI meditation review. That timeline matches what most beginners experience: noticeable but gradual change, not an overnight shift.
Meditative movement practices add a physical layer to that mental training. The World Health Organization highlights yoga's adaptability across ages and abilities, recommending it as a valuable entry point for healthy aging and overall well-being, since it uniquely combines physical and mental conditioning in one practice.
To make sense of how these pieces fit together, the BERN framework groups mind-body medicine into four pillars: Behavior, Exercise, Relaxation, and Nutrition. It offers a practical way to mix practices instead of chasing a single "perfect" technique, and it ties these interventions to the body's own stress-regulation pathways.
4. How to combine practices using the BERN approach
The BERN framework breaks mind-body practice into four manageable pillars, which makes it easier to build a routine without feeling like you need to do everything at once.
Behavior: set a fixed cue, like meditating right after you wake up, so the habit does not depend on willpower.
Exercise: add one meditative movement session, such as a gentle yoga or tai chi class, each week.
Relaxation: use a daily breathwork or breath-anchor pause during a predictable moment, like a lunch break.
Nutrition: practice mindful eating at one meal a day, slowing down enough to notice flavor and fullness.
| Day | Micro-practice | Longer session |
|---|---|---|
| Monday | 5-minute breath anchor | Rest |
| Wednesday | Mindful eating at lunch | Yoga or tai chi class |
| Friday | 1-minute breathwork | Rest |
| Saturday | Journaling | Gentle movement flow |
Pair each practice with an existing habit, keep early goals small, such as one minute rather than twenty, and prioritize showing up consistently over doing a long session occasionally.
5. Where these practices come from
Most mind-body-spirit practices trace back centuries, and understanding their roots can deepen how you approach them today. Yoga developed in ancient India as a spiritual and physical discipline long before it became a fitness trend, originally combining postures, breath control, and meditation as a path toward inner stillness.
Tai chi and qigong emerged in China, rooted in martial arts and traditional medicine, built on the idea that slow, deliberate movement paired with breath supports the flow of internal energy. Meditation itself appears across many traditions, from Buddhist and Hindu contemplative practices in Asia to contemplative prayer in Christian and Jewish traditions, each developing its own technique but sharing a common goal of quieting the mind.
Breathwork has roots in yogic pranayama but also appears in indigenous healing traditions worldwide, where controlled breathing was used in ceremony and healing rituals. Acupuncture originates in traditional Chinese medicine, based on the idea that stimulating specific points on the body supports balance and healing. Massage therapy has parallel histories across cultures, from Ayurvedic bodywork in India to therapeutic touch practices in ancient Greece and Egypt.
Journaling as a wellness tool is more recent, but its contemplative function echoes older traditions of written reflection and prayer. Recognizing these origins is not just historical trivia. It is a reminder that these are tested, long-practiced traditions adapted for modern life, not passing trends.
6. Benefits across physical, mental, and spiritual health
Mind-body-spirit practices tend to offer benefits in three overlapping categories, and most practices touch more than one.
Physically, meditative movement like yoga, tai chi, and qigong supports balance, flexibility, and chronic pain management, with evidence pointing to consistent practice as the key variable, according to the NCCIH overview of yoga safety and effectiveness. Massage and mindful movement can also ease muscle tension and support recovery from physical stress.
Mentally, meditation and breathwork are linked to reduced anxiety and depression symptoms over weeks of practice, as shown in the trial data summarized earlier. Journaling supports emotional processing by giving diffuse feelings a concrete shape on the page, which can make them easier to manage.
Spiritually, practices like ritual, contemplative journaling, and nature-based reflection help connect daily life to a larger sense of meaning or purpose, something that formal exercise alone rarely addresses. Many people find that this spiritual layer is what keeps them returning to a practice long after the physical or mental benefits become familiar.
Because these categories overlap, a single practice like yoga can deliver a physical stretch, a mental reset, and a spiritual pause all in the same session, which is part of why meditative movement works well as a starting point for beginners.
7. What people typically hope to get out of practice
Most people come to mind-body-spirit practices with a handful of common goals, even if they describe them differently. Stress reduction tops the list for many, whether that means calming an anxious mind before a big day or simply sleeping better at night.
Others are looking for physical outcomes: better balance, less joint pain, more flexibility, or simply the ability to move through daily tasks with less strain. This is especially common among older adults exploring gentle yoga or tai chi as a way to stay mobile.
Some practitioners are chasing a mental shift, like sharper focus, better emotional regulation, or relief from racing thoughts. Meditation and breathwork tend to be the entry points here, since both directly train attention.
A smaller but meaningful group is seeking something less measurable: a sense of connection, purpose, or peace that daily routines do not provide. This is where ritual, contemplative journaling, and spiritual practices tend to matter most.
Finally, many people are simply looking for consistency itself: a sustainable habit they can keep up, rather than another short-lived resolution. That goal shapes which practice makes sense, since the easiest practice to sustain usually outperforms the "ideal" one you abandon after two weeks.
8. How to pick the practice that fits you
Choosing the right practice starts with being honest about your goal, your schedule, and your body. If your main issue is racing thoughts or anxiety, meditation or breathwork is a reasonable first step, since both train the mind directly. If stiffness or low mobility is your bigger concern, gentle yoga, tai chi, or qigong addresses the body while still calming the mind.
Time matters too. If you only have a few minutes a day, a short breath anchor or journaling practice fits better than committing to an hour-long class you will likely skip. If you have more time and enjoy structure, a weekly class adds accountability and guided instruction that solo practice does not offer.
Physical considerations matter as well. Someone managing joint pain or limited mobility may do better starting with chair yoga or slow qigong rather than a vigorous flow class, while someone recovering from a high-stress period might benefit more from breathwork or restorative yoga than high-energy movement.
It also helps to notice what you are naturally drawn to. If sitting still feels unbearable, movement-based practices like yoga or mindful walking will likely stick better than seated meditation. There is no single best practice, only the one you will actually repeat.
9. Making practices accessible at any age or ability
Accessibility is less about finding a special version of a practice and more about adapting the one you already like. Most mind-body-spirit practices can flex to fit different ages, bodies, and energy levels.
For older adults or those with limited mobility, chair yoga, slow qigong, and seated breathwork offer the same core benefits as more vigorous versions, and modified pose sequences can support balance without strain. The WHO specifically points to yoga's adaptability as a reason it works well for healthy aging across different physical capacities, as noted in its commentary on yoga and healthy aging.
For people managing chronic pain or injury, shorter sessions, supported poses, or breath-only practices remove the barrier of needing full mobility to participate. Balance-focused movement also matters for fall prevention in older adults, an area where structured balance training complements the stability work built through tai chi and gentle yoga.
For beginners of any age who feel intimidated by class settings, private or small-group sessions offer a lower-pressure entry point, while journaling or short breathwork can be practiced entirely at home with no equipment. The common thread is that modification, not intensity, is what makes a practice sustainable.
10. Why small, consistent practice beats the perfect routine
The biggest misconception about mind-body-spirit practice is that it requires an hour-long ritual to count. In our experience, the people who stick with it are the ones who start absurdly small: one minute of breath work, one page of journaling, one gentle stretch before bed. Consistency compounds in ways a single ambitious session never does. We built our class formats and resources around that same idea: approachable entry points for people who are intimidated or short on time, not just advanced practitioners.
— Juiced
11. Try a guided practice with us in Philadelphia
Reading about these practices only goes so far. If you want to feel the difference a guided session makes, we offer a direct way to try it without committing to a full studio membership first.
Our group classes, including gentle and restorative yoga styles plus tai chi, give you a structured way to practice meditative movement with instruction tailored to your experience level. If you prefer one-on-one pacing or have specific mobility needs, a private session lets us adjust the practice entirely around you. For the spirit-focused side of this work, our Ayurvedic therapies, including Shirodhara and Abhyanga, offer a deeper, body-based path to the calm these practices aim for. Browse our class schedule and find a session that fits your week.
FAQ
What are some examples of mind-body practices?
Common examples include meditation, yoga, tai chi, qigong, breathwork, and mindful movement like walking or dance. Each combines physical awareness with mental focus, and most can be practiced in short daily sessions.
How do I start practicing mind body spirit together?
Start with one small practice from each category, such as a short meditation for the mind, gentle yoga for the body, and a brief ritual or journaling for the spirit. The BERN framework offers a simple structure for mixing behavior, exercise, relaxation, and nutrition without overwhelm.
What are some examples of mind-body control techniques?
Breathwork, progressive muscle relaxation, and guided meditation are common mind-body control techniques that use breath or attention to influence physical tension and emotional state. Tai chi and qigong also train this kind of control through slow, deliberate movement paired with breath.
What are some examples of mind-body exercises?
Yoga, tai chi, qigong, and mindful walking are widely used mind-body exercises that combine physical movement with focused attention. These practices have evidence for benefits in balance, chronic pain, and mental health when practiced consistently, according to NCCIH.
How long should a beginner practice each day?
Beginners can start with as little as one to five minutes a day and still see benefits, since short, frequent practice tends to build attention and body awareness more reliably than occasional long sessions. Gradually extending session length once the habit feels automatic works better than starting with an ambitious routine you cannot sustain.
Sources
Recommended
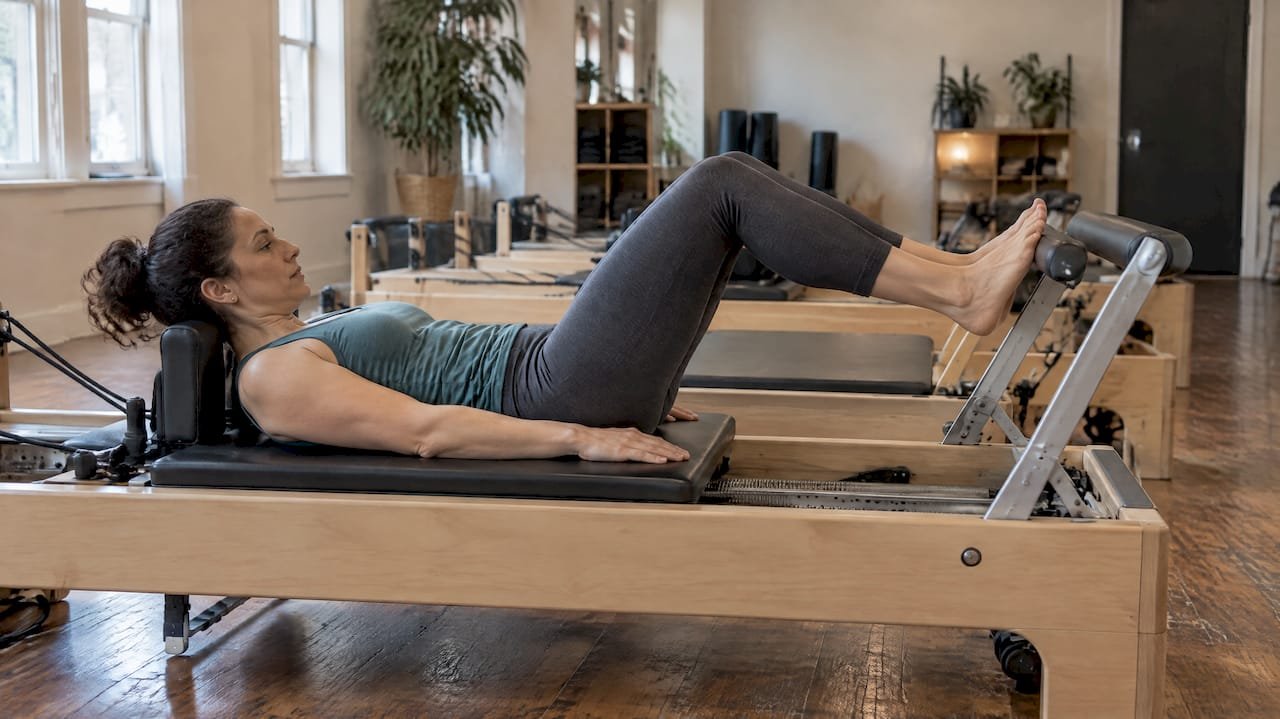
Six Pilates Principles: Origins and Cues for Your Next Move
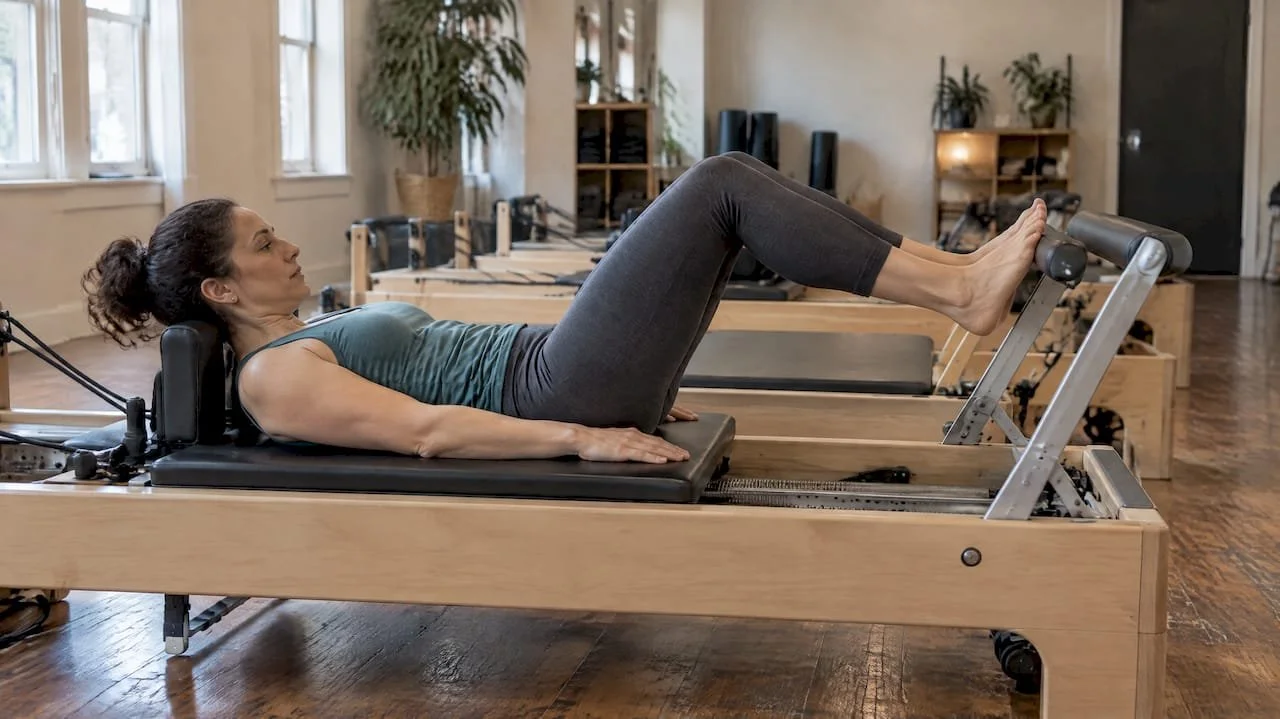
Pilates rests on six core principles: centering, concentration, control, precision, breath and flow. These act as teaching cues that guide every movement back to the "powerhouse," the deep core muscles that stabilize the spine, so that practice stays controlled, intentional and connected rather than rushed or careless.
TL;DR:
Start with one or two cues, such as centering and breath, then add control and precision as your coordination improves.
A 10 to 15 minute micro practice can reset your routine, while a full class usually lasts 45 to 60 minutes.
Stop movements that cause pain, especially in your lower back or neck; for back concerns, use a gentler pelvic tilt and shorter range.
A review of 119 papers found the six traditional principles in only about 23% of studies, while breathing appeared most consistently across fitness and clinical research.
Consistent practice typically builds measurable strength and flexibility changes over 8 to 12 weeks of practice, rather than delivering quick results.
Amritayogawellness
Bring Pilates Principles Into Practice
Explore Amrita Yoga & Wellness, a Philadelphia studio offering Pilates alongside yoga and other wellness practices.
Table of Contents
1. What do the six core principles actually mean?
Each principle answers a different question about how you move, and together they turn a simple exercise into a mind-body practice.
Centering: Every movement starts from the powerhouse, the band of muscles across your abdomen, lower back, hips and glutes. Before you lift a leg or roll up off the mat, draw your navel gently toward your spine so the movement originates from your center rather than your limbs.
Concentration: Pilates asks for full attention on each repetition rather than mindless counting. Pick one cue, such as the position of your pelvis, and hold it in your mind for the entire set instead of letting your thoughts drift.
Control: Nothing in Pilates is thrown or flung into place. Slow a movement down until you can stop it at any point, which is the clearest sign you're moving with control instead of momentum.
Precision: A few correctly aligned repetitions beat a dozen sloppy ones. Check one alignment detail, like keeping your shoulders away from your ears, on every single rep rather than only at the start.
Breath: Breath is paired with movement, often inhaling to prepare and exhaling through exertion. Try lateral or "ribcage" breathing: inhale to widen your ribs sideways, then exhale fully while drawing your abdominals in during the hardest part of a move.
Flow: Movements link together smoothly instead of stopping and starting. Once you know a sequence, practice moving from one exercise into the next without pausing to reset, letting your breath carry you across the transition.
Instructor resources, including a digital textbook on Pilates principles, present these six as the standard framework, though some teachers add related ideas like posture or balance depending on the class style.
2. Build a short routine around the six principles
A simple checklist helps you apply all six principles without overthinking them mid-class.
Set your space and breathe for three to five slow cycles before moving.
Engage your powerhouse by drawing your navel toward your spine (centering).
Choose one focus cue for the session and repeat it silently (concentration).
Perform your first movement slowly enough to pause at any point (control).
Check one alignment detail on every repetition (precision).
Match inhale and exhale to the effort phase of each exercise (breath).
Link two or three movements together without stopping (flow).
Finish with a slower cool-down breath cycle to settle your core before standing.
A short micro-practice of 10 to 15 minutes works for a quick reset, while a full class typically runs 45 to 60 minutes. Beginners should stop any movement that causes pain, especially in the lower back or neck.
Pro Tip: Breathe out as you move into the hardest part of an exercise, drawing your powerhouse in tighter, so breath and control reinforce each other during transitions instead of working against them.
3. Where do these principles come from?
Joseph Pilates called his method "Contrology" in his own writings, including his book Return to Life Through Contrology, which laid out the exercises and philosophy that later practitioners built on. The method began as training for dancers before expanding into general fitness and rehabilitation, and the Pilates Method Alliance along with academic sources, including a Springer Nature textbook chapter, later organized his ideas into the principle framework taught today.
A systematic review of 119 peer-reviewed papers found consensus that Pilates is a mind-body exercise built around core strength, control, flexibility and breathing, though the traditional six principles were mentioned in only about 23% of the papers reviewed. Breathing was the most consistently cited principle across both fitness and clinical research.
Pilates is best understood as a mind-body exercise method, with core stability, muscle control, flexibility, posture and breathing as its most consistently supported elements across the research.
This gap suggests the principles function mainly as teaching language rather than fixed clinical criteria, and their emphasis shifts depending on whether a class targets general fitness or a specific condition like low back pain.
4. How we bring these principles into the studio
We teach both mat and reformer Pilates classes and translate these six principles into cues that work for bodies at any level. For clients managing low-back concerns, we often shift the centering cue toward a gentler pelvic tilt and shorten the range of motion until control is solid, a modification we outline in our guidance on starting Pilates safely. Joining a guided class can help you feel these principles in your own body rather than just reading about them.
5. How Pilates principles compare to yoga's philosophy
Yoga and Pilates both treat the body and mind as connected, but they organize that connection differently. Yoga philosophy traditionally centers on breath, awareness and stillness as paths toward a broader mental or spiritual state, often drawing on practices like meditation alongside physical postures. Pilates, by contrast, builds its philosophy around a specific physical anchor, the powerhouse, and treats mental focus as a tool for achieving precise, controlled movement rather than an end goal on its own.
Where yoga principles tend to describe an internal state or ethical approach to practice, Pilates principles like precision and control are closer to technical instructions you can check against your form in real time. Breath plays a role in both, but yoga breathing practices often stand alone as their own discipline, while Pilates breath is almost always paired directly with a specific movement phase. The flow principle in Pilates also differs from a yoga flow sequence: Pilates flow is about linking strength-based movements smoothly, while yoga flow often links postures with a meditative or energetic intention. Both methods reward consistency and attention, but Pilates philosophy stays closer to the mechanics of the moving body.
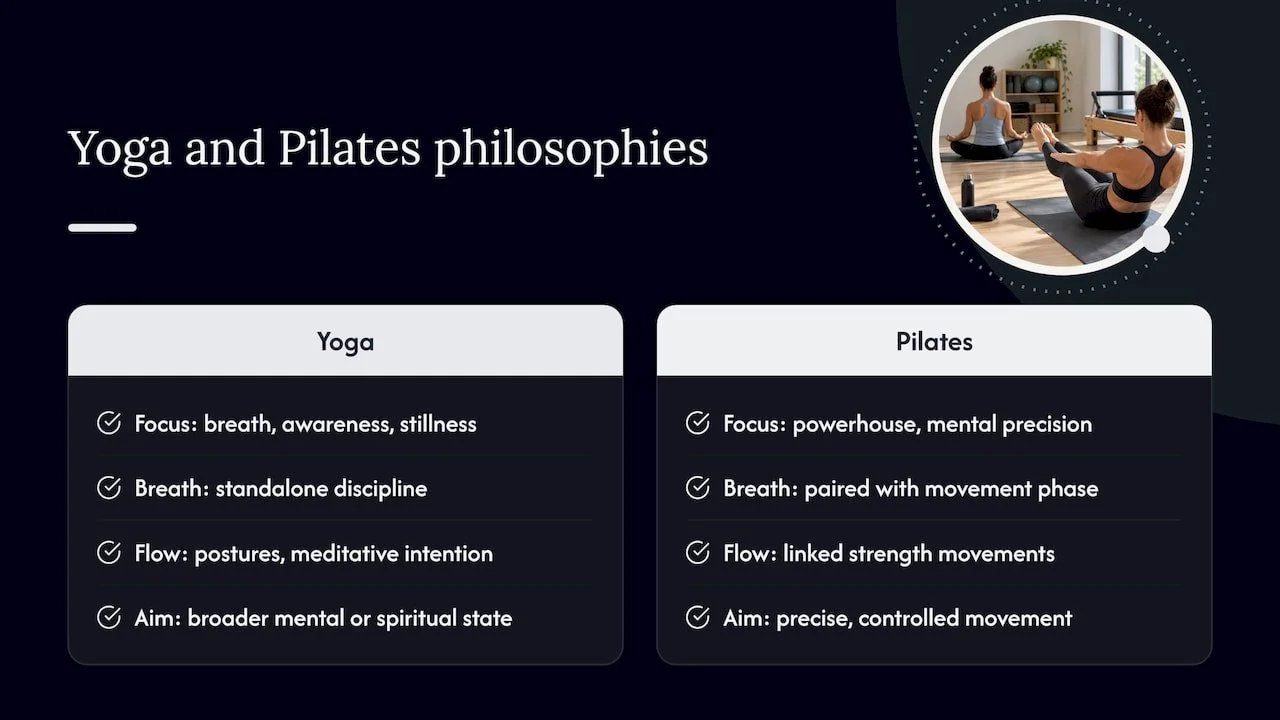
6. Why mental focus matters as much as the exercise itself
Concentration in Pilates is not a side note to the physical work, it's one of the six defining principles, which signals that Joseph Pilates considered mental engagement essential to getting results from the method. Moving through a sequence without attention tends to produce sloppy form and shallow breathing, while giving each repetition your full focus changes how your body executes the same movement.
This mental component extends beyond the single class. Sustained concentration during a session trains a habit of noticing tension, checking alignment and staying present with physical sensation, skills that carry over into how you move and hold stress throughout your day. Our explainer on the Pilates advantage touches on how this body-mind connection shows up beyond the studio. The principle of centering reinforces this mental anchoring too, since returning attention to your powerhouse before each movement works as a kind of recurring checkpoint that pulls focus back whenever it drifts.
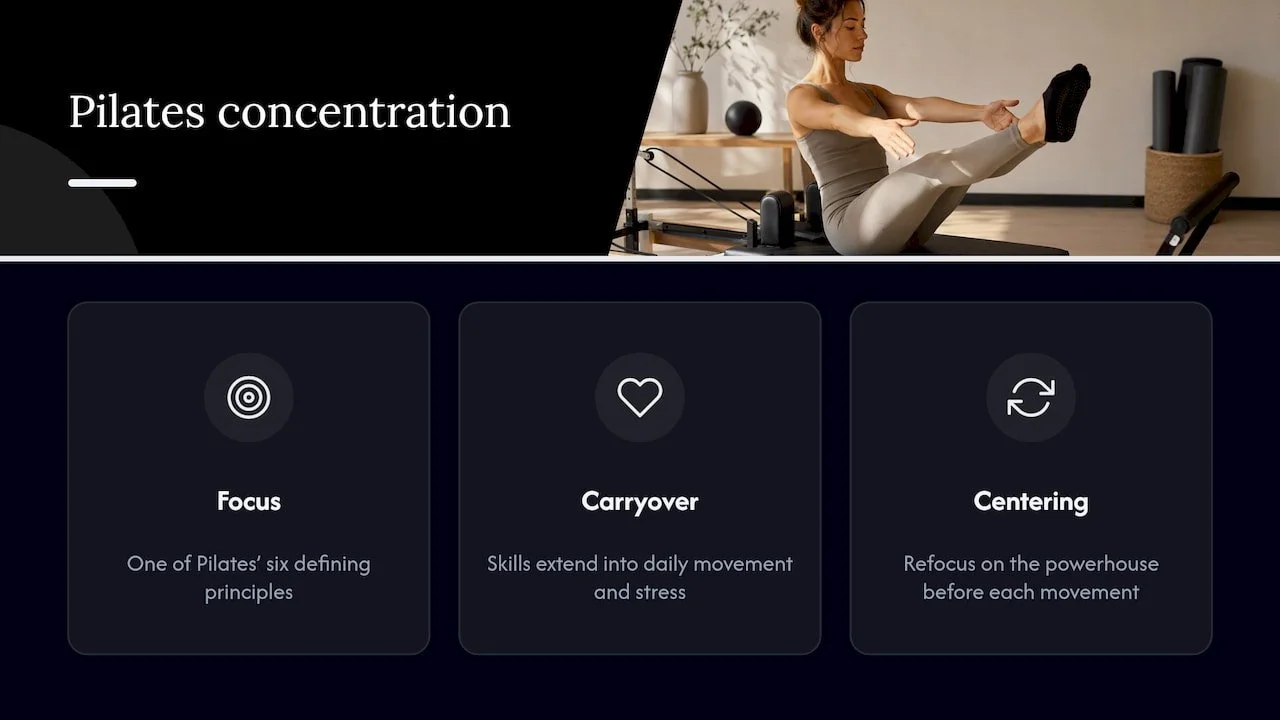
7. What long-term, consistent practice can offer you
Practicing the six principles regularly builds more than muscle. Centering and control gradually improve posture and core stability, which tends to support everyday movement and reduce strain from poor mechanics over time. Consistent attention to breath can also support a calmer nervous system response during and after a session, since slower, controlled breathing is a known component of relaxation practices more broadly.
Beyond the physical, the repeated discipline of concentration and precision builds a kind of patience with your own progress, since Pilates rewards slow, careful refinement over quick results. Many practitioners describe this as a grounding effect that carries into daily life, a sense of being more present and less reactive. Measurable changes in strength and flexibility typically build over 8 to 12 weeks of consistent practice, and the mental steadiness that comes from practicing concentration and control tends to deepen on a similar timeline.
8. Why understanding these principles changes how you practice
Learning the six principles by name gives you a framework for noticing what's actually happening in your body during a session instead of just following along with a routine. I've found that once you can identify whether a movement is lacking control, precision or breath coordination, you start correcting your own form in real time rather than waiting for outside feedback. That shift, from passively doing Pilates to actively practicing its principles, is what separates steady, safe progress from plateauing.
— Juiced
Learn the principles in our classes and private sessions
The fastest way to feel these six principles click is to practice them with guidance, which is exactly what our group mat and reformer classes and private one-to-one sessions are built for. A private session lets an instructor adjust cues like centering or breath pacing to your body in real time, while group classes provide a consistent space to build control and flow alongside others.
Browse our class and membership schedule to find a mat or reformer session that fits your week, or book a one-to-one session if you'd rather start with individual attention before joining a group.
FAQ
What are the 8 principles of Pilates?
Most sources describe six core principles: centering, concentration, control, precision, breath and flow. Some schools or instructors add related ideas such as posture or balance, which is why you may see longer lists in different teaching materials, according to a Pilates digital textbook.
What are some Pilates poses?
Common Pilates exercises include the Hundred, the Roll-Up, the Single Leg Circle and the Plank, each designed to build strength from the powerhouse while applying principles like control and precision. Reformer classes add machine-based variations of these same movement patterns using spring resistance.
What is the main aim of Pilates?
The main aim of Pilates is to build core strength, control and flexibility through mindful, precise movement rather than fast or forceful exercise. A systematic review of the method describes it as a mind-body exercise approach centered on strength, posture and breathing.
What are the seven principles of Pilates?
There is no single, universally agreed seven-principle list. Most academic and practitioner sources use the six core principles, centering, concentration, control, precision, breath and flow, and any seventh addition, such as posture, varies by school or instructor.
How many principles should a beginner focus on?
A beginner can start by focusing on just one or two principles at a time, such as centering and breath, before layering in the rest. Building a solid feel for the powerhouse and breath coordination first tends to make control and precision easier to apply later.
Sources
Recommended
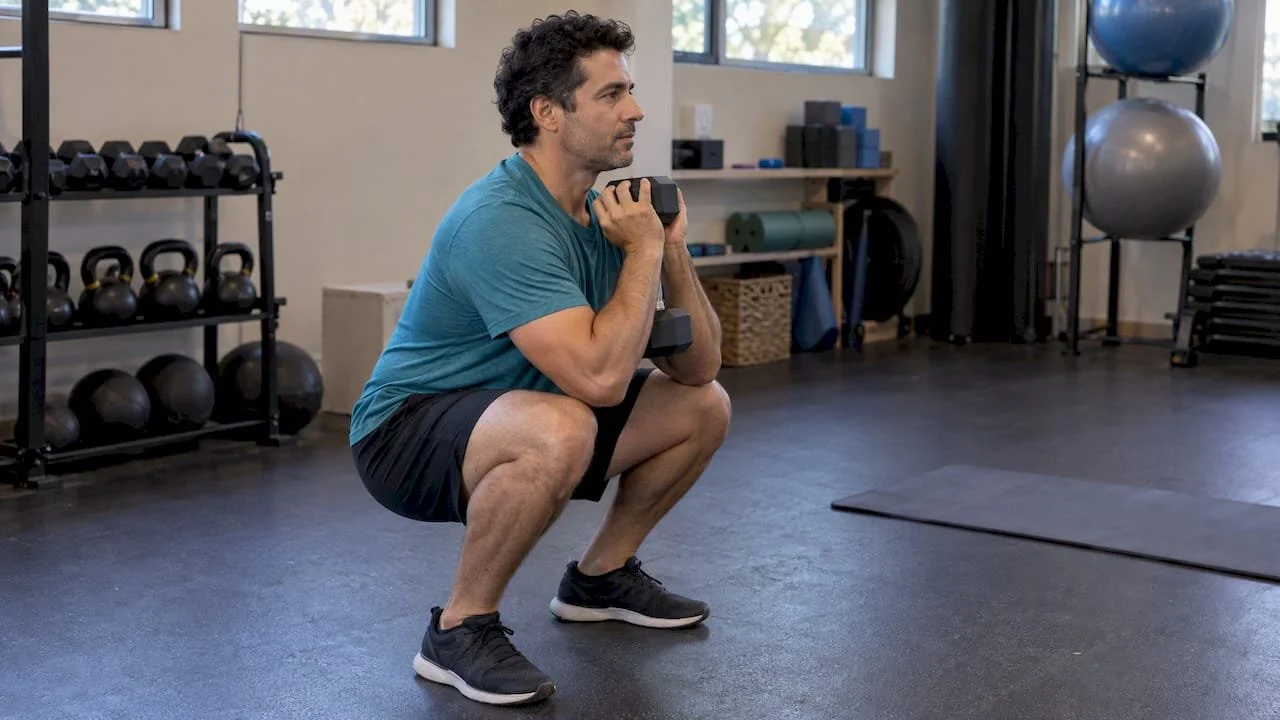
Combining Movement Modalities: What 81 Studies Mean for Your Week
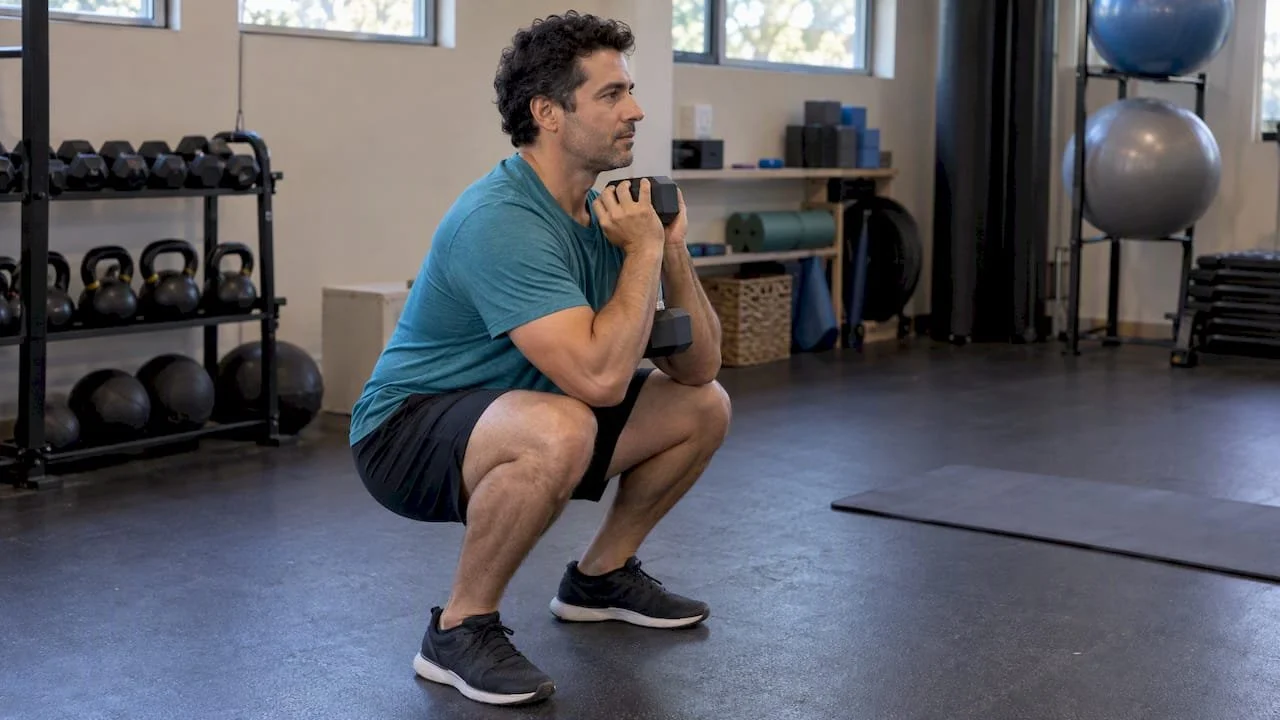
Combining movement modalities reliably improves cardiorespiratory fitness, mobility, injury resilience, and mind-body well-being when you sequence the right stimulus and leave room for recovery. That claim isn't a guess: meta-analyses, clinical reviews, and public health guidelines back it up. Below, we walk through the evidence and the practical steps that turn it into a weekly routine.
TL;DR:
A time efficient session can pair compound lifts with a 10 to 15 minute interval or circuit finisher, then end with mobility work.
When strength gains are the priority, lift before sustained cardio or separate sessions by more than two hours to reduce interference.
Older adults should include balance, strength, and flexibility work at least three days each week to help maintain function and lower fall risk.
People recovering from injury or illness should coordinate exercise choices with a clinician, especially when combining endurance and resistance training.
Beginners should start with low volume and focus on consistency before increasing intensity; meditative movement can support mood and early adherence.
Amritayogawellness
Explore Movement That Fits Your Week
Amrita Yoga & Wellness offers yoga, Pilates, barre, tai chi, and other practices for people exploring varied approaches to movement.
Table of Contents
Core Benefits Explained: Fitness, Mobility, Injury Resilience, and Mind-Body Gains
What the Research Says: Headline Studies and Practical Takeaways
How to Combine Modalities: Sequencing, Frequency, and Sample Templates
Who Benefits Most and How to Adapt: Older Adults, Rehab, and Beginners
Adaptations in Neuroplasticity and Cognitive Function From Multimodal Movement
Psychological and Motivational Benefits of Varied Movement Practices
Community and Social Engagement Impact When Combining Modalities
Nutritional Considerations Complementing Multimodal Movement Practice
Practical Next Steps: Classes and Services at Amrita to Combine Movement Modalities
Core Benefits Explained: Fitness, Mobility, Injury Resilience, and Mind-Body Gains
Each movement modality contributes a distinct physiological signal, and stacking the right ones produces gains no single practice delivers alone. Aerobic exercise paired with resistance training improves cardiorespiratory fitness, body composition, and metabolic markers like blood glucose and lipid profiles more broadly than either one in isolation. Resistance training on its own still carries unique weight: it builds strength and conditions tendons and connective tissue to tolerate load, which matters directly for injury resilience.
Yoga and dedicated mobility work extend joint range of motion and sharpen movement quality, the kind of control that keeps a squat or a stride mechanically sound under fatigue. Balance-focused practices such as tai chi and dance train proprioception, the body's sense of position in space, which translates into fewer falls and better coordination as people age. Meditative movement adds a different kind of return entirely: measurable reductions in stress, anxiety, and depressive symptoms, along with better sleep quality.
Put together, a well-chosen mix covers ground that no single modality reaches:
Cardiometabolic health: aerobic plus resistance work improves heart health, body composition, and blood sugar regulation.
Strength and tissue resilience: progressive resistance training conditions muscle, tendon, and connective tissue against overuse injury.
Flexibility and movement quality: yoga and mobility drills extend range of motion and improve how a joint moves under load.
Balance and coordination: tai chi and dance-based practices sharpen proprioception and reduce fall risk.
Mental health and sleep: meditative movement lowers stress and anxiety symptoms and supports more consistent sleep.
The overlap matters as much as the individual effects. A person doing only cardio misses the tendon-loading benefits of resistance work; someone doing only yoga misses the cardiometabolic stimulus that aerobic training provides. Combining modalities closes those gaps.
What the Research Says: Headline Studies and Practical Takeaways
The case for combining modalities isn't anecdotal. A Harvard Health summary of hybrid training reviewing 81 studies found that hybrid programs mixing aerobic and resistance work in the same session improved cardiometabolic markers while also saving time: participants in hybrid formats averaged less weekly training time than they did when aerobic and resistance sessions were done separately.
That's a meaningful time savings for anyone trying to fit exercise around a full schedule, without giving up the combined cardiometabolic benefit.
On the mental health side, a network meta-analysis of meditative movement interventions found that practices like tai chi, qigong, and yoga produced substantial reductions in anxiety and depressive symptoms compared with non-exercise controls. The effect sizes were large enough to place meditative movement among the more reliable non-pharmacological options for mood support.
Public health guidance backs the multicomponent approach too. The WHO guidelines on physical activity and sedentary behaviour recommend that older adults in particular combine aerobic, muscle-strengthening, and balance activities to protect function and prevent falls.
A few key points stand out:
Hybrid same-session training can match separate-session results in less total time.
Meditative movement shows some of the strongest evidence for anxiety and depression symptom relief among movement-based interventions.
Multicomponent weekly activity is the standard public health recommendation, not an optional add-on.
One caveat worth naming: a documented interference effect exists where heavy endurance work close to a strength session can blunt maximal strength gains in already-trained lifters. It's context-dependent and manageable with smart sequencing, which we cover next.
How to Combine Modalities: Sequencing, Frequency, and Sample Templates
Good programming starts with a decision: what's the primary adaptation this session is for? Strength, cardiovascular conditioning, and mobility all compete for recovery resources, so naming the priority before you train keeps the session coherent instead of diluted.
Pick one primary objective per session. Strength, cardio, or mobility, not all three at full intensity in one sitting.
Sequence by priority. When strength is the goal, lift before any sustained cardio; fatigue from a long run or ride beforehand will compromise lifting mechanics.
Separate sessions when maximizing strength matters most. A gap of more than two hours between endurance and resistance work reduces the interference effect noted in concurrent-training research.
Track effort, not just output. Rating of perceived exertion (RPE) gives a simple, subjective check on whether you're building fatigue faster than you're recovering from it.
Schedule at least one low-intensity day weekly. Gentle yoga, walking, or restorative stretching gives connective tissue and the nervous system a chance to catch up.
Three templates cover most people's needs:
Template A, time-efficient hybrid (one session): warm-up, compound strength movements (squats, rows, presses), a 10 to 15 minute metabolic finisher (intervals or circuit work), then a mobility cool-down. This mirrors the hybrid format in the Harvard summary above and fits well into a single hour.
Template B, three-day multicomponent week: day one pairs strength with mobility work, day two pairs cardio with balance drills, day three is restorative yoga. This spreads the stimulus so no single day is overloaded.
Template C, class-friendly plan: a yoga class paired with a short run or a pilates session, plus one light strength routine during the week. This works well for people building a routine around scheduled classes rather than solo training blocks.
Pro Tip: When you're short on time, choose a hybrid session that trains two capacities at once, like resistance circuits performed with minimal rest to add an aerobic density component.
Our blog on yoga and pilates for fitness and mind walks through how those two practices complement strength-focused training if you want a deeper look at Template C in action.
Who Benefits Most and How to Adapt: Older Adults, Rehab, and Beginners
Different groups need different emphasis, though the multicomponent principle holds across all of them.
Older adults benefit most from sessions that combine balance, strength, and flexibility work at least three days a week, matching the WHO's multicomponent recommendation for maintaining function and preventing falls. Our chair yoga routine for seniors is a practical entry point for building that habit gently.
Rehab and clinical populations often see faster functional gains from multimodal programs: a systematic review on post-stroke rehabilitation found that combining resistance and endurance training improved knee-extensor strength more than single-mode approaches. Anyone recovering from injury or illness should coordinate modality choices with a clinician first.
Beginners do best starting with low volume and high consistency rather than intensity. Meditative movement in particular tends to improve adherence and mood early on, which matters more than raw training load in the first few months.
For readers managing bone health specifically, osteoporosis exercise guidelines offer useful detail on safe loading choices that pair well with balance-focused classes.
Adaptations in Neuroplasticity and Cognitive Function From Multimodal Movement
Movement that combines physical coordination with attentional demands appears to engage the brain differently than repetitive single-mode exercise. Practices that require tracking balance, breath, and sequence at the same time, like tai chi or a flowing yoga sequence, ask more of attention and motor planning than a steady-state jog.
Research on movement-integrated learning suggests that pairing physical movement with cognitive or attentional tasks can support better retention and engagement, a principle drawn from embodied cognition research on how movement and thinking interact. The same logic shows up in school-based findings: a study on movement integration in early childhood education found that programs blending movement into the school day increased physical activity and supported cognitive engagement without cutting into instructional time.
For adults, the practical version is simpler: varying the movement challenge, balance one day, coordination-heavy flow another, steady cardio on a third, gives the brain a broader range of stimulus than doing the same workout on repeat. It's not about any single "brain exercise," but about not letting one movement pattern become the only input your nervous system receives all week.
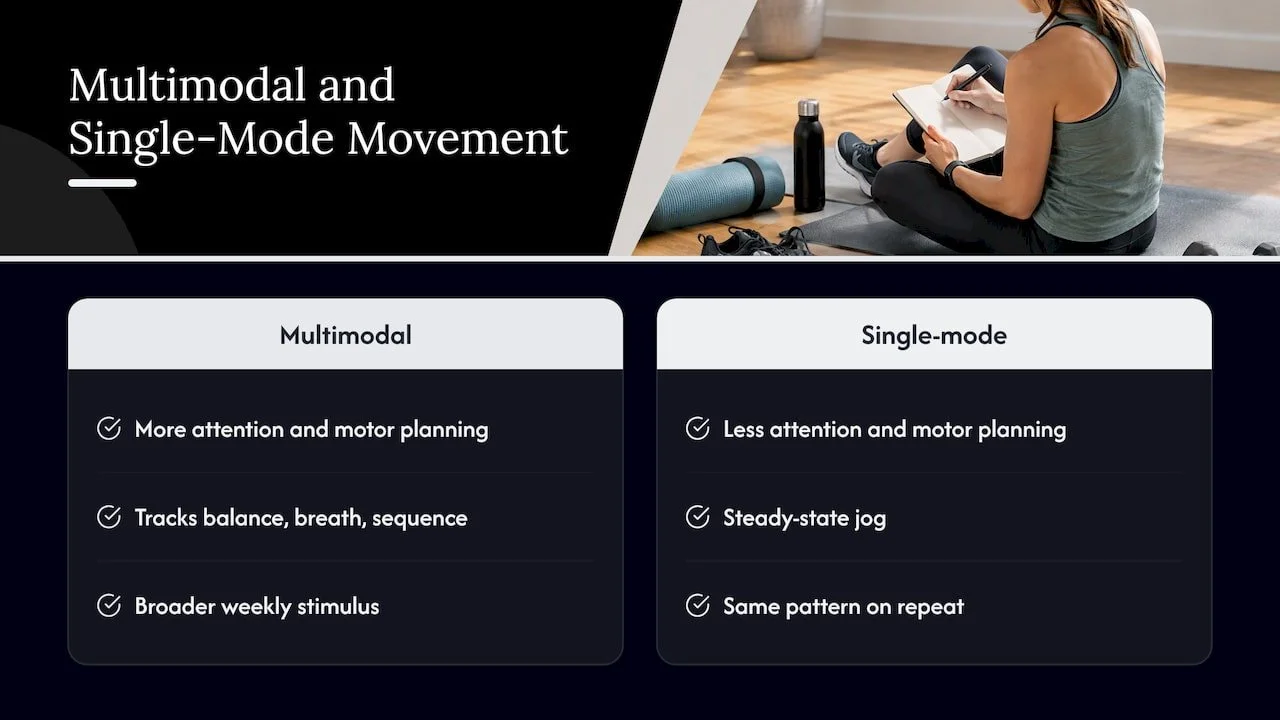
Role of Breathwork Integration Across Modalities
Breath control shows up differently across movement practices, but it's rarely optional once you look closely. In yoga, breath pacing (pranayama techniques) is built into the practice itself, syncing inhalation and exhalation with movement transitions. In tai chi and qigong, slow, deliberate breathing anchors the pace of the whole sequence. Even in resistance training, bracing the breath during a heavy lift is a basic safety technique, not a yoga-specific skill.
Adding deliberate breathwork to higher-intensity modalities gives you a built-in regulation tool: slowing the breath during a cool-down after intervals, for instance, helps shift the nervous system out of a sympathetic, fight-or-flight state faster than simply stopping and waiting. That's part of why meditative movement practices, which blend movement and breath by design, show up so strongly in anxiety and depression research.
Our mindfulness activities for stress relief cover several breath-based techniques that translate well into a strength or cardio warm-up, not just a yoga mat. The point isn't to turn every workout into a meditation session. It's to treat breath as a tool available in any modality, used deliberately rather than left on autopilot.
Psychological and Motivational Benefits of Varied Movement Practices
Doing the same workout week after week is efficient on paper and demotivating in practice. Variety solves a problem that pure physiology doesn't fully explain: people stick with routines they find engaging, and a mix of modalities gives more chances to find that engagement than a single repeated format.
There's also a confidence-building effect to trying different movement types. Someone who feels intimidated by heavy lifting might find early wins in a mobility or balance-focused class, build body awareness there, and carry that confidence into strength work later. The reverse happens too: a strength-focused exerciser who tries yoga for the first time often discovers tightness or imbalances they didn't know they had, which reframes mobility work as useful rather than optional.
Novelty itself has a motivational pull. Learning a new movement pattern, a tai chi form, a pilates sequence, a new strength lift, taps into a sense of progress that's separate from measurable fitness gains. That sense of progress is often what keeps someone training consistently long enough for the physiological benefits to compound.
Community and Social Engagement Impact When Combining Modalities
Group settings change how movement practice feels, and that shift matters more than it might seem on paper. Training alongside other people, whether in a yoga class, a pilates group session, or a tai chi circle, adds a social accountability layer that solo training doesn't offer. Showing up because a class is scheduled, and because familiar faces will be there, often sustains a habit longer than willpower alone.
Combining modalities tends to widen that social circle rather than narrow it. Someone who only ever takes spin classes meets a different group of people than someone who also shows up to a slow-flow yoga session or a barre class. Each modality tends to attract its own community, and moving between them exposes you to more of it.
Our piece on group yoga for wellness and community goes deeper into why shared practice spaces support adherence in ways that a solo home workout routine generally doesn't replicate.
Nutritional Considerations Complementing Multimodal Movement Practice
Varying your training load across the week changes what your body needs to recover well, and a flat, one-size approach to eating rarely matches that variation. A heavy resistance day calls for adequate protein to support muscle repair, while a longer cardio or cardio-heavy hybrid session increases the need for carbohydrate to replenish glycogen stores.
Hydration needs shift too, especially around hot yoga or any higher-sweat session, where fluid and electrolyte replacement matters more than on a restorative or balance-focused day. On lighter mobility or meditative movement days, the nutritional demand is lower, and the bigger priority is often just eating enough overall to support the heavier training days elsewhere in the week.
None of this requires a rigid tracking system for most people. Paying attention to how a session felt, how recovered you feel the next day, and adjusting portions and timing accordingly tends to cover the basics well enough for recreational exercisers combining several modalities.
Studio/author Perspective: How Amrita Applies These Ideas
We build our class mix around a variety of formats including strength-based formats, mobility-focused yoga, and restorative practice on the same weekly schedule. We see students get the best results when they treat that variety as a system rather than a menu, pairing a sweat-focused class with a slower one in the same week. If that approach is new to you, a single combined week in-studio is a low-pressure way to feel the difference.
— Juiced
Practical Next Steps: Classes and Services at Amrita to Combine Movement Modalities
We offer the full range the templates above call for under one roof. Our group class drop-ins cover yoga, pilates, and barre starting at $11 for a Community Class and $28 for a standard Group Class, matching Template B's multicomponent week without requiring you to piece it together across different studios.
For a program built around your specific goals, our One to One Session, from $85 per hour, lets us sequence strength, mobility, and breathwork exactly the way Template A or C calls for. Check our class schedule to find the combination that fits your week.
FAQ
What are the benefits of moving your body?
Regular movement improves cardiorespiratory fitness, strength, flexibility, and balance, while also supporting mental health through stress and anxiety reduction. Combining different movement types, rather than repeating one format, tends to cover more of these benefits at once, as reflected in the cardiometabolic gains reported with hybrid training.
What are the 7 compound exercises?
Compound exercises work multiple muscle groups and joints in a single movement; common examples include the squat, deadlift, bench press, overhead press, pull-up, row, and lunge. These movements form a practical foundation for the strength portion of a combined-modality routine like the templates described above.
What not to do immediately after exercise?
Avoid skipping your cool-down, especially after higher-intensity or hybrid sessions, since an abrupt stop skips the gradual shift out of an elevated heart rate and stress response. It's also best to avoid immediately jumping into another high-intensity session without at least a few hours of separation when strength gains are a priority.
What do movement therapists do?
Movement therapists assess how a person moves and design programs, often combining strength, mobility, and sometimes breath-based techniques, to address pain, injury recovery, or functional limitations. In clinical settings, multimodal approaches combining resistance and endurance work have shown stronger results for functional recovery than single-mode approaches in populations such as stroke rehabilitation patients.
Sources
Network meta-analysis of meditative movement interventions (PMC6111244)
Multimodal treatment for lower limb function after stroke (PMC10815740)
WHO guidelines on physical activity and sedentary behaviour (2020)
Recommended
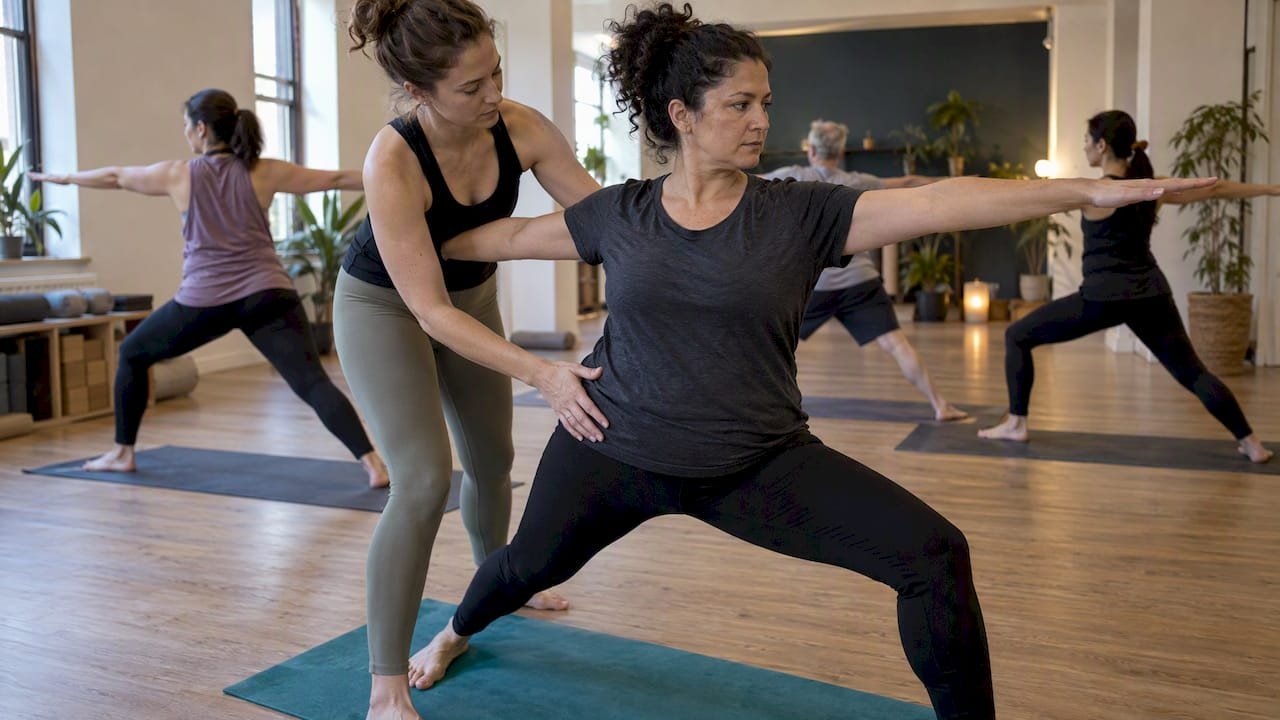
Boutique Studio vs. Gym: Choose by Coaching, Schedule, and Cost
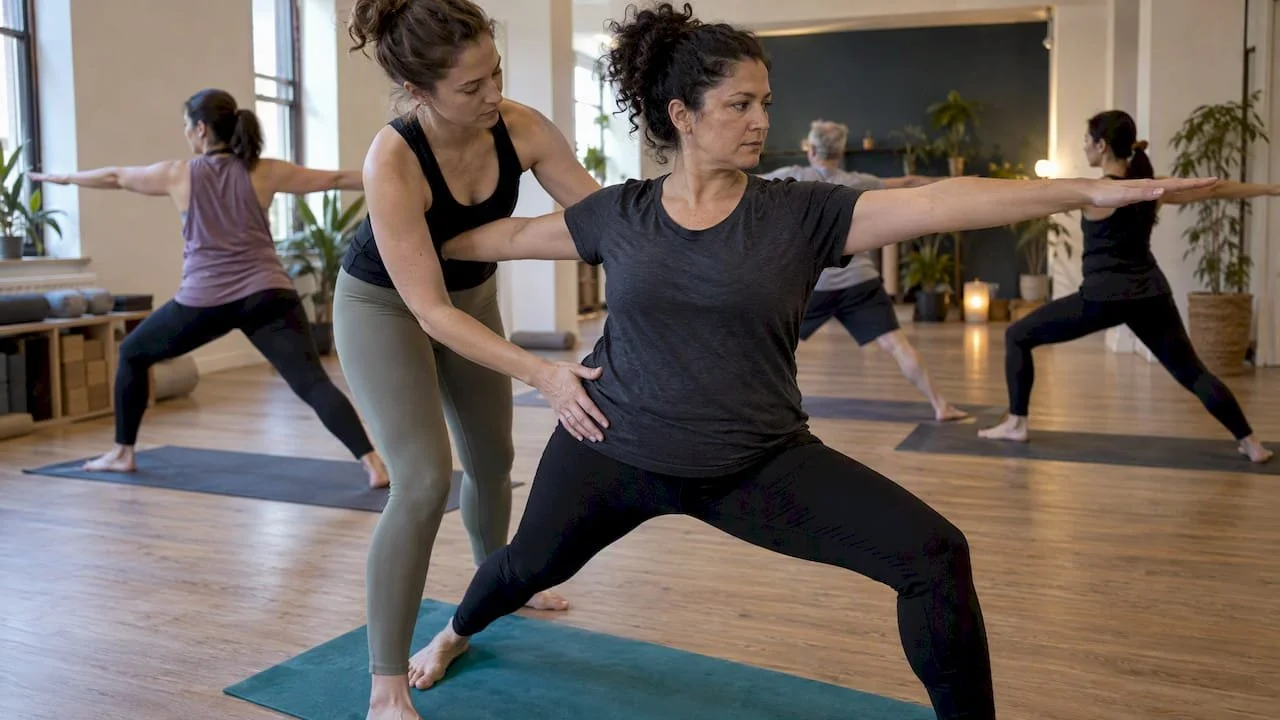
Boutique studios prioritize guided, community-driven classes and coaching, while traditional gyms prioritize variety, open access, and lower cost per month. The American College of Sports Medicine (ACSM) and the IHRSA both track these formats closely, and the right pick depends on how much instruction you want, how your schedule works, and what you're willing to spend each month.
TL;DR:
Studio classes require advance booking and may have cancellation windows, while traditional gyms offer open floor access without reservations for unpredictable schedules.
If you attend four or five classes weekly, an unlimited studio plan may cost less per session than paying individual drop in rates.
Small classes provide live form corrections, but beginners should verify instructor certifications and supervision; experienced lifters may gain less from that added attention.
A study found CrossFit members reported stronger community than traditional gym members, but social connection alone did not independently predict attendance.
Amritayogawellness
Find a Studio That Fits Your Routine
Explore Amrita Yoga & Wellness in Philadelphia, with yoga, Pilates, barre, tai chi, and wellness offerings for different practices.
Table of Contents
How do gyms and studios compare on instruction, equipment, and scheduling?
How big are classes, and how much personal attention do you get?
Which format fits which goals, and where each one falls short
Where are gyms and studios typically located, and how easy are they to reach?
What qualifications do instructors typically have in each setting?
Do studios and gyms offer services beyond the workout itself?
What is a traditional gym?
A traditional gym, sometimes called a big-box gym, gives you a large open floor with free weights, machines, and cardio equipment side by side. You move through your own routine at your own pace, with staff available but not guiding every rep.
Most big-box gyms operate on extended hours, often opening early and closing late, so you can train on your own schedule rather than booking a slot. Access is usually membership-based with month-to-month or annual plans, though many locations also allow day passes.
This model fits self-directed lifters who already know their programming, people watching their budget, and anyone who wants variety: one day of strength training, the next on a treadmill, without booking anything in advance.
What is a boutique fitness studio?
A boutique fitness studio is a smaller facility built around a specific type of movement, such as yoga, pilates, barre, spin, or HIIT. Instead of an open floor, you book a spot in a scheduled class, and that class is led start to finish by an instructor.
Class sizes stay small by design, which means the instructor can actually see your form and correct it in real time. This is the core trade: less open-ended freedom, more structured coaching. Booking typically happens through an app or website, often with a cancellation window, and many studios offer drop-in rates alongside memberships for people who want to test the waters.
This format suits people who want guided progression rather than guesswork, anyone drawn to a specific discipline like pilates reformer work or hot yoga, and those who value showing up to a room of familiar faces each week. If you've ever wondered what group classes look like in practice, a boutique studio is usually where that experience lives.
How do gyms and studios compare on instruction, equipment, and scheduling?
The two formats diverge most sharply in four areas: how much guidance you get, what equipment is available, how you access it, and what the space feels like.
Instruction: Studios build personalization into every class through small group sizes and live corrections; gyms offer open-floor access with personal training available as a separate, often paid, add-on.
Equipment: Studios specialize in gear tied to their discipline, like reformers for pilates or stationary bikes for spin, while gyms stock a broad mix of racks, machines, and cardio equipment for general use.
Scheduling: Studios run on a class calendar with booking and cancellation windows; gyms offer open-floor hours with no reservation needed.
Atmosphere: Studios tend to curate lighting, music, and decor around a specific practice, while gyms focus on functional amenities like locker rooms, showers, and equipment turnover.
The ACSM's facility guidance recommends weighing staffing, programming, and equipment condition regardless of format, since a facility's actual operations matter more than its label. A gym with poorly maintained machines and a studio with an unqualified instructor are both bad choices, no matter what category they fall into.
How do pricing and membership options differ?
Pricing structures reflect what each model is built to deliver. Big-box gyms often spread costs across a large member base, which keeps monthly rates lower, while boutique studios price around smaller class sizes and specialized equipment, which tends to raise the cost per session.
Common pricing forms: monthly membership tiers, class packs, drop-in rates, and unlimited plans.
What raises cost: low instructor-to-member ratios, specialized equipment like reformers, and boutique-style amenities.
What lowers cost: scale, since a gym serving thousands of members can spread overhead across a larger base.
IHRSA's industry data show that both boutique and big-box models can be financially viable businesses, which means the better value for you depends on how often you'll actually show up, not which model charges less on paper. If you plan to attend four or five classes a week, an unlimited plan often works out cheaper per session than drop-ins. Our own breakdown of whether an unlimited membership is worth it walks through that math in more detail.
Does community actually keep you coming back?
Community is one of the most cited reasons people choose boutique studios, and there's some evidence behind it, as discussed in how community supports your wellness journey. A peer-reviewed study comparing CrossFit members to traditional gym members found that CrossFit members reported higher social capital and a stronger sense of community. That same study found these community measures didn't independently predict attendance, meaning the social bond helps but doesn't replace personal commitment.
Scheduled classes with the same instructor and the same faces each week naturally build accountability, since skipping a booked slot feels different than skipping an open gym visit. Gyms can build similar community through small-group training or recurring workout partners, but it takes more initiative since nothing is scheduled for you. NIH's guidance on group activity notes that social support is one of the factors that helps people stay consistent over time.
How should you choose between a gym and a studio?
Match the format to your goals before you match it to your budget. Here's a short process to work through:
Define your goal. Decide whether you want guided coaching and structure, or open-ended access and variety.
Check your schedule. If you need flexibility around unpredictable hours, open-floor gym access may fit better than booked classes.
Set your budget. Compare monthly membership costs against how many sessions you'd realistically attend.
Decide how much coaching you want. If form correction matters to you, lean toward small-class formats.
Identify your preferred equipment or class style. Reformers, spin bikes, and free weights all point toward different formats.
When you tour or trial a location, ask staff directly: What's the typical class size? What are the instructor's certifications? What's the cancellation or credit policy? Is there a trial class or drop-in rate? The ACSM's facility guidance recommends asking exactly these kinds of operational questions rather than relying on branding alone.
Pro Tip: Book a single drop-in class or a trial week before committing to a membership, then judge it on three things: whether it fit your schedule, how much instructor attention you got, and whether you actually enjoyed showing up.
What a boutique studio approach looks like in practice
Our class options show how the boutique model plays out day to day. We offer group classes, livestream drop-ins, community classes, and a beginner-focused pass alongside private one-on-one sessions for people who want individual coaching.
Readers who want structured beginner guidance tend to gravitate toward a beginner-focused pass, while those seeking community and routine often choose a monthly membership tier. People who want maximum personalization typically book a private session instead of a group class, since that format lets instructors focus entirely on their form and pace.
How big are classes, and how much personal attention do you get?
Class size is the single biggest factor separating these two formats. In a boutique studio, class sizes are kept intentionally small, often capped well below what a large group fitness room at a gym would hold, so instructors can watch each person's form and adjust it mid-class. That ratio is the entire value proposition of the model: you're paying for attention, not just access.
Traditional gyms handle personalization differently. Group fitness classes at a gym can run larger and more variable in size, and outside of those classes, the floor is self-directed. If you want one-on-one correction at a big-box gym, you typically book a personal trainer separately, which adds to your monthly cost. The ACSM's guidance for evaluating any facility specifically recommends asking about staff qualifications and how equipment and programming are supervised, since a low price tag doesn't guarantee adequate oversight.
For beginners learning a new movement pattern, like a pilates reformer sequence or a yoga pose that involves balance, that ratio of eyes-on-you instruction can be the difference between building the habit safely and getting discouraged by poor form. For experienced lifters who already know their technique, a lower ratio matters far less, which is part of why self-directed gym-goers often don't feel they're missing anything.
Which format fits which goals, and where each one falls short
Neither format is universally better. Each one is built to solve a different problem, and your goals determine which trade-offs matter.
Boutique studios work best for people who want structured coaching, a specific discipline like barre or pilates, and a consistent class routine to build accountability. The trade-off is a higher cost per session and a fixed schedule that requires booking ahead, which can be a friction point if your calendar changes often.
Traditional gyms work best for people who want flexibility, a lower monthly cost, and variety across strength, cardio, and open-floor training. The trade-off is less built-in guidance, meaning you need to arrive with some knowledge of how to train or pay extra for a personal trainer to get that coaching.
If your main goal is weight training progression and you already know proper form, a gym's equipment variety and lower price point likely serve you better. If your goal is building a yoga or pilates practice from scratch, or you know you need external accountability to stay consistent, a studio's structure and small-class coaching tend to produce better adherence.
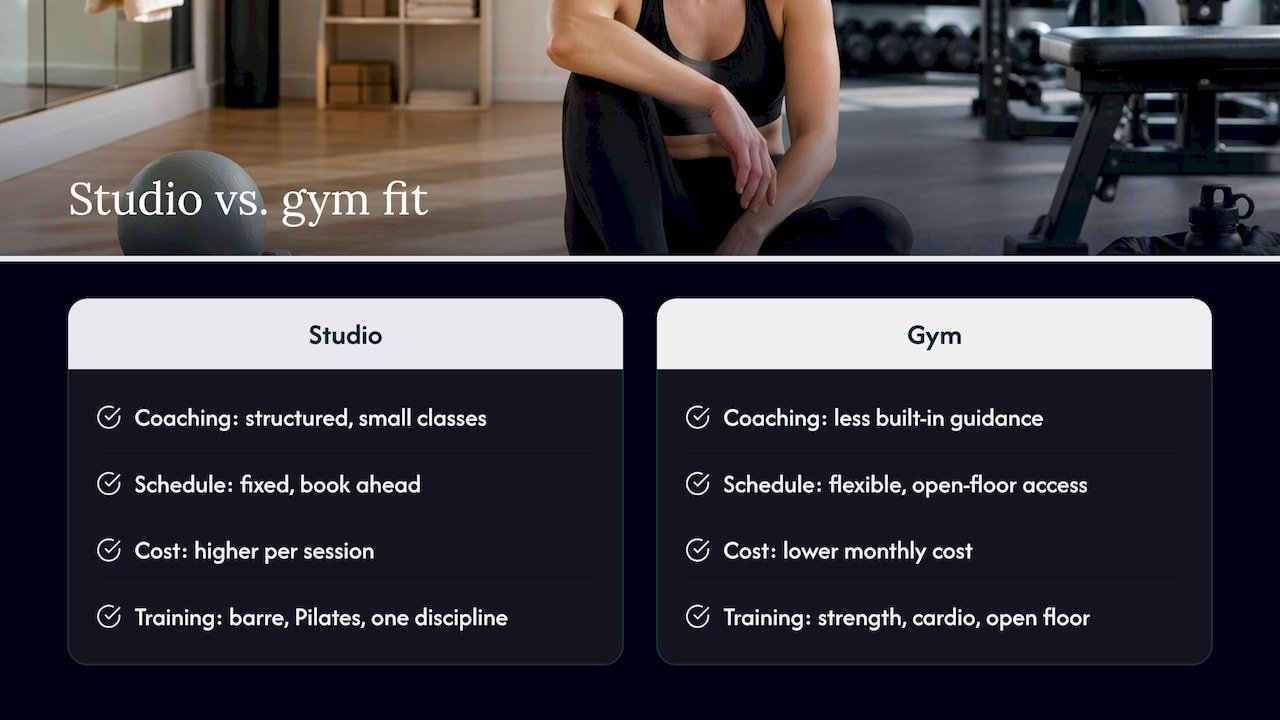
Where are gyms and studios typically located, and how easy are they to reach?
Big-box gyms tend to anchor in suburban retail centers or stand-alone buildings with large parking lots, since their footprint requires space for full equipment floors. That makes them convenient for people who drive to their workout and want a predictable, single-location routine.
Boutique studios more often cluster in urban neighborhoods and walkable commercial strips, since their smaller footprint fits more easily into a storefront or a shared building. For city dwellers without a car, a studio within walking distance can be easier to fit into a daily routine than a suburban gym that requires driving.
Accessibility also extends beyond physical location. Many studios, including ours, offer livestream class options for people who want the instruction and accountability of a class without needing to be on-site, which matters if you travel often or live outside a studio's immediate service area.
What qualifications do instructors typically have in each setting?
Instructor backgrounds differ because the two formats ask instructors to do different jobs. Boutique studio instructors are typically certified in a specific discipline, such as a 200-hour yoga teacher training or a pilates reformer certification, and their training focuses on cueing, alignment, and hands-on correction within that one practice.
Gym staff cover broader ground. Personal trainers usually hold a general certification covering strength training principles across multiple goals, and group fitness instructors at a gym may teach several different class formats rather than specializing in one. Neither path is inherently more rigorous, but the specialization in boutique settings tends to produce deeper expertise in a narrower skill set, which is part of why studios can offer more detailed form correction in that specific discipline.
The ACSM's facility guidance recommends asking directly about instructor certifications and how facilities vet their staff, since titles and credentials vary and aren't always visible from a class schedule alone.
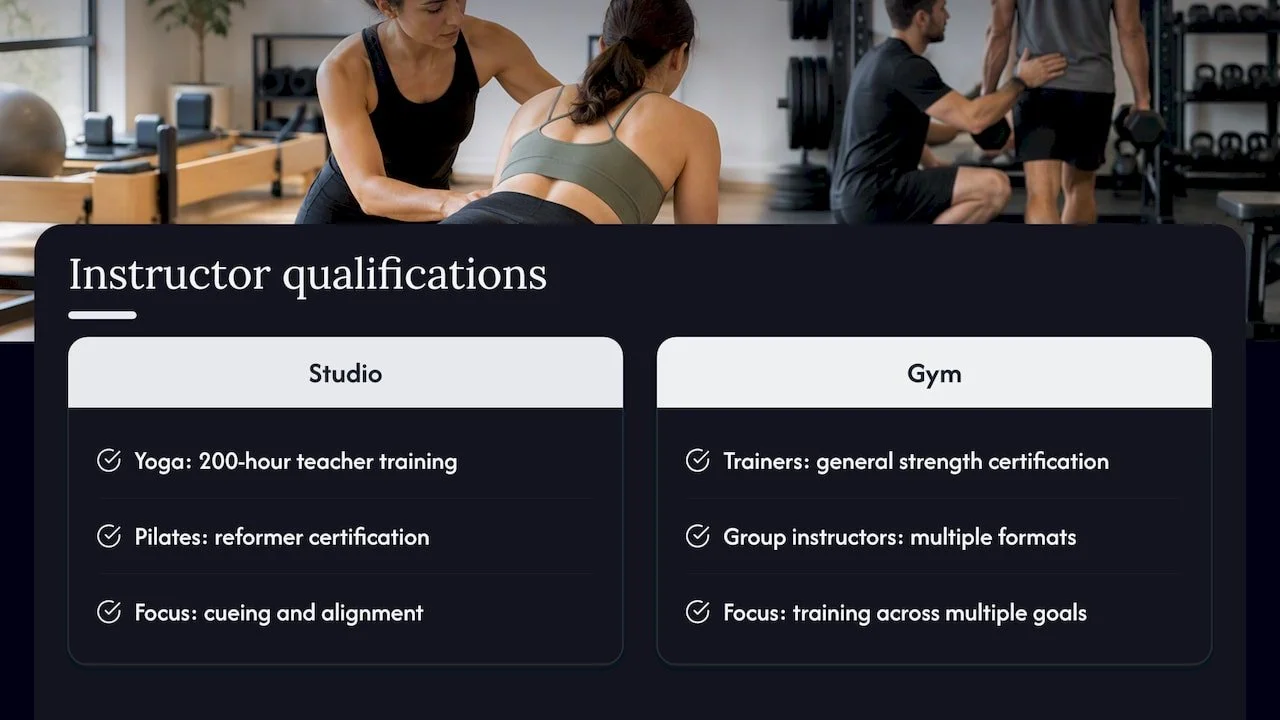
Do studios and gyms offer services beyond the workout itself?
Many boutique studios extend past the workout room into broader wellness services, and that's part of what distinguishes the model beyond class format alone. Massage therapy, Ayurvedic treatments, and workshops on practices like breathwork or tarot are common additions at studios built around holistic wellness rather than pure fitness.
That extension includes massage therapy, Ayurvedic therapies, and wellness workshops alongside yoga, pilates, and barre classes. Readers focused purely on physical training may not need these add-ons, but anyone looking at fitness as part of a broader self-care routine may find this integration valuable.
Traditional gyms generally stay focused on physical training and sometimes nutrition coaching as an add-on service, without the spiritual or recovery-focused offerings that boutique wellness studios build into their model.
When I recommend a studio versus a gym
I point people toward a boutique studio when they tell me they want coaching, a specific discipline, and a group to be accountable to. I point them toward a gym when cost and flexibility matter most, or when they already know how to train and just want access to equipment. When someone genuinely can't decide, I suggest trying one week of each, a studio class and a gym visit, and noticing which one they look forward to.
— Juiced
How Amrita Yoga & Wellness fits into your decision
If the boutique model sounds like the right fit, a trial class is the easiest way to find out. Boutique studios typically attract beginners who want guided instruction, people who want a consistent class community, and anyone drawn to a specific practice rather than a generic workout.
You can start with a group class or drop-in session to test the format without committing to a membership, or book a private one-on-one session if you want individual coaching from the start. For a closer look at what each class involves, our class descriptions page breaks down intensity levels and formats so you can pick the right starting point. When you're ready to see what's on the calendar, check our class and monthly schedule and reserve your first spot.
FAQ
Why are boutique gyms so expensive?
Boutique studios charge more per session because classes stay small, which means fewer people are splitting the cost of the instructor's time and the specialized equipment. IHRSA's industry data show that big-box gyms spread overhead across a much larger member base, which keeps their monthly rates lower by comparison.
What is the difference between a studio and a gym?
A gym offers open-floor access to a broad mix of equipment that you use on your own, while a studio runs scheduled, instructor-led classes focused on one discipline, like yoga, pilates, or spin. The core difference is structure: gyms give you freedom and variety, studios give you guidance and a smaller group setting.
What is the 3-3-3 rule gym?
Definitions of this rule vary across fitness sources, and there's no single standardized version tied to a major health or fitness organization. A commonly cited version refers to structuring a workout into three segments, such as warm-up, main training, and cool-down, but you should confirm the specific approach with a qualified trainer before applying it to your own routine.
What does "big-box gym" mean?
A big-box gym refers to a large-scale fitness chain or facility with extensive equipment, open-floor access, and typically lower membership costs due to its larger member base. This term contrasts with boutique studios, which operate smaller spaces built around specialized, instructor-led classes.
Sources
Recommended
Integrative Wellness for Adults: Five Practices, From Plan to Studio
Integrative wellness combines conventional medical care with evidence-based complementary therapies to treat the whole person rather than isolated symptoms. The National Center for Complementary and Integrative Health and the World Health Organization both frame this coordination as central to modern care, and studios like ours at Amrita Yoga & Wellness put it into practice daily through yoga, tai chi, and guided coaching. Done well, it supports mental clarity, physical resilience, and a stronger sense of purpose all at once.
TL;DR:
A 2019 review of 49 studies found meditation, tai chi, qigong, and yoga improved sleep; many trials lasted 4 to 24 weeks.
An overview of 210 reviews found moderate to good evidence that yoga and tai chi help with pain, depression, and anxiety, though results vary.
Start with one foundation, add a repeatable practice, and track sleep, pain, or mood weekly during a trial lasting 4 to 12 weeks.
People with chronic conditions or prescription medications should consult their clinician first and disclose every supplement, practice, and session frequency they use.
Pregnancy, cancer treatment, cardiac disease, and recent surgery may require practice modifications; check practitioner credentials and avoid anyone who discourages medical disclosure.
Amritayogawellness
Explore Wellness Practices in Philadelphia
Amrita Yoga & Wellness offers yoga, tai chi, Pilates, barre, and other wellness services for adults at different experience levels.
Table of Contents
What Integrative, Complementary, and Whole-Person Health Mean
How a Community Studio Puts Integrative Wellness Into Practice
Start Your Integrative Wellness Plan at Amrita Yoga & Wellness
What Integrative, Complementary, and Whole-Person Health Mean
These terms get used interchangeably, but they describe different things. According to NCCIH's definitions, complementary health approaches are non-mainstream practices used alongside conventional medicine, while alternative approaches replace conventional care entirely. Integrative health goes a step further: it deliberately coordinates both systems, often with a clinician aware of everything a patient is doing.
Whole-person health shifts the question from "what disease do you have" to "what does your life actually look like." It considers sleep, stress, relationships, movement, and diet as inputs that shape physical outcomes, not background noise. A 2024 peer-reviewed modeling study found that this kind of integrated care pathway can plausibly improve long-term outcomes and reduce cumulative health care costs compared with conventional, fragmented care.
A few elements show up consistently in whole-person frameworks:
Ongoing coordination between a primary clinician and any complementary practitioners involved.
Deliberate behavior change goals, not just symptom management.
Attention to foundational lifestyle pillars before layering on specialized therapies.
Core Practices Adults Use and What They Target
Most integrative routines draw from five overlapping categories, and matching the category to the goal matters more than chasing the trendiest option.
Mind-body practices: meditation and mindfulness-based stress reduction help with anxiety, racing thoughts, and sleep onset, typically in sessions of 10 to 30 minutes several times a week.
Movement therapies: yoga, tai chi, and qigong build flexibility, balance, and stress regulation, and they adapt well to beginners or people managing chronic pain.
Manual and procedural therapies: acupuncture and massage are often considered for musculoskeletal pain or recovery support, usually alongside, not instead of, medical treatment.
Lifestyle supports: nutrition quality, consistent sleep hygiene, daily movement, and social connection form the base that other therapies build on.
Behavioral supports: health coaching, psychotherapy, and medication coordination keep the plan realistic and help prevent gaps between what a clinician recommends and what actually happens at home.
Someone dealing with low back pain might start with gentle yoga and a nutrition check-in. Someone managing anxiety might prioritize mindfulness practice and a coaching conversation about sleep. The categories overlap by design, which is part of what makes integrative wellness flexible rather than one-size-fits-all.
What the Research Actually Shows
The evidence base for mind-body and movement therapies has grown substantially, though it comes with caveats worth understanding before building a plan around it.
A 2019 meta-analysis of 49 studies covering 4,506 participants found that mind-body therapies, including meditation, tai chi, qigong, and yoga, improved sleep quality and reduced insomnia severity, with some interventions also lowering inflammatory markers like C-reactive protein. Many of the trials behind that finding ran between 4 and 24 weeks, which is why short-term trials in that same window are a reasonable way to judge whether a practice is working for you.
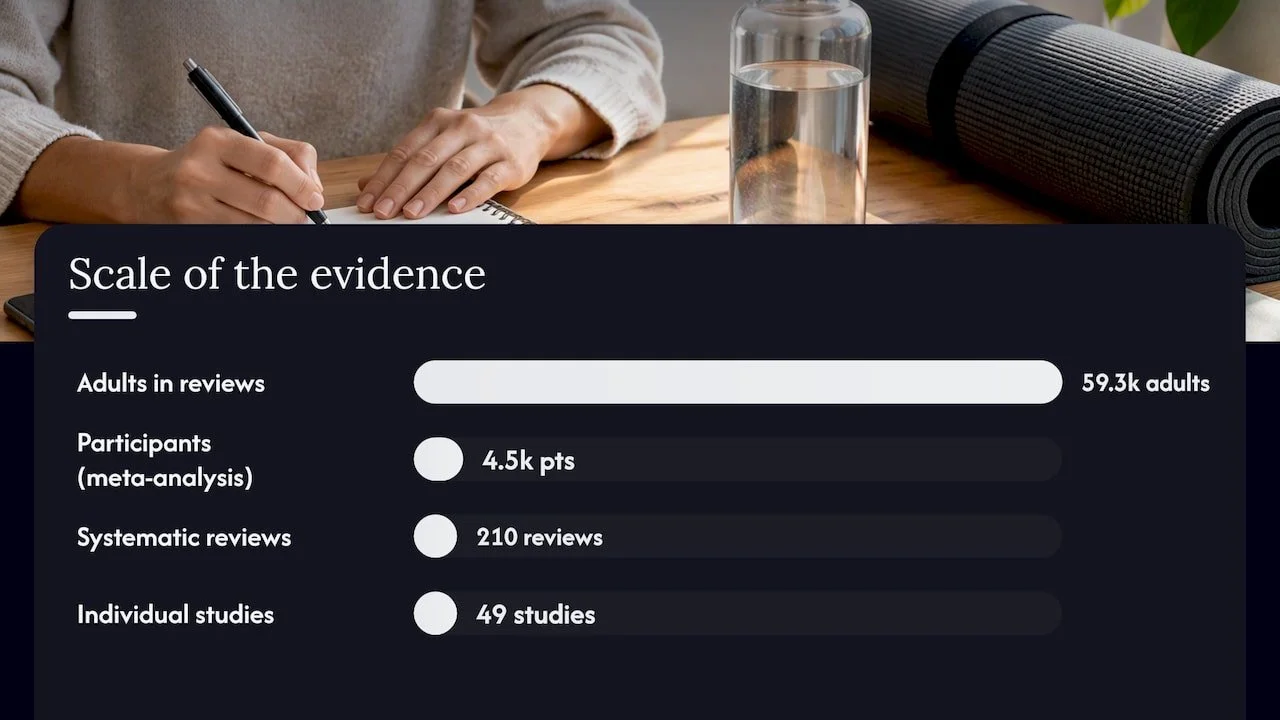
Separately, a critical overview of 210 systematic reviews spanning 59,306 adults reported moderate-to-good evidence that tai chi and yoga help manage musculoskeletal conditions like low back pain and osteoarthritis, along with mental health outcomes including depression and anxiety.
A few limitations temper these findings:
Trial quality and design vary widely across studies, making direct comparisons difficult.
Few randomized trials focus on adults managing multiple conditions at once, which is common in real life.
Effect sizes differ by population, so results don't transfer uniformly from one group to another.
The WHO's Traditional Medicine Strategy for 2025 to 2034 adds a policy dimension, supporting the integration of traditional and complementary medicine into formal health systems while prioritizing safety, regulation, and stronger evidence standards.
Building Your Own Integrative Wellness Plan
A workable plan follows a sequence rather than trying everything at once.
Document your starting point: list current goals, medications, and medical conditions, and get sign-off from your clinician if you have a chronic condition or take prescription medication.
Start with foundations: movement, nutrition, sleep, and social connection come first because they support everything layered on top. Harvard Health's five pillars of longevity frame these as the most consistently validated levers for long-term health.
Add one mind-body or movement practice: pick something you can realistically repeat, whether that's a weekly yoga class or ten minutes of daily meditation.
Set a trial window: commit to 4 to 12 weeks before judging results, tracking a specific measure like sleep quality, a pain scale, or mood.
Reassess and adjust: drop what isn't working, keep what is, and introduce the next layer only after the current one feels stable.
Low-cost entry points matter here. Community classes, short coaching check-ins, and free guided meditation apps all lower the barrier to that first trial month.
Pro Tip: Keep a simple weekly log of one number (sleep hours, pain level, or mood rating) so you have real data instead of a vague impression when the trial period ends.
When you talk to your provider, mention every supplement, practice, and session frequency you're using, not just prescription changes. That disclosure is what lets coordination actually work instead of becoming two disconnected health plans running side by side.
Safety Checks Before You Start a New Practice
"Natural" does not automatically mean risk-free, and some complementary approaches need medical oversight before you begin. Pregnancy, active cancer treatment, and cardiac disease are common situations where a practice needs modification rather than a blanket yes or no, according to NCCIH guidance on complementary approaches.
Some supplements interact with prescription medications, including blood thinners and chemotherapy drugs, which is why disclosure to your clinician matters.
Intense movement practices may need modification for joint conditions, pregnancy, or recent surgery.
Credentialed practitioners should be able to explain their training, certifications, and how they handle medical disclosures.
A practitioner who discourages you from telling your doctor about a therapy is a warning sign, not a selling point.
When vetting a complementary practitioner, ask directly about certification body, years of training, and experience working alongside medical providers for your specific condition.
How a Community Studio Puts Integrative Wellness Into Practice
At Amrita Yoga & Wellness, we build class schedules around the same whole-person logic described above. A 12-week plan might start with a beginner-friendly yoga or tai chi class for movement and stress regulation, add a mindfulness or breathwork workshop for the mental health layer, and introduce a private session as needed once goals are clearer.
Our class mix spans yoga styles, pilates, and tai chi, so movement goals and pain-related goals can be addressed separately.
Workshops on mindfulness and breathwork give a structured entry point for the mind-body layer of a plan.
Private sessions allow pacing and modification for specific conditions or injuries.
Full class descriptions make it easier to match a format to where you are starting from.
Key Takeaways to Get Started This Week
Three things matter more than the specific therapy you pick: start with one foundational habit, track something measurable, and keep your clinician in the loop if you manage a chronic condition. Complexity can come later, once the basics are holding steady.
| Step | Action | Timeframe |
|---|---|---|
| 1 | Pick one foundational habit (sleep, movement, or nutrition) | Week 1 |
| 2 | Add one guided class or mind-body practice | Weeks 2 to 4 |
| 3 | Track a single measure weekly (sleep, pain, or mood) | Weeks 1 to 12 |
A Studio Perspective on What Consistency Looks Like
The adults who see the clearest changes rarely start with an ambitious routine. They show up for one class a week, sleep a little better within a month, and notice their stress response easing before anything else shifts. The pattern repeats often enough that it's worth trusting: small, repeatable steps beat sporadic, intense ones almost every time.
— Juiced
Start Your Integrative Wellness Plan at Amrita Yoga & Wellness
Reading about movement, mindfulness, and lifestyle pillars only gets you so far. We built our studio around giving you a direct way to act on all of it, with options sized for wherever you're starting.
Try a drop-in group class to test a foundational movement practice without committing to a membership.
Book a private session if you want pacing adjusted to a specific condition or goal.
Explore our Ayurvedic therapies, including Shirodhara and Abhyanga, as a supportive layer alongside movement and mindfulness work.
Whether you start with a single class or a monthly membership, the goal is the same: build a routine you can actually keep.
This article is general information, not a substitute for advice from a qualified doctor. Consult a qualified healthcare professional about your own circumstances before acting on anything here.
FAQ
What does integrative wellness mean?
Integrative wellness means coordinating conventional medical care with evidence-based complementary therapies, such as yoga, meditation, or massage, to address physical, mental, and social aspects of health together. The NCCIH describes this coordination as treating the whole person rather than isolated symptoms.
What does it mean to take an integrative approach?
Taking an integrative approach means your conventional provider and any complementary practitioners you see are both aware of your full treatment plan and working from the same goals. It typically starts with foundational habits like sleep and movement before adding targeted therapies.
What are complementary and integrative health approaches?
Complementary approaches are non-mainstream practices used alongside conventional medicine, while integrative health actively coordinates both systems through communication between providers. Common examples include yoga, tai chi, acupuncture, and massage, often layered onto standard medical care rather than replacing it.
What are some examples of integrative health practices?
Common examples include mind-body practices like meditation and yoga, movement therapies like tai chi and qigong, manual therapies like massage and acupuncture, and lifestyle supports like nutrition and sleep hygiene. A 2019 meta-analysis found several of these mind-body practices improved sleep quality across 4,506 participants.
How do I know if a wellness practitioner is qualified?
Ask about their certification body, years of training, and whether they're willing to coordinate with your medical provider on your care plan. A qualified practitioner should encourage disclosure to your doctor rather than discourage it, especially for conditions requiring oversight like pregnancy or cardiac disease.
Sources
Recommended
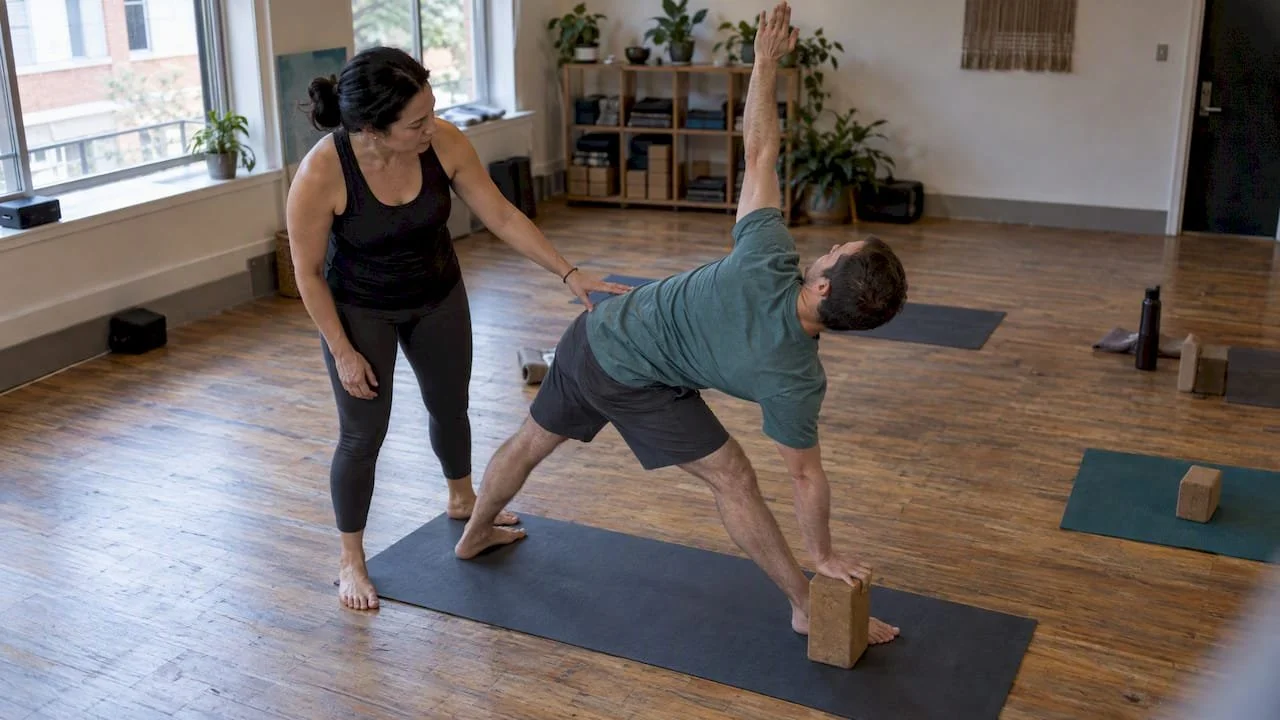
Avoid Injury: 10 Common Yoga Mistakes Beginners and Intermediates Make
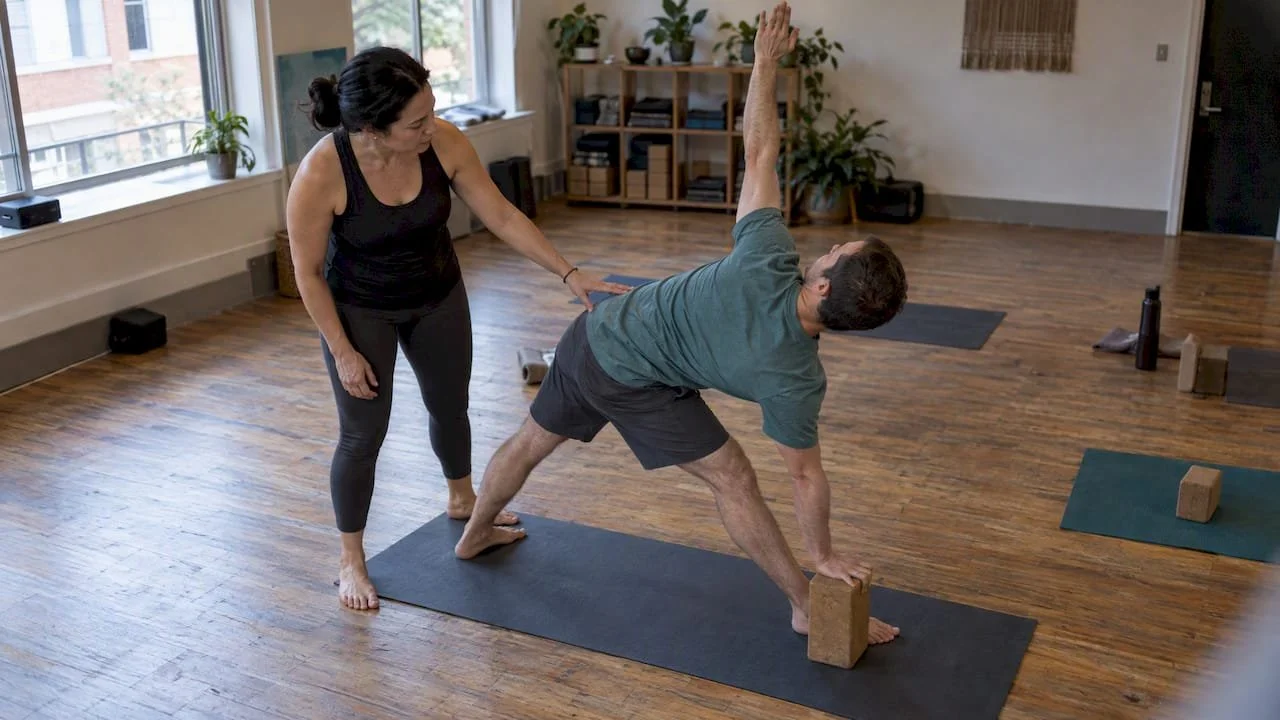
Most yoga injuries trace back to four habits: holding the breath, pushing into a pose instead of easing into it, ignoring alignment or skipping props, and rushing past warm-up and rest. The fix is one simple rule: breathe steadily, stop at sharp pain, and modify before you force a shape. At Amrita Yoga & Wellness, that rule shapes how every class is taught, from beginner mat work to advanced flow.
TL;DR:
Spend five minutes warming up, use blocks or straps to preserve alignment, and finish with at least three to five minutes of stillness.
Increase new intensity or hold times only after about two weeks, and build inversions or deep backbends through supported versions first.
People with glaucoma should get medical advice before inversions, while those with low bone density should avoid forceful backbends and deep spinal flexion.
A light snack with carbohydrates and protein 60 to 90 minutes before class can help, while steady hydration matters most for hot or vigorous sessions.
A 10 to 20 minute practice four or five times weekly supports steadier progress than a 90 minute class every few weeks.
Amritayogawellness
Build a Safer Yoga Practice
Explore yoga classes at Amrita Yoga & Wellness, with options for beginners through advanced practitioners in Philadelphia.
Table of Contents
3. How to pick a class, teacher, and props that keep you safe
5. How Amrita Yoga & Wellness builds safety into every class
6. Why hydration and nutrition timing matters more than you think
1. Spot and fix the mistakes that cause most setbacks
These are the errors we see trip up beginners and intermediate practitioners most often, along with the fixes for each.
Holding your breath during hard poses signals tension and cuts off the steady exhale that helps muscles release. Fix: inhale to lengthen, exhale to settle deeper, and never hold air during a stretch.
Chasing the final shape of a pose instead of building toward it gradually strains tissue that is not ready. Fix: work the preparatory version first and let depth come over weeks, not minutes.
Skipping warm-up sends cold muscles straight into deep stretches or backbends. Fix: spend the first five minutes on joint circles and gentle sun salutations before anything intense.
Ignoring alignment cues, like knees collapsing inward in lunges or rounding the lower back in forward folds, loads joints unevenly. Fix: check knee-over-ankle tracking and keep a slight bend in the knees during forward folds.
Refusing props because they feel like a beginner's crutch leaves many poses out of reach safely. Fix: a block under the hand in triangle pose or a strap around the foot in seated stretches changes nothing about the pose's benefit, only its accessibility.
Rushing your own progression, adding inversions or deep backbends before building core and shoulder strength, is a common path to strain. Fix: master supported variations for several weeks before attempting the full expression.
Clenching the jaw, shoulders, or hands during effort wastes energy and masks poor form. Fix: scan your body every few breaths and consciously soften anything that is not doing the work.
Comparing your shape to the person on the next mat pushes people into ranges of motion their joints are not ready for. Fix: measure progress against your own range from last month, not against someone else's flexibility.
Locking the knees or elbows in standing or plank poses stresses the joint instead of the muscle. Fix: keep a micro-bend in any weight-bearing joint.
Skipping shavasana at the end of class cuts the nervous system's transition back to a resting state. Fix: give yourself at least three to five minutes lying still, even on a short practice day.
Pro Tip: If your lower back aches in forward folds, bend your knees more than feels necessary. A softer spine beats a straight-legged stretch that pulls from the wrong place.
Pro Tip: Wrist pain in plank or downward dog often means the weight is sitting in the heel of the hand. Spread your fingers wide and press through the knuckles instead.
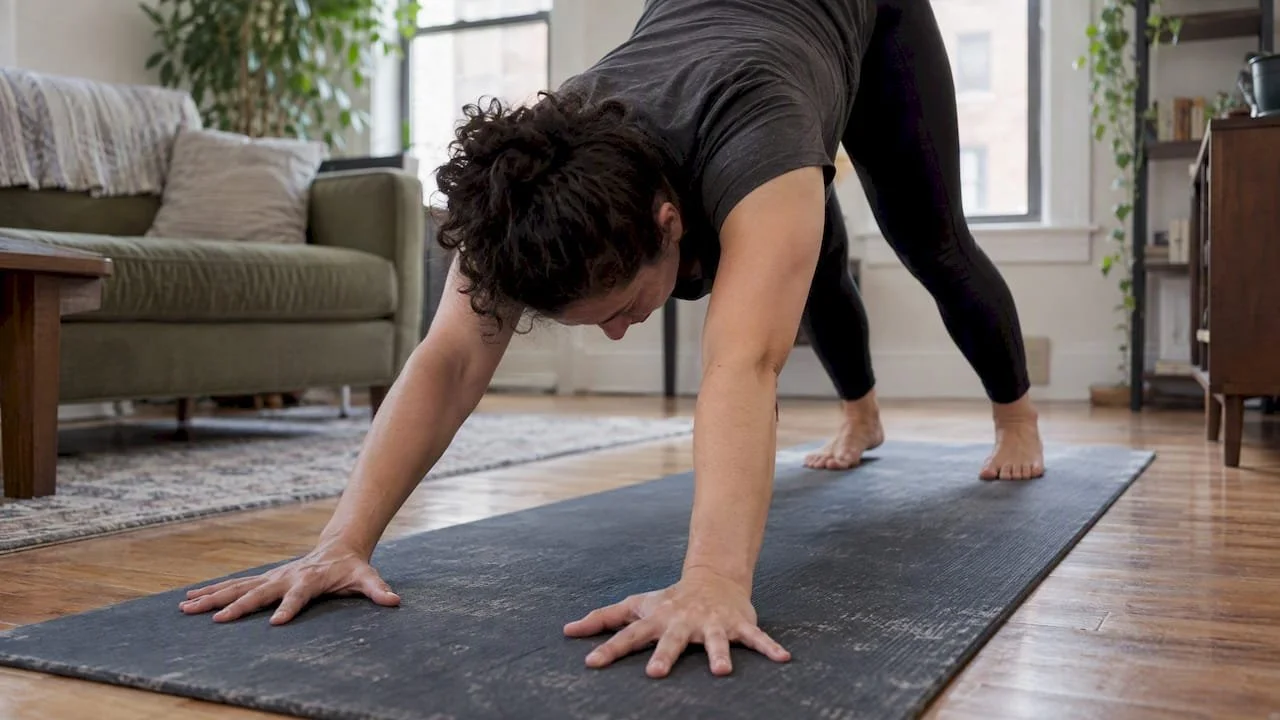
2. What the research says about yoga injuries and red flags
A systematic review of epidemiological studies found that most adverse events during yoga practice are mild and transient, typically sprains and strains rather than serious harm. A PLOS One review of case reports and case series examined 76 cases and found that advanced postures like headstand, shoulder stand, and lotus, along with forceful breathing techniques, were disproportionately linked to adverse events affecting the eyes, nervous system, or joints.
Productive discomfort feels like effort or a stretching sensation that eases as you breathe into it.
Sharp, shooting, or persistent pain is a signal to back off immediately and modify the pose.
Numbness, tingling, or dizziness during or after practice warrants a conversation with a clinician.
People with glaucoma should talk with a physician before practicing inversions, since head-down poses can raise intraocular pressure. Those with low bone density face similar caution around forceful backbends, where osteoporosis exercise guidelines recommend gentler, controlled movement over deep spinal flexion.
Most adverse events are mild, but a Cochrane review on yoga for chronic low-back pain found low-certainty evidence that yoga can slightly increase the risk of adverse events, mainly back pain, compared with no exercise at all.
3. How to pick a class, teacher, and props that keep you safe
A good beginner class offers modifications without singling anyone out, gives clear verbal cues about alignment, and uses hands-on or verbal corrections consistently rather than only demonstrating once and moving on.
Before booking, ask:
Does the teacher offer modifications for common limitations like tight hamstrings or wrist pain?
Are props like blocks, straps, and blankets available and actively encouraged?
How does the teacher handle injuries or physical limitations mentioned before class?
Props solve specific problems. A block under the hips in seated poses eases tight hamstrings, a strap looped around the foot extends your reach without rounding the spine, and a folded blanket under the knees protects joints during kneeling poses. Our chair yoga poses for beginners guide covers gentler adaptations for anyone working with limited mobility.
4. Build a practice routine that prevents overuse
A short, repeatable structure beats a long, inconsistent one. Try this order:
Warm up for five minutes with joint circles and easy flows to raise body temperature.
Link breath to movement through sun salutations or gentle standing poses.
Spend the bulk of class on focused strength or flexibility work, choosing one or two target areas rather than everything at once.
Cool down and finish in shavasana for three to five minutes minimum.
For progression, give any new intensity or longer hold time about two weeks before increasing it again. Jumping straight from a beginner backbend to a full wheel pose in one session is how strain happens. Between challenging transitions, use three breaths to reset: one inhale to find length, one exhale to anchor your base, one more inhale to adjust alignment before moving on. Our 10 to 20 minute beginner routines lay out this kind of pacing in full.
Pro Tip: When a transition feels rushed, pause and take one extra breath before moving. Speed is almost never the goal in a beginner or intermediate practice.
5. How Amrita Yoga & Wellness builds safety into every class
As a Philadelphia-based studio, Amrita Yoga & Wellness offers yoga, pilates, barre, tai chi, and massage therapy under one roof, with class structures built around accessibility and community rather than performance. Classes, workshops, and retreats are designed so beginners and advanced practitioners alike can find their level without guesswork. Our beginner's guide to learning yoga poses breaks down foundational postures step by step, supporting the kind of gradual, well-cued progression this article recommends.
6. Why hydration and nutrition timing matters more than you think
Practicing on an empty stomach or after a heavy meal both cause problems, just different ones. Too little fuel before a class, especially a longer or hot yoga session, can lead to lightheadedness or shaky balance during standing poses. A large meal right before practice does the opposite, pulling blood toward digestion and away from the muscles doing the work, which makes twists and forward folds uncomfortable.
A light snack with some carbohydrate and a little protein, eaten 60 to 90 minutes before class, tends to work better than practicing fully fasted or fully stuffed. Hydration matters just as much, particularly for hot yoga or vigorous flow classes where sweat loss is higher. Drinking water steadily through the day works better than chugging a large amount right before class, which can leave you feeling sloshy during inversions or twists.
After practice, rehydrating and eating something within an hour or two supports recovery, especially after a sweatier or more intense session. Skipping this step is a common beginner mistake that shows up as fatigue or a headache later in the day rather than during class itself. None of this needs to be complicated: water, a reasonable snack beforehand, and a real meal afterward cover most of what a regular practice requires.
7. Why consistency beats intensity for real progress
Many beginners treat yoga like a sport they need to master quickly, practicing hard for a week and then stopping for a month. Flexibility, strength, and breath control all build through repetition over time, not through one intense session. A short, 10 to 20 minute practice done four or five times a week moves you forward faster than one 90-minute class every couple of weeks.
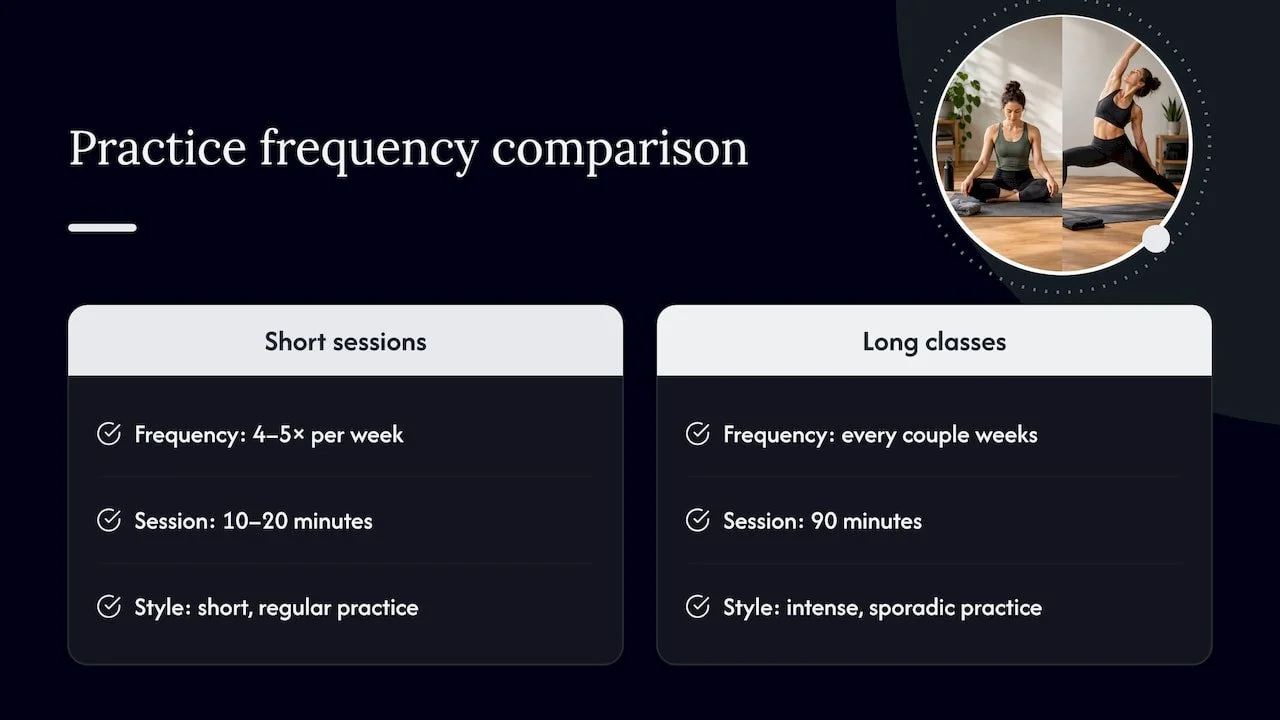
Inconsistency also raises injury risk. Tissues adapt to regular, moderate loading, so a body that has not practiced in three weeks is more vulnerable to strain when it suddenly attempts a full class at the same intensity as before. Treating practice like brushing your teeth, something small and automatic, removes the all-or-nothing thinking that causes people to quit.
Setting a realistic schedule matters more than setting an ambitious one. Three short sessions a week that you actually complete build more capability than an ideal five-day plan you abandon after two weeks. Our routines for beginners are built around this kind of manageable repetition rather than marathon sessions.
8. Why staying present changes how your body responds
Running through poses on autopilot, thinking about work or scrolling through a mental to-do list, means missing the cues your body sends about tension, fatigue, or early pain. Mindfulness in yoga is not a separate spiritual add-on. It is the attention that lets you notice a twinge in your knee before it becomes an injury.
Presence also affects breath, and breath affects how a pose feels. A distracted mind tends to hold the breath without noticing, which tightens muscles and makes effortful poses feel harder than they need to. Bringing attention back to the breath, even briefly between poses, resets that pattern.
A simple way to build this habit is to pick one anchor, the sensation of feet on the mat, the sound of your breath, or the weight of your hands in a pose, and return to it whenever your mind wanders. This does not require a separate meditation practice. It just means treating the hour on the mat as a chance to actually notice what is happening in your body instead of performing poses from memory.
9. Why flexibility without strength sets you up for injury
A common misconception is that yoga is purely a flexibility practice, so progress means deeper stretches and little else. Many injuries actually come from being flexible without the muscular control to support that range of motion. A hip that can fold deeply into a split but lacks the strength to stabilize that position under load is more likely to get hurt than a less flexible hip with solid muscular support.
Poses like plank, warrior sequences, and chair pose build the strength that protects joints during deeper stretches elsewhere in a practice. A PLOS One review notes that advanced poses carry more risk partly because they ask joints to move through large ranges without always building the supporting strength first.
Balancing a practice means including strength-focused poses, not just the stretches that feel immediately satisfying. Holding a plank for a few extra breaths or working through a slow, controlled chair pose does as much for injury prevention as any amount of stretching. Our 10 basic poses every beginner should learn includes several that combine both qualities at once.
10. The one cue that fixes several mistakes at once
Instructors often notice the same pattern: students hold their breath right as a pose gets hard, which tightens everything from the jaw to the hips. One fix handles several problems at once. Before your next challenging pose, try a three-breath reset: inhale to find length, exhale to settle your base, inhale again to adjust alignment. Test it in your next class or home session and notice what loosens.
— Juiced
Where to get hands-on correction and guided practice
Reading about alignment only goes so far. A teacher watching your form in real time catches the small habits, like a dropped shoulder or a locked knee, that are hard to feel on your own. Amrita Yoga & Wellness offers both supervised group classes and private sessions for readers who want that kind of direct feedback.
Drop into a group or livestream class to practice alongside an instructor who can adjust your form as you go.
Book a private or small-group session for focused, one-on-one correction on the poses giving you trouble.
Browse our class descriptions to find the style and level that fits where you are right now.
This article is general information, not a substitute for advice from a qualified doctor. Consult a qualified healthcare professional about your own circumstances before acting on anything here.
FAQ
What should you avoid doing right after yoga?
Avoid jumping straight into a cold shower, a heavy meal, or intense activity right after class. Give your body a few minutes in shavasana first, then rehydrate and eat something within an hour or two to support recovery.
Who should avoid certain yoga poses or practices?
People with glaucoma should consult a physician before practicing inversions, since head-down poses can raise eye pressure. Those with low bone density should modify forceful backbends, and pregnant practitioners should avoid prone positions and prolonged time on the back, especially after the first trimester.
What do chiropractors generally think about yoga?
Views vary, but many clinicians support yoga as a complement to other care for back pain when practiced with attention to form. A Cochrane review found small improvements in function and pain for people with chronic low-back pain, alongside a low-certainty increased risk of minor adverse events compared with no exercise.
What are common injuries linked to yoga practice?
Most reported injuries are mild sprains and strains, often in the wrist, shoulder, lower back, knee, or hamstring. A PLOS One review of case reports and case series examined cases and found that advanced postures like headstand, shoulder stand, and lotus, along with forceful breathing techniques, were disproportionately linked to adverse events affecting the eyes, nervous system, or joints.
How do I know the difference between discomfort and an injury?
Productive discomfort feels like effort that eases as you breathe and settle into a pose. Sharp, shooting, or lingering pain, or any numbness and tingling, is a sign to stop and modify, and persistent symptoms deserve a conversation with a clinician.
Sources
Adverse Events Associated with Yoga: A Systematic Review of Published Case Reports and Case Series
Yoga for chronic non-specific low-back pain - Cochrane Review
Head-down yoga poses increase eye pressure in glaucoma patients — American Optometric Association
Recommended
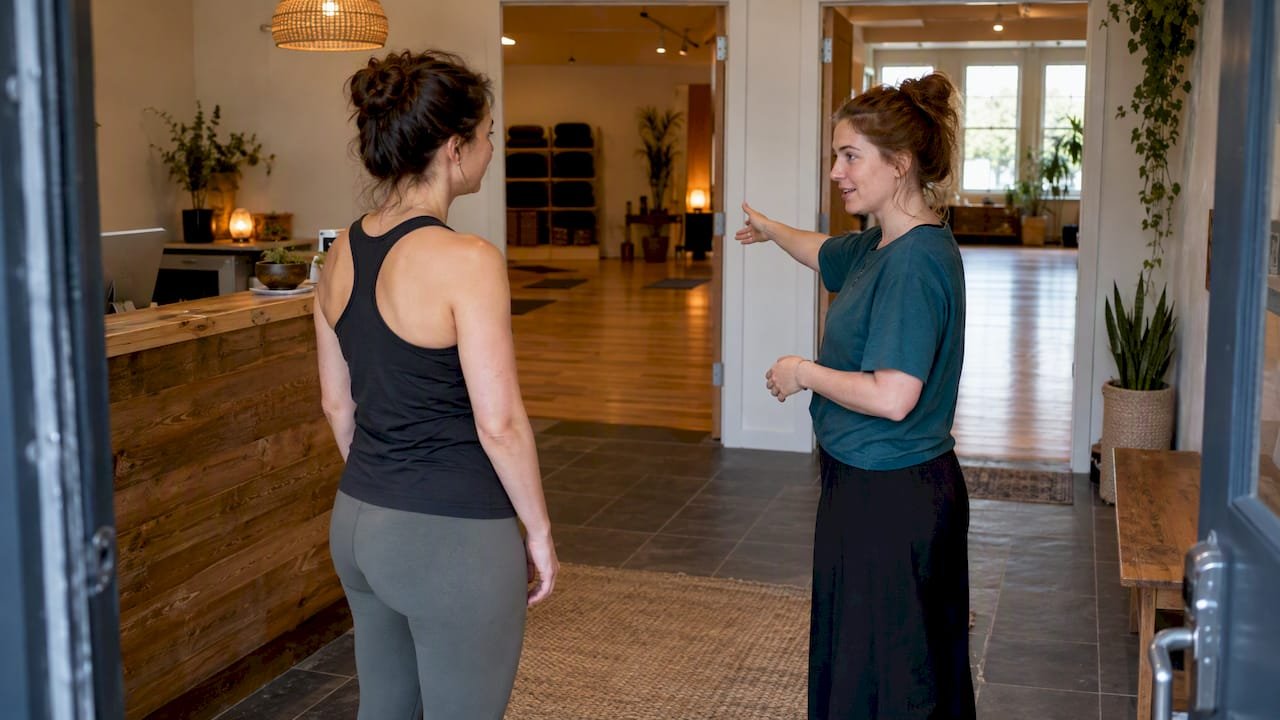
Match Your Goals to Philadelphia Boutique Studios by Neighborhood
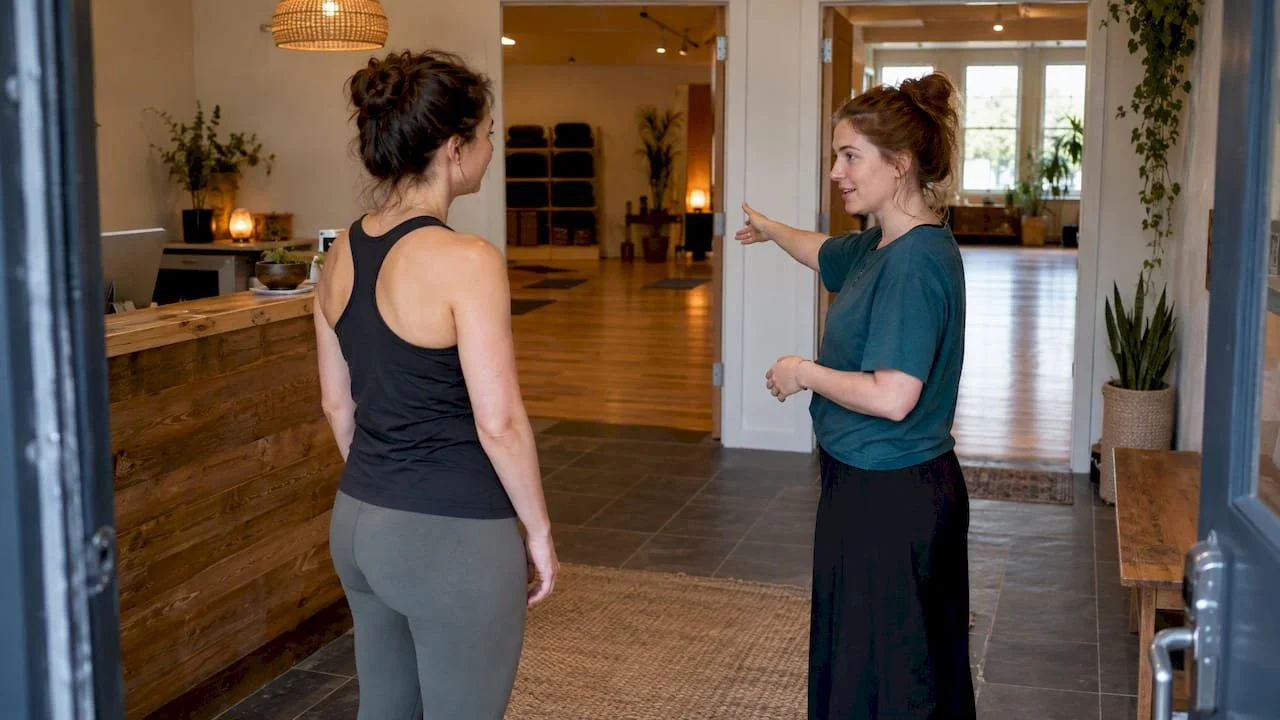
Philadelphia's boutique fitness scene spans yoga, pilates, barre, cycling, and small-group strength training, with studios clustered in Old City, Center City, Fishtown, and South Philly. The fastest way to find your fit is to book a drop-in or intro package at one or two studios this week. We built Amrita Yoga & Wellness around that same idea, and resources like ClassPass's Philadelphia market data and the YMCA's small-group training programs confirm the city's appetite for varied, community-driven workouts.
TL;DR:
Boutique fitness growth in Philadelphia relies heavily on community, social events, and personalized instruction, which boost member retention and engagement.
Choosing a studio depends more on schedule fit, instructor background, and vibe than on equipment or reputation, emphasizing trial classes for evaluation.
Pricing typically follows drop-in, class packs, or unlimited memberships, with unlimited plans best for those training multiple times weekly at a single studio.
Instructor qualifications vary, with certifications important in yoga and reformer Pilates, and small classes enabling real-time form correction.
Neighborhood location influences the studio experience, with Old City and Center City offering more community-oriented options, and Fishtown appealing to younger, trendier crowds.
Amritayogawellness
Find Your Philadelphia Wellness Fit
Explore Amrita Yoga & Wellness classes, workshops, retreats, and wellness services for varied practices and community connection.
Table of Contents
How one Philadelphia studio structures inclusive boutique offerings
Why community makes or breaks your boutique fitness experience
What's driving Philadelphia's boutique fitness boom
ClassPass reported a boutique-fitness surge in Philadelphia, with yoga and strength training ranking among the city's dominant genres. That growth tracks with a broader shift toward classes built around connection, not just calories burned.
Old City has become a proving ground for this trend. Local reporting on Old City's boutique studios found that successful spots lean into community events and collaborations that help members form real friendships, something a treadmill row rarely delivers. The same coverage notes that "boutique" increasingly signals high-touch service and belonging rather than a particular piece of equipment.
A few patterns stand out across the city:
Classes increasingly blend movement with social elements like themed nights or post-workout gatherings.
Smaller class sizes let instructors adjust cues in real time instead of shouting generic reps.
Neighborhood identity shapes studio culture almost as much as the workout itself.
Boutique studios in Philadelphia are growing because members want connection, not just a workout. That shift matters when you're choosing where to spend your money: a studio's community feel often predicts whether you'll actually show up in month three.
Boutique studio types and what each one feels like
Most Philadelphia boutique studios fall into a handful of categories, and each serves a different goal.
Yoga studios typically run 60- to 75-minute classes in groups of 10 to 25, ranging from gentle restorative sessions to heated vinyasa flows.
Pilates studios split between mat classes, which mirror a small group fitness format, and reformer sessions on specialized equipment, usually capped at 8 to 12 people.
Barre studios combine low-impact, high-rep movements in 45- to 60-minute classes aimed at muscular endurance rather than max strength.
Indoor cycling studios pair high-intensity intervals with music-driven pacing, often in rooms of 20 to 40 bikes.
Small-group strength and HIIT programs, the kind the Philadelphia YMCA documents in formats like barre, boxing, kettlebells, and TRX, emphasize certified trainers and personalized coaching because the groups stay small.
Recovery-focused studios round out the mix with slower, restorative sessions designed to complement harder training days.
Pro Tip: Book two different modalities in your first week, a flow-based class and a strength-based one, to see which pace actually holds your attention.
Finding boutique studios by Philadelphia neighborhood
Where you train often matters as much as what you train in, especially if you're commuting on foot or by transit.
Old City has become a hub for community-first studios that host events and partner with nearby businesses.
Center City offers the highest studio density and the easiest transit access, convenient for a lunchtime or after-work class.
Fishtown leans younger and trendier, with studios that often double as neighborhood gathering spots.
South Philly mixes longstanding community classes with newer boutique openings, often at friendlier price points.
University City serves students and hospital staff with flexible scheduling around academic and shift calendars.
If your commute options are limited, pick your neighborhood first and let that narrow your modality choices rather than the reverse.
What boutique fitness actually costs in Philadelphia
Pricing in Philadelphia's boutique scene generally follows three shapes: single drop-ins, class packs, and monthly unlimiteds. Drop-ins tend to run higher per class but require no commitment, which suits anyone still shopping around. Class packs reward semi-regular attendance with a lower per-visit rate, and unlimited memberships make the most sense once you're training three or more times a week at one studio.
Drop-in rates are the most flexible but the most expensive per visit.
Class packs typically reward regular attendance over the course of several weeks.
Monthly unlimiteds pay off fastest for people training multiple times weekly at a single studio.
Multi-studio marketplace passes are only cost-effective for people who train across several studios often; a single studio's in-house unlimited is usually cheaper for loyal regulars. Intro offers, community classes, and off-peak time slots remain the simplest ways to sample a studio before committing to a membership tier.
How to choose the right boutique studio for you
Picking a studio is less about finding the "best" one in Philadelphia and more about finding the one that fits your schedule, goals, and personality. Run through this checklist before you book:
Modality fit: does the class style match what you actually enjoy doing, not just what you think you should be doing?
Class size and energy: do you want personal attention or the energy of a packed room?
Instructor background: are trainers certified, and do they offer modifications for beginners?
Schedule overlap: does the studio offer times that realistically fit your week?
Price structure: does a drop-in, pack, or unlimited membership match your expected frequency?
Cancellation policy: how strict are late-cancel and no-show fees?
Overall vibe: does the space feel welcoming the moment you walk in?
Before booking, ask directly: What's your drop-in policy for first-timers? Are modifications offered for beginners? What should I bring?
A simple three-step plan works well: sample one class at two or three studios, evaluate consistency and instructor quality across three total visits, then commit to a membership or move on to the next option.
Pro Tip: Keep a short note after each trial class, noting energy level, instructor attentiveness, and whether you'd come back, so you're comparing facts instead of vague impressions a week later.
How one Philadelphia studio structures inclusive boutique offerings
At Amrita Yoga & Wellness, we structure our Philadelphia offerings around the same checklist points above. Our class lineup includes multiple yoga styles (including hot and aerial formats), pilates mat and group reformer sessions, barre, tai chi, massage therapy, and wellness workshops like tarot readings and breathwork.
We offer beginner-friendly entry points, including a dedicated Nurtured Beginnings pass for people new to the practice.
Our community class format gives newer or budget-conscious students a lower-cost way to sample group training.
We offer membership tiers structured to fit different budgets and attendance levels.
We built these formats around inclusivity and approachability for every experience level, which maps directly to the schedule, price, and beginner-support questions worth asking any studio you're considering.
Trial class and cancellation policies worth checking
Before you commit to any Philadelphia boutique studio, read the trial and cancellation terms closely, because they vary widely between businesses. Some studios offer a free or discounted first class, while others only sell discounted intro passes covering several visits.
Local guides on the city's fitness scene generally advise sampling intro offers before committing to a membership, since the right workout depends heavily on your personal goals and schedule rather than a studio's reputation alone. That advice holds regardless of modality: a trial class tells you more in 60 minutes than any class description can.
Cancellation policies typically require canceling a spot 12 to 24 hours before class to avoid a late fee, and no-shows are often billed at the full class rate. Membership cancellations usually require written notice with a set number of days' lead time, so ask about that window before you sign up for anything longer than a single month.
If recovery or complementary care factors into your routine, it's worth asking a studio whether they coordinate with outside providers like OsteoStrong Tysons VA in-person wellness sessions. Some Philadelphia-area clients pair their fitness routine with adjunct care such as chiropractic services for mobility work, which some studios can point you toward even if they don't offer it directly.
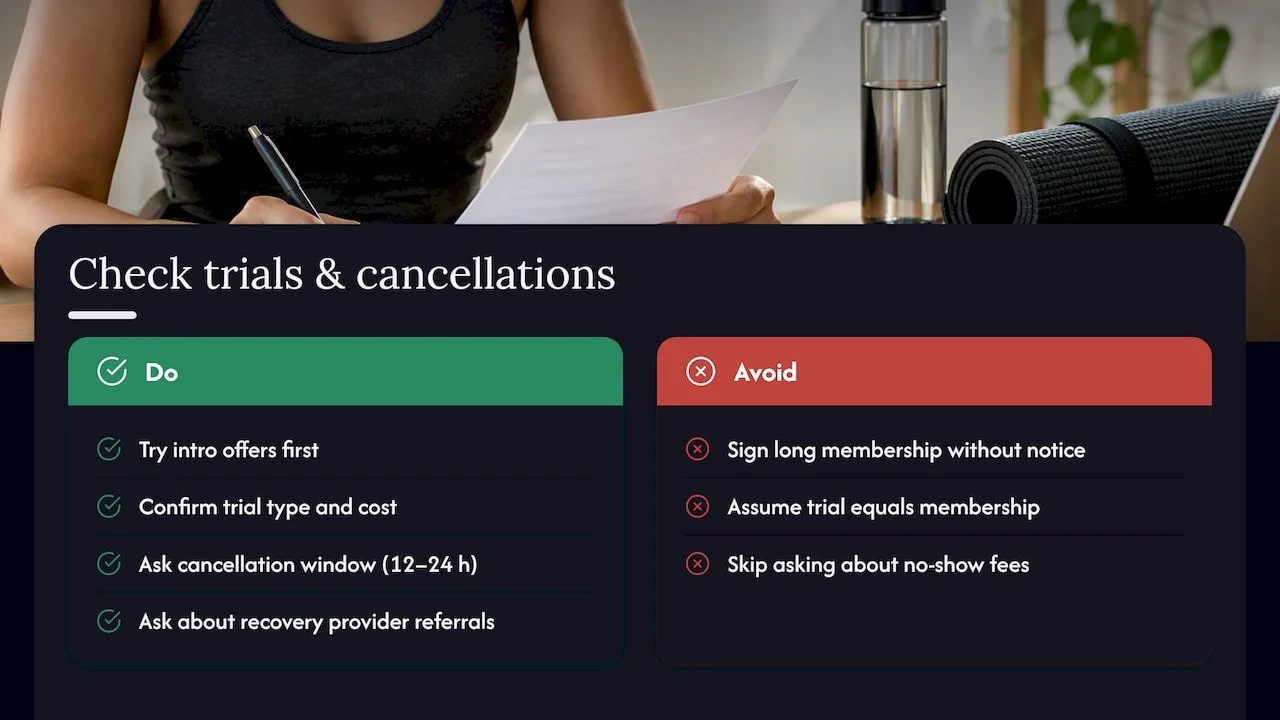
Instructors' qualifications and training styles
Instructor quality varies more than most people expect walking into a new studio, so it's worth asking directly about certifications and specialties before you book a series of classes. Yoga instructors in Philadelphia commonly hold 200-hour or 500-hour teacher training certifications, while pilates instructors, especially those teaching reformer work, typically complete equipment-specific certification programs separate from general fitness credentials.
For strength and small-group formats, the YMCA's small-group training programs emphasize certified trainers delivering personalized coaching precisely because class sizes stay small enough for real-time correction. That same logic applies across the city's boutique scene: smaller rooms let instructors actually watch your form instead of calling out cues to a crowd.
Training styles differ by instructor even within the same modality. Some lean heavily into alignment and injury prevention, others prioritize pacing and music-driven energy, and some focus on breathwork and mental components alongside the physical workout. Asking a studio about an instructor's background before your first class, rather than after a frustrating session, saves time and often money.
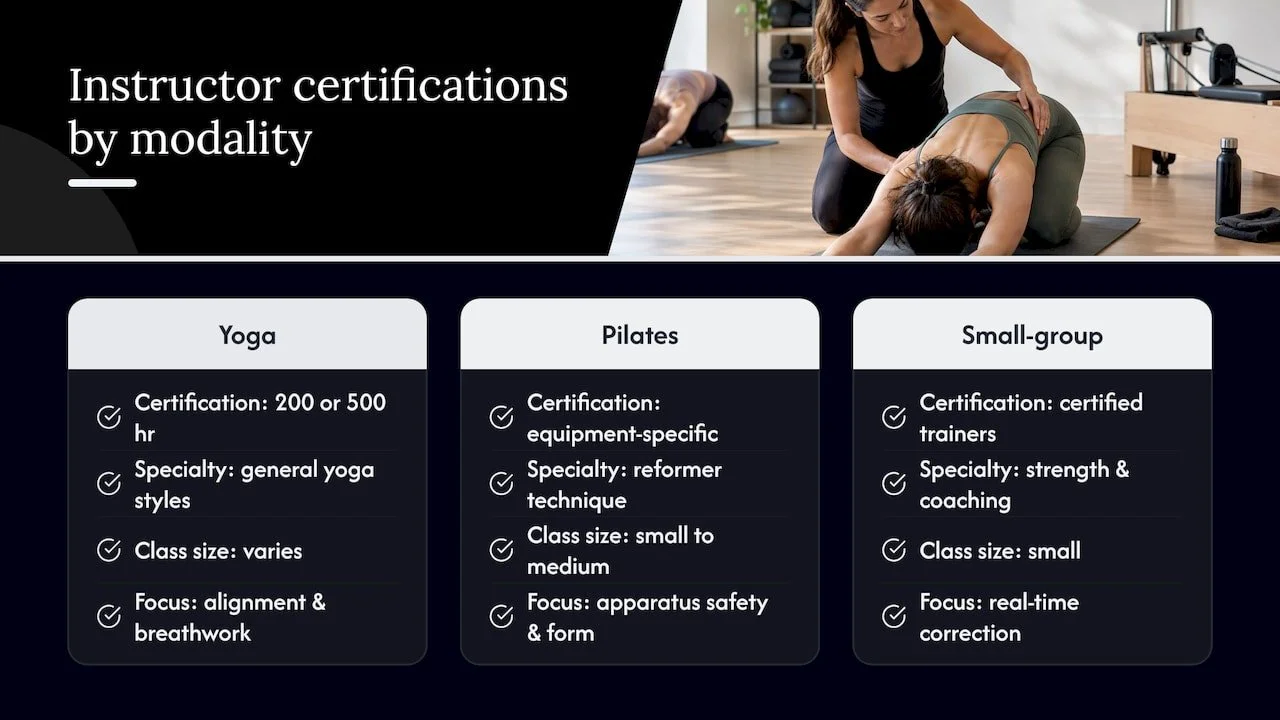
Why community makes or breaks your boutique fitness experience
The studios that keep people coming back aren't always the ones with the flashiest equipment. They're the ones where someone remembers your name by the third visit. If you're testing studios, judge the room's energy as closely as the workout itself.
— Juiced
Try a class at Amrita Yoga & Wellness
We built our Philadelphia studio around the same community-first approach this guide describes: inclusive class formats, beginner-friendly structure, and flexible membership shapes that fit different schedules and budgets.
If you want to see what a session actually looks like before booking, our class descriptions break down format and intensity for every offering, from restorative yoga to group reformer pilates. When you're ready to try one in person, our drop-in and class-pack options let you sample a single class without committing to a membership. Use that first visit to judge fit the same way you would at any studio on your shortlist.
FAQ
Is there a fancy gym in Philadelphia?
Philadelphia has several premium boutique studios with upscale amenities like recovery lounges, specialty lighting, and curated playlists, particularly in neighborhoods like Old City and Center City. Local guides describe these as experience-driven spaces rather than traditional gyms, built around atmosphere as much as equipment.
How much does boutique fitness cost?
Boutique fitness pricing in Philadelphia typically follows drop-in, class-pack, or monthly unlimited structures, with unlimiteds paying off fastest for frequent single-studio attendance. At our studio, for example, a Group Class Drop In runs $28 per session, while our Earth Monthly Membership is $119 per month for unlimited group classes.
What is the 3-3-3 rule for fitness?
Definitions of this rule vary across fitness sources, and no single boutique-fitness authority defines it the same way. If you encounter it while researching Philadelphia studios, treat it as general guidance rather than a standard every studio follows.
Why is Gen Z so obsessed with the gym?
Reporting on Philadelphia's fitness scene points to younger members prioritizing social connection and experience-driven classes, not just physical results, which helps explain demand for mood-and-movement formats with music, lighting, and recovery add-ons. Local coverage of Old City's boutique studios found that community events and collaborations, not just workouts, are a major draw for younger members.
Sources
How boutique fitness is offering a different kind of experience in Philadelphia’s Old City
The Complete Guide to Philadelphia's Best Workout Classes and Fitness Trends
Recommended
Find Your Breathwork Style: 6 Purpose Groups for Beginners
Breathwork is the deliberate use of breathing patterns to influence your nervous system, mood, and physical state. The main families you will encounter are slow-paced and diaphragmatic techniques, yogic pranayama, clinical breathing retraining, and expressive or fast-paced methods. Slow-paced approaches have the strongest, most consistent evidence for easing stress and anxiety, which makes them the natural starting point for most people.
TL;DR:
Slow-paced diaphragmatic breathing is the most supported method for easing stress and anxiety with minimal risk, especially for beginners.
Multi-session, guided breathwork programs lasting at least five minutes show higher effectiveness than single, self-directed sessions.
Techniques like diaphragmatic breathing, box breathing, and 4-7-8 breathing are simple, low-risk options suitable for most people.
Fast-paced or intense methods such as holotropic or Wim Hof require supervision due to risks of dizziness, hyperventilation, or physiological distress.
People with respiratory or cardiovascular conditions should consult a healthcare professional before practicing more vigorous or breath-holding techniques.
Amritayogawellness
Explore Guided Breathwork Practice
Amrita Yoga & Wellness offers breathwork workshops alongside yoga, Pilates, barre, tai chi, and massage therapy in Philadelphia.
Table of Contents
What breathwork actually means
Breathing on purpose, rather than letting it run on autopilot, shows up across nearly every wellness tradition. Yogic pranayama has roots going back thousands of years in South Asia, Qigong uses breath to move energy through the body in Chinese practice, and shamanic traditions in various cultures use fast or circular breathing to shift consciousness. Contemporary therapeutic breathwork borrows from all of these while adding a clinical layer aimed at measurable outcomes.
Most people come to breathwork for one of four reasons: to calm a racing mind, to sharpen focus before a demanding task, to build better emotional regulation over time, or to manage a respiratory condition like asthma. The right technique depends heavily on which of those goals you are chasing, which is why a single "best" breathwork method does not really exist.
Terminology gets muddled fast, so it helps to separate three terms. "Breathwork" is the broad umbrella covering any intentional breathing practice. "Pranayama" refers specifically to the yogic system of breath control, with named techniques and traditional sequencing. "Breathing retraining" is the clinical term used by physiotherapists and respiratory specialists for structured programs that correct dysfunctional breathing patterns, often tied to asthma or chronic hyperventilation. You will see all three words used loosely in studios and online content, but knowing the distinction helps you find the right resource.
What the research actually supports
A meta-analysis of randomized controlled trials found that breathwork produces small-to-moderate reductions in self-reported stress, anxiety, and depressive symptoms, with effect sizes of g = −0.35 for stress, g = −0.32 for anxiety, and g = −0.40 for depressive symptoms.
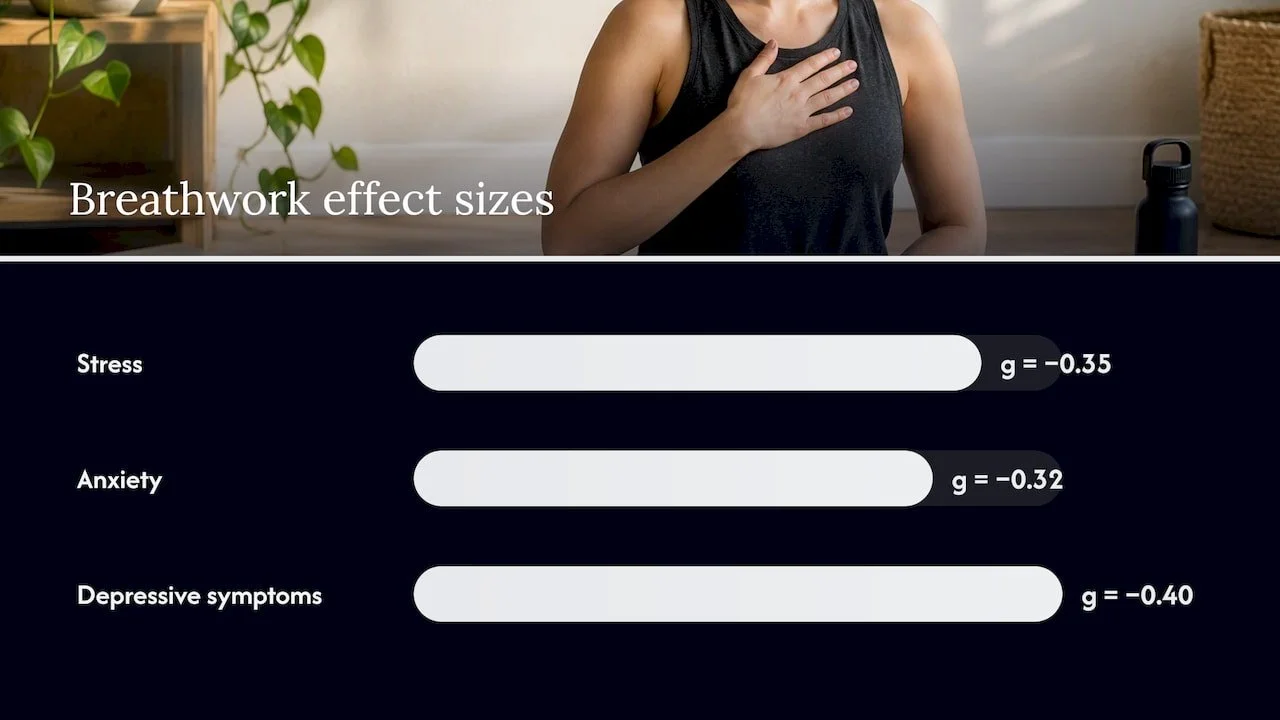
Small-to-moderate effect sizes (g = −0.32 to −0.40) for anxiety and depressive symptoms mean breathwork helps, but it is not a dramatic fix on its own. Researchers behind that review also flagged a gap between the hype around branded breathwork modalities and what the data actually shows: the rhythmic act of breathing slowly may explain much of the benefit rather than any particular trademarked method.
A separate systematic review looked at what made breathing interventions actually work. It found that programs using multi-session, human-guided training, with sessions lasting at least roughly five minutes, were more consistently effective than single, self-directed sessions. Out of 72 interventions reviewed, 54 were identified as effective, and slow, diaphragmatic breathing showed up as the most common ingredient among the successful ones.
There is a real caveat worth sitting with. Trials in this space are heterogeneous, meaning they measure different outcomes with different populations and different session lengths, and some benefit likely comes from the attention and structure of a guided program rather than the breathing technique alone. That does not erase the findings, but it does mean claims of a single miracle method deserve skepticism.
The practical takeaway: if you are new to this, start with slow-paced or diaphragmatic breathing. It has the broadest support, the lowest risk, and it sets a foundation before you try anything more intense.
Types of breathwork and how to practice each one
Breathwork techniques generally sort into six purpose-driven groups. Pick based on your goal first, your comfort level second.
Foundational slow-paced breathing builds the base for almost everything else.
Diaphragmatic breathing is belly breathing that engages the diaphragm instead of the chest, best for anyone new to breathwork or dealing with everyday stress; inhale through the nose and let your belly expand, exhale slowly, practiced for 5 to 10 minutes lying down to start, with no major safety concerns for most people.
Coherent breathing paces inhales and exhales to around five to six breaths per minute, fitting people who want a measurable calming effect tied to heart rate variability; inhale for about five seconds and exhale for about five seconds, typically for 5 to 10 minutes seated, and it carries little risk beyond mild lightheadedness if you push the pace too hard at first.
Paced slow breathing is a looser version of coherent breathing without strict timing, suited to beginners who find counting distracting; simply slow your breath rate below your resting pace and keep it smooth, for 5 minutes or more, with the same low risk profile.
Paced and patterned calming techniques add structure for people who like a clear count to follow.
Box breathing, also called square breathing, inhales, holds, exhales, and holds again for equal counts, often four seconds each. It works well for people who want a mental anchor during acute stress, such as before a presentation, and sessions of 3 to 5 minutes are typical. The breath holds can trigger lightheadedness in beginners, so starting with shorter counts is wise.
4-7-8 breathing inhales for four counts, holds for seven, and exhales for eight, making it a favorite for winding down before sleep. It suits people dealing with racing thoughts at bedtime, and most people do four to eight cycles per session. The extended hold and exhale can feel uncomfortable at first, so easing into the counts over several sessions helps.
Pursed-lip breathing has you inhale through the nose and exhale slowly through pursed lips, a technique borrowed directly from respiratory medicine for people managing breathlessness. It fits anyone with chronic obstructive pulmonary disease or exercise-induced breathlessness particularly well, and it can be used in short bursts whenever shortness of breath strikes, with essentially no downside when done gently.
Yogic pranayama carries traditional names and specific physical techniques, and our pranayama resources go deeper into how these integrate with a full practice.
Alternate nostril breathing, or Nadi Shodhana, closes one nostril at a time while breathing through the other, suited to people seeking balance and mental clarity before meditation; practiced for 5 to 10 minutes, it is gentle for most practitioners.
Ujjayi breath creates a soft ocean-like sound by slightly constricting the throat on each breath, commonly paired with movement in a vinyls yoga class; it is used throughout a practice session rather than as a standalone exercise, and it is low risk for nearly everyone.
Kapalabhati, or skull-shining breath, uses forceful, rapid exhales with passive inhales, appealing to practitioners wanting an energizing jolt; it is typically done in rounds of 20 to 30 breaths. It is not recommended during pregnancy or for anyone with high blood pressure, glaucoma, or a hernia, and first attempts go better under direct instruction.
Clinical and retraining techniques are built around measurable respiratory outcomes rather than a meditative feel.
The Buteyko method teaches reduced-volume nasal breathing to address chronic over-breathing, aimed specifically at people with asthma or hyperventilation patterns. Programs run over weeks with short daily practice sessions. Breathing retraining for asthma more broadly has been shown to improve symptoms and reduce reliever medication use over 6 to 12 months, with trials reporting reductions of roughly 1.5 to 2.5 puffs per day when programs include sufficient patient contact. These approaches genuinely benefit from a qualified respiratory physiotherapist rather than a self-taught attempt, since short one-off sessions rarely produce lasting change for a clinical population.
Intense and expressive methods sit at the far end of the intensity spectrum and carry the most caveats.
The Wim Hof Method combines cycles of forceful breathing with breath retention and cold exposure, drawing people who want an intense physiological reset or an energy boost. Sessions often run 10 to 20 minutes across several rounds. Because it involves voluntary hyperventilation, it can cause dizziness, tingling, or fainting, and it should never be practiced in water or while driving. Holotropic and transformational breathwork use sustained rapid breathing, often with music, to access altered states or process emotion, appealing to people exploring deeper personal or therapeutic work. Sessions typically last 60 to 120 minutes and are guided in groups or one-on-one. The systematic review of breathing interventions found that this style of prolonged forced hyperventilation carries real potential to provoke anxiety or physiological distress, so a supervised setting matters here more than almost anywhere else in breathwork.
Quick energizers and calmers round out the list as short, accessible tools.
Lion's breath combines a wide-mouth exhale with a stuck-out tongue and an audible roar, useful for releasing tension or facial stress in a single round or two. Humming bee breath, or Bhramari, closes the eyes and ears while humming on the exhale, creating a vibration that many people find calming within just a few rounds. Neither carries meaningful risk for most healthy adults.
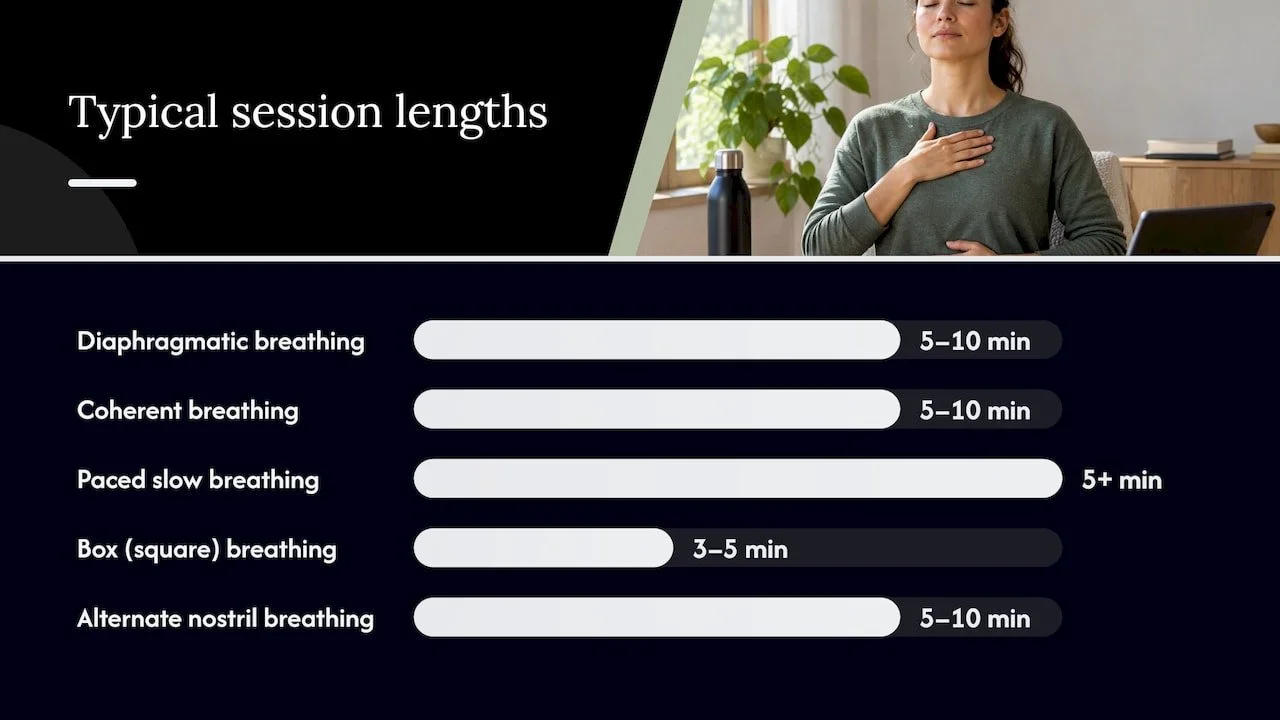
How to start a breathwork practice safely
A sustainable practice beats an intense one you abandon after a week. Here is a simple way to begin.
Week one: Practice diaphragmatic breathing for 5 minutes daily, lying down, right after waking or before bed.
Week two: Extend to 10 minutes and move to a seated position once lying down feels automatic.
Week three: Introduce one paced technique, such as box breathing or coherent breathing, for 5 minutes alongside your diaphragmatic practice.
Week four: Try a guided class or workshop session to see how a teacher's cues change the experience before adding any higher-intensity method.
Sessions of at least five minutes, repeated across multiple sessions, consistently outperform single, one-off attempts in research on breathing interventions. Consistency does more work than intensity, especially in the first month.
When choosing guided instruction, whether a class, workshop, or private session, look for a few things: a teacher who can explain the physiological reasoning behind a technique, clear verbal cues you can follow with your eyes closed, the ability to modify a practice for a health condition you disclose, and a calm, unhurried pace that never pressures you into breath holds you are not ready for.
Pro Tip: Pair your breathwork minutes with something you already do daily, like brewing coffee or brushing your teeth, so the habit attaches to an existing cue instead of relying on willpower alone.
Safety signs and when to stop
Mild lightheadedness, tingling in the fingers, or a brief wave of emotion can happen during breathwork, especially with faster techniques. If that happens, pause, sit or lie down, breathe gently through your nose, and stop the session if symptoms do not settle within a minute or two.
Persistent breathlessness, dizziness, chest tightness, or a racing heart outside of practice can signal a breathing pattern disorder, where chronic over-breathing or chest-dominant breathing has become habitual. These patterns typically respond to physiotherapist-led retraining rather than a general wellness class, and a referral is worth pursuing if symptoms linger.
Specific caution applies to people with asthma, cardiovascular disease, epilepsy, psychosis, or those who are pregnant. Fast or breath-holding techniques in particular can interact poorly with these conditions, so checking with a physician or a qualified practitioner before trying anything beyond slow diaphragmatic breathing is a reasonable baseline for safety.
How our studio supports safe breathwork learning
We built our class and workshop formats around the same principle the research points to: guided, repeated practice beats a single unsupervised attempt. We offer pranayama-focused sessions and breathwork workshops that provide direct instruction and the chance to ask questions in real time, rather than guessing from a video. We also cover how breath integrates into yoga and into Pilates on our blog, which is useful if you want to see how breathwork fits into a broader movement practice rather than standing alone. Our breathwork benefit posts walk through what different techniques tend to offer so you can match a class to your goal before you book.
Finding the breathwork style that actually fits you
The biggest mistake we see is people jumping straight to the most intense technique they heard about, usually something fast and dramatic, without building any foundation first. Start slow. Notice how your body responds to a gentle five-minute session before adding breath holds or rapid cycles. The calmest, least glamorous techniques are the ones with the sturdiest evidence behind them, and trying a few different styles over a month or two will tell you more about what fits than reading about them ever will.
— Juiced
Try guided breathwork at our studio
Reading about breathwork only gets you so far. The techniques with the strongest track record, slow and diaphragmatic breathing especially, work best when a teacher can watch your pace and adjust cues in real time, and that is exactly what our in-studio sessions are built for.
A few ways to start: guided group classes, personalized one-to-one sessions, or combined breathwork and restorative therapies are available.
None of this replaces medical care for a diagnosed respiratory or cardiovascular condition, but it does give you a structured, supervised way to build the habit. Browse our class schedule and find a session that matches where you are starting from.
FAQ
What are the 14 breathing styles?
There is no single, universally agreed list of specific breathing styles. Breathwork is better understood as a handful of purpose-based families, slow-paced, pranayama, clinical retraining, and expressive or intense techniques, within which dozens of named variations exist depending on the tradition or teacher.
What is 4-7-8 4-7-8 breathing?
4-7-8 breathing is a paced technique where you inhale for four counts, hold for seven, and exhale for eight, usually repeated for four to eight cycles. It is commonly used to wind down before sleep or to interrupt a stress response, and most people find the extended exhale produces a quick calming effect.
What are the most popular breathwork techniques?
Diaphragmatic breathing, box breathing, 4-7-8 breathing, and alternate nostril breathing are among the most widely practiced techniques because they are simple to learn and low risk. The Wim Hof Method and holotropic breathwork have also grown in popularity, though they call for more caution and ideally supervised instruction.
How many breathwork types are there?
The exact count varies by source since techniques are often renamed or combined across traditions, so there is no fixed number. It is more useful to think in terms of five or six purpose-driven groups covering calming, energizing, clinical retraining, and expressive practices, each containing several named techniques.
Do I need a teacher to start breathwork?
You can start slow diaphragmatic breathing safely on your own, but research on breathing interventions found that guided, multi-session programs produce more consistent results than single self-directed attempts. Guidance becomes especially important once you move toward faster or breath-holding techniques, where a qualified instructor can adjust pacing for your comfort and health history.
Sources
Recommended
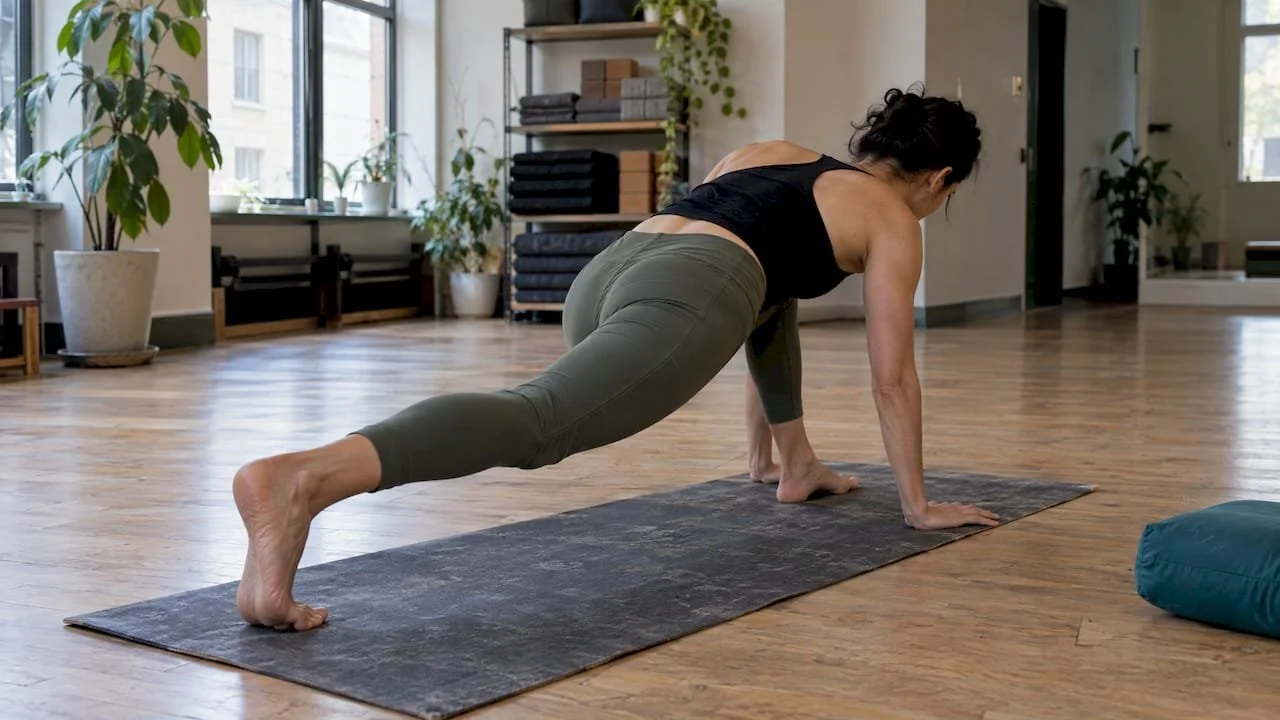
Master 7 Intermediate Yoga Transitions With Teacher Tested Drills
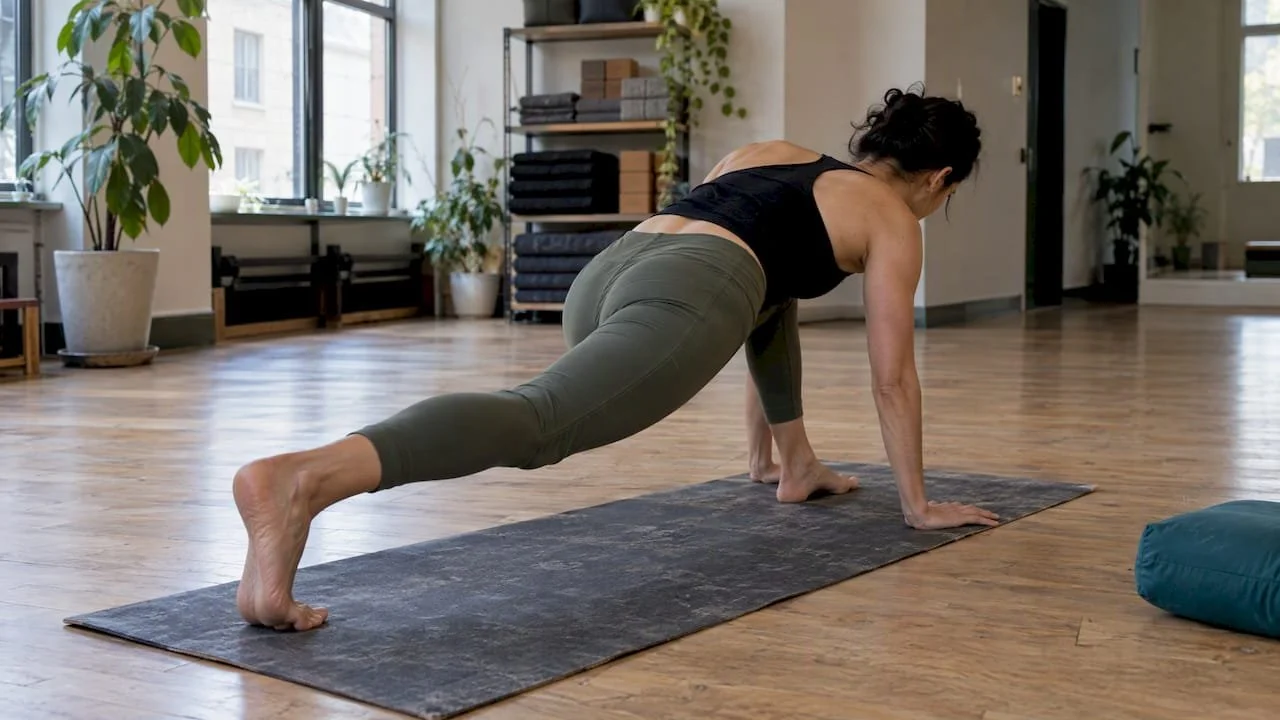
Intermediate yoga transitions are the breath-linked movements that carry you from one posture into the next, and the skill lives in the movement itself, not just the poses on either side. A few you can use today: Chair into High Lunge, Triangle into Half Moon, Downward Dog into Warrior I, and Plank into Side Plank. Each one rewards slow, breath-mapped attention over speed.
TL;DR:
Properly practicing breath-linked transitions enhances alignment and stability, requiring slow, mindful movements rather than rushing through to poses.
Repeating each transition five times with focus on form helps build muscle memory and confidence before integrating into full sequences.
Using props like blocks or walls can lower injury risk and improve stability during complex transitions, especially for beginners or those regressing.
Different sequencing patterns—one-and-done, ladder flow, and step-by-step—serve distinct goals, from precision to skill building and preparation for advanced poses.
Isolating mobility and strength drills, such as thoracic rotations and core activation, accelerates progress in transitions more effectively than only practicing full movements.
Amritayogawellness
Refine Your Yoga Transitions
Explore yoga classes, workshops, and wellness practices at an inclusive Philadelphia studio supporting mindful movement and personal growth.
Table of Contents
Examples of intermediate transitions and how to move through them
Once you can hold intermediate postures, the next skill is connecting them without losing alignment. Here are transitions worth practicing on repeat, each with a breath cue and a way to adjust the difficulty.
Chair to High Lunge: inhale to rise through Chair, exhale to step one foot back into a lunge, keeping the front knee tracking over the ankle rather than drifting inward.
Triangle to Half Moon: inhale as you shift weight into the standing leg and lift the back leg into Half Moon; a block under the bottom hand shortens the lever and steadies the hips.
Downward Dog to Warrior I: draw the knee forward using core engagement, then inhale to rise into the lunge and stack the torso upright; stepping the foot halfway forward first makes this more approachable.
Plank to Side Plank: shift weight onto one hand, inhale to stack the hips and open the chest, exhale to lengthen through the top fingertips; dropping the bottom knee removes much of the load.
Low Lunge to Extended Side Angle: inhale to open the chest and rotate, exhale to anchor the back heel and extend the top arm overhead.
Twisted Chair to Twisted High Lunge: combine rotation with a lift of the back heel, moving the spine and hips together rather than twisting from the shoulders alone.
Low Lunge step-through to Half Moon with an arm-balance lead-in: floating the back leg through to a bent-knee hover builds the hip flexion and shoulder stability needed before attempting poses like Eka Hasta Bhujasana.
Each of these treats the movement between postures as its own event rather than a gap to rush through, which matches how intelligent sequencing builds from simple actions toward more complex ones.
Pro Tip: Practice each transition five times slowly before adding it to a full flow; speed should come last, not first.
How sequencing patterns organize your transition practice
Three sequencing patterns show up again and again in intermediate classes, and each serves a different goal.
One-and-done: you move through a sequence once with full attention to alignment, useful when the goal is precision rather than repetition.
Ladder flow: you repeat a short sequence while adding one new transition each round, which builds skill gradually without overwhelming the nervous system.
Step-by-step: you break a complex transition into its component parts, practice each part on its own, then link them together once each piece feels stable.
Choosing between them depends on what you want from the practice: ladder flow suits skill-building days, one-and-done fits a cardio-focused flow, and step-by-step works best when preparing for something genuinely new like an arm-balance entry. Across all three, teachers often repeat 'landmark actions' such as pressing through the outer heel or drawing the ribs in, so the same cue transfers to unfamiliar transitions without extra instruction.
Drills that build the physical pieces of a transition
Transitions draw on specific mobility and strength qualities, and isolating them speeds up progress more than repeating the full movement over and over.
Hip mobility: a Lizard-to-Malasana flow opens the hips and hamstrings needed for leg-over-arm actions in arm balances.
Thoracic rotation: pairing a quad stretch with Thread-the-Needle or a seated twist frees the upper spine for deeper rotations in poses like Revolved Side Angle.
Core and bandha activation: hollow-body pulses, supported jump-through holds, and standing one-leg balances train the stability that transitions depend on.
Arm strength: progress from Tripod hold toward Crow prep, then add Chaturanga negatives and Plank shoulder taps to build pressing strength gradually.
Props matter here: a block under the hand, a strap around the feet, or a wall behind the hips lets you train the same pattern with less load. Aim for 5 to 8 slow repetitions per drill rather than rushing to full expression.
Pro Tip: Treat drills as their own practice, not a warm-up to skip through: five focused minutes on thoracic rotation can unlock a twist you have been forcing for months.
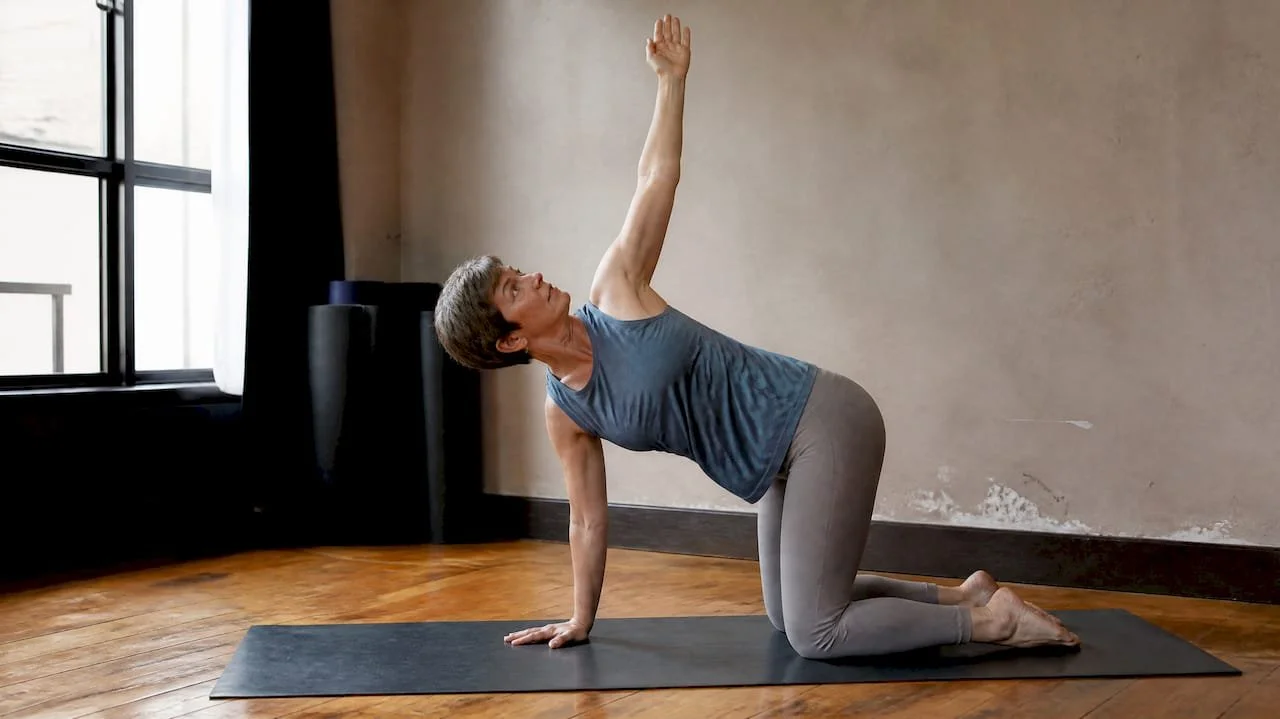
Staying safe and knowing when to regress a transition
Transitions carry more injury risk than static holds because attention tends to jump ahead to the next pose instead of staying in the movement itself. Treating the transition itself as a pose, with steady breath and a fixed gaze, lowers that risk considerably.
Shorten the lever (bend the working knee) when a straight-leg transition feels unstable.
Drop the back knee to the floor in lunges and side planks when the core cannot yet control the full pose.
Place a block under the hand in standing poses to reduce the reach and stabilize the hips.
Move slowly between floor and standing postures, since fast changes can trigger lightheadedness as blood pressure adjusts.
ACE's regression guidance frames these choices as smarter technique, not a lesser version of the pose. A well-fitted mat also matters here: better grip and traction reduce slip risk during dynamic entries like Side Plank or Half Moon.
A sample intermediate flow with breath counts
This sequence runs about 12 postures and works well as a stand-alone practice or as the center of a longer class.
Chair, 5 breaths, inhale to rise.
Chair to High Lunge, exhale to step back, 5 breaths.
High Lunge to Half Moon, inhale to lift, 3 breaths each side (regression: keep fingertips on a block).
Half Moon to Warrior II, exhale to lower, 3 breaths.
Warrior II to Extended Side Angle, inhale to extend, 5 breaths.
Extended Side Angle to Triangle, exhale to straighten the front leg, 5 breaths.
Triangle to Twisted Chair, inhale to rise and rotate, 3 breaths.
Downward Dog, 5 breaths.
Downward Dog to Plank, inhale to shift forward, 3 breaths.
Plank to Side Plank, exhale to open, 3 breaths each side (regression: bottom knee down).
Child's Pose, 5 breaths.
Seated twist to close, 5 breaths each side.
Once this flow feels steady, progress it by adding the Low Lunge step-through to Half Moon described earlier, or by shortening breath counts to build more cardio demand. For readers building toward a faster-paced class, our guide on hot vinyasa preparation covers how to adjust pacing for heat and intensity.
What years of teaching transitions have taught us
Students rarely fail a transition because they lack strength. They fail it because they rush the breath to match the shape they picture in their head rather than the one their body is actually in. Our studio teaches across styles from gentle to hot vinyasa, and the drills and sequencing patterns above come directly from how we build classes for practitioners at this stage.
— Juiced
Practice these transitions with guided feedback
Reading about a transition only gets you so far: a teacher watching your knee track or your hip height catches details you cannot feel on your own. Our Group Class Drop In gives you that live feedback inside a full sequence, while a One to One Session lets you isolate a single transition, like Half Moon or an arm-balance entry, and work it until it feels steady.
Book a drop-in class to practice transitions inside a guided flow.
Schedule a private session for focused coaching on one specific transition.
Review our class descriptions to find the format that matches your current level.
Ready to put these transitions into practice? Check our class schedule and find a time that works for you.
FAQ
What are some examples of intermediate yoga sequences?
An intermediate sequence typically moves through standing postures connected by breath-linked transitions, such as Chair into High Lunge into Half Moon, followed by a Plank to Side Plank series. The sample 12-pose flow above shows how these pieces link together with specific breath counts.
What are some interesting yoga transitions?
Transitions that combine rotation with balance tend to stand out, such as Twisted Chair moving into Twisted High Lunge, or a Low Lunge step-through that floats into Half Moon as a lead-in to arm-balance work. These ask for coordinated breath, core engagement, and hip mobility rather than one isolated skill.
What are 10 intermediate yoga poses?
Common intermediate postures include Half Moon, Warrior I, Warrior II, Extended Side Angle, Triangle, Side Plank, Revolved Side Angle, Twisted Chair, High Lunge, and Crow prep. Each one appears in the transitions and sample sequence described earlier in this guide.
What are considered intermediate yoga poses?
A pose generally counts as intermediate when it asks for balance, rotation, or sustained core engagement beyond what beginner postures require, such as Half Moon or Side Plank. Intelligent sequencing guidance recommends building the mobility and strength for these poses before adding them to a flow.
Recommended
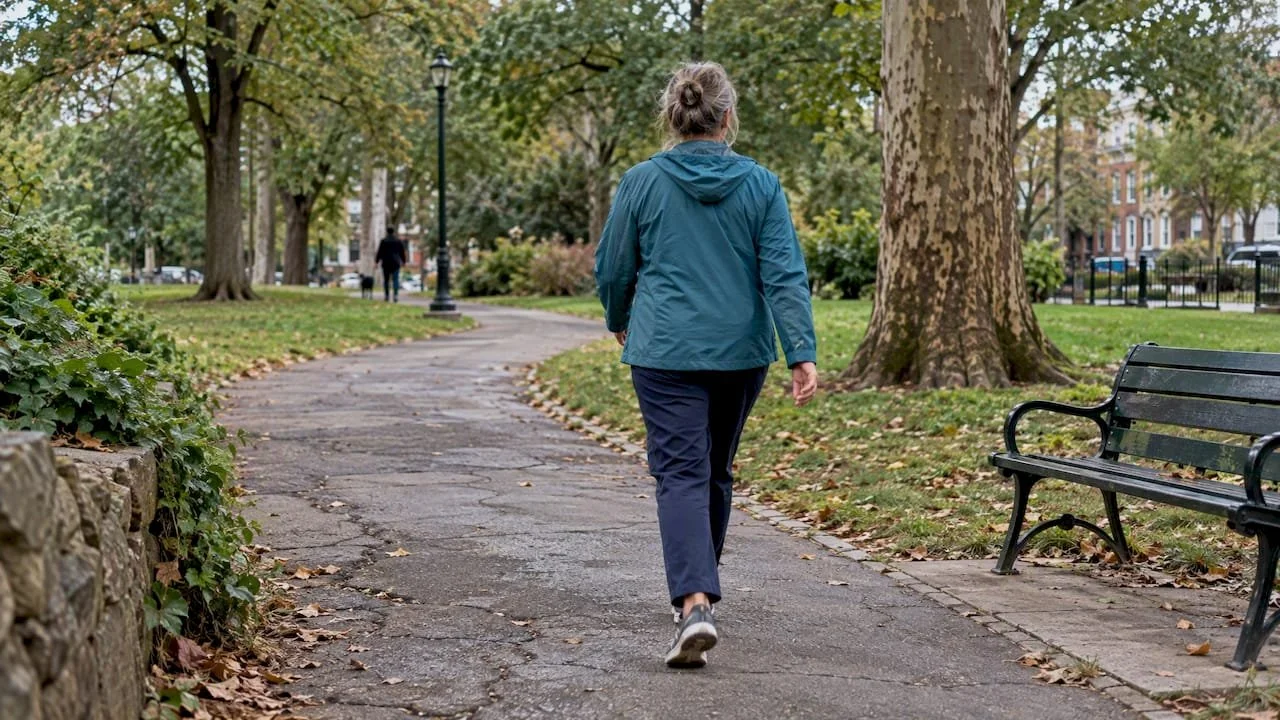
150–300 Minutes a Week: Movement Benefits, Mood Winners, Habit Tactics
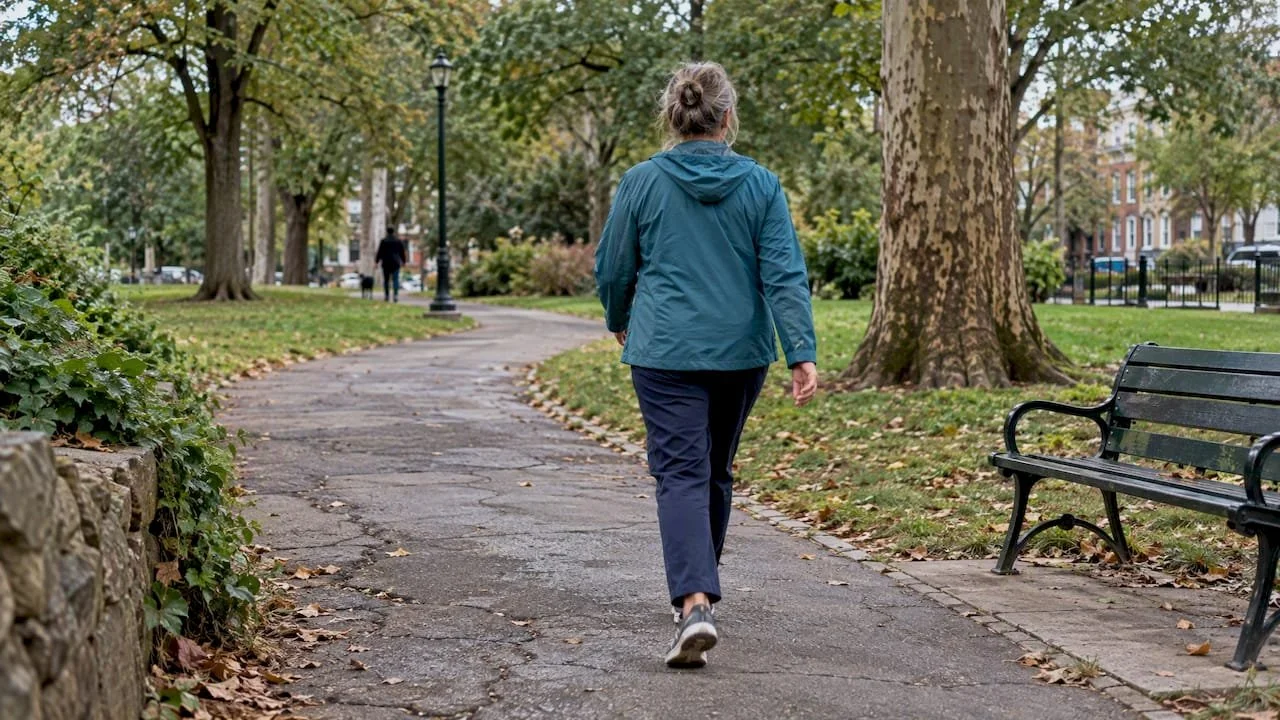
Regular movement practice reliably lifts mood, lowers risk for major chronic diseases, preserves strength and mobility with age, and supports better sleep and sharper thinking. Guidance from the World Health Organization and the CDC, along with large reviews of clinical trials, consistently point to the same conclusion: movement works, and the dose required is smaller than most people expect.
TL;DR:
Engaging in at least 150 to 300 minutes of moderate activity weekly, plus strength training twice a week, offers the most comprehensive health benefits.
Resistance exercises preserve bone density and muscle strength, especially important for aging populations, while balance training reduces fall risk.
Modest increases in daily steps significantly lower mortality risks, with the steepest decline occurring when transitioning from sedentary to lightly active.
Regular movement can help reduce depression symptoms, improve mood, and enhance sleep quality, with adherence influenced by enjoyment and consistency.
Benefits are scalable across all age groups, with adaptations available for those managing chronic conditions or disabilities.
Amritayogawellness
Build A Movement Practice That Lasts
Explore accessible yoga, Pilates, barre, tai chi, and wellness offerings at a Philadelphia studio serving beginners through advanced practitioners.
Table of Contents
Physical and functional benefits: weight, heart health, bones, strength, and mobility
Disease risk reduction and longevity: diabetes, cancer, and mortality
Mental health and cognition: exercise as treatment and prevention
Amrita Yoga & Wellness resources for building a movement habit
Physical and functional benefits: weight, heart health, bones, strength, and mobility
Movement changes how your body works on nearly every level. Combined with attention to diet, regular activity helps regulate calorie balance and supports weight management over time, though exercise alone rarely produces large weight loss without dietary changes working alongside it.
The cardiovascular effects show up fast and compound over years. Regular activity improves blood pressure and lipid profiles and is tied to measurably lower cardiovascular disease risk, a pattern confirmed across population studies and clinical guidance alike, according to a long-running review of physical activity evidence.
Bones and muscles respond directly to load. Resistance training signals bone tissue to stay dense and muscle tissue to stay strong, which matters most as people age and natural muscle mass declines. Balance work adds a second layer of protection: it trains the neuromuscular reflexes that prevent a stumble from becoming a fall, a focus echoed in clinic-based balance training guidance for older adults.
Functional ability ties these threads together. Being able to carry groceries, climb stairs, or get up from the floor without strain depends on the same strength and balance that structured movement builds.
Weight management works best when movement and dietary habits reinforce each other rather than acting alone.
Blood pressure and cholesterol respond to consistent moderate activity within weeks.
Resistance training protects bone density and counters age-related muscle loss.
Balance exercises reduce fall risk by sharpening reflexes and coordination.
Regular physical activity is linked to lower all-cause mortality and reduced risk for conditions including heart disease and type 2 diabetes, according to a major evidence review on physical activity, a pattern that holds across age groups and fitness levels.
Disease risk reduction and longevity: diabetes, cancer, and mortality
Movement's protective effect against chronic disease is one of the most consistent findings in public health research. Regular activity is associated with lower type 2 diabetes risk and improved blood sugar control, a relationship strong enough that physical activity appears in most diabetes prevention guidelines.
The cancer connection is narrower but real: several site-specific cancers show lower incidence among physically active people, and survivors who stay active often report better outcomes. Mortality data tells a similarly clear story.
Type 2 diabetes risk drops with regular moderate activity, independent of weight loss.
Several cancers show lower incidence rates among people who move regularly.
All-cause mortality falls as daily activity, including simple step counts, increases.
Regular physical activity is associated with lower all-cause mortality, with measurable benefits even from modest increases in daily steps, according to a comprehensive review of physical activity evidence. You do not need an elite training program to see this effect. Going from sedentary to lightly active produces the steepest drop in risk, with further gains leveling off at higher volumes.
Mental health and cognition: exercise as treatment and prevention
Exercise belongs in the conversation about depression treatment, not just prevention. A 2023 network meta-analysis of randomized controlled trials covering 218 studies and over 14,000 participants found moderate reductions in depression symptoms from walking or jogging, yoga, strength training, mixed aerobic exercise, and tai chi or qigong, according to this systematic review and network meta-analysis. Walking and jogging produced some of the largest effects, with a substantial effect size reported in the analysis.
Effects tended to track with intensity: harder efforts generally produced larger improvements. But intensity is not the whole story. Strength training and yoga were among the most acceptable modalities to participants, meaning people stuck with them, and a program you actually continue beats a harder one you quit after two weeks.
Walking or jogging produced some of the strongest depression-reduction effects in the analysis.
Yoga and strength training scored high on acceptability, supporting long-term adherence.
Tai chi and qigong also showed moderate benefit, offering a lower-impact option.
Beyond clinical depression, regular movement improves mood and sleep quality in the short term, often within a single session, according to CDC's summary of physical activity benefits.
Pro Tip: If motivation is the obstacle, pick the modality you enjoy most rather than the one research ranks highest. Consistency beats intensity for mental health outcomes.
Recommended dose and what counts: WHO and CDC guidance
Health authorities converge on a specific weekly target, not a vague suggestion to "move more." The World Health Organization recommends adults get 150 to 300 minutes of moderate-intensity activity per week, or 75 to 150 minutes of vigorous activity, plus muscle-strengthening work on two or more days per week.
Moderate intensity includes brisk walking, casual cycling, water aerobics, or a vinyasa yoga class, anything that raises your heart rate while still letting you hold a conversation.
Vigorous intensity includes running, fast cycling, swimming laps, or a high-intensity interval class, where talking in full sentences becomes difficult.
Muscle-strengthening activity on two or more days a week covers resistance bands, free weights, bodyweight circuits, or a reformer pilates session.
Any movement counts toward the weekly total, and CDC guidance notes that benefits begin accumulating with small increases in daily activity, even below the full target, according to CDC's physical activity basics page.
Older adults and people managing chronic conditions should add balance training and progress gradually, adjusting intensity to what feels sustainable rather than chasing the upper end of the range immediately.
How to make movement regular: practical adherence tactics
Most people do not fail at exercise because they lack information. They fail because the plan does not fit their actual week. The fix is behavioral, not informational.
Start with short sessions. Ten to twenty minutes, attached to an existing habit like morning coffee or a lunch break, builds momentum faster than an ambitious hour-long plan you skip.
Track progress simply. A notebook, a calendar with checkmarks, or a basic app keeps the habit visible and motivating.
Rotate modalities. Mixing yoga, strength work, walking, and group classes reduces both boredom and overuse injury.
Use social support. Group classes and workout buddies add accountability that solo routines often lack.
Progress gradually. Increase duration or intensity in small steps, and talk to a healthcare provider if new pain, dizziness, or unusual symptoms show up during activity.
Pro Tip: Schedule movement like an appointment, not an intention. A time slot on your calendar survives a busy week far better than a mental note to "exercise later."
Amrita Yoga & Wellness resources for building a movement habit
We built our class library and blog around the same evidence this article draws on: start small, choose a modality you enjoy, and progress safely.
Our 15-minute chair yoga routine for beginners offers a low-barrier entry point for readers with limited mobility or new to movement.
Our piece on using yoga for strength, calm, and clarity connects specific practices to the mental health benefits covered above.
Our chair yoga routine for seniors addresses balance and functional ability directly.
None of this replaces medical care. Anyone managing a chronic condition or recovering from injury should loop in a healthcare provider before changing their routine.
Impact of regular movement on immune system function
Movement and immune function are connected, though the relationship is more nuanced than "exercise boosts immunity." Regular moderate activity is linked to the broader pattern of reduced chronic disease risk and improved overall health markers that support immune resilience over time, as reflected in CDC's summary of physical activity benefits.
The practical takeaway sits closer to consistency than intensity. Regular, moderate movement, the kind most adults can sustain week after week, supports the general health markers (healthy weight, lower inflammation-related risk factors, better sleep) that in turn support a well-functioning immune system. Very long or extremely intense exertion without adequate recovery can temporarily stress the body, which is one more argument for the moderate, sustainable approach this article focuses on throughout.
For most people, this means a walk, a yoga class, or a strength session several times a week does more for long-term immune health than sporadic extreme workouts. The goal is a routine your body can repeat, not a single heroic effort.
Variations in benefits across age groups and populations
The core benefits of movement, mood, cardiovascular health, strength, and disease risk reduction, show up across every age group, but the emphasis shifts.
Children and adolescents benefit most from activity that builds coordination, bone density during peak growth years, and social skills through play or team sports. Adults in their working years see the clearest returns in cardiovascular health, weight management, and stress resilience, since this is often the period when sedentary work and chronic stress accumulate fastest.
Older adults gain the most from a combination of resistance training and balance work, since these two elements most directly address fall risk and the independence needed for daily tasks, a point emphasized in clinic guidance on balance training for seniors. Even light, consistent movement in this group correlates with preserved mobility and reduced hospitalization risk tied to falls.
People with disabilities or chronic conditions benefit from movement adapted to their specific capacity rather than a generic program. Chair-based yoga, seated strength work, and modified balance exercises let this population access the same cardiovascular, mood, and strength benefits documented across the broader population, often with meaningful improvements in daily function even at lower overall volumes of activity.
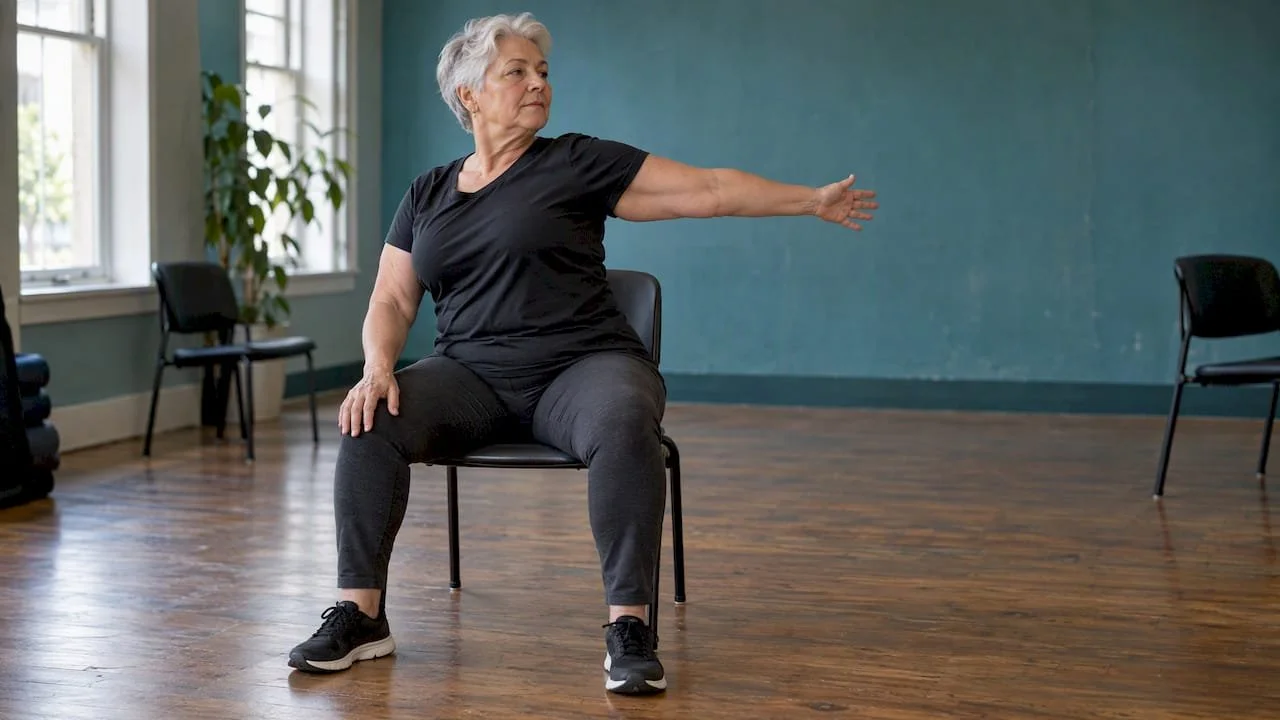
The common thread: benefits scale with what a person can sustainably do, not with how closely they match an idealized fitness standard.
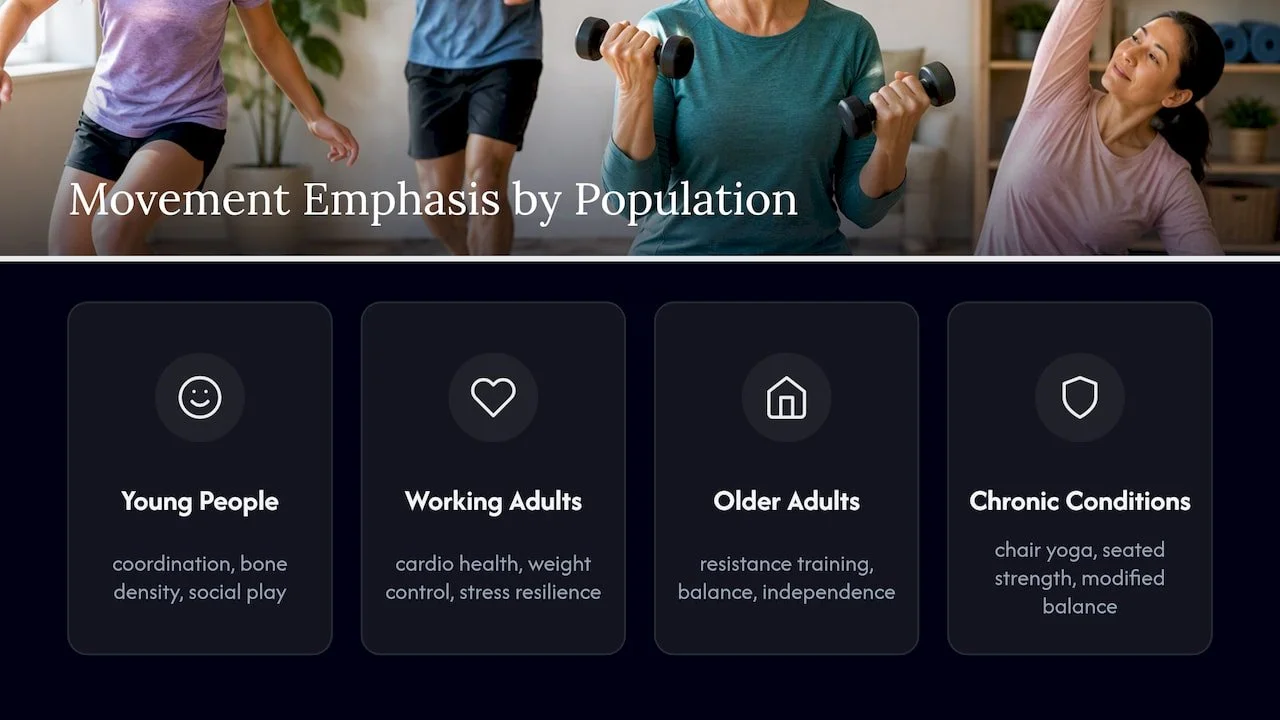
Role of movement in stress management and resilience
Movement is one of the most direct tools available for managing everyday stress, partly because the body's stress response and its physical activity systems are closely linked. A brisk walk, a yoga session, or a strength workout gives the nervous system an outlet, and the mood improvements that follow exercise show up almost immediately, often within a single session, according to CDC's summary of physical activity benefits.
Over time, a consistent movement practice appears to build resilience, not just in the moment but as a buffer against future stress. People who move regularly often report handling day-to-day pressures with more steadiness, likely connected to the same mood and sleep improvements documented in the mental health research above.
Practices that combine movement with breathwork, like yoga or tai chi, add a second layer of stress regulation by training slower, controlled breathing alongside physical effort. This combination may explain why these modalities scored well on both effectiveness and acceptability in the depression research cited earlier.
The practical implication is straightforward: when stress is high, movement is not a luxury to skip until things calm down. It is one of the more reliable ways to calm them down in the first place.
Why consistent movement matters more than perfect movement
Some students who stick around are not the ones who started with the hardest class; they are the ones who started small and kept showing up. The evidence backs this instinct. Begin with whatever movement fits your week, build from there, and let consistency do the work that intensity cannot.
— Juiced
How we can help you build a regular practice
Whatever benefit you are chasing, there is a class built around it. Strength and bone health point toward reformer pilates and strength-focused sessions, mood and flexibility point toward yoga offerings, and stress relief pairs well with Ayurvedic therapies like Abhyanga and Shirodhara.
New to movement? A Nurtured Beginnings pass eases you in at a manageable pace.
Want structure? Our class schedule shows group, livestream, and membership options.
Prefer one-on-one guidance? Our private sessions start from $85 per hour.
Browse our full class and membership schedule to find the entry point that fits your week.
This article is general information, not a substitute for advice from a qualified doctor. Consult a qualified healthcare professional about your own circumstances before acting on anything here.
FAQ
What are the benefits of regular movement and exercise?
Regular movement improves mood, sleep, and energy in the short term, while reducing long-term risk for heart disease, type 2 diabetes, and some cancers. It also preserves strength, bone density, and balance, which supports independence as you age, according to CDC's physical activity guidance.
What are 5 benefits of regular physical activity?
Five well-documented benefits include improved cardiovascular health, lower type 2 diabetes risk, stronger bones and muscles, better mood and reduced anxiety, and improved sleep quality. These effects are summarized across CDC's benefits overview and a major evidence review.
What is the 3-3-3 rule for exercise?
The 3-3-3 rule is a popular fitness shorthand rather than an official guideline from a health authority, and definitions vary depending on the source. The core guidance from the World Health Organization remains the more reliable target: 150 to 300 minutes of moderate activity weekly plus strength training twice a week.
What are 7 benefits of regular physical activity?
Regular activity supports weight management, cardiovascular health, stronger bones and muscles, lower diabetes and cancer risk, better mood, improved sleep, and sharper cognition. These outcomes are detailed across CDC's physical activity basics and research on exercise and depression.
How much exercise do I actually need each week?
Health guidance points to 150 to 300 minutes of moderate activity or 75 to 150 minutes of vigorous activity weekly, plus muscle-strengthening work on two or more days, according to the World Health Organization. Any amount above zero provides some benefit, so starting small is still worthwhile.
Sources
Recommended
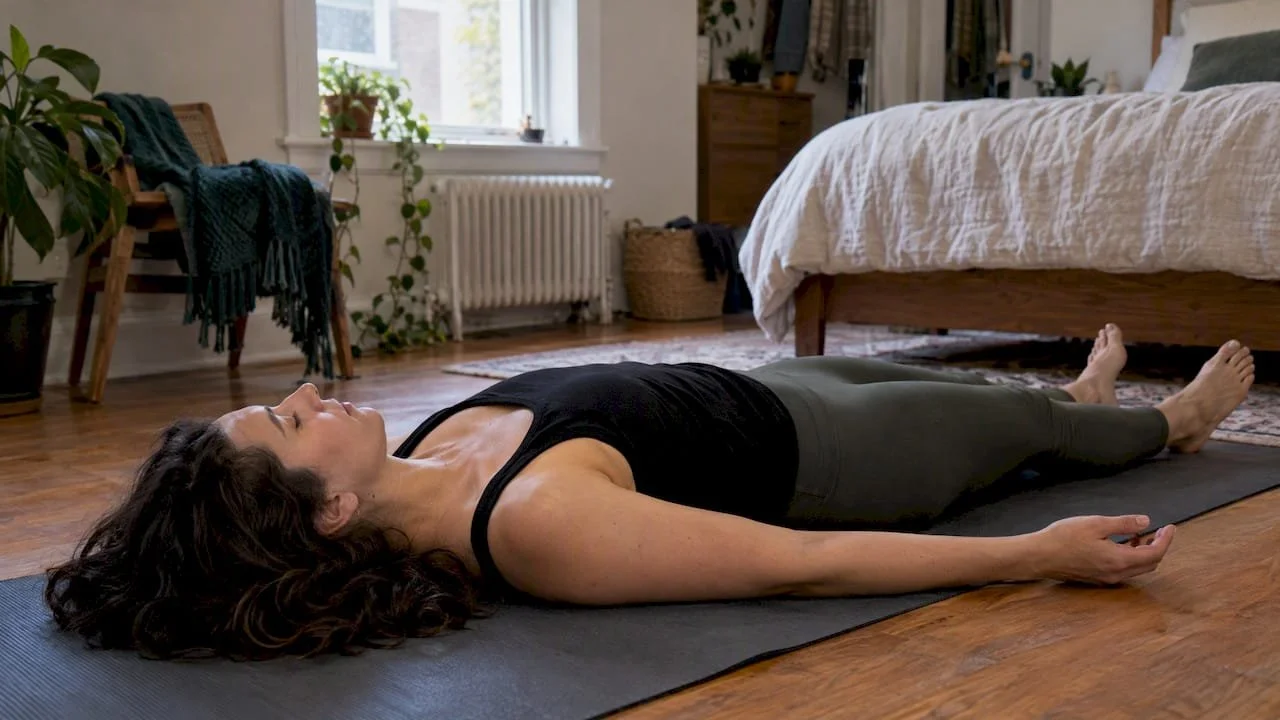
5 Minute Breathwork, Cyclic Sighing, Research Backed, Studio Guided
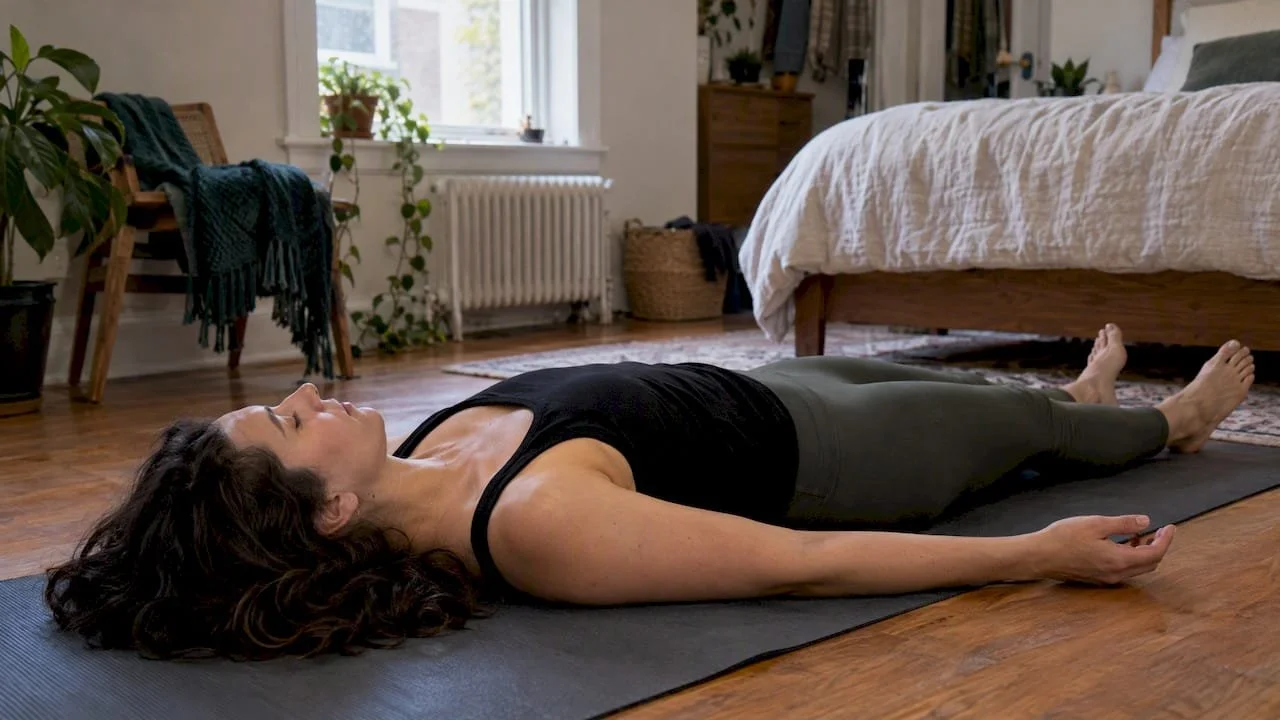
The fastest way to calm anxiety through breath is a technique called cyclic sighing: a double inhale through the nose followed by a long, slow exhale through the mouth. A Stanford-led randomized trial found that practicing it for a few minutes a day reduced anxiety and improved mood more than mindfulness meditation did. The long exhale is doing the real work here, and several other exercises use the same principle. Step-by-step instructions for each follow below.
TL;DR:
Practicing cyclic sighing for five minutes daily with an emphasis on a longer exhale significantly reduces anxiety and improves mood.
Slow, exhalation-focused techniques like diaphragmatic breathing and paced breathing are supported by research for better safety and effectiveness over fast or forceful methods.
Consistency matters more than technique complexity, with evidence indicating that regular, guided sessions produce more reliable benefits over weeks.
Techniques should be personalized and adjusted if they increase anxiety or cause discomfort, especially for people with respiratory or cardiac conditions.
Guided instruction or in-person classes can enhance technique accuracy and ensure long-term benefits, especially for beginners.
Amritayogawellness
Practice Breathwork With Guidance
Amrita Yoga & Wellness connects Philadelphia adults with yoga, breathwork workshops, and wellness practices for physical and mental well-being.
Table of Contents
Step-by-step breathwork exercises to reduce anxiety
Each of these techniques can be practiced seated, with your feet flat and your shoulders relaxed. Start with whichever feels most natural, then rotate as needed.
Cyclic sighing: Inhale through your nose, pause, then take a second shorter sip of air to fully fill your lungs, then exhale slowly through your mouth for twice as long as the inhale. Repeat for 5 minutes. The extended second inhale and the long exhale are the two parts that matter most.
Diaphragmatic (belly) breathing: Place one hand on your chest and one on your belly. Breathe so only the lower hand rises, inhaling for 4 counts and exhaling for 6, for 5 to 10 minutes.
4-7-8 breathing: Inhale for several counts, hold for a count, exhale for a longer count. If holding feels uncomfortable, shorten all three counts proportionally rather than skipping the hold.
Box breathing: Inhale for several counts, hold briefly, exhale for similar length, hold briefly. This works well as a steady anchor during ordinary stress, but the holds can feel confining during acute panic, so switch to an exhale-focused technique if that happens.
Paced breathing at roughly six breaths per minute: Inhale and exhale over several seconds each, continuously, for multiple minutes. This pace is associated with higher heart rate variability, a marker linked to a calmer nervous system.
Alternate nostril breathing: Close one nostril, inhale through the other, then switch nostrils and exhale. Reverse and repeat for several rounds. Substitute another technique if nasal congestion makes this awkward.
A 60 to 90 second reset: When you only have a minute, do 6 to 8 rounds of a single long exhale, out through pursed lips, with no formal counting required.
Pro Tip: Whichever exercise you choose, make the exhale longer than the inhale. That single adjustment matters more than the specific method.
How to practice safely and avoid common pitfalls
Breathwork is generally low-risk, but a few rules keep it that way.
Stop and seek medical care if you experience chest pain, severe breathlessness, or fainting during practice.
Avoid fast, forceful breathing patterns when you are already anxious; stick to slow, comfortable counts instead.
Begin seated with back support, and build sessions up to at least 5 minutes rather than rushing a longer routine on day one.
If you feel lightheaded or tingly, breathe a little shallower and slower rather than stopping outright, since over-breathing is the usual cause.
If a technique increases your anxiety instead of lowering it, switch to simple, unforced exhale-focused breathing or pause the practice.
People with a history of panic disorder, respiratory conditions such as asthma or COPD, or cardiac issues should check with a clinician before starting a new breathing routine, since some instructions that involve deep or forceful inhalation can worsen symptoms in panic disorder specifically.
Pro Tip: If a technique feels wrong for your body, change the method, not your commitment to practicing.
What the research says about breathwork and anxiety
The evidence for slow, exhale-weighted breathing is stronger than for fast or forceful techniques. In the Stanford trial of 111 volunteers, participants who practiced cyclic sighing for five minutes daily over one month showed greater improvement in positive mood than a mindfulness-meditation group, and the cyclic-sighing group also lowered their resting breathing rate.
A systematic review of 58 studies covering 72 breathing interventions found that 54 of those interventions were effective, and that session length of at least 5 minutes along with human-guided instruction predicted better outcomes.
A 2025 meta-analysis of six randomized trials with 517 patients found that prāṇāyāma breathing reduced symptom severity in conditions including PTSD and depression compared with passive controls, while noting more adverse events with fast breathing techniques than with slow ones. Taken together, these sources point in the same direction:
Slow, exhalation-focused breathing has a more consistent safety and benefit profile than fast-paced techniques.
Sessions under 5 minutes and techniques taught without guidance show weaker or less reliable results.
Results vary across studies, and benefits tend to be stronger when breathwork is paired with mindfulness or structured instruction rather than practiced in isolation.
A repeatable 5-minute daily practice plus a panic script
A short routine beats an occasional long one, because consistency is what builds the effect over weeks.
Warm-up (30 seconds): Sit comfortably and take two normal breaths to notice your current pace.
Core practice (4 minutes): Do cyclic sighing or diaphragmatic breathing continuously, keeping the exhale longer than the inhale throughout.
Cool-down (30 seconds): Return to normal breathing and notice any shift in your body before standing up.
For acute anxiety in the moment, use this 60 to 90 second script instead: take one double inhale through the nose, then sigh out slowly through your mouth, repeating 6 to 8 times while naming one thing you can see and one thing you can hear between cycles. That grounding cue keeps attention anchored while the long exhales do their work.
As the daily habit sticks, you can extend sessions, add simple mindfulness cues between breathing rounds, or explore mindfulness practices built for yoga and wellness settings for more structure.
Keep a simple streak reminder, such as a calendar check mark, rather than tracking detailed metrics.
Add one extra minute per week until you reach a length that feels sustainable.
How Amrita Yoga & Wellness teaches breathwork
Some yoga and wellness studios build breathwork into group classes, workshops, and private sessions, with instruction designed to be approachable for people trying these techniques for the first time. Guided instruction matters because a trained eye can catch pacing or posture issues that are easy to miss when practicing alone, which the research above ties directly to better outcomes. Readers who want more structured support than a self-guided routine can bring their questions into a class or book a private session for individualized pacing.
The real lesson in breathwork for anxiety
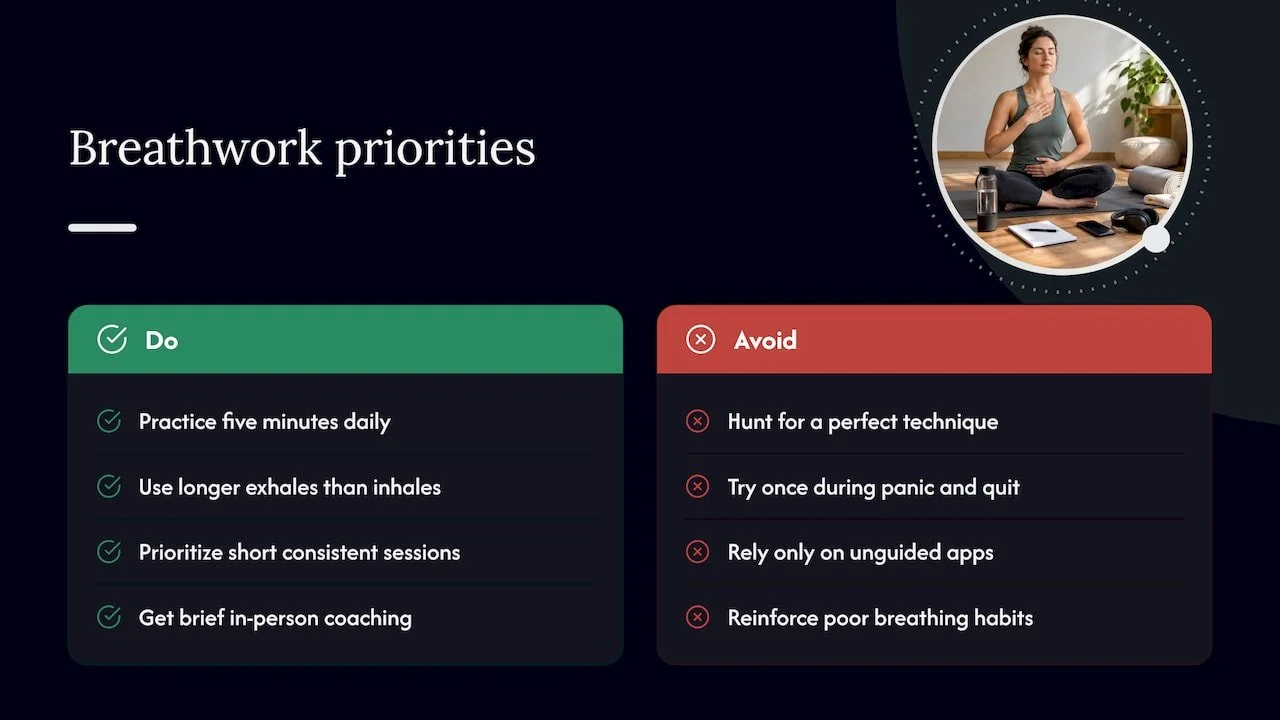
The breathwork world oversells complexity. Readers chase elaborate patterns, apps, and counting systems when the actual mechanism is almost boringly simple: a longer exhale signals safety to your nervous system, and that signal does most of the heavy lifting. Box breathing, alternate nostril breathing, and 4-7-8 all work through variations of the same principle, not through some unique formula each one claims to own.
The bigger failure point isn't technique selection, it's consistency and guidance. People try a breathing exercise once during a panic spike, decide it "didn't work," and abandon it, when the Stanford research points to daily five-minute practice building benefit over weeks. Prioritize showing up for short sessions over hunting for the perfect method, and get a few minutes of in-person coaching if you can, since guided instruction keeps you from reinforcing poor habits before they become automatic.
— Juiced
Practice breathwork with guided support at Amrita
If reading instructions isn't enough, Amrita's group and livestream classes include guided breathwork alongside yoga, so you can practice these techniques with real-time feedback instead of guessing at your pacing. First-time attendees get beginner-friendly cues and modifications, and private sessions are available for anyone who wants individualized pacing or has a health concern to work around.
Check the class schedule to find a session that fits, or book a one-to-one session for breathwork tailored to your needs.
FAQ
Which breathwork technique is best for anxiety?
Cyclic sighing, with its extended exhale, has the strongest evidence behind it for fast relief, supported by a Stanford randomized trial showing benefits from five minutes of daily practice. Diaphragmatic breathing and paced breathing at a slow, steady rate are close alternatives that work through the same exhale-focused mechanism.
What is the 3-3-3 rule for anxiety?
The 3-3-3 rule is a grounding technique, not a breathing pattern: you name three things you can see, three sounds you can hear, and move three parts of your body. It pairs well with slow breathing but is a separate grounding tool rather than a breathwork method on its own.
Does breathwork really work for anxiety?
Breathing exercises can reduce anxiety symptoms, particularly slow, exhale-weighted techniques practiced for at least five minutes, according to a systematic review of breathing interventions. Effects vary across people and studies, and benefits tend to be more consistent when paired with guided instruction or mindfulness.
What is the relationship between anxiety and breathing issues?
Anxiety often speeds and shallows breathing, and that faster breathing pattern can itself feed feelings of panic or breathlessness. Slowing the exhale interrupts that cycle, which is part of why exhale-focused techniques show more reliable results than fast breathing patterns in clinical research.
How can I combine breathwork with other anxiety management techniques?
Pairing breathwork with brief mindfulness practice tends to produce steadier results than breathing alone, based on a 2024 review of combination approaches. Adding a short grounding cue or a few minutes of passive attention after your breathing session is a simple way to combine the two.
Sources
Recommended
Pick the Right Pilates Specialization for New Instructors: Hours & Pay
Mat, reformer, comprehensive apparatus, clinical rehab, prenatal and postnatal, active aging, athletic performance, chair and Cadillac work, barre hybrids, and group versus private teaching cover the main paths a new Pilates instructor should weigh. Each one carries its own training hours, prerequisites, and pay pattern, so the right choice depends on how much time, money, and client base you have before you even enroll.
TL;DR:
Most instructors start with mat certification, which requires fewer hours and offers faster, cost-effective entry.
Apparatus training, especially in reformer, Cadillac, and clinical areas, demands more hours and often higher fees, leading to better private rates.
Supervised teaching hours and in-person practice are crucial for meeting certification standards and building real client experience; vague or online-only programs are less reliable.
Specialties like rehab, prenatal, and athletic performance typically increase earning potential and require targeted knowledge of safety and client needs.
Building local practice hours through mentorship and workshops enhances skills more than certification alone, with private sessions paying significantly more.
Amritayogawellness
Explore Pilates Training in Philadelphia
Amrita Yoga & Wellness supports Pilates enthusiasts and future instructors through classes, workshops, and wellness offerings in a community setting.
Table of Contents
2. How many training hours do certification programs require?
5. How Amrita Yoga & Wellness supports your Pilates teaching growth
1. What are the main Pilates teaching specializations?
A mat instructor teaches group mat classes built on the core repertoire, and this route usually requires the lowest number of training hours, making it the most common entry point into the field. College and community programs often describe mat certificates as covering teaching principles and applied anatomy rather than full apparatus work, which keeps the barrier to entry lower than apparatus-based tracks.
A reformer instructor works on the spring-loaded apparatus that defines most boutique studio classes, and this specialty tends to support higher private rates than mat-only teaching because reformer sessions are harder to replace with a free app or a YouTube video. Comprehensive or full apparatus training adds the Cadillac, chair, and barrels to reformer work, qualifying a teacher to run an entire studio's equipment roster rather than one machine, which widens job options at full-service studios.
Clinical or rehab Pilates asks for a base certification plus added coursework in injury patterns and movement screening, and it often means working alongside physical therapists or taking medical referrals, so programs in this track look for a teacher who already holds a comprehensive credential. Prenatal and postnatal Pilates demands specific safety training around positioning, intra-abdominal pressure, and pelvic floor function, and a teacher without that extra layer of education should not be leading pregnant clients through standard repertoire.
Active aging and older adult specialization adapts exercises for balance, joint mobility, and fall prevention, a growing niche as community centers and retirement communities add movement programming. Athletic and sports performance Pilates integrates with strength and conditioning work, appealing to teachers who want to support competitive athletes or weekend runners rather than general wellness clients.
Chair, Cadillac, and barrel-focused niches sit inside comprehensive training but can become a teacher's signature offering once certified, since fewer instructors build deep comfort with those apparatus. Barre and hybrid modalities borrow Pilates principles and crossover certifications, letting a teacher run format classes without a full comprehensive credential. Group versus private teaching is less about apparatus and more about business model: group classes pay less per session but fill a schedule faster, while private sessions pay more per hour and demand stronger one-on-one coaching and client management skills.
Mat and group formats suit teachers who want quick entry and steady class fills.
Reformer, comprehensive, and clinical tracks suit teachers aiming for private clients and higher per-session rates.
Prenatal, active aging, and athletic niches suit teachers with a specific population they already understand or want to serve.
2. How many training hours do certification programs require?
The NPCP sets the hour benchmarks most American programs build toward.
The NPCP requires a substantial number of training hours to sit for the Comprehensive Exam, with mat-only certification demanding fewer hours compared to comprehensive training, which is why mat routes move faster and cost less than apparatus-based ones.
Beyond total hours, look at what fills them. Solid programs include anatomy coursework, supervised observation of working teachers, and hands-on practice teaching, and the NPCP handbook lists in-person components for repertoire and special-population work as part of meeting eligibility rules. A program that skips supervised teaching hours or pushes everything online is unlikely to satisfy those requirements.
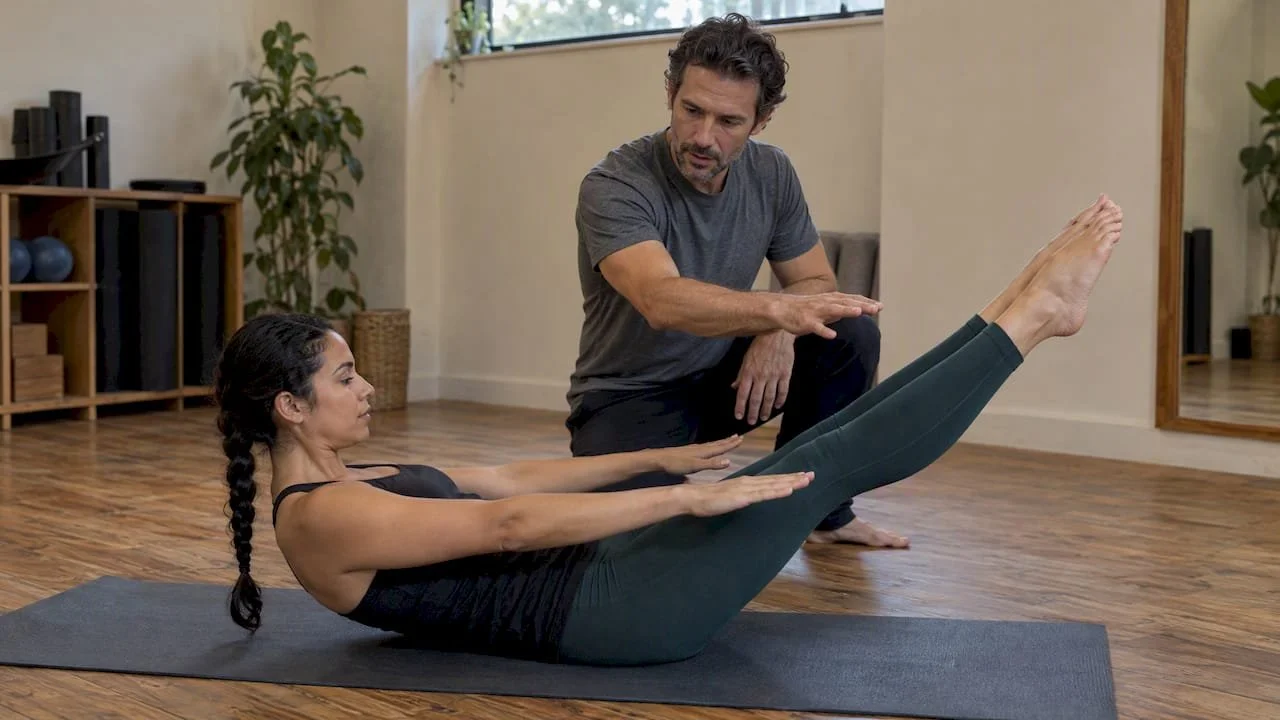
Accreditation adds another layer of confidence. The Pilates Method Alliance runs ITTAP, a voluntary review that recognizes training programs meeting professional standards, and the PMA itself notes that no single certification is universally considered the best, which makes checking for ITTAP recognition a more useful filter than chasing a brand name.
3. How do you choose the right specialization for you?
Picking a lane starts with naming the job you actually want, not the certification that sounds most impressive.
Define your goal: group instructor, private specialist, or rehab-focused teacher, since each points to a different hour commitment.
Match your budget and timeline to the program, because comprehensive and clinical tracks cost more and take longer than mat-only paths.
Check prerequisites before enrolling, since several rehab and prenatal programs require an existing mat or comprehensive credential.
Ask each program for total hours, supervised teaching hours, which apparatus are covered, and how much is in-person versus online.
Ask how the program assesses competency, whether through written exams, practical teaching evaluations, or both.
Start mat-first if you are unsure, then add apparatus or a specialty once you know what clients you enjoy teaching.
Watch for vague hour counts, no supervised practice teaching, or missing anatomy and special-population modules. Those gaps often mean a program will not satisfy NPCP eligibility or leave you underprepared for real clients.
Pro Tip: Call a program's office and ask how many supervised teaching hours graduates log before certification: a clear, specific number is a good sign; a vague answer is not.
4. What can you expect to earn in each specialty?
Pay moves with specialization. Specialist certifications in reformer, rehab, and prenatal work commonly increase earning potential compared with entry-level mat-only teaching, largely because private and apparatus sessions carry higher per-session rates than group mat classes.
Reformer, Cadillac, and chair work create differentiation that opens private-session income, and clinical or prenatal niches do the same by serving clients who need expertise a general mat class cannot offer. Building that income usually means growing a private client book, running specialty workshops, and marketing directly to the population you serve rather than waiting for a studio schedule to fill itself.
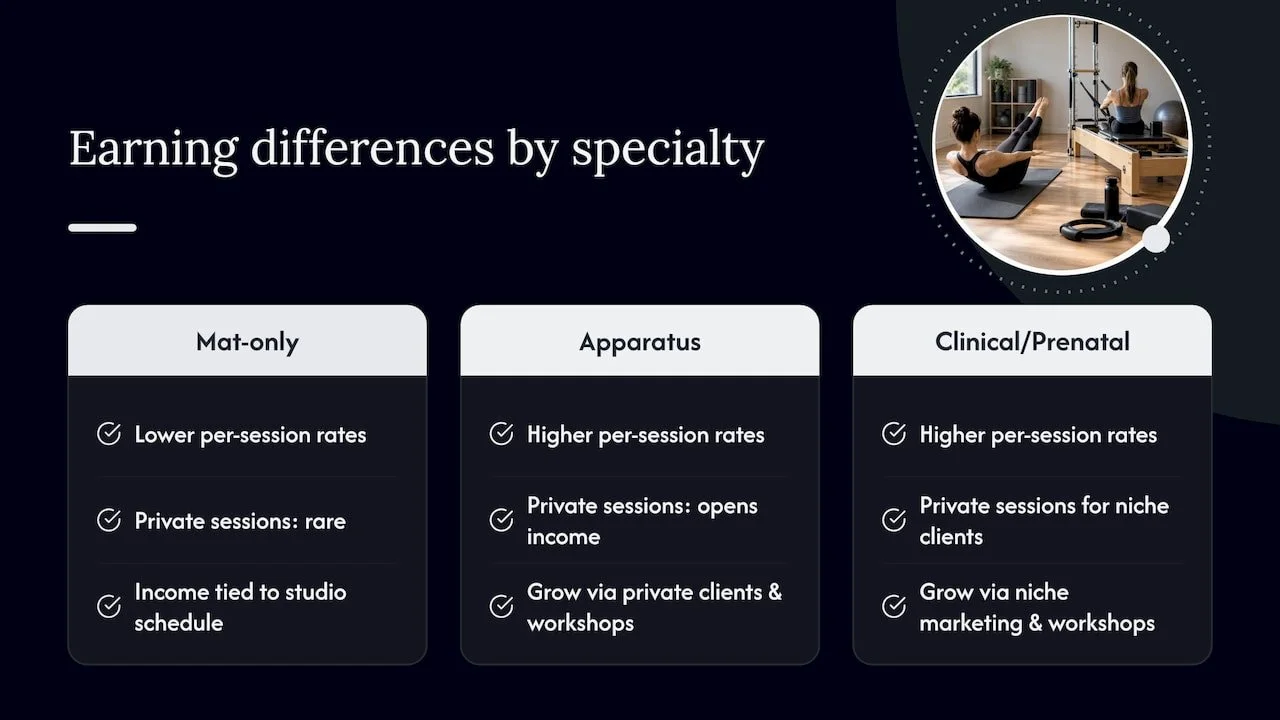
5. How Amrita Yoga & Wellness supports your Pilates teaching growth
Amrita Yoga & Wellness runs group mat and reformer classes, private sessions, and teacher-focused workshops in Philadelphia, giving developing instructors a place to log observation hours, practice teaching, and build the client relationships that specialization tracks require.
Sequencing your training without burning out
Most new teachers do better starting with mat, moving into supervised practice teaching, then adding a specialty once they know which clients energize them. Skipping straight to a narrow clinical or prenatal certification before building general teaching reps tends to leave gaps that supervised hours would have caught. Mentorship matters here more than the letters after your name: a teacher who watched you correct cueing in real time will catch things a workbook cannot. Pick the specialty that matches what you already notice yourself drawn to, and check whether your local market actually has demand for it before you commit the hours.
— Juiced
Where to get practice hours and mentorship locally
Building real teaching hours matters as much as the certificate itself. Amrita Yoga & Wellness offers group class drop-ins starting at $28, private sessions from $85 per hour, and teacher-focused workshops where you can observe, assist, and build the client relationships your specialization needs.
Reach out through Amrita Yoga & Wellness to book a session or ask about upcoming teacher workshops.
Where to verify certification rules and pay data
For program eligibility, check the NPCP handbook and PMA's ITTAP page. For pay context, see Gymdesk's salary research. For movement quality considerations relevant to clinical and athletic tracks, see Everton Chiropractic's guide.
Sources
FAQ
What are the different levels of Pilates instructors?
Instructors typically progress from mat-only certification into comprehensive or apparatus certification, then into specialty credentials like clinical, prenatal, or active aging work. The NPCP sets the comprehensive and mat hour minimums most American programs follow.
What is the most respected Pilates certification?
There is no single certification considered universally best. The Pilates Method Alliance notes that ITTAP accreditation of a training program is a more reliable quality signal than any one certificate name.
What is the 10/20/30 rule in Pilates?
This phrase is not a recognized industry standard covered by NPCP or PMA guidance, and definitions circulating online vary widely without a consistent source. Treat any claim about a fixed numeric rule in Pilates teaching with caution unless it comes from a named certifying body.
How much do Pilates teachers get paid per hour?
Pay varies by specialization and session type, with apparatus work, private sessions, and specialties like rehab or prenatal Pilates commonly commanding higher rates than entry-level group mat classes. Private one-on-one sessions, such as those priced from $85 per hour at studios like Amrita Yoga & Wellness, generally pay more per hour than group class formats.
Do I need a mat certification before training on apparatus?
Many comprehensive programs accept candidates without prior mat certification, but a mat-first path lets you build teaching confidence before tackling reformer, Cadillac, and chair work. Check each program's prerequisites directly, since requirements differ by school.
Recommended
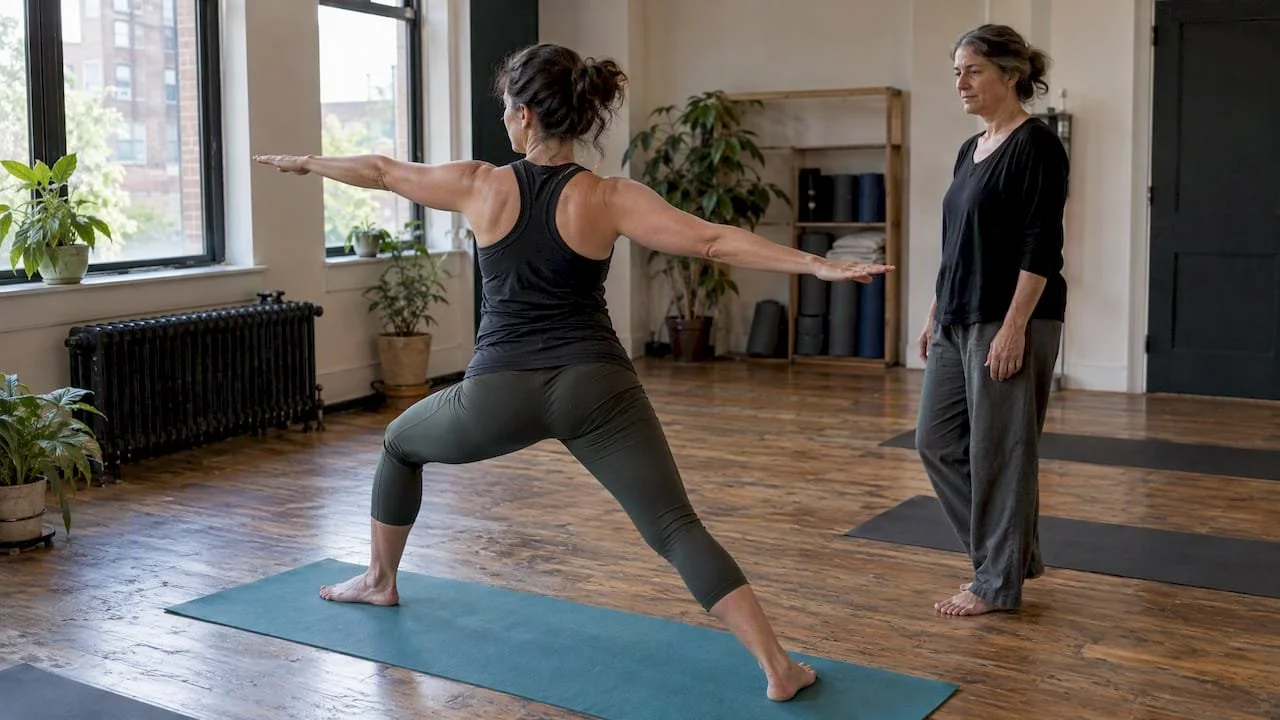
Four Week Low Risk Routine to Safely Use Ancient Healing Practices
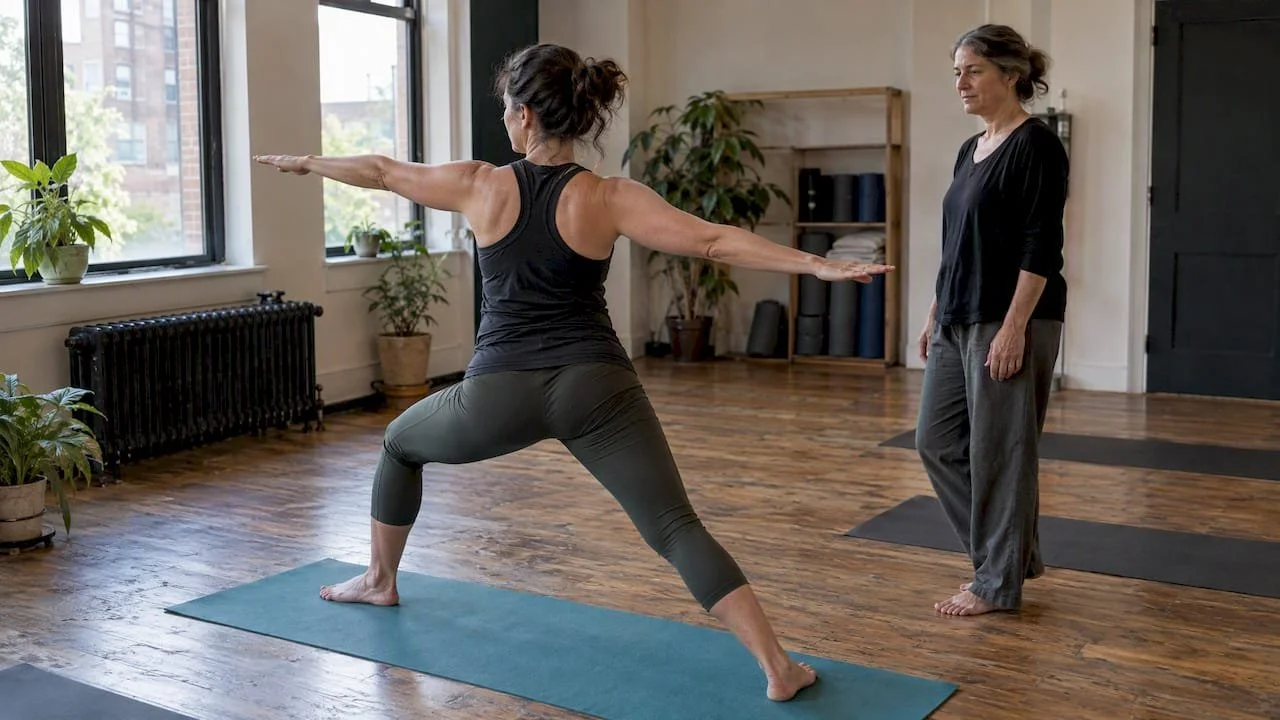
Many ancient healing practices, including yoga, meditation, tai chi, breathwork, and ritualized daily habits, can support modern wellbeing when adopted thoughtfully. The strongest evidence backs movement and mindfulness practices for stress, sleep, and pain, while herbal remedies carry real risks around quality control and drug interactions. Treat these traditions as complements to medical care, not replacements for it.
TL;DR:
Movement practices like yoga and tai chi can be learned at home or in groups with proper guidance to reduce injury risk and accommodate health conditions.
Mindfulness techniques such as meditation and breathwork are low-risk and accessible without equipment but require consistent practice to support stress, sleep, and anxiety.
Herbal remedies and Ayurvedic products pose risks due to quality control issues and potential interactions with medications, emphasizing the need for clinician oversight.
Building a daily routine that integrates movement, mindfulness, and sleep hygiene over several weeks helps gauge effectiveness without relying on single sessions or dramatic rituals.
Consult a qualified healthcare professional before adding herbal products or modifying practices, and prioritize reputable teachers and community-based experience for cultural practices.
Amritayogawellness
Find Your Wellness Practice
Explore accessible yoga, tai chi, breathwork, Pilates, and other wellness offerings through Amrita Yoga & Wellness in Philadelphia.
Explore Amrita Yoga & Wellness
Table of Contents
What Ancient Healing Practices Look Like in Practice
Ancient healing traditions fall into a few practical categories, and knowing the difference helps you pick a starting point. Movement-based practices like yoga, tai chi, and qigong combine physical postures with breath control and are generally accessible to beginners with proper instruction. Contemplative practices such as meditation and mindfulness require no equipment and can be learned from a book, app, or teacher, though guided instruction speeds progress.
Acupuncture and Ayurveda are product- and technique-based systems that involve a trained practitioner and, in Ayurveda's case, herbal formulations, so they need more vetting before you start. Ritual and ceremonial practices, often tied to specific Indigenous or cultural lineages, are less about individual wellness hacks and more about community and meaning, and they deserve particular care around authenticity.
Yoga and tai chi/qigong: entry-level movement practices you can learn in a group class with modification for injuries.
Meditation and breathwork: low-risk contemplative tools that need no special equipment.
Acupuncture: requires a licensed practitioner and is not a do-it-yourself practice.
Ayurveda: includes bodywork (generally low-risk) and herbal products (higher-risk, discussed below).
Ritual and ceremony: best learned from community-sanctioned or lineage-authorized teachers rather than borrowed casually.
What the Evidence Actually Supports
The World Health Organization reports that 170 of 194 Member States use traditional medicine practices such as herbal remedies, acupuncture, yoga, or Indigenous therapies, and its current strategy pushes for evidence-based integration, quality control, and people-centered care rather than assuming age or tradition alone proves something works.

Most WHO Member States report using some form of traditional or complementary medicine, according to the World Health Organization, which signals how mainstream these practices have become worldwide even as regulation varies widely by country.
On the research side, the picture is mixed but informative:
NCCIH notes yoga can help with stress, sleep, balance, and some pain conditions, but it should complement, not replace, medical care, and unsupervised practice raises injury risk.
NCCIH finds meditation and mindfulness can ease anxiety, depression, and insomnia in some populations, though results vary by condition and are not a cure.
A systematic review overview documented multiple herbs with potential interactions with prescription drugs, alongside uneven evidence quality and a need for clinician monitoring.
Ayurvedic herb research is similarly limited, and a hepatotoxicity review documents liver injury cases tied to certain AYUSH products, recommending vigilance and better quality control.
A Daily Framework for Blending Old and New
The most reliable way to bring ancient practices into modern life is a whole-person routine rather than a single dramatic ritual. Whole-health frameworks like the VA's model recommend weaving movement, nutrition, sleep, mindful awareness, and relationships together instead of relying on one practice to do everything. Here is a simple daily and weekly structure built on that principle.
Morning ritual (5 to 20 minutes): a short sequence of gentle movement, a few minutes of breath work, and one nourishing habit such as a mindful breakfast or a glass of water before coffee.
Midday reset: a five-minute mindful walk or seated breathing break to interrupt stress before it compounds through the afternoon.
Evening wind-down: restorative breathing or a short meditation paired with consistent sleep hygiene, like dimming lights and setting a fixed bedtime.
Weekly community touchpoint: one class, workshop, or group session to keep practice social rather than purely solitary.
Periodic check-ins: a conversation with a clinician any time you add a supplement or herbal product, or if a health condition changes.
Pro Tip: Track sleep, mood, and energy weekly instead of judging a practice after one session; small, consistent habits show their value over weeks, not days.
This sequencing matches what NCCIH's guidance on stress recommends: start with low-skill, non-ingestible practices like movement and breath before considering herbal products, and let subjective changes in sleep and mood guide whether to continue or adjust.
Staying Safe: Herbs, Movement, and Cultural Respect
Safety questions cluster around three areas: what you ingest, how you move, and whose traditions you are borrowing.
Herbs and supplements: talk to a pharmacist or clinician before combining herbal products with prescription medication, since interactions are documented and not always predictable, and watch for signs of liver trouble such as unusual fatigue or yellowing skin.
Movement practices: learn yoga, tai chi, or qigong under a qualified instructor at first, avoid pushing into extreme postures early, and ask about modifications if you are pregnant, older, or managing a health condition.
Cultural respect: for ritual and ceremonial practices tied to specific communities, seek out lineage-authorized or community-sanctioned teachers rather than adopting sacred practices casually as a wellness trend.
For a deeper look at how evidence-informed thinking shapes safe integration of traditional and modern care, Everton Chiropractic's overview is a useful primer on the concept.
How to Start: A Four-Week Low-Risk Plan
You do not need a retreat or a cabinet of supplements to begin. A gradual, four-week approach lets you test what works before committing time or money.
Week 1: add a daily 5 to 10 minute breathing and movement micro-practice, such as a short yoga flow or seated breath work.
Week 2: layer in a brief evening meditation, even five minutes, to support wind-down and sleep.
Week 3: join one in-person or online class to get feedback on form and technique.
Week 4: evaluate how you feel, then consider a private session or a vetted product choice if you want to go further.
Before joining a class or trying a supplement, ask a teacher or clinician about their training, how they modify for injuries or health conditions, and whether a product has third-party testing. Stop and seek medical advice if you notice sharp pain, dizziness, or any signs of an adverse reaction.
Amrita Yoga & Wellness as an Applied Example
Amrita Yoga & Wellness, a studio in Philadelphia, offers a working model of this kind of integration. Its group classes and workshops give beginners a supervised entry point, while private sessions allow for individual modification. Its Ayurvedic-style therapies, including Shirodhara and Abhyanga, are supervised, non-ingestible bodywork rather than herbal products, which sidesteps much of the interaction risk discussed above. The studio also publishes mindfulness content for readers who want structured practice ideas, and its community focus reflects the kind of weekly group touchpoint that whole-health frameworks recommend.
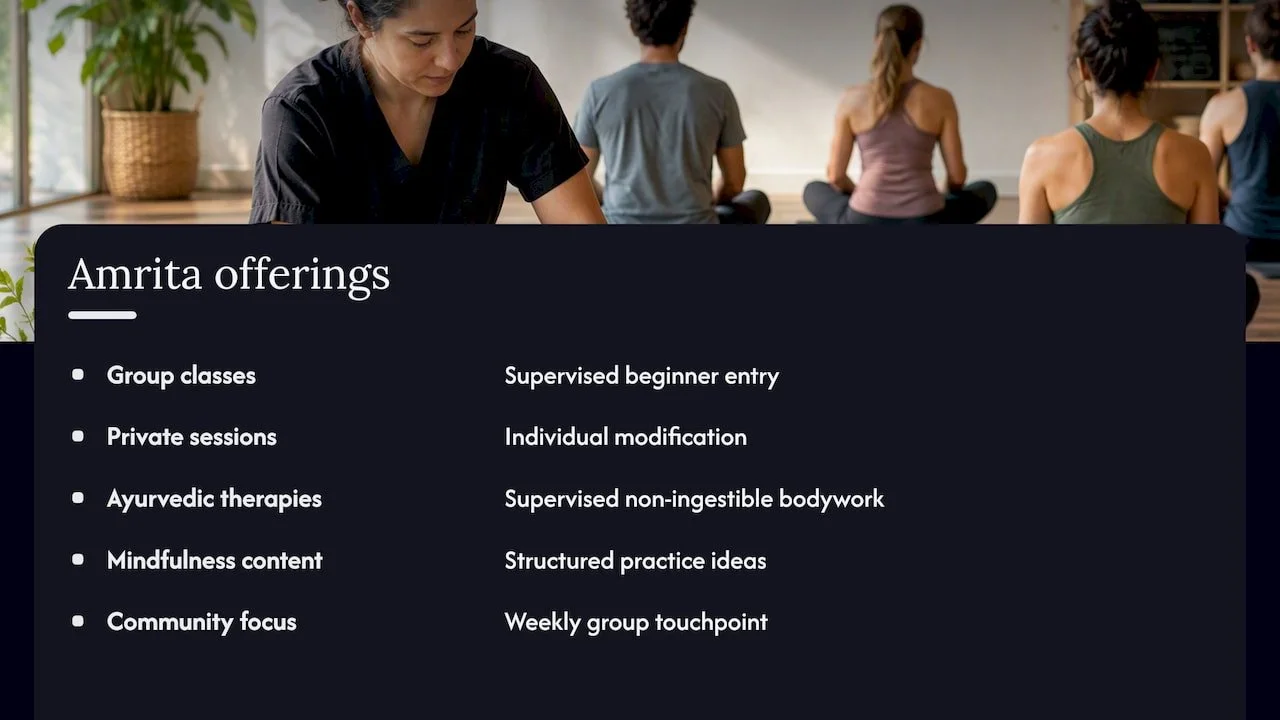
A Balanced View on Old Wisdom and New Evidence
The temptation with ancient healing is to treat it as either magic or superstition, and both framings miss the point. These traditions deserve respect for their origins and the communities that developed them, but they also deserve honest scrutiny, especially where herbal products are concerned. The practices worth keeping are the boring, consistent ones: a daily breath practice, a weekly class, a habit of noticing how you feel. Keep a clinician informed about anything you ingest, and let results, not novelty, decide what stays in your routine.
— Juiced
Getting Started With Amrita Yoga & Wellness
If you want guided support rather than trial and error, Amrita Yoga & Wellness gives Philadelphia-area beginners a structured way to try these practices safely. You can start with a low-commitment drop-in class, book a private session for one-on-one modification, or explore a supervised Ayurvedic therapy like Abhyanga before considering any herbal product.
Drop-in group or livestream classes for a first taste of guided movement and breath work.
Private one-to-one sessions for personalized pacing or modifications.
Ayurvedic therapies such as Shirodhara or Abhyanga offering supervised, non-ingestible Ayurvedic bodywork.
Browse the class schedule to find a session that fits your week and start with supervised practice before adding anything else to your routine.
This article is general information, not a substitute for advice from a qualified doctor. Consult a qualified healthcare professional about your own circumstances before acting on anything here.
Sources
FAQ
What are some examples of ancient healing practices?
Common examples include yoga, meditation, tai chi, qigong, acupuncture, and Ayurveda, along with ancestral plant remedies and ritual or ceremonial practices tied to specific cultures. Movement and contemplative practices generally carry the most consistent evidence for stress and sleep support, according to NCCIH.
What are some examples of ancient wellness practices?
Beyond yoga and meditation, ancient wellness practices include breathwork, tai chi, Ayurvedic bodywork like Abhyanga, and community rituals built around seasonal or daily rhythms. Many of these focus on consistent, low-intensity habits rather than single dramatic interventions.
What are some spiritual healing practices?
Spiritual healing practices often include meditation, prayer or ritual ceremony, breathwork, and community gatherings tied to specific cultural or religious traditions. These practices are best learned from teachers with genuine ties to the tradition rather than adopted informally, according to WHO's guidance on cultural context.
What are some examples of healing rituals?
Healing rituals can range from a daily breathing or movement sequence to community ceremonies marking seasonal changes or life transitions. Their value often comes as much from consistency and community connection as from the specific actions involved.
Is it safe to combine herbal remedies with prescription medication?
Not always. Systematic reviews document herb-drug interactions and cases of liver injury tied to certain herbal products, so a pharmacist or clinician should review any herbal addition to your medication routine.
Recommended
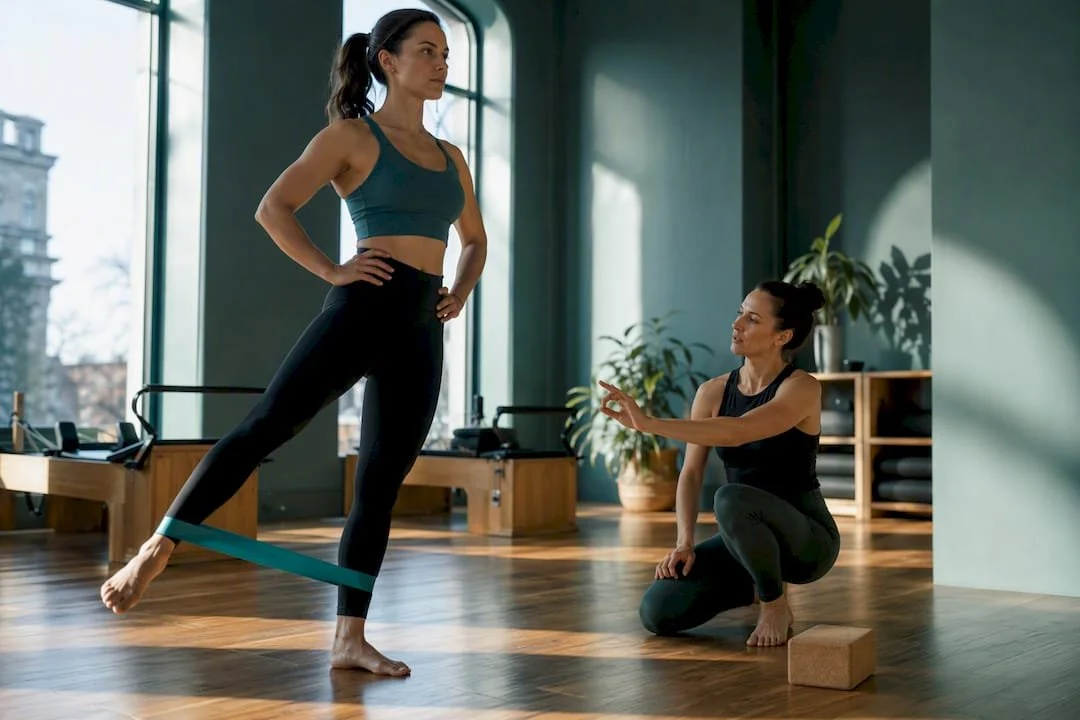
4 Pilates Cue Types With Copyable Scripts and Timing for Instructors
Four classroom ready cue types for Pilates instructors, with copyable scripts, timing tips, and research backed external focus guidance you can use in class.
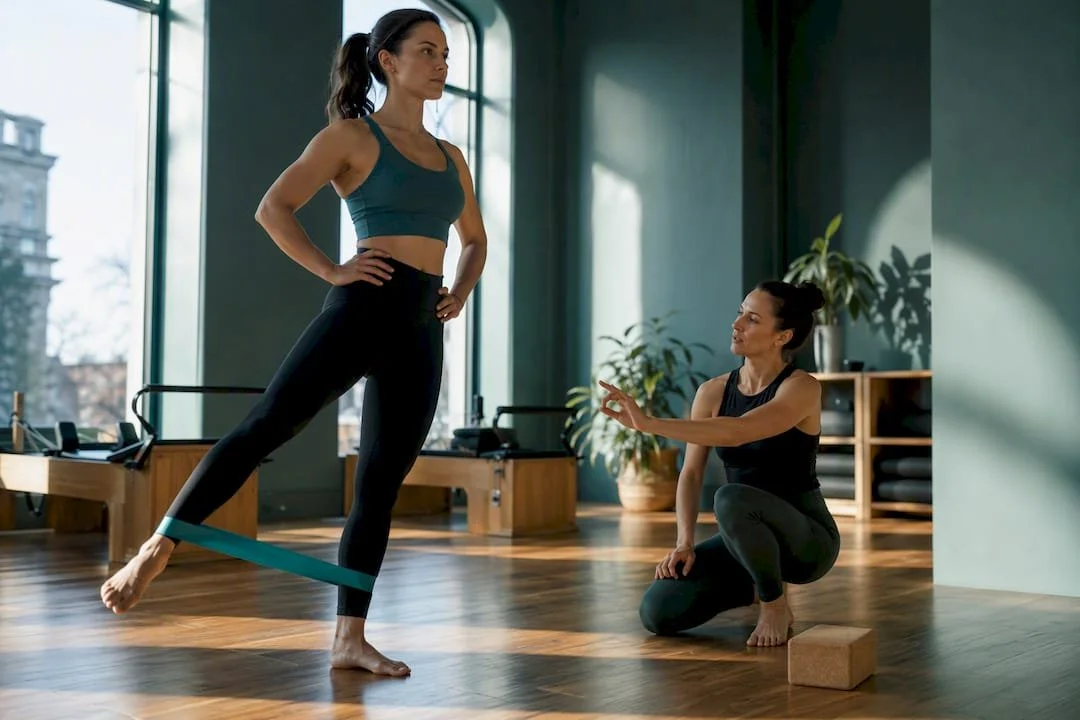
The most effective Pilates cueing techniques fall into four categories: visual, auditory, experiential, and tactile. The single rule that ties them together is this: favor external focus language that points attention to an outcome outside the body, and match your cue type to how each student learns. This list gives you scripts, timing guidance, and the research behind why it works.
TL;DR:
External focus cues are most effective when pointing attention to outcomes outside the body, and matching cue types to students’ learning preferences accelerates progress.
Different cueing styles—visual, auditory, experiential, and tactile—should be used strategically throughout class, with visual for complex exercises, auditory for pacing, experiential for awareness, and tactile for correction.
Layer cues according to a four-step framework: set up the position visually and verbally, activate deep stabilizers with experience or touch, correct minimally during movement, and streamline cues during flow.
External focus instructions consistently outperform internal cues across motor learning research, improving both immediate performance and long-term skill retention.
Always seek consent before tactile cues, keep contact brief and purposeful, and have fallback scripts ready when a cue fails to produce the desired movement change.
Table of Contents
1. Four cueing categories and when to use each
Visual cues show rather than tell, auditory cues use words or imagery, experiential cues connect movement to a felt sensation, and tactile cues use touch to guide position or muscle activation. Each works best in a different moment of class, and knowing which to reach for saves you from repeating a cue that already failed to land.
Visual: Demonstrate the movement or draw a shape in the air. Best for complex exercises and beginners who need to see the pattern before attempting it. Example: "Watch how my spine curls like a C before you try it."
Auditory: Speak a direct instruction or use imagery tied to sound or rhythm. Best for experienced students who respond to verbal pacing. Example: "Exhale for five counts as you roll up."
Experiential: Ask the student to notice a sensation or imagine an object moving through space. Best for building body awareness in intermediate students. Example: "Imagine a string pulling the crown of your head toward the ceiling."
Tactile: Use a light touch to guide alignment or activation, always with consent first. Best for students who plateau on verbal cues alone. Example: A hand at the low back signals "lengthen away from here."
According to IDEA Health & Fitness Association, most students have a dominant learning preference among these four styles, and matching your cue to that preference speeds progress and improves satisfaction. A quick way to find it: ask, test one cue type, and watch which one produces a cleaner rep.
2. Cue scripts for common Pilates objectives
These scripts cover the five goals instructors cue most often: breath, core control, alignment, balance, and mobility. Use the external focus version whenever a student overthinks the internal mechanics.
Breath: "Exhale as you press your ribs down and back into the mat" (auditory, external). For a slower class, try the experiential version: "Feel your breath fill the space behind your kidneys." Time this cue on the exhale, right before the effort phase of the movement.
Core control: Instead of "engage your core," say "draw your belly button toward your spine like you're zipping up tight jeans" (auditory with external image). A tactile alternative: two fingers pressing gently below the navel as a reminder to hollow, only after asking permission.
Alignment: "Stack your shoulders directly over your wrists" works better than "don't sag." Pair it with a visual demo showing the straight line from ear to hip to ankle before the student attempts a plank.
Balance: "Root your standing foot into the floor like it's growing into the ground" gives an external target instead of "don't wobble." Demo first for anyone new to single-leg work, then cue verbally once they're moving.
Mobility: "Reach your fingertips toward the far wall" extends range more effectively than "stretch your side body." Use this during flow, when students no longer need a full demo.
Demo before you talk when the exercise is unfamiliar or has more than two moving parts. Once students know the shape, shift to verbal and tactile cues so class keeps moving.
Pro Tip: Keep each cue to one idea. A student can absorb "exhale and reach" but loses the thread at "exhale, reach, and keep your pelvis level."
3. A four-step framework for layering cues in class
A reliable sequence for delivering cues, adapted from IDEA's mat work teaching framework, moves through four stages: lay the foundation, find the center, hold still and move, then flow. Each stage calls for a different cue density.
Lay the foundation: Set up the position with visual and auditory cues together, since students need both to see and hear the target shape.
Find the center: Add one experiential or tactile cue to activate the deep stabilizers, such as "feel your low back stay heavy on the mat."
Hold still and move: Cue one correction per repetition, not a running commentary, so students can process and adjust.
Flow: Drop to single-word or short-phrase cues ("reach," "exhale," "lengthen") since students should now know the pattern.
The decision rule is simple: if a cue doesn't produce a visible change within one or two reps, switch modality rather than repeating the same words louder.
4. Why external focus cues improve motor learning
The case for external focus phrasing isn't a teaching trend, it's a consistent finding across decades of motor learning research. A large-scale meta-analysis reviewing dozens of studies found that external focus instructions outperform internal focus instructions for motor performance, retention, and transfer, across different ages, health statuses, and skill levels. A separate set of experimental studies found the same pattern on balance and simulator tasks: external focus produced better learning outcomes than internal focus.
Converting a cue is often just a phrase swap:
"Squeeze your glutes" becomes "press the mat behind you."
"Engage your abs" becomes "draw your navel toward your spine like closing a zipper."
"Tuck your pelvis" becomes "lengthen your tailbone toward your heels."
The research consistently favors external focus cues over internal ones for both immediate performance and longer-term skill retention, according to the meta-analytic review, which means the words you choose in class aren't just style, they measurably affect how well a movement pattern sticks.
5. Tactile cuing: consent, safety, and hands-on technique
Touch is one of the most effective cueing tools available, but only when it's used with clear consent. Ask before every session, not just once: "Is it okay if I use touch to help guide your alignment today?" A student can say yes for one exercise and no for another.
Pelvis: A light hand at the sacrum cues neutral spine during bridging or footwork.
Ribs: Fingertips at the lower ribs help a student feel expansion and control during breath work.
Scapula: A gentle cue at the shoulder blade guides depression during arm work.
Hamstrings: A brief tap signals engagement during leg circles or bridge variations.
Touch requires professional judgment and, in some U.S. states, specific licensing for hands-on techniques, so confirm your local requirements and always keep contact brief, purposeful, and within clear professional boundaries.
6. Quick fixes when a cue doesn't land
When a cue fails, don't repeat it louder. Run through three fallback scripts in order: visual first, then external verbal, then tactile if the student has consented.
Visual fallback: Demonstrate the exact movement again, slower than before.
External fallback: Swap the verbal cue for an outcome-focused version, such as "push the floor away" instead of "engage your legs."
Tactile fallback: Add a brief touch cue at the target muscle, with permission.
Timing matters as much as wording. Cue the effort phase on the exhale, give one correction per repetition, and check setup before assuming the cue itself is the problem.
Pro Tip: If a student still misses the cue after three attempts, the fix is usually fewer words, not more of them.
How Amrita Yoga & Wellness applies these cueing techniques
Instructors can shift between visual, auditory, experiential, and tactile cues depending on class level and how each student responds in real time. Effective teacher training programs emphasize practiced observation and always asking consent before hands-on correction, reflecting these standards.
— Juiced
Practice these techniques in class with us
Reading a list of cues is one thing, applying them under a teacher's eye is another. Our group Pilates and livestream classes give practitioners a place to feel these cues in action, while a private session offers direct, one-on-one feedback on how you're responding to different cue types.
Book a group class to practice recognizing and responding to visual, auditory, experiential, and tactile cues in real time.
Schedule a private or small-group session for individualized cueing feedback and hands-on correction.
Ask about our teacher development track if you're building your own cueing repertoire for future classes.
Start with a one-to-one session to see which cue types work best for your body.
Sources
Instructions for motor learning: differential effects of internal versus external focus of attention
FAQ
What are some good cues for Pilates?
Good cues connect an exercise to an external outcome, such as "press the mat behind you" instead of "squeeze your glutes." The most effective options combine a visual demo with one clear verbal cue, adjusted to what each student responds to.
What are examples of cueing techniques?
Cueing techniques fall into four types: visual (demonstration), auditory (verbal instruction or imagery), experiential (felt sensation), and tactile (touch), as outlined by IDEA Health & Fitness Association. Instructors typically layer these, starting with visual and auditory, then adding tactile or experiential cues as needed.
What is the 80/20 rule in Pilates?
There is no standardized rule documented in Pilates pedagogy sources, so instructors should be cautious about treating any such rule as an established principle. If you've heard a specific ratio locally, it likely refers to a specific studio's teaching philosophy rather than a universal Pilates standard.
What are the 34 moves of Pilates?
Definitions of the classic Pilates mat repertoire vary by teacher training lineage, and no single authoritative source in this article confirms a fixed total count of moves. Instructors are better served focusing on cueing quality for the exercises in their own repertoire rather than a specific total count.
Recommended
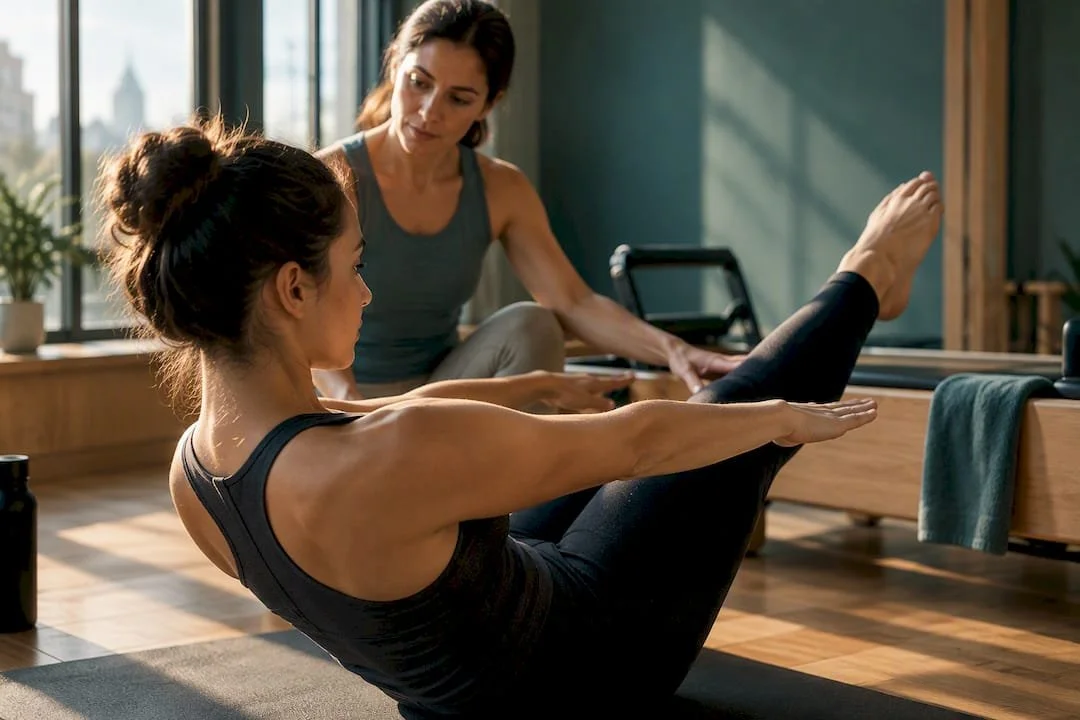
Pilates Continuing Education: Privates First for Students & Teachers
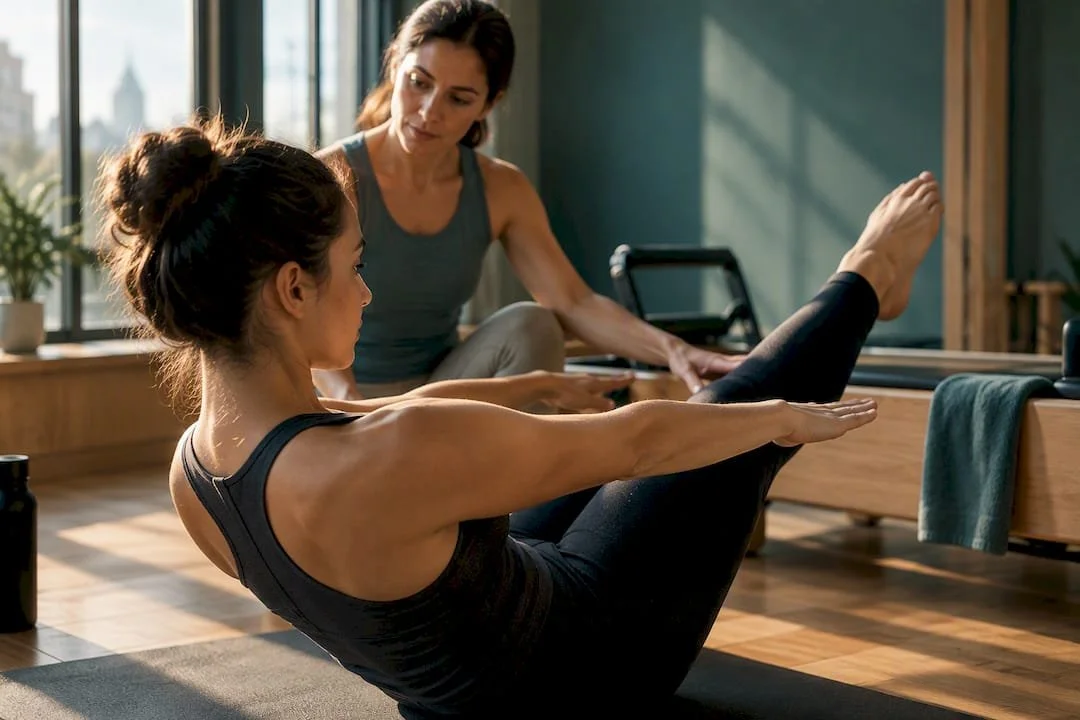
The main studio pathways for continuing your Pilates education are drop-in mat and reformer classes, focused workshops, private or small-group lessons, mentorship and apprenticeship, and full studio teacher training. Most students get the clearest answer to "what's next" by booking one diagnostic private session or a skills workshop first, which is a practical starting point offered at Amrita Yoga & Wellness.
TL;DR:
Supervised reformer classes twice weekly produce measurable strength and psychological improvements within four to six weeks, based on recent studies.
Private lessons can correct technique faster than group classes, making them essential before joining workshops or mentorship programs.
Full teacher certification programs follow ordered modules requiring specific supervised hours, avoiding advanced repertoire before mastering fundamentals.
For recreational practice, attending regular drop-in classes and occasional workshops over 6 to 12 months builds strength and body awareness effectively.
Confirm studio programs provide clear supervision ratios, written practicum hours, and specific progress assessments before enrolling in mentorship or certification pathways.
Amritayogawellness
Find Your Next Pilates Step
Explore Pilates classes, workshops, and teacher training options at Amrita Yoga & Wellness in Philadelphia.
Table of Contents
Studio Continuing Education Options Explained
Each route above serves a different goal, and matching the option to what you actually want to accomplish saves both time and money.
Drop-in mat classes are the backbone of ongoing practice. They suit anyone who wants steady conditioning, better body awareness, and the kind of repetition that builds long-term strength without a major schedule commitment. Reformer group classes add resistance and spring-based feedback, which tends to produce more measurable strength gains. An 8-week supervised Reformer program delivered three sessions a week has been shown to improve strength, endurance, and psychosomatic measures in a randomized trial of overweight and obese women, and a separate 6-week Reformer protocol reduced pain and improved psychological outcomes in people with chronic musculoskeletal pain when delivered twice-weekly in 45 to 50 minute sessions. Both studies point to the same pattern: consistent, supervised sessions multiple times a week produce measurable results within a few weeks.
Workshops and intensives target a narrow skill, such as cueing language, injury-modified practice, or a specific piece of repertoire. These typically run two to six hours or fill a weekend, making them a low-commitment way to break a plateau.
Private and small-group lessons offer one-on-one feedback that group settings cannot match. Sessions often focus on:
Correcting alignment issues that get missed in a group class
Building confidence with equipment before joining a reformer class
Preparing for a specific goal, like a return from injury or a teaching audition
Pro Tip: Use a short block of privates to fix technique before starting a workshop series, since instructors can correct habits faster one-on-one than in any group format.
Mentorship and apprenticeship come next for anyone moving toward teaching. The common structure follows a progression: assist an experienced instructor, observe full classes, then teach short segments under direct supervision before taking on a full class. Programs typically expect feedback cycles and gradually increasing responsibility rather than a sudden jump to independent teaching.
Studio teacher training ties these pieces together in sequence. Representative programs, such as Polestar Pilates' Complete Matwork Series, move through ordered modules (Principles, then Modules 1 through 3), paired with practicums and set minimums for supervised and self-directed practice hours. That module order matters: skipping ahead to advanced repertoire before mastering foundational cueing tends to slow progress rather than speed it up.
How to Choose the Right Studio Option for Your Goal
Before committing money or months to any path, run through a short checklist.
Check supervision ratios. Ask how many students share instructor attention during practicums or mentorship hours.
Ask for a sample weekly plan. A program that cannot describe a typical week is not ready to describe your progress.
Confirm practicum and mentorship hours in writing. Vague promises about "hands-on experience" are not the same as a set number of supervised hours.
Ask how progress gets assessed. Look for concrete checkpoints, not just a final certificate.
Review the cancellation and change policy. Costs and schedules shift, so know your options before paying in full.
Ask about scope for special populations. If you plan to work with prenatal, senior, or rehab clients, confirm the program actually covers those modifications.
Red flags include programs that skip observation hours entirely, instructors who cannot explain how special-population modifications are taught safely, and any teacher-track program that promises independent teaching without a supervised practicum. On cost and time scales, single workshops run a few hours, workshop series or short modules run several weeks, and full teacher-training cohorts typically span multiple months with staged tuition. The National Pilates Certification Program handbook outlines curriculum components, including anatomy, repertoire, and required observation and practice-teaching hours, as a useful reference point when comparing what a studio program actually requires.
Sample Pathways From Practice to Teaching
Three realistic timelines show how these pieces fit together depending on your goal.
Pathway A, recreational deepening (6 to 12 months): two to three weekly group classes plus an occasional workshop to sharpen specific skills, with no teaching component at all.
Pathway B, preparing to teach group classes (6 to 18 months): weekly private sessions to build technique, layered with mentorship and supervised practice teaching as confidence grows.
Pathway C, specialized or clinical focus (8 to 24 months): a mix of reformer practice, targeted workshops on populations like prenatal or rehab clients, and supervised practice teaching under a mentor experienced in that specialty.
For any of these, log hours honestly: track class attendance, private session dates, and supervised teaching minutes in a simple notebook or spreadsheet. Set milestones every four to six weeks rather than waiting for a final deadline, since short checkpoints make it easier to spot whether you are actually progressing or just staying busy.
Why Trust This Guidance
This guidance draws on studio-based teaching structures and current research on supervised Pilates delivery, plus the day-to-day class and workshop scope at Amrita Yoga & Wellness, a Philadelphia studio offering yoga, Pilates mat and reformer classes, barre, tai chi, massage therapy, and teacher trainings. The author, Juiced, covers Pilates education pathways and certification topics for the studio's blog, drawing on published research and studio program structures rather than personal instruction.
What Most Advice on This Topic Gets Wrong
Most advice treats continuing education as a straight line toward certification, as if every student who takes a workshop is angling to teach. That is not true, and the framing hurts recreational students who feel pressure to "level up" when what they actually want is a stronger, more consistent practice. The bigger mistake is skipping private sessions before jumping into a reformer class or a teacher-training cohort. A few sessions of one-on-one correction fix habits that group settings never catch, and they make every class or workshop afterward more useful. If you take one thing from this guide, prioritize honest feedback early, whether that means a private lesson or a mentor who will tell you what is not working. Certificates matter less than whether you can actually teach or move well.
— Juiced
How Amrita Yoga & Wellness Supports Your Next Step
Whatever stage you are at, Amrita Yoga & Wellness has a matching option. Ongoing practice fits into drop-in mat and reformer classes or a monthly membership. Readers working on a specific skill can book a private or small-group session to correct technique before joining a workshop or mentorship track.
New students can also check current trial pricing before committing to a full membership. Browse the class schedule and book a session to find your starting point.
Sources
FAQ
How long does it take to prepare to teach Pilates?
Timelines vary by intensity, but a realistic range generally spans several months when combining weekly private sessions, mentorship, and supervised practice teaching. Programs that follow ordered modules, like the Polestar Complete Matwork Series, typically pace this progression through set practicum and supervised-hour requirements.
Are reformer classes better than mat classes for building strength?
Reformer classes add resistance that can produce faster, more measurable strength gains, as shown in an eight-week supervised Reformer trial with overweight and obese women. Mat classes remain valuable for conditioning and body awareness and work well alongside reformer training rather than replacing it.
What should I ask before joining a studio mentorship program?
Ask for the exact number of observation and supervised teaching hours offered, how instructor feedback is delivered, and whether you will assist, observe, and then teach under direct supervision before leading a class independently. Confirm these details in writing rather than relying on a general description of "hands-on experience."
Can private sessions help before I start a teacher-training program?
Yes, private sessions correct technique and alignment issues faster than group classes because instructors can give immediate, one-on-one feedback. Many studio programs expect a baseline of movement proficiency before starting formal mentorship, and private sessions are a practical way to build that foundation.
Where can I start if I only want to deepen my personal practice?
Regular drop-in mat or reformer classes, combined with an occasional workshop on a specific skill, cover most recreational goals without any teaching component. This pathway typically takes 6 to 12 months to show steady improvement in strength and body awareness.