The Amrita Journal
Explore thoughtful stories, practical wellness guidance and inspiring ideas to support your movement, mindfulness and everyday wellbeing at Amrita.
Beginner Aerial Yoga Poses: Build Strength and Flexibility
TL;DR:
Most beginner aerial yoga poses rely on the hammock to support and deepen stretches, making the practice accessible regardless of flexibility or strength. Proper setup, including hammock height and clothing, combined with gradual progression and foundational poses, ensures safety and builds trust in the support system. Consistent practice focused on core poses develops the necessary strength, flexibility, and body awareness, laying a solid foundation for advanced moves over time.
If you've been curious about beginner aerial yoga poses but worried that you're not flexible enough or strong enough to get started, you're not alone. Most people walk into their first aerial yoga class with exactly that fear. Here's what actually happens: the hammock does most of the heavy lifting, making traditional yoga poses more accessible and deeper from your very first session. This guide walks you through everything you need to start safely, from setting up your hammock to five foundational poses you can practice right away.
Table of Contents
Key takeaways
| Point | Details |
|---|---|
| No flexibility needed | The hammock supports your body so beginners can achieve deeper stretches safely from day one. |
| Hammock height matters | Set the hammock at your hip crease for optimal safety and support in every foundational pose. |
| Dress for the fabric | Fitted leggings that cover your knees protect against hammock pressure points and skin irritation. |
| Start slow, stay consistent | Practice 2 to 3 times per week and spend the first few weeks mastering foundational poses only. |
| Stop at discomfort | Step out of any pose that causes dizziness or sharp discomfort. Progression is earned gradually. |
Equipment and preparation basics
Before you attempt a single pose, your setup and habits will determine how safe and enjoyable aerial yoga feels. This is the part most beginner guides gloss over, and it's where most early frustration comes from.
Getting your hammock height right
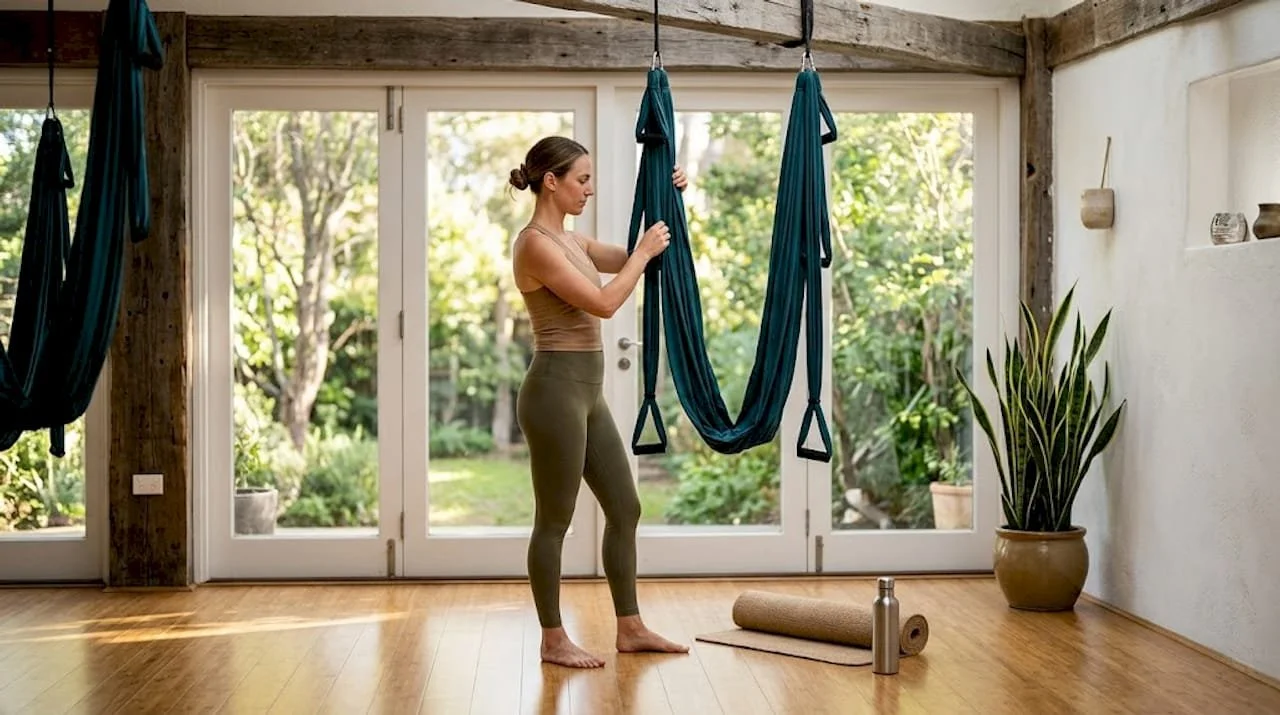
Hammock height at hip creaseis the foundational rule you'll hear in every aerial yoga guide for beginners, and for good reason. Too high and you'll struggle to get in and out of poses. Too low and you lose the support that makes the practice both safe and effective. Stand in front of the hammock and adjust the fabric so it rests directly at the fold of your hip. That position supports most beginner poses without modification.
If you're practicing at a studio, an instructor will set this for you. If you're setting up at home, check out this aerial yoga equipment checklist from Amritayogawellness to make sure your rigging and hardware are rated for aerial use before you ever leave the ground.
What to wear and how to prepare your body
Fitted leggings prevent chafing from hammock pressure points, particularly around the knees, inner thighs, and underarms. Skip shorts. Skip loose pants that bunch up. A fitted long-sleeve top is also worth considering if your arms will be bearing weight.
Here's a quick preparation checklist before every session:
Remove all jewelry, including rings and bracelets, before touching the hammock
Avoid eating a heavy meal in the 1 to 2 hours before practice to prevent nausea during inversions
Hydrate well in advance but avoid drinking large amounts right before class
Do a 5 to 10 minute floor warm-up to prepare your joints and sense your body's baseline
Pro Tip: Run the hammock fabric between your hands before practice. This brief sensory check helps your nervous system get familiar with the texture and tension before your full body weight goes into it.
| Preparation factor | Recommended approach |
|---|---|
| Hammock height | Hip crease level for most beginner poses |
| Clothing | Fitted leggings covering knees, close-fit top |
| Meal timing | Avoid eating 1 to 2 hours before practice |
| Warm-up | 5 to 10 minutes of floor mobility work |
| Jewelry | Remove all items before practice |
5 step-by-step beginner aerial yoga poses
Beginner aerial classes typically progress from floor-aided stretches to standing hammock-assisted poses before any full suspension. These five poses follow that same logic. Work through them in order during your first several sessions.
Pose 1: Supported downward dog
Stand facing the hammock with the fabric at hip height.
Place both hands on the fabric and walk your feet back until your body forms an angled "V" shape.
Press into the hammock with straight arms and draw your hips up and back.
Hold for 5 to 8 breaths, feeling your hamstrings and spine lengthen with the hammock's resistance.
This pose is where most people feel the hammock's power for the first time. The fabric creates gentle traction along your spine that a floor-based downward dog simply cannot replicate.
Pose 2: Floating pigeon pose
Sit on the hammock as if it were a swing, with the fabric supporting your hips.
Bring your right shin parallel to the front edge of the hammock and let the fabric hold your weight.
Keep your left leg extended behind you with the foot resting lightly on the floor.
Fold forward gently over your right shin and hold for 6 to 10 breaths before switching sides.
Benefit: Opens the hips and glutes without compressing the knee joint the way floor pigeon does.
Modification: Keep both feet touching the floor for stability until you feel confident in the hammock.
Pose 3: Cocoon inversion
Sit in the hammock and pull the fabric up over your head so your body is gently wrapped.
Allow yourself to tilt backward slowly until your head hangs below your hips.
Let the hammock take your full weight. Your arms can rest at your sides or cross over your chest.
Breathe slowly for 3 to 5 breaths, then use your core to return to upright.
This is most people's first true inversion. Because the hammock wraps around your entire body, beginners build trust with inversions through this pose before attempting anything more exposed.
Pro Tip: If you feel any pressure in your head or ears during the cocoon inversion, come up slowly and take 2 to 3 seated breaths before trying again. Dizziness that persists means you're done with inversions for that session.
Pose 4: Superman pose
Stand behind the hammock and place it across your hip bones.
Tip your body forward, letting your legs lift off the ground behind you.
Extend your arms forward like you're flying, keeping your core gently engaged.
Hold for 4 to 6 breaths, squeezing through your glutes and upper back to maintain the line.
This is one of the most underrated basic aerial yoga positions for beginners. It strengthens the posterior chain (your glutes, back extensors, and shoulder stabilizers) without any impact, making it a great complement to the forward-folding work in the other poses.
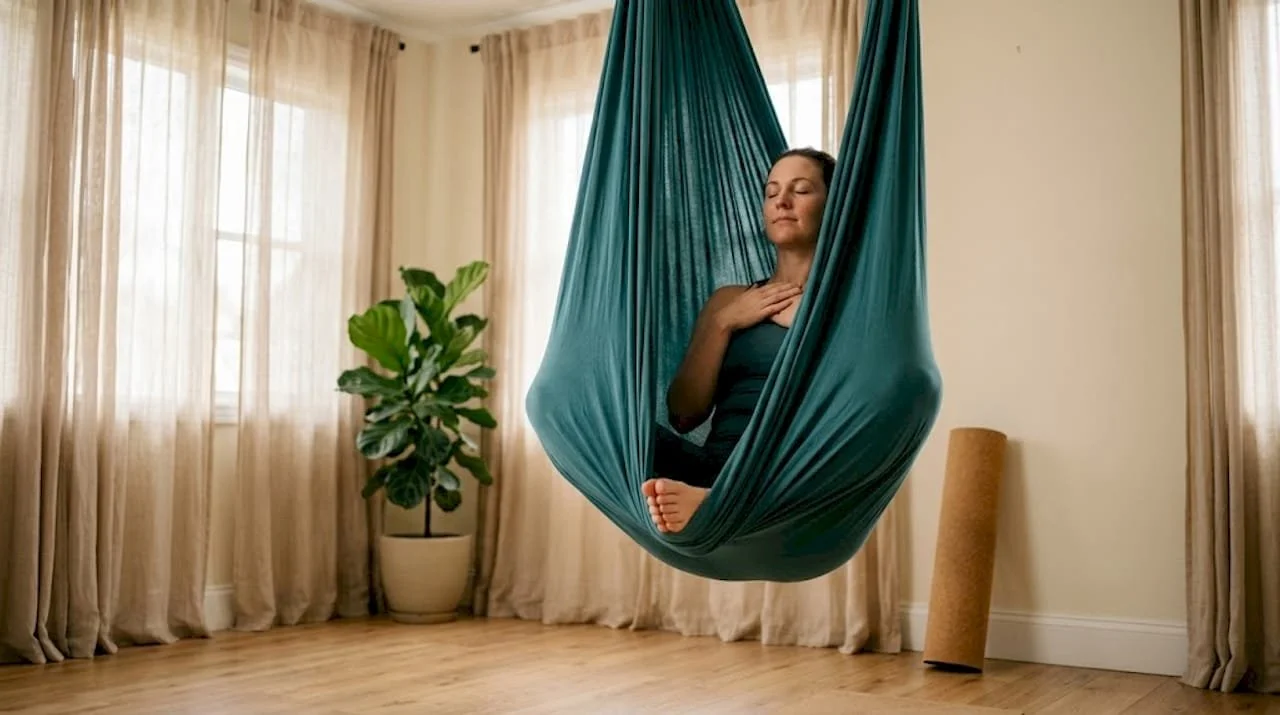
Pose 5: Aerial corpse pose (Savasana)
Sit in the hammock and hold both sides of the fabric.
Lean back slowly until the hammock cradles your full body from head to hips.
Let your arms drop, close your eyes, and allow the fabric to rock you gently.
Stay here for 3 to 5 minutes to close your session.
Aerial Savasana promotes deeper relaxationcompared to floor-based Savasana because the gentle compression and rocking activate your parasympathetic nervous system more directly. It's not just a nice ending. It's a physiologically distinct recovery state.
| Pose | Primary benefit | Ground contact needed? |
|---|---|---|
| Supported downward dog | Spinal traction, hamstring stretch | Yes (hands) |
| Floating pigeon | Hip opener, glute release | Yes (one foot) |
| Cocoon inversion | First inversion, full body relaxation | No |
| Superman pose | Back strength, posterior chain | No |
| Aerial Savasana | Spinal decompression, nervous system reset | No |
Common beginner mistakes to avoid
Even with a great set of step-by-step aerial yoga poses in hand, beginners consistently trip on the same few patterns. Knowing them in advance saves you frustration and protects your body.
The biggest error is moving too fast. After a few sessions of supported poses, the urge to try advanced inversions or drops is real. Resist it. Focusing on core foundational moves for 2 to 3 weeks builds the strength and proprioception that advanced poses actually require. Rushing creates bad habits and increases injury risk significantly.
Skin irritation is another predictable issue that beginners treat as a surprise. The hammock fabric concentrates pressure at contact points. If your inner knees are red and sore after class, it is not because aerial yoga is wrong for your body. It is because your clothing left those areas exposed. Long fitted leggings that cover the knee solve most of this.
Here are the other patterns worth watching:
Holding your breath during poses, especially inversions. Breath is your anchor. If your breathing gets shallow or stops, so should your movement.
Gripping the hammock with white-knuckle tension. Trust develops gradually. Practice releasing grip tension intentionally between holds.
Skipping the warm-up. Cold joints plus sudden weight-bearing aerial positions is a recipe for tweaks and pulls.
Comparing your early progress to anyone else's timeline.
"Beginner-friendly means supportive, not necessarily easy. Mastering balance and body awareness is the real focus of your first weeks."
Pro Tip: Keep a simple practice log after each session. Note which poses felt stable, which created discomfort, and how long you held inversions. This data helps you progress intentionally rather than by guesswork.
Building a beginner aerial yoga routine
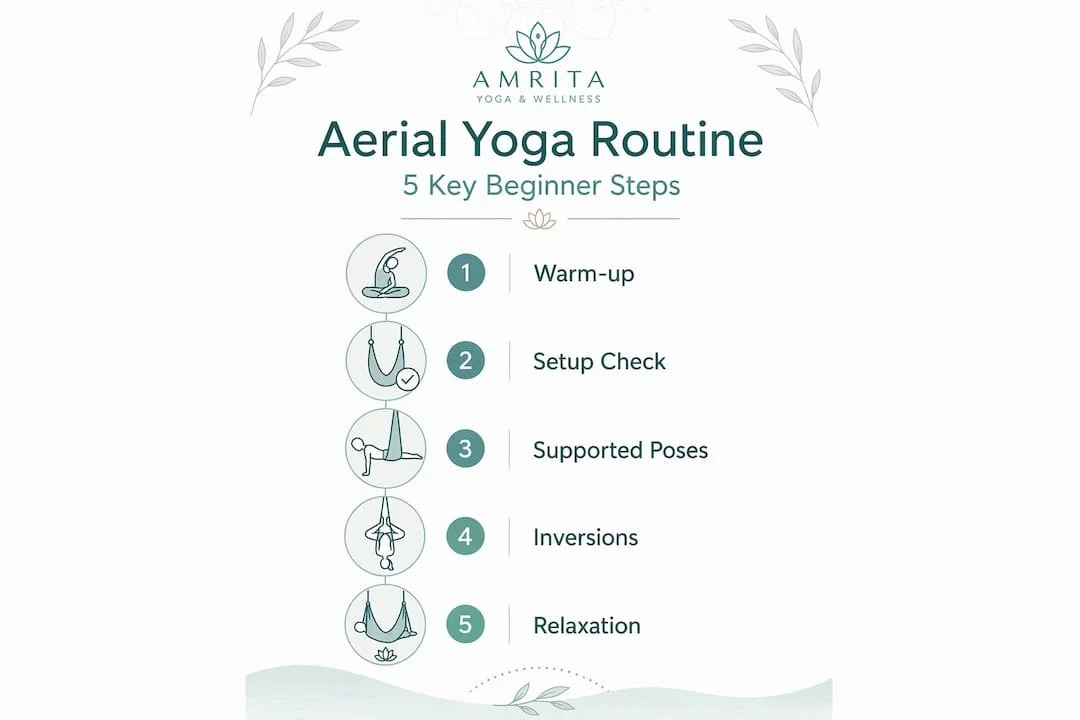
A consistent practice schedule matters more than how perfect your poses look. Here is how to structure your first month as a practical aerial yoga for beginners guide:
Weeks 1 and 2: Practice 2 times per week. Focus only on the five foundational poses above. Spend extra time in the cocoon inversion and Superman pose to build hammock trust and posterior strength.
Week 3: Add a third session per week. Introduce a 10 minute floor warm-up before every session. Begin holding each pose 2 to 3 breaths longer.
Week 4: Try sequencing the five poses in order without breaks between them. Notice what flows naturally and where your transitions feel awkward.
Practicing 2 to 3 times per week is the sweet spot for building strength and body memory without overloading your connective tissue, which adapts more slowly than muscle.
| Session component | Duration | Purpose |
|---|---|---|
| Floor warm-up | 8 to 10 minutes | Joint prep, body awareness |
| Foundational poses | 25 to 30 minutes | Strength, flexibility, balance |
| Aerial Savasana | 4 to 5 minutes | Recovery, nervous system reset |
| Optional journaling | 3 to 5 minutes | Progress tracking and reflection |
For deeper aerial yoga strength guidance, Amritayogawellness has a dedicated resource on developing the core and upper body capacity that makes these sessions progressively more rewarding.
My honest take on starting aerial yoga
I'll be direct about something I've seen repeatedly: the people who get the most out of aerial yoga in their first month are almost never the most athletic ones in the room. They are the ones willing to stay in a pose that feels slightly weird, breathe through the discomfort of unfamiliar sensation, and come back the next session anyway.
When I first experienced the fabric around my hips during Superman pose, my instinct was to bail out. It felt strange and vaguely unstable. What I've learned since is that the sensation of instability is actually your proprioceptive system learning. That weirdness is the training effect. The biggest misconception out there is that flexibility unlocks aerial yoga. It's the other way around. Aerial yoga develops flexibility because the hammock lets your body move into ranges of motion it would otherwise protect itself from reaching on a flat floor.
What I'd tell any beginner is this: do not chase the advanced poses you see on social media. Chase the feeling of your body learning to trust a new kind of support. That trust builds something you carry with you into every other physical practice you do, aerial or not. And the five poses in this guide are genuinely enough to create that foundation if you work them with intention for four weeks.
— Amritayogawellness
Start your aerial yoga practice with Amrita Yoga & Wellness
Ready to take these foundational moves off the screen and into a real hammock? Amrita Yoga & Wellness in Philadelphia offers beginner-friendly aerial yoga classes designed around exactly this kind of progressive, safety-first approach. Whether you are walking in with zero yoga experience or coming from a traditional mat-based practice, their instructors meet you where you are.
Classes are structured to give you hands-on guidance through the same foundational aerial yoga poses for beginners covered here, with expert eyes on your alignment and hammock setup from the start. Explore the full class offerings at Amritayogawellness and book a beginner session that fits your schedule. You can also check out their aerial yoga beginner guide for additional resources to support your practice between classes.
FAQ
What are the best beginner aerial yoga poses to start with?
The five most beginner-friendly poses are supported downward dog, floating pigeon, cocoon inversion, Superman pose, and aerial Savasana. These build hammock trust, foundational strength, and flexibility progressively without requiring prior yoga experience.
Do I need to be flexible to start aerial yoga?
No. The hammock acts as a structural support that makes poses accessible from your first session, regardless of your current flexibility level. Flexibility develops as a result of practice, not a prerequisite for it.
How often should beginners practice aerial yoga?
Practicing 2 to 3 times per week is the recommended frequency for beginners. This builds strength and body memory while giving connective tissue adequate recovery time between sessions.
What should I wear to my first aerial yoga class?
Wear fitted leggings that cover your knees and a close-fitting top. Loose clothing bunches in the hammock and bare skin at pressure points like the knees and inner thighs leads to irritation and chafing.
Is aerial yoga safe for complete beginners?
Yes, when practiced with proper hammock setup and foundational progressions. Beginning with low-to-ground poses before full suspension, wearing appropriate clothing, and working with a qualified instructor significantly reduces risk for new practitioners.
Recommended
Aerial yoga poses: build flexibility and strength fast
TL;DR:
Aerial yoga offers low-impact, joint-friendly strength and flexibility benefits supported by scientific studies.Proper equipment, setup, and mindful practice are essential for safety and effective progress.Consistent mastery of foundational poses over time builds lasting strength, flexibility, and mental discipline.
If you've been searching for a workout that's easy on your knees and hips but still challenges your muscles, you're not alone. Many people in Philadelphia want something that feels fresh, not another repetitive gym routine. Aerial yoga beginner poses offer exactly that: a low-impact practice where a fabric hammock supports your body weight, allowing you to move deeper into stretches and build real strength without grinding your joints. Randomized controlled trials show that yoga training improves both strength and respiratory health, and aerial yoga takes those benefits even further by adding suspension and decompression. This guide walks you through everything you need to start safely and see results.
Table of Contents
Key Takeaways
| Point | Details |
|---|---|
| Begin with right gear | Preparation and correct equipment are crucial for safe and confident aerial yoga practice. |
| Master foundational poses | Simple, core beginner poses are best for rapidly building flexibility and strength. |
| Track your gains | Measuring performance over time helps motivate and prove real progress in your abilities. |
| Avoid common mistakes | Awareness and proactive strategies keep you safe and maximize results. |
| Consistency wins | Steady, repeated practice fosters lasting strength and body awareness more than complexity. |
What you need to start aerial yoga
Now that you know aerial yoga can improve strength, here's what you need to get started safely.
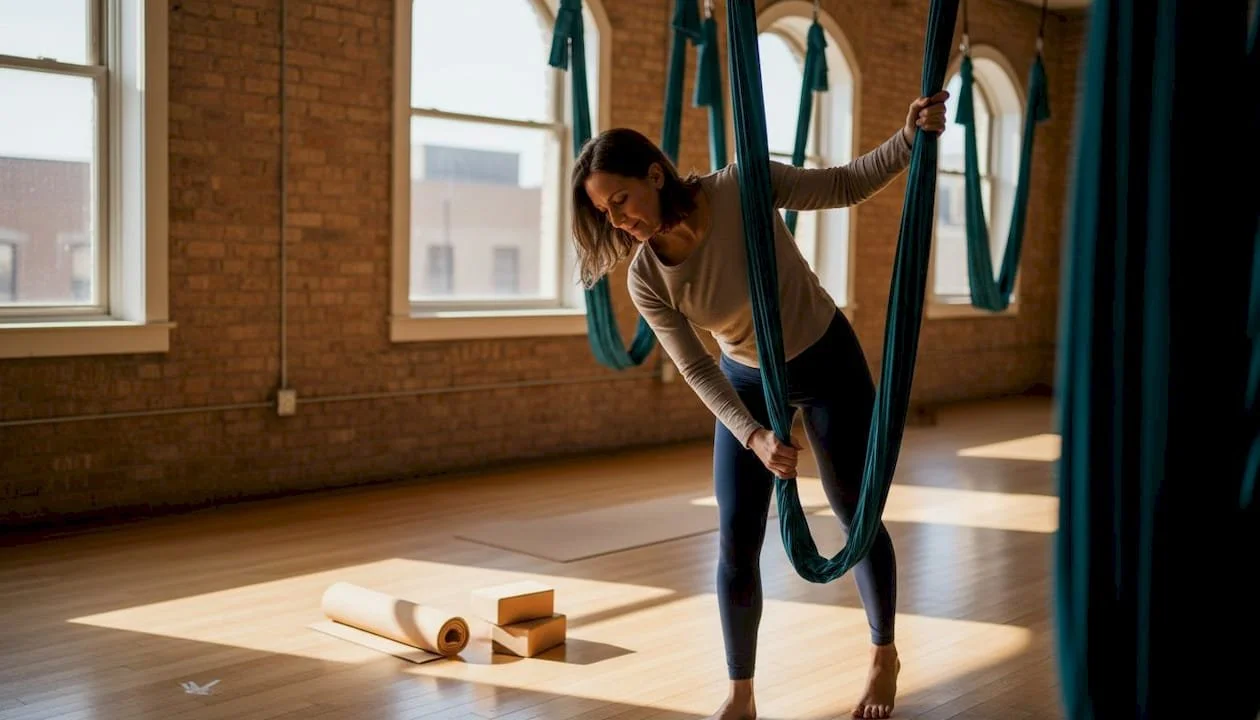
Before you attempt a single pose, having the right setup matters enormously. Aerial yoga uses a silk or nylon hammock, sometimes called an aerial silk or yoga swing, suspended from a ceiling anchor or a freestanding rig. The hammock needs to hold at least 300 to 400 pounds to be safe for most adults. You'll also need two locking carabiners to connect the hammock to the rigging hardware, and a yoga mat placed directly beneath the hammock to cushion any dismounts.
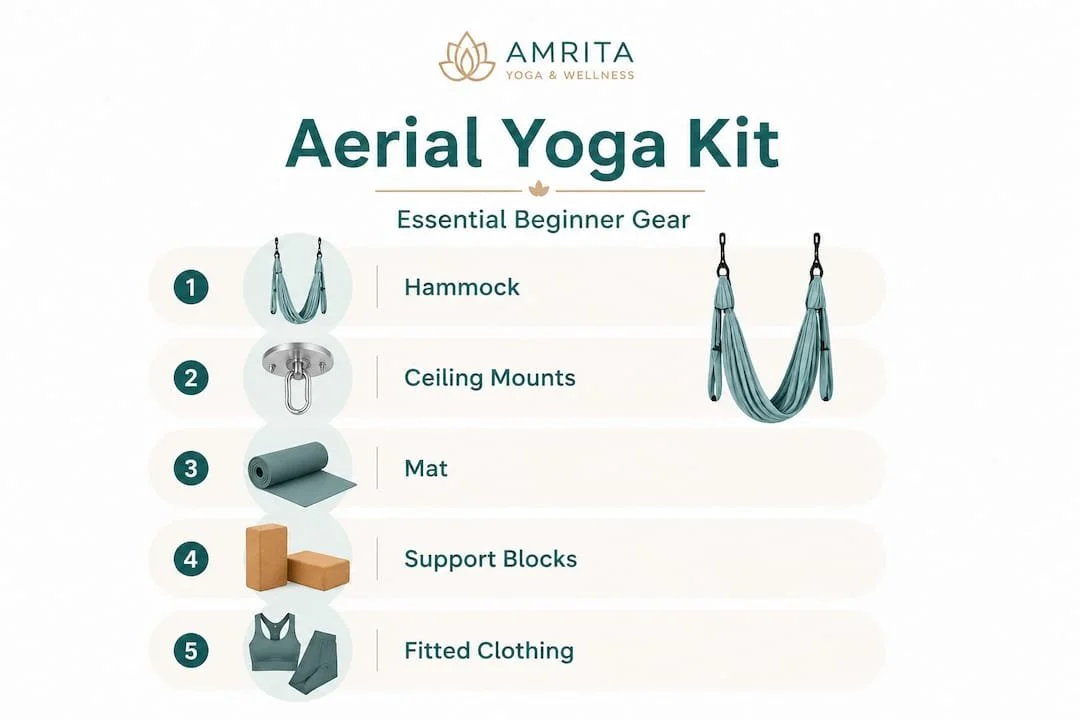
Your attire is just as important as your gear. Wear fitted, full-length leggings and a long-sleeved shirt so the fabric doesn't pinch bare skin during poses. Avoid jewelry, belts, or anything with sharp edges that could snag the hammock material.
Ceiling height is a factor many beginners overlook. You need at least nine to ten feet of clearance from floor to ceiling to hang the hammock low enough for standing poses while still having room to invert safely. If you're practicing at home, have a licensed contractor or rigging professional install the anchor point. A single poorly placed anchor can fail under dynamic load, which is a serious safety risk.
Yoga reduces muscle stiffness and enhances elasticityover time, but only if you prepare your body before each session. A five-minute warm-up of gentle neck rolls, shoulder circles, wrist rotations, and light hip circles primes your connective tissue and reduces the chance of strain. Review the fullaerial yoga equipment checklistbefore your first session to make sure nothing is missing.
Quick-start checklist for your first session:
Aerial hammock rated for at least 300 lbs
Two locking carabiners and appropriate ceiling hardware
Yoga mat placed under the hammock
Fitted, skin-covering clothing
Ceiling clearance of 9 to 10 feet minimum
A spotter or instructor present
Five-minute warm-up completed
| Item | Why it matters | Beginner priority |
|---|---|---|
| Aerial hammock | Supports body weight in all poses | Essential |
| Locking carabiners | Prevents accidental release | Essential |
| Yoga mat | Cushions dismounts and floor work | High |
| Fitted clothing | Prevents skin pinching and fabric snags | High |
| Ceiling anchor | Determines safety of the entire setup | Essential |
| Spotter | Guides alignment and catches falls | Strongly recommended |
Pro Tip: Use a spotter for your first few attempts. Having someone steady the hammock and give real-time feedback on your alignment builds confidence faster than practicing alone and dramatically reduces the risk of awkward falls.
Step-by-step: Foundational aerial yoga poses
Once you're set up and warmed up, you're ready to move into your first aerial yoga poses.
Each pose below is chosen specifically for beginners because it builds body awareness, core engagement, and flexibility without requiring prior gymnastics or dance experience. Take your time with each one. There's no rush to move to the next pose until the current one feels stable and comfortable.
1. Floating Savasana (Aerial Corpse Pose)
This is the gentlest entry point into aerial yoga and a wonderful way to feel the hammock supporting your full body weight.
Set the hammock at hip height.
Sit in the center of the hammock and lean back slowly.
Let your legs drape over the front edge and your arms hang freely at your sides.
Close your eyes, breathe deeply, and allow the hammock to cradle your spine.
Hold for 2 to 3 minutes, focusing on releasing tension in your lower back.
Benefit: Spinal decompression and deep relaxation. This pose immediately shows you how the hammock can take pressure off your vertebrae.
2. Aerial Child's Pose
Stand facing the hammock and place it at hip height.
Drape your torso over the hammock so it rests under your hip bones.
Reach your arms forward toward the floor and let your head hang naturally.
Gently walk your feet back until you feel a stretch through your hips and lower back.
Hold for 30 to 60 seconds, breathing steadily.
Benefit: Hip flexor release and gentle spinal traction. This mirrors the floor version but allows a deeper, gravity-assisted stretch.
3. Supported Plank
Place the hammock at ankle to shin height.
Face away from the hammock and place your shins on top of the fabric.
Walk your hands forward into a plank position, wrists under shoulders.
Engage your core and keep your hips level, not sagging or piking up.
Hold for 20 to 30 seconds, then lower your knees to the floor to rest.
Benefit: Core and shoulder strength. Aerial yoga strengthening moves like this one build functional upper-body stability that carries over into everyday life.
4. Seated Buddha
Lower the hammock to just below knee height.
Sit inside the hammock as if sitting in a swing, with the fabric supporting your sit bones.
Cross your ankles or bring the soles of your feet together in a butterfly position.
Sit tall, lengthen your spine, and rest your hands on your knees.
Hold for 1 to 2 minutes, using the gentle sway to release hip tension.
Benefit: Hip opening and postural alignment. The suspended seat naturally encourages an upright spine without the strain of sitting on a hard floor.
5. Hip Hang
Stand inside the hammock and step both feet through so the fabric rests at hip level.
Lean forward slightly and allow the hammock to support your hip bones.
Let your upper body hang forward toward the floor, arms relaxed.
Breathe slowly and let gravity create traction through your lumbar spine.
Hold for 30 to 45 seconds, then use your core to return upright.
Benefit: Lumbar decompression and hamstring lengthening. Many beginners feel immediate relief in their lower back after this pose.
6. Aerial Low Lunge
Set the hammock at mid-thigh height.
Place your back foot on top of the hammock and step your front foot forward into a lunge.
Keep your front knee directly over your ankle.
Raise your arms overhead and breathe into the hip flexor stretch.
Hold for 20 to 30 seconds per side.
Benefit: Hip flexor and quad flexibility. Building aerial yoga strength through lunges also improves balance and single-leg stability. Empirical evidence links yoga with measurable improvements in both strength and lung function, and these dynamic poses are a big reason why.
"Always focus on steady, controlled movements to prevent injury and maximize benefits."
Pro Tip: Start with shorter holds of 15 to 20 seconds and gradually build to 60 seconds or more over several weeks. Rushing into long holds before your muscles are ready is a fast track to soreness and discouragement.
Common mistakes and how to avoid them
Despite careful preparation, even attentive beginners can make mistakes. Here's how to avoid the most common ones.
Aerial yoga is forgiving in many ways, but a few consistent errors can stall your progress or lead to unnecessary strain. Knowing what to watch for keeps your practice moving forward.
Over-gripping the hammock. When you feel unsteady, the natural instinct is to squeeze the fabric as hard as possible. This creates tension in your forearms, shoulders, and neck that works against the relaxation aerial yoga is meant to produce. Instead, use a firm but relaxed grip and trust the hammock to hold you.
Holding your breath. Beginners often hold their breath during challenging moments, which increases muscle tension and reduces the benefit of each pose. Breathe continuously and use your exhale to release deeper into stretches.
Hammock set too low or too high. A hammock that's too low forces you to scrunch your body awkwardly. One that's too high makes it hard to get in and out of poses safely. Adjust the height for each pose category: hip height for sitting poses, ankle height for plank variations, and so on.
Skipping the warm-up. Cold muscles and connective tissue are far more vulnerable to strain. Yoga training reduces muscle stiffness over time, but that protection builds gradually. Until then, a proper warm-up is non-negotiable. Explore more aerial yoga techniques to understand how warm-up routines fit into a full session.
Neglecting alignment. Sloppy alignment in aerial yoga can put uneven stress on your joints. For example, in Supported Plank, letting your hips sag strains your lower back. Always check that your joints are stacked correctly before settling into a hold.
"Focusing on slow, mindful movements reduces the risk of strain and injury."
Pro Tip: If you feel sharp pain rather than a productive stretch, exit the pose immediately and reassess your setup or alignment. Pain is your body's signal that something is off, not a cue to push harder.
How to track your progress and results
After starting and refining your form, it's important to recognize how your flexibility and strength grow with practice.
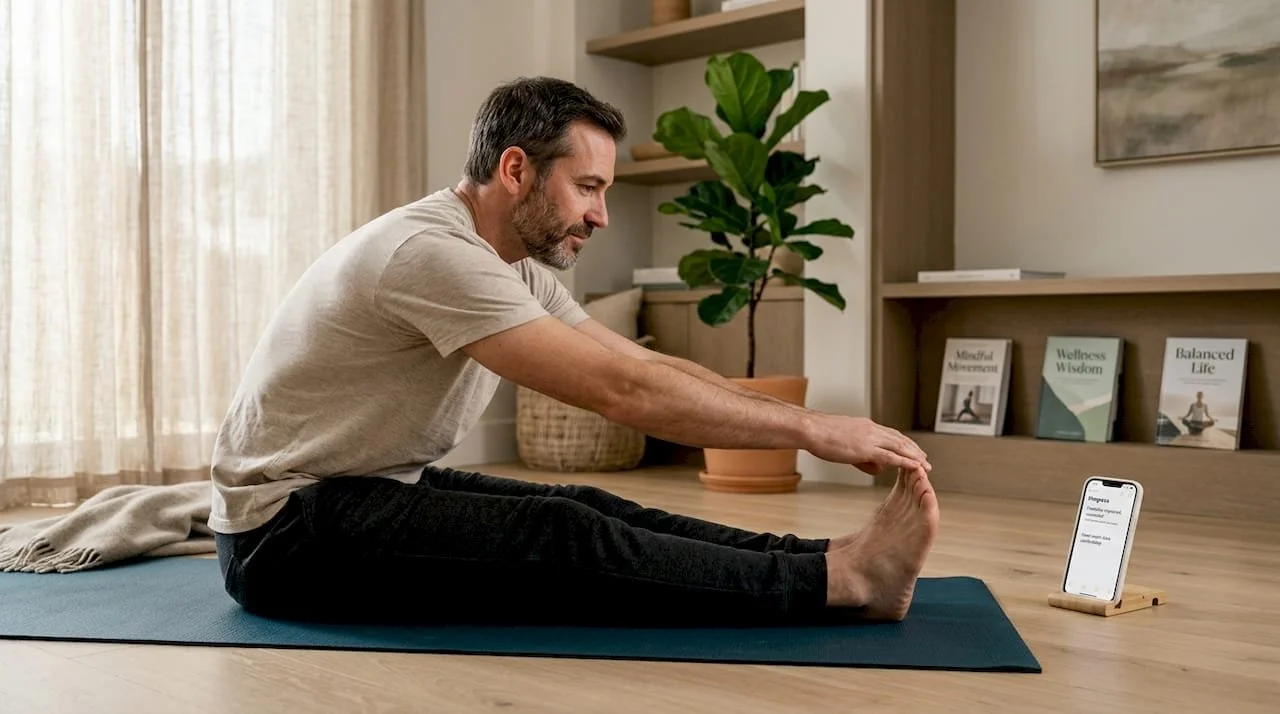
Progress in aerial yoga can feel subtle at first, especially if you're used to weight-based fitness where numbers on a barbell tell you exactly how you're improving. But the gains are real and measurable. Yoga training improves handgrip strength and flexibility in as little as 12 weeks of consistent practice, which means you have a clear timeline to work toward.
Use this simple tracking table to log your progress weekly:
| Metric | Week 1 baseline | Week 4 | Week 8 | Week 12 |
|---|---|---|---|---|
| Floating Savasana hold (minutes) | 1 min | 2 min | 3 min | 4+ min |
| Forward reach (inches past toes) | 0 in | 1 in | 2 in | 3+ in |
| Supported Plank hold (seconds) | 15 sec | 25 sec | 40 sec | 60 sec |
| Sessions per week | 1 | 2 | 2 to 3 | 3 |
Beyond the numbers, pay attention to these qualitative progress signals:
Poses that felt shaky now feel stable and controlled
You breathe more easily during holds instead of bracing
New poses feel less intimidating to attempt
Your posture improves throughout the day, not just during practice
Getting in and out of the hammock feels natural rather than awkward
You don't need any special equipment to self-assess. Sit on the floor with your legs extended and reach toward your toes. Mark where your fingertips land. Check again every four weeks. For grip strength, notice how long you can hold a plank or support your weight in a hanging pose before your hands fatigue. These simple checks give you honest feedback without any gym equipment.
Tracking your Yoga Wellness Benefits over time also keeps you motivated. When you can see that your flexibility has genuinely improved, it reinforces the habit of showing up consistently. Read more about building aerial yoga strength for lasting flexibility to understand how these gains compound over months of practice.
Why simple, consistent practice beats complexity in aerial yoga
Armed with ways to measure your progress, let's zoom out for an honest look at what actually works for beginners in aerial yoga.
Here's something most beginner guides won't tell you: the biggest obstacle isn't learning advanced poses. It's the temptation to skip ahead before the basics are solid. We see this constantly with new students. They watch an aerial yoga video online, get inspired by an inverted split or a spinning cocoon pose, and then feel frustrated when they can't replicate it after two sessions. That frustration leads to quitting, which is the worst possible outcome.
The truth is that mastering five foundational poses, truly mastering them to the point where your alignment is automatic and your breathing stays calm, builds more strength and flexibility than cycling through twenty poses with poor form. Science backs this up. The measurable improvements seen in controlled studies come from repeated, methodical practice over weeks, not from variety or novelty.
Experienced instructors consistently see the best results in students who embrace patience. The student who comes twice a week, works the same six poses, and focuses on going one centimeter deeper each session outperforms the student who tries something new every class. Consistency creates the neuromuscular patterns your body needs to move safely and efficiently in the hammock.
This is also why the real impact on wellness from aerial yoga goes beyond the physical. When you commit to a simple, consistent practice, you build mental discipline and body awareness that carry into every area of your life. That's the deeper value that no trick pose can give you.
Ready to try aerial yoga? Start your journey in Philadelphia
If you're ready to get started or take your aerial yoga practice further, local guidance can make all the difference.
At Amrita Yoga & Wellness, we offer beginner-friendly aerial yoga classes in a safe, welcoming environment right here in Philadelphia. Our instructors guide you through proper setup, alignment, and progression so you build real strength and flexibility from your very first session.
Beyond aerial yoga, our studio offers a full range of wellness experiences including hot yoga, pilates, barre, tai chi, and massage therapy. We also host community events and workshops, including tarot readings, for those who want to explore holistic well-being beyond the mat. Whether you're a complete beginner or returning after a long break, our community is here to support your growth. Check our class schedule and reserve your spot today.
Frequently asked questions
Can anyone do aerial yoga poses as a beginner?
Yes, most healthy adults can start aerial yoga, but it's important to use proper equipment and begin with beginner-friendly poses under qualified instruction.
How quickly will I see results in strength or flexibility?
Yoga training improves handgrip strength and flexibility within 8 to 12 weeks of consistent practice, so you can expect noticeable changes within about three months.
Is aerial yoga safe for my joints?
When practiced with proper safety precautions, aerial yoga is gentle on joints because the hammock reduces compression. Yoga training reduces muscle stiffness and musculoskeletal strain over time, making it a strong choice for joint-friendly fitness.
What if I feel dizzy or strained during aerial yoga?
Exit the pose slowly, return to standing or seated, and rest before continuing. Always listen to your body and avoid pushing through discomfort, especially in inverted positions.
Recommended
building aerial yoga strength — Blog — Amrita Yoga & Wellness
Building Aerial Yoga Strength for Lasting Flexibility — Amrita Yoga & Wellness
Improving Aerial Yoga Flexibility Naturally: A Step-by-Step Guide — Amrita Yoga & Wellness
Aerial Yoga Strengthening Moves for Total Body Power — Amrita Yoga & Wellness
Master Aerial Yoga Poses for Beginners Step by Step
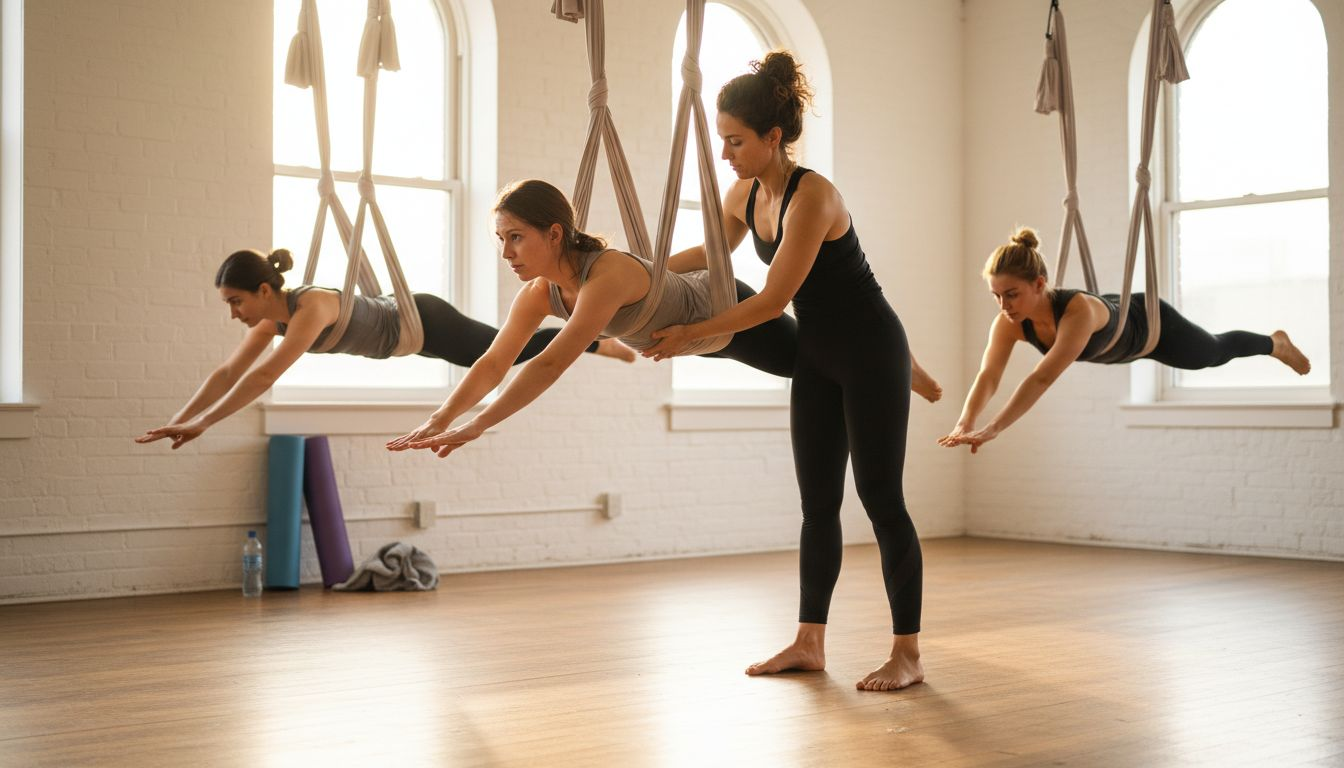
Feeling stiff or searching for an enjoyable way to strengthen your body without high-impact workouts? Aerial yoga combines traditional yoga postures with the support of a specialized hammock, making difficult moves like backbends and inversions easier and safer for beginners. For adults in Philadelphia, this unique fitness option offers gentle support while building flexibility and muscle. This guide lays out practical steps for setting up your space, selecting equipment, and mastering foundational poses, ensuring a confident start and steady progress.
Table of Contents
Quick Summary
| Key Point | Explanation |
|---|---|
| 1. Assess Your Space and Equipment | Ensure your practice area is spacious, secure, and has the proper overhead support to safely install your aerial hammock. |
| 2. Set Up the Hammock Properly | Use a sturdy mounting point and ensure all components are rated for sufficient weight to create a safe suspension system for your practice. |
| 3. Warm Up Before Practice | Engage in dynamic stretches and light cardio to prepare your muscles and joints, enhancing performance and reducing injury risk. |
| 4. Focus on Body Alignment | Maintain proper positioning throughout poses to prevent injuries; check shoulder, spine, core, and weight distribution frequently. |
| 5. Cool Down and Track Progress | Gradually decrease activity post-practice with gentle stretches and hydration, while documenting improvements to aid in your aerial yoga journey. |
Step 1: Prepare Your Space and Equipment
Setting up a safe and effective aerial yoga practice begins with creating the right environment and gathering essential equipment. Before you start your aerial yoga journey, you'll need to carefully prepare your space and choose the right gear to support your practice.
First, assess your available space and ensure you have a sturdy overhead mounting point capable of supporting your body weight. Most aerial yoga hammocks can support up to 300 kilograms of weight, but proper installation is crucial. You'll want an area with at least 8-10 feet of ceiling height and a clear radius of about 6 feet around your hammock to allow full movement without obstruction.
Equipment selection is critical for a safe aerial yoga experience. Here are the essential items you'll need:
Aerial silk hammock with sturdy support chains and carabiners
Secure ceiling mount or free-standing aerial rig
Thick exercise mat for floor work
Comfortable, form-fitting clothing without zippers or buttons
Optional: grip gloves for additional hand support
When selecting your hammock, look for professional-grade materials that can withstand repeated use and provide reliable support. The hammock should be hung less than one meter above the ground, which helps beginners feel secure while learning new poses.
Pro tip: Always test your equipment's weight capacity and mounting points before your first practice, and consider having an experienced professional help you set up your initial aerial yoga space.
Step 2: Set Up Your Yoga Hammock Safely
Setting up your aerial yoga hammock requires precision, care, and attention to safety details. Your goal is creating a secure suspension system that will support your body weight and allow fluid, confident movement during practice.
Selecting the right mounting point is crucial for a safe aerial yoga experience. Proper equipment setup involves identifying a structural support beam capable of handling significant weight. Ideal mounting points include:
Reinforced ceiling joists
Purpose-built aerial rigging frames
Professional-grade mounting brackets
Steel support beams
Before installation, you'll need specialized hardware to ensure a stable setup:
Check ceiling mount's weight rating
Select carabiners rated for your body weight
Use webbing straps designed for aerial equipment
Verify all connection points are secure
Important mounting guidelines include positioning your hammock approximately waist height, which allows safe entry and exit while providing enough clearance for basic poses. Most practitioners recommend leaving a 6-foot radius around your hammock to prevent accidental collisions with furniture or walls.
Safety always comes first in aerial yoga. Never compromise on equipment quality or installation integrity.
Pro tip: Consider having a professional rigger or experienced aerial yoga instructor verify your hammock installation before your first practice to ensure maximum safety and confidence.
Here's a summary comparing key safety and setup considerations for aerial yoga at home vs. in a studio:
| Factor | Home Practice | Studio Practice |
|---|---|---|
| Equipment Setup | Self-installed, requires personal verification | Professionally installed, regularly inspected |
| Space Requirements | Must create and clear your own area | Designed specifically for aerial yoga |
| Supervision | May require self-assessment or occasional instructor visits | Direct instructor guidance during every session |
| Safety Assurance | Relies on personal diligence and research | Guided by certified professionals |
| Maintenance | User responsibility, periodic checks needed | Studio staff manages upkeep and checks |
Step 3: Warm Up Your Body Effectively
Before diving into aerial yoga poses, preparing your body through a strategic warm-up is essential for preventing injuries and maximizing performance. Your warm-up will gradually increase muscle readiness and joint flexibility, setting the foundation for a safe and enjoyable aerial practice.
Dynamic stretching techniquesare crucial for preparing your body for aerial yoga movements. Start with light cardiovascular activities that gradually increase your heart rate and muscle temperature:
Gentle walking in place
Arm circles and shoulder rolls
Slow torso twists
Ankle and wrist rotations
Light marching movements
Progressive warm-up stages help your body adapt to the upcoming physical demands. Follow these key warm-up components:
Begin with 5-10 minutes of low-intensity movement
Perform dynamic stretches targeting major muscle groups
Focus on mobility exercises for shoulders, hips, and spine
Incorporate gentle joint mobilization techniques
Key muscle groups to focus on include your core, shoulders, and lower back, which are critical for aerial yoga stability and movement. Pay special attention to shoulder mobility and core engagement, as these will be fundamental in supporting your body during suspended poses.
Gradual, mindful warm-up is your first defense against potential aerial yoga injuries.
Pro tip: Listen to your body during warm-up and modify movements if you feel any unusual tension or discomfort, allowing yourself to ease into the practice gently.
Step 4: Learn Foundational Aerial Yoga Poses
Mastering foundational aerial yoga poses will help you build confidence and develop essential skills for your aerial practice. By understanding and practicing these basic techniques, you'll create a solid foundation for more advanced movements.
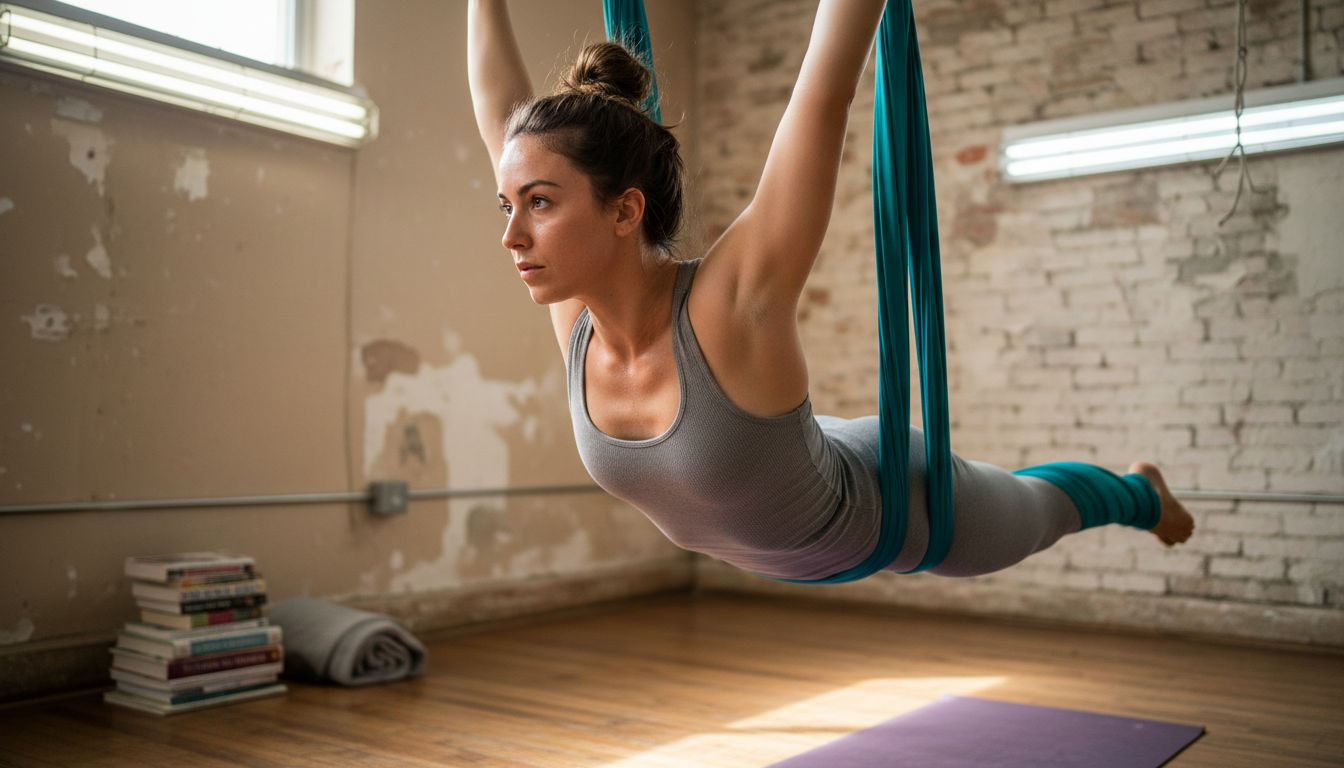
Beginner aerial yoga poses offer unique opportunities to explore movement with hammock support. These foundational poses help you understand how to use the hammock effectively while building strength and flexibility.
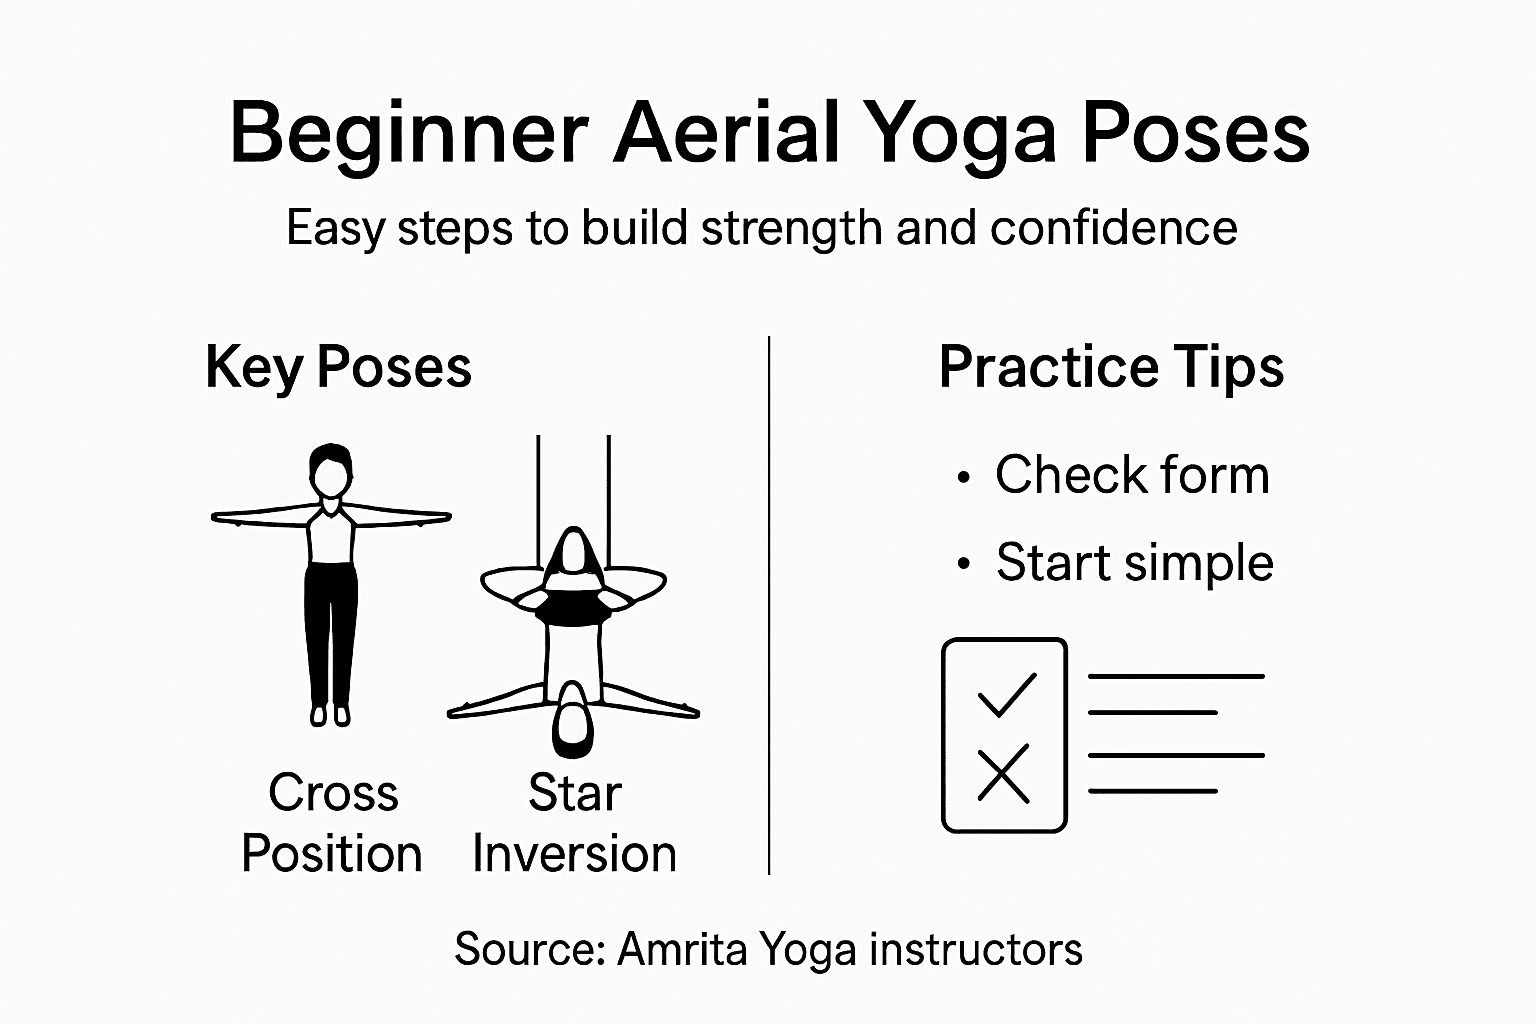
Here is a reference for common foundational aerial yoga poses and their benefits:
| Pose Name | Primary Focus | Typical Benefit |
|---|---|---|
| Cross Position | Core activation | Builds basic strength |
| Star Inversion | Spine and hips | Improves flexibility |
| One-Legged King Pigeon | Hips and quads | Enhances hip mobility |
| Seated Hammock Swing | Balance and posture | Develops coordination |
Cross Position: Basic suspended pose for beginners
Star Inversion: Gentle upside-down orientation
One-Legged King Pigeon: Modified hammock variation
Seated Hammock Swing: Basic seated suspension technique
Start with these progression steps for learning foundational aerial yoga poses:
Always begin with instructor guidance
Practice each pose slowly and mindfully
Focus on maintaining core engagement
Use the hammock for gentle support
Breathe steadily during each pose
Body alignment is crucial when practicing aerial yoga poses. Keep your movements controlled and pay attention to how the hammock supports your body weight. Core strength and balance will help you transition smoothly between different positions.
Your hammock is a tool for support, not just suspension. Learn to trust its stability and your own body's capabilities.
Pro tip: Start with extremely simple poses and progress gradually, allowing your body to adapt to the unique sensations of suspended movement.
Step 5: Check Your Form and Adjust Alignment
Perfecting your body alignment in aerial yoga is crucial for preventing injuries and maximizing the effectiveness of each pose. Understanding how to assess and adjust your positioning will help you develop a safer, more confident practice.
While aerial yoga provides unique support through the hammock, maintaining proper body mechanics remains essential. Key areas to focus on during form checks include:
Shoulder positioning: Keep shoulders relaxed and away from ears
Spine alignment: Maintain neutral spine position
Core engagement: Activate core muscles consistently
Weight distribution: Balance evenly across hammock support
Breathing pattern: Breathe deeply and steadily
Use these steps to systematically check and adjust your alignment:
Pause between pose transitions
Do a mental body scan
Make micro-adjustments as needed
Reset position if feeling unstable
Ask instructor for visual feedback
Body awareness plays a critical role in aerial yoga practice. Subtle movements and corrections can dramatically improve your overall performance and reduce strain on your muscles and joints.
Alignment is not about perfection, but about creating a balanced, sustainable practice that supports your body's natural movement.
Pro tip: Practice in front of a mirror or ask a fellow student to observe your form, providing an external perspective on your alignment and positioning.
Step 6: Cool Down and Monitor Progress
After an intense aerial yoga session, cooling down properly helps your body recover and prevents potential muscle soreness. Gradual exercise reduction is essential for maintaining your body's overall wellness and flexibility.
Your cool-down routine should focus on gradually lowering your heart rate and stretching the muscle groups you've engaged during your aerial yoga practice:
Gentle hammock stretches
Static floor stretches
Deep breathing exercises
Slow joint mobility movements
Hydration and relaxation
Implement these cool-down progression steps:
Exit hammock slowly and mindfully
Perform 10-15 minutes of gentle stretching
Focus on muscles used during aerial poses
Track your flexibility improvements
Drink water to support muscle recovery
Progress tracking is crucial for continuous improvement. Personal performance metrics will help you understand your aerial yoga journey, including flexibility gains, strength development, and mental focus.
Consistent practice and mindful reflection are the keys to steady advancement in aerial yoga.
Pro tip: Keep a workout journal to document your progress, noting specific pose improvements, flexibility changes, and how your body feels after each session.
Unlock Your Full Potential with Expert Guidance at Amrita Yoga & Wellness
Struggling to master foundational aerial yoga poses safely and effectively can feel overwhelming without proper support and instruction. This article highlights crucial steps such as setting up secure equipment, warming up mindfully, and fine-tuning your form to build strength and confidence. If you want to transform these challenges into opportunities for growth and well-being, Amrita Yoga & Wellness in Philadelphia offers the perfect environment to deepen your aerial yoga practice.
Join our welcoming community through expert-led classes and workshops that emphasize safe technique, body alignment, and tailored progression. Whether you are a beginner eager to learn the basics or seeking to integrate aerial yoga into your holistic wellness routine, we are here to guide you every step of the way. Take action now to elevate your body and mind by exploring all our offerings at Amrita Yoga & Wellness and start your journey toward aerial yoga mastery today.
Frequently Asked Questions
How do I prepare my space for practicing aerial yoga at home?
To prepare your space for aerial yoga, ensure you have a sturdy overhead mounting point and at least 8-10 feet of ceiling height. Clear a 6-foot radius around your hammock for safe movement, and choose a thick exercise mat to provide comfort during floor work.
What equipment do I need to start aerial yoga?
The essential equipment for aerial yoga includes a reliable aerial silk hammock, a secure ceiling mount or free-standing aerial rig, comfortable clothing, and optionally grip gloves for added support. Gather these items before starting your practice to ensure safety and effectiveness.
What are some foundational aerial yoga poses for beginners?
Foundational aerial yoga poses for beginners include the Cross Position, Star Inversion, One-Legged King Pigeon, and Seated Hammock Swing. Focus on mastering these poses to build strength and confidence in aerial techniques.
How can I check my form and alignment during aerial yoga?
To check your form in aerial yoga, perform a mental body scan during transitions and make micro-adjustments as needed. Pay attention to your shoulder positioning, spine alignment, core engagement, and weight distribution to maintain stability and prevent injuries.
What should my cool-down routine include after an aerial yoga session?
Your cool-down routine should consist of gentle hammock stretches, static floor stretches, and deep breathing exercises to lower your heart rate and relax your muscles. Aim for about 10-15 minutes of gentle stretching to promote recovery after each aerial yoga session.
How can I track my progress in aerial yoga?
Track your progress in aerial yoga by keeping a workout journal where you document improvements in flexibility, strength, and muscle recovery. Reflect on specific pose enhancements and how your body feels after each session to monitor advancements over time.
Recommended
Role of Hammocks in Aerial Yoga: Benefits and Safety
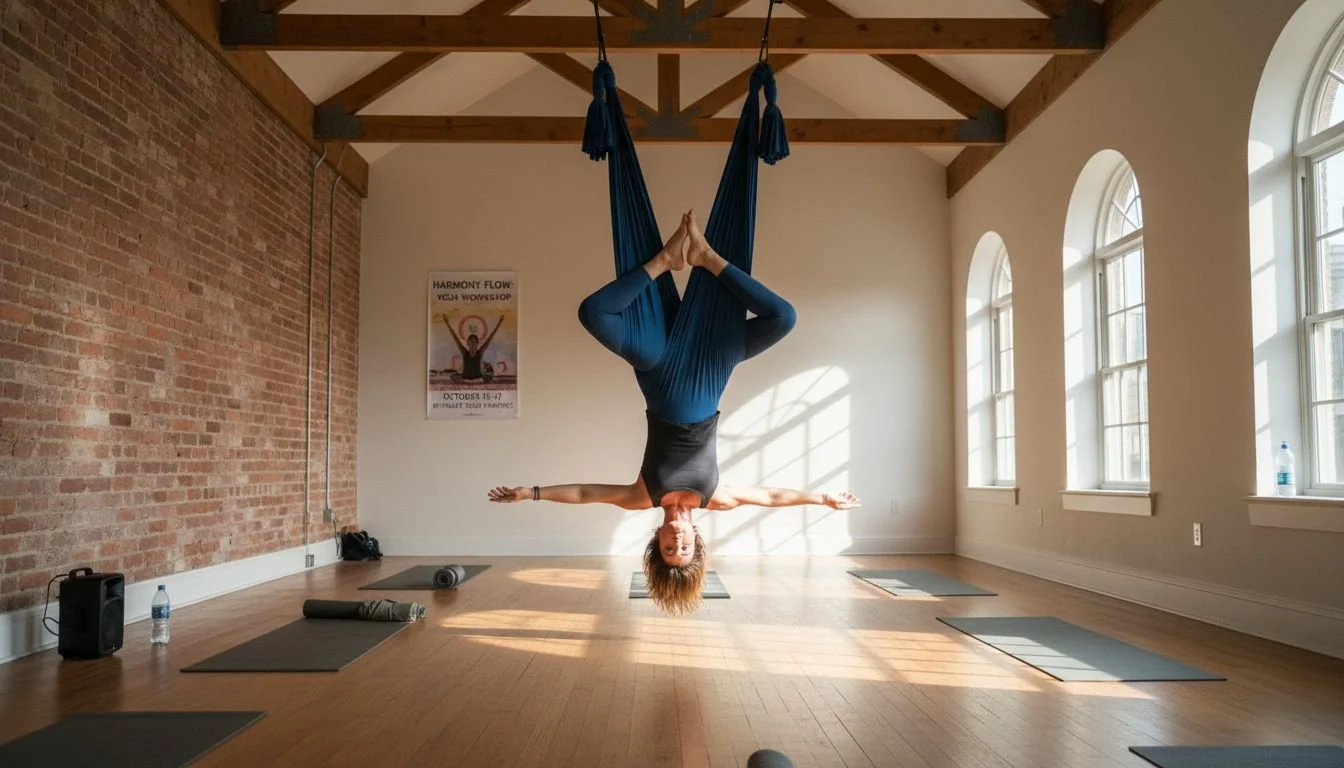
Over 30 million American adults now practice yoga and many are looking for ways to take their routines to the next level. As interest grows, aerial yoga hammocks have emerged as a unique tool for those wanting both support and challenge in their fitness journey. Whether you are a beginner or a seasoned yogi, understanding these hammocks reveals new ways to increase flexibility, improve strength, and experience movement in an entirely different dimension.
Table of Contents
Key Takeaways
| Point | Details |
|---|---|
| Aerial Yoga Hammocks Enhance Practice | Aerial yoga hammocks provide unique support, allowing for deeper stretches and greater flexibility during yoga practice. |
| Material and Design Matter | The performance and safety of hammocks depend on the materials used, with options varying from silk to durable polyester. |
| Safety is Paramount | Proper installation, equipment inspections, and training with certified instructors are essential for preventing injuries in aerial yoga. |
| Mindful Progression is Key | Practitioners should start slowly, focus on core strength, and respect their physical limits to safely enjoy aerial yoga. |
What Are Aerial Yoga Hammocks?
Aerial yoga hammocks are specialized, suspended fabric props designed to transform traditional yoga practice by introducing a dynamic and supportive element. Suspended from the ceiling, these unique hammocks provide practitioners with opportunities to explore yoga postures, inversions, and movements in an entirely new dimension.
These hammocks are typically crafted from high-strength, soft silk or similar durable fabric materials engineered to safely support a practitioner's body weight. Aerial yoga hammocks function as both a support system and a versatile training tool, enabling yoga enthusiasts to perform traditional poses with enhanced stability and reduced gravitational strain. The hammock acts like a flexible sling, allowing practitioners to achieve deeper stretches, improve flexibility, and engage muscles from unique angles that ground-based yoga cannot provide.
Key characteristics of aerial yoga hammocks include:
Adjustable height settings
Weight capacity ranging from 300-1000 pounds
Soft, breathable fabric construction
Secure attachment mechanisms for ceiling mounting
Varying widths to accommodate different body types
While these remarkable yoga training tools facilitate unique movement possibilities, they require proper instruction and careful technique to ensure practitioner safety and maximize their transformative potential.
Types of Hammocks Used in Aerial Yoga
Aerial yoga practitioners utilize a diverse range of hammocks designed to support different skill levels, body types, and specific practice styles. Hammock materials and specifications vary significantly to accommodate the unique needs of aerial yoga enthusiasts, with options ranging from lightweight silk fabrics to more robust polyamide constructions.
Fabric Composition plays a crucial role in determining a hammock's performance and durability. Common materials include:
Parachute-grade silk
High-tensile polyester blends
Nylon ripstop fabrics
Tricot knit materials
Specialized elastic-blend textiles
The width and length of aerial yoga hammocks are equally important considerations. Practice levels and body types dramatically influence hammock selection, with standard dimensions typically ranging from 3 to 5.5 meters in length and approximately 2.8 to 3.2 meters in width. Professional-grade hammocks often feature reinforced edges, multiple attachment points, and weight capacities exceeding 450 kilograms, ensuring maximum safety and versatility for practitioners.
What Are Aerial Yoga Hammocks?
Aerial yoga hammocks are specialized, suspended fabric props designed to transform traditional yoga practice by introducing a dynamic and supportive element. Suspended from the ceiling, these unique hammocks provide practitioners with opportunities to explore yoga postures, inversions, and movements in an entirely new dimension.
These hammocks are typically crafted from high-strength, soft silk or similar durable fabric materials engineered to safely support a practitioner's body weight. Aerial yoga hammocks function as both a support system and a versatile training tool, enabling yoga enthusiasts to perform traditional poses with enhanced stability and reduced gravitational strain. The hammock acts like a flexible sling, allowing practitioners to achieve deeper stretches, improve flexibility, and engage muscles from unique angles that ground-based yoga cannot provide.
Key characteristics of aerial yoga hammocks include:
Adjustable height settings
Weight capacity ranging from 300-1000 pounds
Soft, breathable fabric construction
Secure attachment mechanisms for ceiling mounting
Varying widths to accommodate different body types
While these remarkable yoga training tools facilitate unique movement possibilities, they require proper instruction and careful technique to ensure practitioner safety and maximize their transformative potential.
Types of Hammocks Used in Aerial Yoga
Aerial yoga practitioners utilize a diverse range of hammocks designed to support different skill levels, body types, and specific practice styles. Hammock materials and specifications vary significantly to accommodate the unique needs of aerial yoga enthusiasts, with options ranging from lightweight silk fabrics to more robust polyamide constructions.
Fabric Composition plays a crucial role in determining a hammock's performance and durability. Common materials include:
Parachute-grade silk
High-tensile polyester blends
Nylon ripstop fabrics
Tricot knit materials
Specialized elastic-blend textiles
The width and length of aerial yoga hammocks are equally important considerations. Practice levels and body types dramatically influence hammock selection, with standard dimensions typically ranging from 3 to 5.5 meters in length and approximately 2.8 to 3.2 meters in width. Professional-grade hammocks often feature reinforced edges, multiple attachment points, and weight capacities exceeding 450 kilograms, ensuring maximum safety and versatility for practitioners.
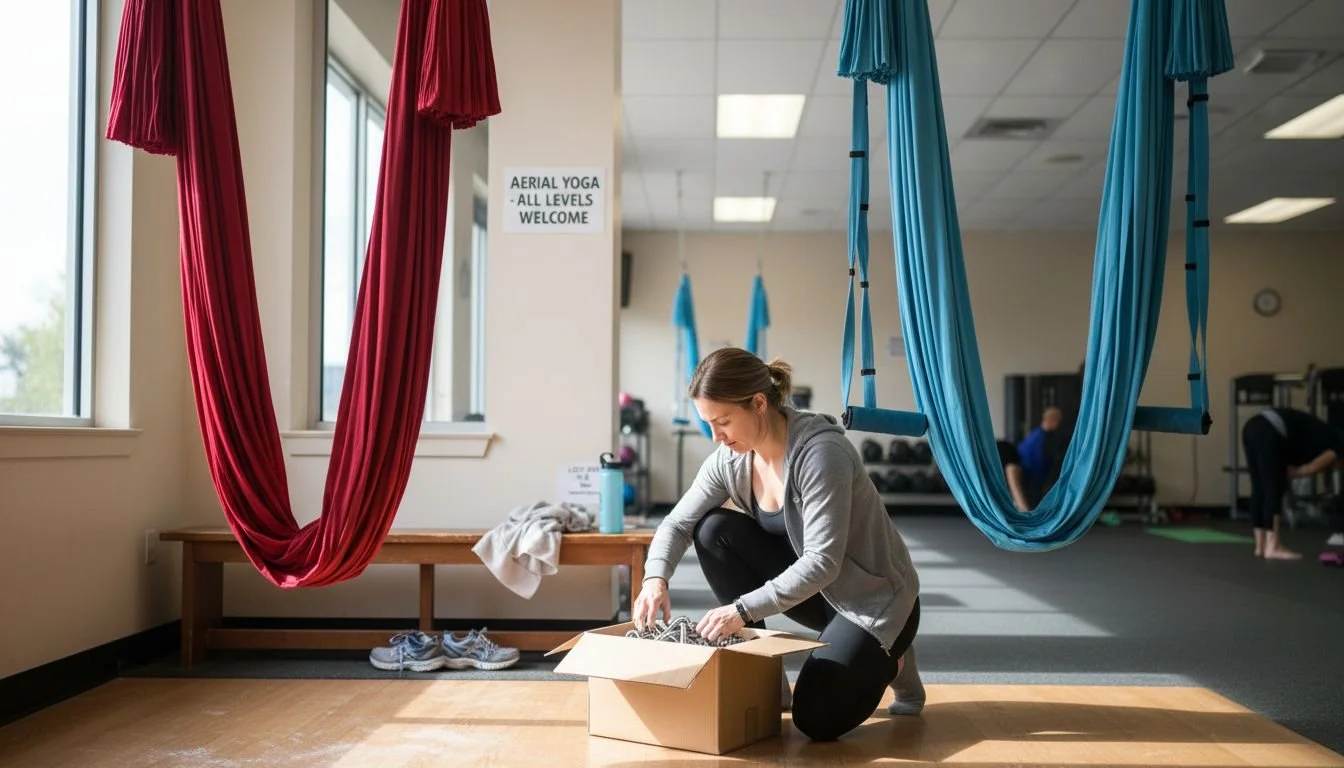
Advanced aerial yoga enthusiasts might opt for specialized hammocks with additional features like integrated grip handles, color-coded strength zones, or modular attachment systems. These innovative designs enable more complex aerial movements and provide enhanced support during challenging inversions and suspension techniques.
How Hammocks Enhance Yoga Practice
Aerial yoga hammocks revolutionize traditional yoga by providing unprecedented physical support and expanding movement possibilities. Practitioners can achieve deeper stretches and unique body alignments that are simply impossible on a standard yoga mat, transforming the entire yoga experience into a more dynamic and engaging practice.
Core Benefits of incorporating hammocks into yoga practice include:
Spinal decompression
Enhanced muscle engagement
Improved balance and coordination
Reduced joint stress
Increased overall flexibility
Aerial yoga hammocks challenge muscles in innovative ways, creating a full-body workout that goes beyond traditional ground-based yoga. The suspended environment forces practitioners to engage stabilizer muscles, build core strength, and develop greater body awareness. By reducing gravitational pressure, hammocks allow practitioners to explore inverted postures and deep stretches with reduced risk of strain or injury.
The psychological benefits are equally remarkable. Suspended in a gentle, supportive fabric, practitioners can experience a unique sense of weightlessness and freedom. This meditative state not only reduces physical tension but also promotes mental relaxation, helping individuals release stress and cultivate a deeper mind-body connection through their aerial yoga practice.
Correct Setup and Maintenance Essentials
Proper installation of aerial yoga hammocks requires meticulous attention to safety and structural integrity. Critical considerations include selecting robust mounting points capable of supporting significant dynamic weight, ensuring precise height and tension measurements, and conducting regular comprehensive inspections to prevent potential equipment failure.
Key Installation Parameters include:
Mounting height between 80-100 cm from floor
Distance between hammock attachment points: 50-80 cm
Minimum weight capacity exceeding practitioner's body weight by 300%
Attachment to permanent structural elements (not suspended ceilings)
Use of professional-grade mounting hardware
High-quality hammock materials play a crucial role in long-term safety and performance, with polyamide and specialized fabric blends offering superior durability and load-bearing capabilities. Practitioners should perform thorough pre-use inspections, checking for potential fabric weaknesses such as small tears, fraying edges, or compromised stitching. Implementing a consistent maintenance routine involves cleaning the hammock after each use, storing it in a cool dry environment, and replacing the equipment at recommended intervals or immediately upon detecting any structural compromise.

Professional aerial yoga practitioners recommend maintaining a detailed maintenance log that tracks usage frequency, inspection dates, and any observed wear patterns. This proactive approach not only extends the hammock's functional lifespan but also provides critical documentation for safety compliance and potential equipment warranty claims.
Key Safety and Injury Prevention Tips
Aerial yoga safety requires a comprehensive approach to preventing potential injuries, demanding strategic preparation, mindful practice, and continuous awareness of one's physical limitations. Practitioners must develop a holistic understanding of their body's capabilities and potential risks associated with suspended yoga techniques.
Essential Safety Precautions include:
Always train with a certified aerial yoga instructor
Perform thorough equipment inspections before each session
Start with beginner-level inversions and progressions
Maintain consistent core engagement
Use spotters or assistants during complex movements
Listen to your body and avoid overexertion
Wear form-fitting, snag-resistant clothing
Before attempting advanced aerial techniques, practitioners should invest significant time in developing fundamental strength, flexibility, and body awareness. Beginners should prioritize learning proper entry and exit techniques, understanding how to distribute body weight safely, and recognizing early warning signs of potential strain or discomfort. Gradual progression is key to preventing unnecessary injuries and building confidence in aerial yoga practice.
Mental preparation is equally crucial in injury prevention. Practitioners must cultivate a mindset of patience, self-awareness, and respect for their physical boundaries. Breathing techniques, focused concentration, and maintaining a calm emotional state can significantly reduce the risk of panic-induced mistakes during challenging aerial yoga movements.
Elevate Your Aerial Yoga Experience with Expert Guidance and Safety
Mastering aerial yoga demands more than just a hammock it requires understanding safety, proper setup, and progressive training to unlock its full benefits such as spinal decompression, enhanced muscle engagement, and mental relaxation. If you are passionate about deepening your aerial yoga practice while prioritizing injury prevention and body awareness exploring professional instruction and supportive community sessions is essential.
Discover how Amrita Yoga & Wellness in Philadelphia can support your aerial yoga journey with a variety of classes and workshops designed to teach safe aerial techniques and build foundational strength. Access expert insights, class schedules, and join others seeking holistic wellness. Do not wait to transform your practice and reap the physical and mental rewards of aerial yoga by connecting with us today at Amrita Yoga & Wellness. Your path to elevating mind and body begins here.
Frequently Asked Questions
What are aerial yoga hammocks?
Aerial yoga hammocks are specialized fabric props used to enhance traditional yoga practice by providing support and enabling unique movements and postures.
What are the benefits of using hammocks in aerial yoga?
Hammocks offer benefits such as spinal decompression, improved flexibility, enhanced muscle engagement, and a reduced risk of injury through support in challenging poses.
How should I properly set up an aerial yoga hammock?
Ensure that the hammock is mounted securely at a height of 80-100 cm from the floor, with attachment points spaced 50-80 cm apart, and use professional-grade mounting hardware for safety.
What safety precautions should I take while practicing with aerial yoga hammocks?
Always train with a certified instructor, conduct pre-use equipment inspections, start with beginner-level movements, maintain core engagement, and listen to your body's limits to prevent injuries.